Aerith Gainsborough Weapons and Abilities | Aerith Best Build

This is a character page for Aerith, containing her abilities, characteristics, and Limit Breaks, as well as her weapons, and recommended battle settings for Aerith in the game Final Fantasy 7 Remake (FF7 Remake). When playing FF7 Remake, check this article any time you need to know something about using Aerith.
List of Contents
Aerith's Backstory and Profile

| Aerith is a flower seller who lives in the Sector 5 slums, who first meets Cloud on the streets of Midgar after the bombing of Mako Reactor 1. Shinra has kept a close eye on her ever since she was a child, as she has the ability to hear the voice of the planet. She is often found tending a modest bed of flowers at an old church in Sector 5. Source: FINAL FANTASY VII REMAKE |
| Name | Aerith Gainsborough |
|---|---|
| Age | 22 |
| Height | 163 cm (5'4") |
| Birthday | February 7th |
| Blood Type | O |
| Voice Actor | English: Briana White Japanese: Maaya Sakamoto |
| Weapon | Rods |
Aerith's Characteristics
Adept Healer and Long Range Combatant

Aerith is a character who uses magic to aid her party in battle both through recovery and attacks, with the latter being more prevalent. Her long-ranged attacks also allows her to dish out damage without taking any in return.
Long-range Attacks Using Magic
 |
|
|---|---|
| Effect | Aerith attacks using long-ranged magic bolts. It is possible to cause an area-of-effect chaing by hitting enemies repeatedly. |
| Usage | Create combos by continuously tapping or long-pressing ▢ |
Aerith's Strengths and Unique Ability
Tempest

|
|
|---|---|
| Definition | A long-range magic attack. When fully-charged, causes an explosion after the attack hits the enemy. |
| Usage | Press and hold △ to charge attack |
Tempest is a magic skill that increases power with the length of the charge. It also deals continuous damage to the enemy.
Aerith's Abilities
Soul Drain

| Effect | How to Learn | ||||
|---|---|---|---|---|---|
| Unleash an attack that absorbs MP. Absorbs additional MP from staggered enemies. | Learned from the start. | ||||
| Power | Stagger Rate | ATB Gain | |||
| 140 | 1 | 0 | |||
ATB Ward

| Effect | How to Learn | ||||
|---|---|---|---|---|---|
| Conjure a magical ward. Allies who use ATB within it regain partial ATB from your gauge. Costs 2 ATB. | Equip Reinforced Staff. Reach 100% Proficiency to learn permanently. | ||||
| Power | Stagger Rate | ATB Gain | |||
| - | - | 1000 | |||
Arcane Ward

| Effect | How to Learn | ||||
|---|---|---|---|---|---|
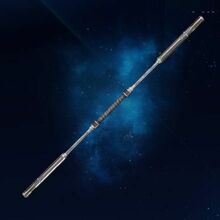
| Conjure a ward. Attack spells cast within the ward will be automatically cast twice. | Equip Guard Stick. Reach 100% Proficiency to learn permanently. | ||||
| Power | Stagger Rate | ATB Gain | |||
| - | - | 0 | |||
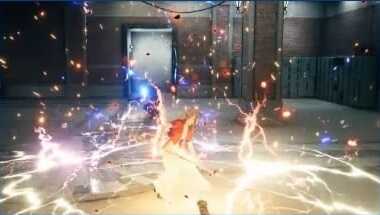
Sorcerous Storm
| Effect | How to Learn | ||||
|---|---|---|---|---|---|
| Deal magic damage to nearby enemies. | Equip Silver Staff. Reach 100% Proficiency to learn permanently. | ||||
| Power | Stagger Rate | ATB Gain | |||
| 294 | 1 | 0 | |||
Fleeting Familiar

| Effect | How to Learn | ||||
|---|---|---|---|---|---|
| Summon a fairy that attacks your enemies periodically as well as after you use abilities and spells. | Equip Arcane Scepter. Reach 100% Proficiency to learn permanently. | ||||
| Power | Stagger Rate | ATB Gain | |||
| - | - | 0 | |||
Ray of Judgment

| Effect | How to Learn | ||||
|---|---|---|---|---|---|
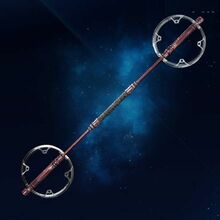
| Deal magic damage to nearby enemies. | Equip Mythril Rod. Reach 100% Proficiency to learn permanently. | ||||
| Power | Stagger Rate | ATB Gain | |||
| 640 | 10 | 0 | |||
Lustrous Shield

| Effect | How to Learn | ||||
|---|---|---|---|---|---|
| Conjure a magical shield that keeps enemies at bay and stops projectiles. | Equip Bladed Staff. Reach 100% Proficiency to learn permanently. | ||||
| Power | Stagger Rate | ATB Gain | |||
| - | - | 0 | |||
Aerith's Limit Breaks
Healing Wind

| Effect | How to Learn | ||||
|---|---|---|---|---|---|
| Summon a soothing breeze to restore a moderate amount of HP to all party members. | Learned from the start. | ||||
| Power | Stagger Rate | ATB Gain | |||
| Heals 1/2 max HP | - | 0 | |||
Planet's Protection

| Effect | How to Learn | ||||
|---|---|---|---|---|---|
| Entreat the planet’s favor to nullify physical damage dealt to all party members. | Clear Party Member vs. Wild Animals in Corneo Colosseum. | ||||
| Power | Stagger Rate | ATB Gain | |||
| - | - | 0 | |||
List of Limit Breaks | Limit Break Guide
Aerith's Weapons
Aerith's Starting Weapon
| Weapon | ATK | MATK | DEF | MDEF | Slots |
|---|---|---|---|---|---|
|
|
29 | 43 | 0 | 0 | ○○ |
Aerith's Other Weapons
| Weapon | ATK | MATK | DEF | MDEF | Slots |
|---|---|---|---|---|---|
|
|
27 | 50 | 0 | 0 | ○-○ |
|
|
24 | 36 | 0 | 0 | ○-○○-○ |
|
|
24 | 92 | 0 | 0 | ○○○ |
|
|
39 | 34 | 0 | 0 | ○-○○○ |
|
|
50 | 82 | 0 | 0 | ○-○○ |
List of Weapons Stats and Materia Slots
Aerith's Stats
Level 50 Stats
| Stat | Value |
|---|---|
| HP | 3952 |
| MP | 85 |
| Strength | 75 |
| Magic | 107 |
| Vitality | 52 |
| Spirit | 74 |
| Luck | 59 |
| Speed | 50 |
How to Use Aerith
Charge Tempest for Delayed ATB Boost
Charge Aerith's Tempest for slow-moving or stationary enemies as the attack will act as a "time bomb" in a fixed position. After a few seconds, it will explode and deal multi-hit damage to nearby enemies while also filling Aerith's ATB Gauge.
Make use of its delayed damage by consuming ATB charges before it explodes so Aerith can easily fill her ATB gauge once it does.
Cast Attack Spells With Arcane Ward
If you are planning to bombard your enemies with attack spells, be sure to use Guard Stick's Arcane Ward and stand on it before casting an attack spell. This conserves your ATB charges by casting the attack spell twice while consuming only 1 ATB bar.
Take note that both attack spells cast while on an Arcane Ward consumes MP, so if the character only has enough MP for one spell, the spell will only be cast once.
Use Sorcerous Storm Against Melee Enemies
Silver Staff's Sorcerous Storm damages all enemies around Aerith. Its range is not that wide, so it is best used when Aerith is being surrounded or attacked by melee enemies.
Use Ray of Judgment on Staggered Enemies
Using Mythril Rod's Ray of Judgment against staggered enemies will increase its stagger damage multiplier by 20% while also dealing continuous heavy damage in a straight line. This ability moves very slowly so it is not advisable to use against moving enemies.
Lustrous Shield Blocks Ranged Attacks
The Lustrous Shield learned from Bladed Staff is extremely useful against enemies that launches projectiles. It casts a stationary shield in front of a party member that can completely block most ranged attacks.
This works well with Barret and Aerith as they can safely attack enemies from afar behind the shield.
Best Build for Aerith
Red Mage Build
| Equipment | Stats (Fully Upgraded) / Effect |
|---|---|
 Silver Staff Silver Staff |
|
 Chain Bangle Chain Bangle |
|
 Circlet Circlet |
Increases max MP by 10% Increases magic power by 5% |
| Silver Staff | |
|---|---|
| Chain Bangle | |
Notes
- Switch the Fire materia according to the enemy's weakness.
- Use Cog Bangle if Chain Bangle is unavailable then remove the MP Up materia.
- Switch Circlet with Healing Carcanet if you need increased healing.
White Mage Build
| Equipment | Stats (Fully Upgraded) / Effect |
|---|---|
 Guard Stick Guard Stick |
|
 Chain Bangle Chain Bangle |
|
 Healing Carcanet Healing Carcanet |
Increases the effectiveness of healing items, spells, and abilities. |
| Guard Stick | |
|---|---|
| Chain Bangle | |
Notes
- Use Cog Bangle if Chain Bangle is unavailable then remove one of the HP Up materias.
Black Mage Build
| Equipment | Stats (Fully Upgraded) / Effect |
|---|---|
 Mythril Rod Mythril Rod |
|
 Chain Bangle Chain Bangle |
|
 Circlet Circlet |
Increases max MP by 10% Increases magic power by 5% |
| Mythril Rod | |
|---|---|
| Chain Bangle | |
Notes
- Switch the Fire materia according to the enemy's weakness.
- Use Cog Bangle if Chain Bangle is unavailable then remove the HP Up materia.
- Switch the HP Up materia with the Enemy Skill materia for a Semi-Blue Mage build.
Recommended Battle Shortcuts for Aerith
| Button | Setup |
|---|---|
| ▢ | Soul Drain |
| △ | Sorcerous Storm |
| ◯ | Lustrous Shield / Pray |
| X | Ray of Judgment |
Character Links
| Main Characters | |||
|---|---|---|---|
 Cloud Cloud |
 Aerith Aerith |
 Barret Barret |
 Tifa Tifa |
| Best Build for Each Character | |||
| Character Ranking by Stat | |||
| AVALANCHE | |||
 Jessie Jessie |
 Wedge Wedge |
 Biggs Biggs |
- |
| Shinra Company | |||
 Sephiroth Sephiroth |
 Hojo Hojo |
 Reno Reno |
 President President |
 Rude Rude |
 Heidegger Heidegger |
 Roche Roche |
 Tseng Tseng
|
 Scarlet Scarlet
|
 Palmer Palmer
|
 Reeve Reeve |
 Rufus Rufus |
| Other Characters | |||
 Red XIII Red XIII |
 Don Corneo Don Corneo
|
 Leslie Leslie |
 Andrea Andrea |
 Madam M Madam M |
 Sam Sam |
 Kyrie Kyrie
|
 Zack Zack |
 Vincent Vincent |
 Jenova Jenova |
- | - |
| INTERmission DLC | |||
 Yuffie Yuffie |
 Sonon Sonon |
 Zhijie Zhijie |
 Nayo Nayo |
 Billy Bob Billy Bob |
 Polk Polk |
 Nero Nero |
 Weiss Weiss |
 Melfi Melfi |
- | - | - |
Comment
Yeah, feels like they're setting it up. Honestly I hope so, back when the og came out I tried every "trick" and "guide" to get her back no matter how ridiculous or difficult it was. There where lots of those with pictures of Aeris/Aerith late in the game as proof, I was 10 and sad so I fell for it, lots of people did. If she actually survives in the remake that would bring me closure or something lol.
Author
Aerith Gainsborough Weapons and Abilities | Aerith Best Build
Rankings
Gaming News
Popular Games

Genshin Impact Walkthrough & Guides Wiki

Umamusume: Pretty Derby Walkthrough & Guides Wiki

Crimson Desert Walkthrough & Guides Wiki

Monster Hunter Stories 3: Twisted Reflection Walkthrough & Guides Wiki

Honkai: Star Rail Walkthrough & Guides Wiki

Pokemon Pokopia Walkthrough & Guides Wiki

The Seven Deadly Sins: Origin Walkthrough & Guides Wiki

Wuthering Waves Walkthrough & Guides Wiki

Zenless Zone Zero Walkthrough & Guides Wiki

Arknights: Endfield Walkthrough & Guides Wiki
Recommended Games

Fire Emblem Heroes (FEH) Walkthrough & Guides Wiki

Diablo 4: Vessel of Hatred Walkthrough & Guides Wiki

Cyberpunk 2077: Ultimate Edition Walkthrough & Guides Wiki

Yu-Gi-Oh! Master Duel Walkthrough & Guides Wiki

Super Smash Bros. Ultimate Walkthrough & Guides Wiki

Pokemon Brilliant Diamond and Shining Pearl (BDSP) Walkthrough & Guides Wiki

Elden Ring Shadow of the Erdtree Walkthrough & Guides Wiki

Monster Hunter World Walkthrough & Guides Wiki

The Legend of Zelda: Tears of the Kingdom Walkthrough & Guides Wiki

Persona 3 Reload Walkthrough & Guides Wiki
All rights reserved
© SQUARE ENIX CO., LTD. All Rights Reserved.
CHARACTER DESIGN:TETSUYA NOMURA/ROBERTO FERRARI
The copyrights of videos of games used in our content and other intellectual property rights belong to the provider of the game.
The contents we provide on this site were created personally by members of the Game8 editorial department.
We refuse the right to reuse or repost content taken without our permission such as data or images to other sites.


![Star Savior Review [First Impressions] | Engaging, Entertaining, and Expensive](https://img.game8.co/4447603/8f500e9bf666bdb8adb1af478e9dfdbd.png/show)


Red mage is very powerful class. If anyone need information about this class you should read this article: https://www.sellersandfriends.com/blog/ffxiv-red-mage-unlock-guide-release-the-most-powerful-job