This survey will take about 1 minute.
Your answers will help us to improve our website.
FF7 Remake
Chapter 5: Dogged Pursuit Story Guide & Walkthrough
This is a guide and walkthrough to Chapter 5: Dogged Pursuit, a story chapter in the game Final Fantasy 7 Remake. Read on to learn locations of items, rewards for completing this chapter, as well as useful tips and strategies for getting through this part of the story.
| Previous Chapter | Mad Dash |
|---|---|
| Current Chapter | Dogged Pursuit |
| Next Chapter | Light the Way |
List of Contents
- List of Main Scenario Objectives
- Chapter 5: Dogged Pursuit Walkthrough
- On the Train
- Corkscrew Tunnel
- Corkscrew Tunnel - Section C
- Corkscrew Tunnel - Rail Yard
- Service Tunnel
- Maps and Obtainable Items
- Maps
- Obtainable Items
- Shops & Vending Machines
- Tips and Strategies
- Boss Strategy Guide
- Crab Warden
- Story Walkthrough Related Links
List of Main Scenario Objectives
| No. | Title | Description |
|---|---|---|
| 1 | All Aboard for Sector 4 | Some time into the ride, an unscheduled ID scan sweeps the train. |
| 2 | Separate Ways | The ID scan detects an anomaly and the passenger car they're in is sealed off. The team is forced to change their plan. |
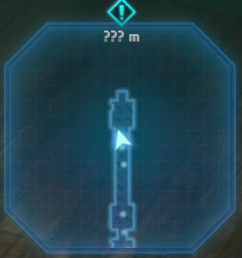
| 3 | Looking for a Friend | Having reunited after their dramatic leap from the train, the three regroup at a nearby rail map to discuss their next steps. |
| 4 | Get Your Bearings | Barret decides to switch to plan E. The team will follow the Mako Reactor 5 line through the corkscrew tunnel, guided by the signs another Avalanche cell left. |
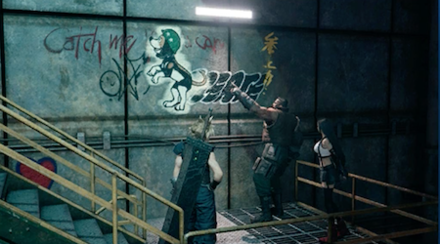
| 5 | Find Stamp | Following the Stamp graffiti, the team arrives at the train yard. They must drive off security and find a way to get past the locked gate. |
| 5-1 | The Nose Knows | The team has found Avalanche's graffiti. Now they just have to follow Stamp's nose. |
| 5-2 | Check the Route | As there is a hidden passageway leading to the reactor from the train yard, the three set out to look for it. |
| 5-3 | Train Yard Security | The security officers guarding the train yard have been defeated, but the gate to the train yard is locked. |
| 6 | Secret Passageway | The three dispatch the Crab Warden that was apparently station in the train yard. At last, they can take the secret passageway. |
| 6-1 | Stairway Detour | The team climbs the stairs next to the train yard and finds another way in. Now they head for the secret passageway in the train yard. |
| 11 | Slum Wisdom | Avoiding Shinra security, the team leaves the corkscrew tunnel behind. Following the route to Mako Reactor 5, they move into the plate's interior. |
| 12 | Sudden Attack | Jessie has been injured in the attack by unknown assailants, meaning Barret has no choice but to ask Cloud to participate in the next mission. |
| 13 | A New Operation | Cloud, Tifa, and Barret all board the train and head for Mako Reactor 5, determined to make this second bombing mission a success. |
Chapter 5: Dogged Pursuit Walkthrough
On the Train
| Objectives | |
|---|---|
| 1 | Talk to Tifa. She will leave the party. |
| 2 | Walk into the next car to start a cutscene. |
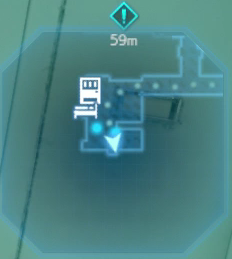
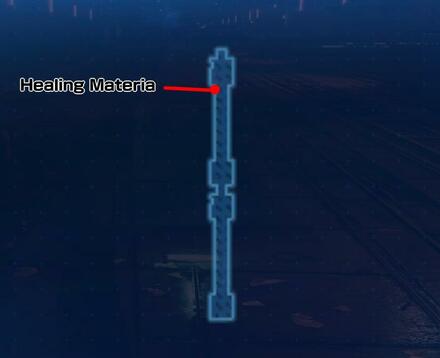
 You can pick up a Healing Materia from the seat across from the Middle Manager. You can pick up a Healing Materia from the seat across from the Middle Manager. |
|
| 3 | Go back to the car you came from and walk to Tifa. |
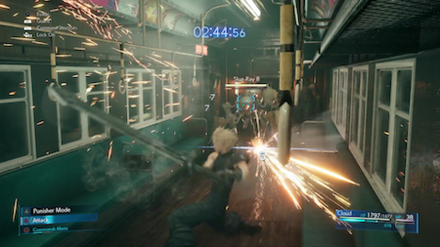
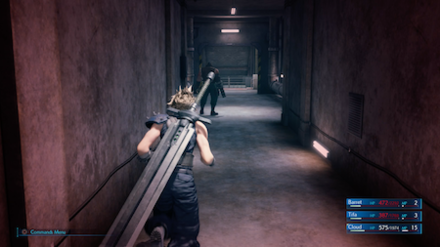
| 4 | After a cutscene, you will have to fight three Slug-Rays. |
| 5 | Two more Slug-Rays will come out from behind you. |
| 6 | Go back into the car you came from, and a cutscene will begin. |
Corkscrew Tunnel
| Objectives | |
|---|---|
| 1 | After the cutscene, fight three Slug-Rays. |
| 2 | Go straight forward in the tunnel to look for Barret. |
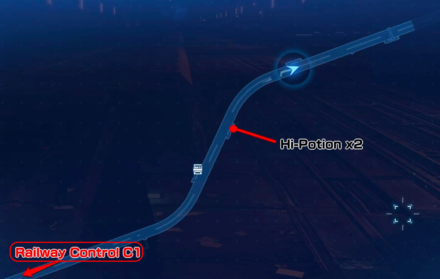
 You can go up the stairs on the right to find a chest with 2 Hi-potions. You can go up the stairs on the right to find a chest with 2 Hi-potions. |
|
| 3 | Continue forward. After a cutscene, you'll fight three Security Officers and two Slug-Rays. |
| 4 | Climb the stairs on the right and run on the upper platform across the tracks. |
| 5 | Reunite with Barret and fight two Slug-Rays and three Grenadiers. Walk back onto the stairs where Barret and Tifa are waiting to start a cutscene. |
Corkscrew Tunnel - Section C
| Objectives | |
|---|---|
| 1 | Run straight forward along the road. You'll encounter three Slug-Rays. |
| 2 | Continue along the path. You'll meet two Slug-Rays and two Guard Dogs. |
 If you break the Shinra Boxes in the middle of the road here, there's a high chance of obtaining one or more Phoenix Downs. If you break the Shinra Boxes in the middle of the road here, there's a high chance of obtaining one or more Phoenix Downs. |
|
| 3 | Go up the stairs on the left side. You'll find 3 Wererats. |
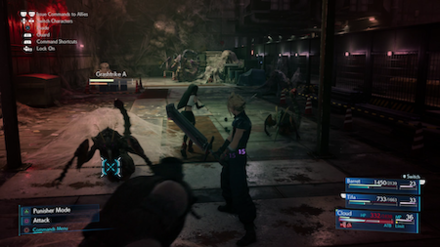
| 4 | Go down the stairs ahead and you'll encounter a Grashtrike. |
| Go back to face the wall and you'll find a chest with 2 Hi-potions on the right side. | |
| 5 | Pull the web away from the staircase and continue up. You'll find two more Grashtrikes. |
| 6 | Tear away the web in front of the stairs. Down the stairs, you'll encounter two Grashtrikes and a Queen Grashtrike. |
| 7 | Tear the web to continue ahead to the next area. |
 Open the chest next to the vending machine to get 3 Phoenix Downs. Open the chest next to the vending machine to get 3 Phoenix Downs. |
|
| 8 | Go up the stairs and across the platform. |
| 9 | Down the next set of stairs, you'll fight a Flametrooper and four Security Officers. |
| 10 | Go through the metal door on the left side at the end of the area. |
| 11 | Follow Barret and Tifa across the tracks. A cutscene will begin. |
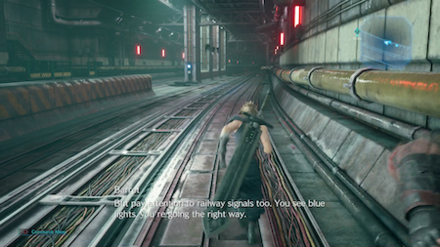
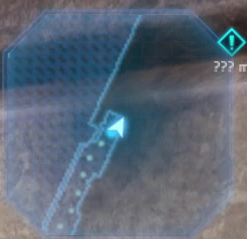
| 12 | Run straight along the tracks. Be sure to take the left path at the fork – otherwise, Tifa will let you know after a while that you're on the wrong path. |
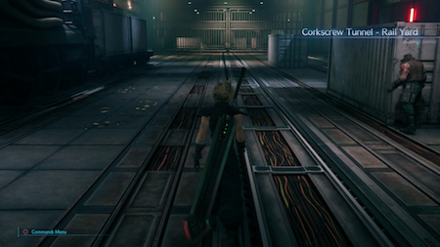
Corkscrew Tunnel - Rail Yard
| Objectives | |
|---|---|
| 1 | Straight ahead, you'll encounter two Flametroopers, and two Sentry Launchers. |
| 2 | You won't be able to go through the gate. Go up the stairs and through the steel door. |
| 3 | Go through the door at the end. |
| 4 | Turn left at the fork and go through the door. |
| 5 | Turn right at the fork and go through the door. You'll encounter two Elite Security Officers. |
 Optionally, go straight instead to find a Lightning Materia and a rest area, then go back. Optionally, go straight instead to find a Lightning Materia and a rest area, then go back. |
|
| 6 | Go out the door on the opposite side and go down the ladder. |
| 7 | Turn left and go to the end. A cutscene will begin. |
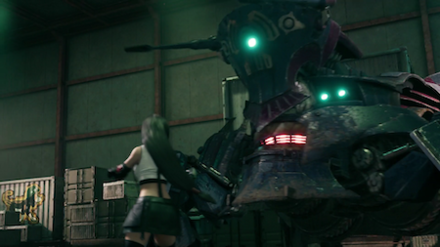
| Boss 8 |
Fight the Crab Warden. You'll get a pair of Metal Knuckles as a reward for defeating it. How to Beat Crab Warden |
| 9 | Follow Tifa and Barret sidling along the metal fence. |
| 10 | Climb down the ladder. |
Service Tunnel
| Objectives | |
|---|---|
| 1 | Continue down the road. |
| 2 | Press the Button to go down the elevator. |
Maps and Obtainable Items
Maps
| List of Maps | |
|---|---|
 |
 |
 |
 |
 |
- |
Obtainable Items
| Train Bound for Sector 4 | ||
|---|---|---|
| Healing Materia | - | - |
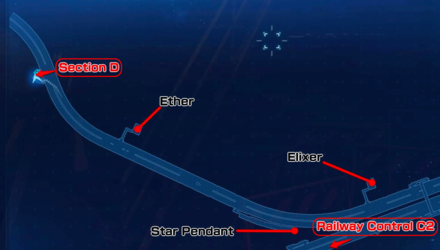
| Corkscrew Tunnel - Section C | ||
| Hi-Potion x2 | Ether | Elixir |
| Star Pendant | - | - |
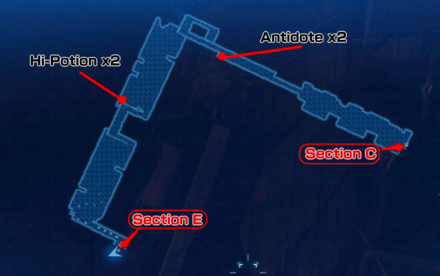
| Corkscrew Tunnel - Section D | ||
| Antidote x2 | Hi-Potion x2 | - |
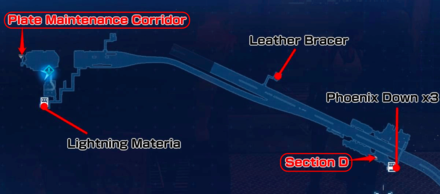
| Corkscrew Tunnel - Section E | ||
| Leather Bracer | Phoenix Down x3 | Lightning Materia |
Shops & Vending Machines
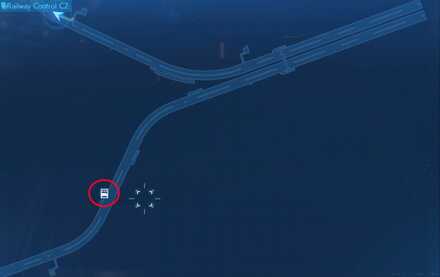
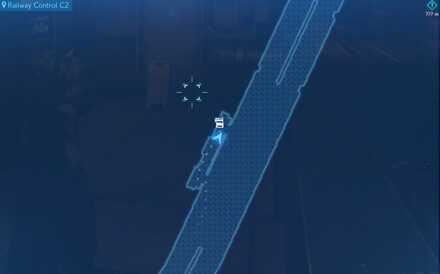
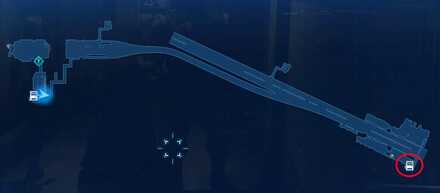
Vending Machine - Railway Control C2
 |
 |
| Items | Price |
|---|---|
| Potion | 50 Gil |
| Phoenix Down | 300 Gil |
| Antidote | 80 Gil |
| Weapons / Armor | Price |
|---|---|
| Iron Bangle | 1000 Gil |
| Star Bracelet | 1600 Gil |
| Accessories | Price |
|---|---|
| Power Wristguards | 800 Gil |
| Bulletproof Vest | 800 Gil |
| Earrings | 800 Gil |
| Talisman | 800 Gil |
| Revival Earrings | 500 Gil |
| Materia | Price |
|---|---|
| Healing Materia | 600 Gil |
| Fire Materia | 500 Gil |
| Ice Materia | 500 Gil |
| Lightning Materia | 500 Gil |
| Deadly Dodge Materia | 600 Gil |
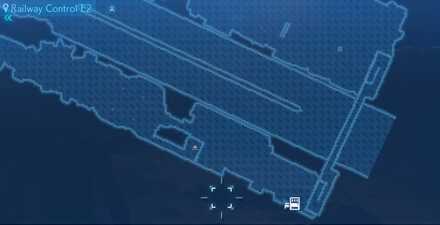
Vending Machine - Railway Control E2
 |
 |
| Items | Price |
|---|---|
| Potion | 50 Gil |
| Phoenix Down | 300 Gil |
| Antidote | 80 Gil |
| Weapons / Armor | Price |
|---|---|
| Iron Bangle | 1000 Gil |
| Star Bracelet | 1600 Gil |
| Accessories | Price |
|---|---|
| Power Wristguards | 800 Gil |
| Bulletproof Vest | 800 Gil |
| Earrings | 800 Gil |
| Talisman | 800 Gil |
| Revival Earrings | 500 Gil |
| Materia | Price |
|---|---|
| Healing Materia | 600 Gil |
| Cleansing Materia | 1500 Gil |
| Fire Materia | 500 Gil |
| Ice Materia | 500 Gil |
| Lightning Materia | 500 Gil |
| Poison Materia | 1500 Gil |
| Barrier Materia | 1500 Gil |
| Deadly Dodge Materia | 600 Gil |
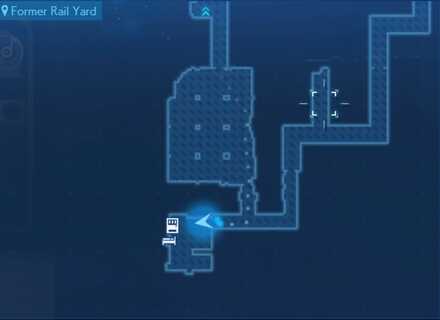
Vending Machine - Former Rail Yard
 |
 |
| Items | Price |
|---|---|
| 28. Stamp (Stock: 1) | 50 Gil |
| Potion | 50 Gil |
| Hi-Potion (Stock: 3) | 100 Gil |
| Ether (Stock: 1) | 100 Gil |
| Phoenix Down | 300 Gil |
| Phoenix Down (Stock: 1) | 100 Gil |
| Antidote | 80 Gil |
| Weapons / Armor | Price |
|---|---|
| Iron Bangle | 1000 Gil |
| Star Bracelet | 1600 Gil |
| Accessories | Price |
|---|---|
| Power Wristguards | 800 Gil |
| Bulletproof Vest | 800 Gil |
| Earrings | 800 Gil |
| Talisman | 800 Gil |
| Revival Earrings | 500 Gil |
| Materia | Price |
|---|---|
| Healing Materia | 600 Gil |
| Cleansing Materia | 1500 Gil |
| Fire Materia | 500 Gil |
| Ice Materia | 500 Gil |
| Lightning Materia | 500 Gil |
| Poison Materia | 1500 Gil |
| Barrier Materia | 1500 Gil |
| Deadly Dodge Materia | 600 Gil |
Tips and Strategies
Watch Out for Queen Grashstrikes
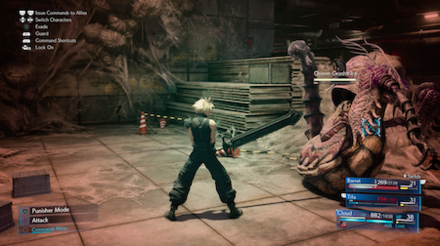
Queen Grashstrikes will use a web attack which can bind one of your party members. Switch to another ally and attack the Queen to free them before she pulls them in too close.
Queen Grashtrike Weaknesses and Obtainable Items
Fight Fire with Fire
Flametroopers use powerful streams of fire to hit anything in their path, but they're weak to a taste of their own medicine. Stand at a distance and hit them with Fire Magic to take them out.
Flametrooper Weaknesses and Obtainable Items
Use Lightning Magic on Sentry Launchers
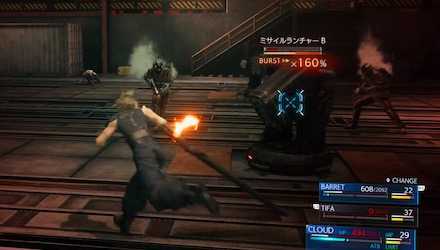
Sentry Launchers are tough enemies which appear in the middle of the path and fire volleys of missiles at your party. Stop them early on before they do too much damage by hitting them with Lightning Magic. They'll also appear together with Flametroopers, making for one tough squad, so take each foe out one at a time without letting them group together to deal damage.
Sentry Launcher Weaknesses and Obtainable Items
Heal Before Facing Crab Warden
Between the final Rest Area in the chapter and the Crab Warden, you'll fight two Elite Security Officers, who have the potential to deal some damage to your party. If you've taken a few hits, be sure to go back and rest again before facing the Boss.
Boss Strategy Guide
Crab Warden
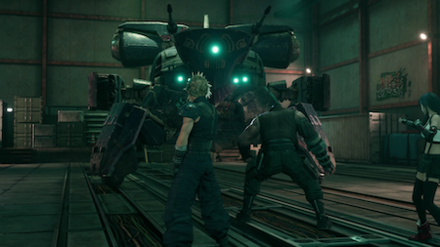
Crab Warden is the first multi-phase Boss since Scorpion Sentinel. As they are both based on shelled insects, they seem to be part of a set. Be aware of the differences between each of its three Phases before fighting it.
Phase One
- Slow, but hits hard.
- Has separate Left and Right Legs – attack the legs first to Stagger it.
- After Staggering it, aim for the heart.
Phase Two
- 5 Slug-Rays will come out to join the battle.
- It will start to use Wildfire, a flamethrower attack.
- It will use Missile Barrage to unleash Missiles at you.
- From this phase on, you will be able to use a Summon.
Phase Three
- It will gain a Left and Right Auxiliary Weapon, and a Pilot.
- Its attack Surge shocks the ground with electricity, dealing damage to everyone. Watch out!
- If you cripple the Pilot, it will become unable to move, so aim for this first.
Story Walkthrough Related Links
| Chapter 1 | The Destruction of Mako Reactor 1 |
|---|---|
| Chapter 2 | Fateful Encounters |
| Chapter 3 | Home Sweet Slum |
| Chapter 4 | Mad Dash |
| Chapter 5 | Dogged Pursuit |
| Chapter 6 | Light the Way |
| Chapter 7 | A Trap is Sprung |
| Chapter 8 | Budding Bodyguard |
| Chapter 9 | The Town That Never Sleeps |
| Chapter 10 | Rough Waters |
| Chapter 11 | Haunted |
| Chapter 12 | Fight for Survival |
| Chapter 13 | A Broken World |
| Chapter 14 | In Search of Hope |
| Chapter 15 | The Day Midgar Stood Still |
| Chapter 16 | The Belly of the Beast |
| Chapter 17 | Deliverance from Chaos |
| Chapter 18 | Destiny's Crossroads |
| INTERmission Chapters | |
|---|---|
| Chapter 1 | Wutai's Finest |
| Chapter 2 | Covert Ops |
Comment
1  Anonymous almost 6 years
Looks like the map shows a healing materia but it isn't listed in the obtainable items
Author

Chapter 5: Dogged Pursuit Story Guide & Walkthrough
Please participate in our site
improvement survey
03/2026
improvement survey
03/2026
Would you assist in
improving Game8's site?
improving Game8's site?

×
We are listening to our users' valuable opinions and discussing how to act on them.
The information collected through this survey will be used for the purpose of improving our services. In addition, the information will only be disclosed a part of a statistic in a format that will not allow identification of personal information.
Begin Survey
Not Now
×
Please rate each item regarding Game8.co's Advertisements.
Amount of Ads
Very Dissatisfied
Somewhat Dissatisfied
Fine
Somewhat Satisfied
Highly Satisfied
Placement of Ads
Timing of Ad Display
Ad Loading Speed
Safeness of Ads
Content of Ads
×
Please rate each item regarding Game8.co's Quality of Articles.
Amount of information
Very Dissatisfied
Somewhat Dissatisfied
Fine
Somewhat Satisfied
Highly Satisfied
Frequency of updates
Speed of new information
Accuracy of articles
Understandibility of articles
Readability of sentences
×
Please rate each item regarding Game8.co's Usability of the Site.
Ease of finding information
Very Dissatisfied
Somewhat Dissatisfied
Fine
Somewhat Satisfied
Highly Satisfied
Loading Speed
Use of Color
Font Size
Visibility of Images
Easy to Understand Layout
×
Please rate each item regarding Game8.co's Message Boards, Comments.
Ease of Writing
Very Dissatisfied
Somewhat Dissatisfied
Fine
Somewhat Satisfied
Highly Satisfied
Readability
Ease in Finding Information
Comment Quality
Comment Quantity
Admin Response
×
Please rate each item regarding Game8.co's Site's new design.
Please rate our site's new design
Very Dissatisfied
Somewhat Dissatisfied
Fine
Somewhat Satisfied
Highly Satisfied
Do you think that the website's design change makes the site easier to use?
Has the new design made it easier for you to find information on the site?
Has the new design improved the overall visual appeal of the site?
How would you rate your overall satisfaction with the new design of the site?
×
How likely are you to recommend Game8 to someone you know?
Very Unlikely
0
1
2
3
4
5
6
7
8
9
10
Very Likely
If you have other opinions regarding potential improvement to the website, please share them with us. We would appreciate your honest opinion.
Note: This is a free response section, so you can proceed without entering anything.
Note: Please be sure not to enter any kind of personal information into your response.
Note: Please be sure not to enter any kind of personal information into your response.
×
Thank You
×
Thank you for participating in our survey! Your answers will help us to improve the quality of our website and services.
We hope you continue to make use of Game8.
We hope you continue to make use of Game8.
Close
Rankings
- We could not find the message board you were looking for.
Gaming News


![Everwind Review [Early Access] | The Shaky First Step to A Very Long Journey](https://img.game8.co/4440226/ab079b1153298a042633dd1ef51e878e.png/thumb)

![Monster Hunter Stories 3 Review [First Impressions] | Simply Rejuvenating](https://img.game8.co/4438641/2a31b7702bd70e78ec8efd24661dacda.jpeg/thumb)
Popular Games

Genshin Impact Walkthrough & Guides Wiki
Honkai: Star Rail Walkthrough & Guides Wiki
Umamusume: Pretty Derby Walkthrough & Guides Wiki
Pokemon Pokopia Walkthrough & Guides Wiki
Resident Evil Requiem (RE9) Walkthrough & Guides Wiki
Monster Hunter Wilds Walkthrough & Guides Wiki
Wuthering Waves Walkthrough & Guides Wiki
Arknights: Endfield Walkthrough & Guides Wiki
Pokemon FireRed and LeafGreen (FRLG) Walkthrough & Guides Wiki
Pokemon TCG Pocket (PTCGP) Strategies & Guides Wiki


Recommended Games
Diablo 4: Vessel of Hatred Walkthrough & Guides Wiki
Fire Emblem Heroes (FEH) Walkthrough & Guides Wiki
Yu-Gi-Oh! Master Duel Walkthrough & Guides Wiki
Super Smash Bros. Ultimate Walkthrough & Guides Wiki
Pokemon Brilliant Diamond and Shining Pearl (BDSP) Walkthrough & Guides Wiki
Elden Ring Shadow of the Erdtree Walkthrough & Guides Wiki
Monster Hunter World Walkthrough & Guides Wiki
The Legend of Zelda: Tears of the Kingdom Walkthrough & Guides Wiki
Persona 3 Reload Walkthrough & Guides Wiki
Cyberpunk 2077: Ultimate Edition Walkthrough & Guides Wiki


All rights reserved
© SQUARE ENIX CO., LTD. All Rights Reserved.
CHARACTER DESIGN:TETSUYA NOMURA/ROBERTO FERRARI
The copyrights of videos of games used in our content and other intellectual property rights belong to the provider of the game.
The contents we provide on this site were created personally by members of the Game8 editorial department.
We refuse the right to reuse or repost content taken without our permission such as data or images to other sites.
Put the leather bracer into the walkthrough, not just list it in the items list at the end. I almost missed it.