This survey will take about 1 minute.
Your answers will help us to improve our website.
FF7 Remake
Best Build for Each Character (Intergrade Updated)
This is a guide for the best builds of each character in the game Final Fantasy 7 Remake (FF7 Remake), including Intergrade DLC characters. Read on to know more about the different gear setups that you can use depending on your needs!
List of Contents
Best Builds for Each Character
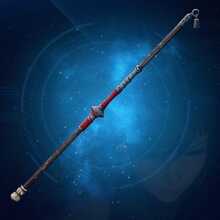
Best Build for Cloud
| Equipment | Stats (Fully Upgraded) / Effect |
|---|---|
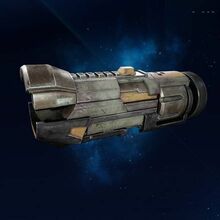
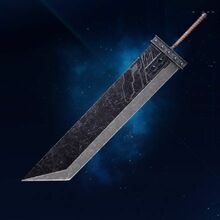 Buster Sword Buster Sword |
|
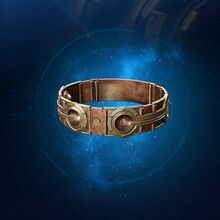 Chain Bangle Chain Bangle |
|
 Gotterdammerung Gotterdammerung |
Enter battle with a full limit break gauge. Limit break gauge gradually fills during battle. |
| Buster Sword | |
|---|---|
| Chain Bangle | |
The recommended setup for Cloud is a Balanced Build. This setup covers Cloud's combat capabilities using both physical and magic attacks while also giving him support spells like Cure and Raise.
See the link below for more details about this build as well as other setups for Cloud!
Cloud Strife Weapons and Abilities | Cloud Best Build
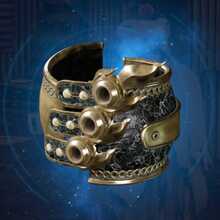
Best Build for Barret
| Equipment | Stats (Fully Upgraded) / Effect |
|---|---|
 Big Bertha Big Bertha |
|
| Chain Bangle |
|
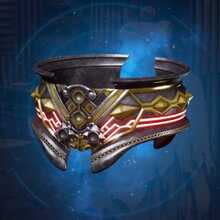
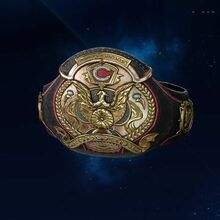 Champion Belt Champion Belt |
Increases max HP by 10% Increases strength by 5% |
| Big Bertha | |
|---|---|
| Chain Bangle | |
A Full Tank Build for Barret would be optimal as Barret can use Lifesaver to transfer damage received by other members to him. Using Steelskin and Manaward will make him tankier even more.
See the link below for more details about this build as well as other setups for Barret!
Barret Wallace Weapons and Abilities | Barret Best Build
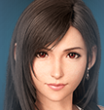
Best Build for Tifa
| Equipment | Stats (Fully Upgraded) / Effect |
|---|---|
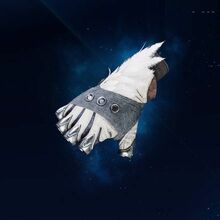 Feathered Gloves Feathered Gloves |
|
| Chain Bangle |
|
| Gotterdammerung |
Enter battle with a full limit break gauge. Limit break gauge gradually fills during battle. |
| Feathered Gloves | |
|---|---|
| Chain Bangle | |
Using a Balanced Build on Tifa gives additional damage output with physical and magic attacks while also providing support with Healing, Revival, and ATB Assist materias.
See the link below for more details about this build as well as other setups for Tifa!
Tifa Lockhart Weapons and Abilities | Tifa Best Build
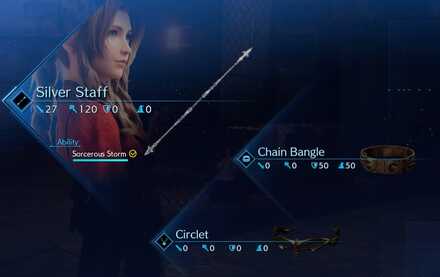
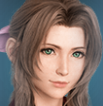
Best Build for Aerith
| Equipment | Stats (Fully Upgraded) / Effect |
|---|---|
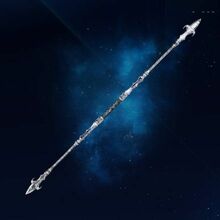 Silver Staff Silver Staff |
|
| Chain Bangle |
|
 Circlet Circlet |
Increases max MP by 10% Increases magic power by 5% |
| Silver Staff | |
|---|---|
| Chain Bangle | |
Make Aerith a Red Mage to utilize her high magic attack rating for inflicting elemental magic damage with normal attacks, casting attack spells, and party-wide healing.
See the link below for more details about this build as well as other setups for Aerith!
Aerith Gainsborough Weapons and Abilities | Aerith Best Build
Best Builds for Each Intergrade Character
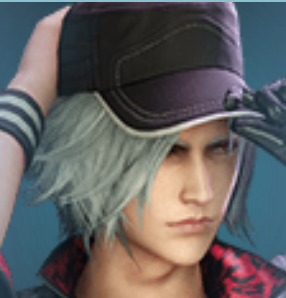
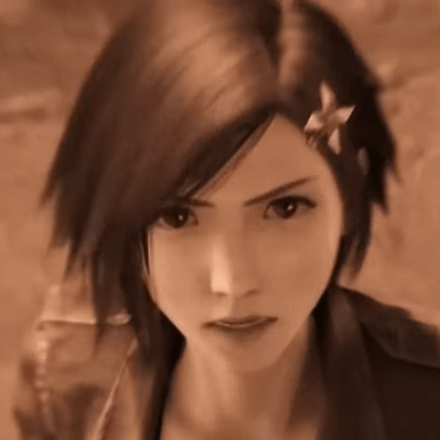
Best Build for Yuffie
| Equipment | Stats (Fully Upgraded) / Effect |
|---|---|
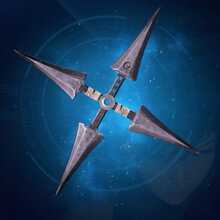 4-Point Shuriken 4-Point Shuriken |
|
 Chthonian Chthonian |
|
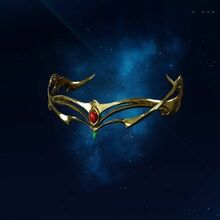
 Ribbon Ribbon |
Prevents detrimental status effects. Makes it harder to be interrupted when casting magic. |
| 4-Point Shuriken | |
|---|---|
| Chthonian Armlet | |
Yuffie's strength comes from her versatility, being able to deal both close-range, long-range damage, physical, and magic damage. A Balance Build suits her the most, focusing on survivability as she can be quickly taken down with her low health.
Yuffie Kisaragi Weapons, Abilities and Voice Actor
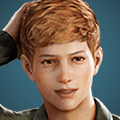
Best Build for Sonon
| Equipment | Stats (Fully Upgraded) / Effect |
|---|---|
 Marshalist's Staff Marshalist's Staff |
|
 Firebird Armlet Firebird Armlet |
|
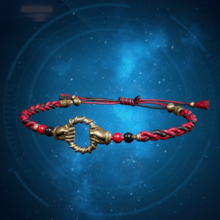 Kindred Cord Kindred Cord |
Prevents detrimental status effects. Makes it harder to be interrupted when casting magic. |
| Marshalist's Staff | |
|---|---|
| Firebird Armlet | |
As you can't control Sonon in INTERmission, his main role is Yuffie's Support. He can either specialize in physical or magic depending on his weapon, as long as you can keep him alive and synergize with Yuffie. Making sure Yuffie and himself stay alive is his primary role, with dealing damage with her secondary.
Sonon Kusakabe Weapons, Abilities and Voice Actor
Character Links
| Main Characters | |||
|---|---|---|---|
 Cloud Cloud |
 Aerith Aerith |
 Barret Barret |
 Tifa Tifa |
| Best Build for Each Character | |||
| Character Ranking by Stat | |||
| AVALANCHE | |||
 Jessie Jessie |
 Wedge Wedge |
 Biggs Biggs |
- |
| Shinra Company | |||
 Sephiroth Sephiroth |
 Hojo Hojo |
 Reno Reno |
 President President |
 Rude Rude |
 Heidegger Heidegger |
 Roche Roche |
 Tseng Tseng
|
 Scarlet Scarlet
|
 Palmer Palmer
|
 Reeve Reeve |
 Rufus Rufus |
| Other Characters | |||
 Red XIII Red XIII |
 Don Corneo Don Corneo
|
 Leslie Leslie |
 Andrea Andrea |
 Madam M Madam M |
 Sam Sam |
 Kyrie Kyrie
|
 Zack Zack |
 Vincent Vincent |
 Jenova Jenova |
- | - |
| INTERmission DLC | |||
 Yuffie Yuffie |
 Sonon Sonon |
 Zhijie Zhijie |
 Nayo Nayo |
 Billy Bob Billy Bob |
 Polk Polk |
 Nero Nero |
 Weiss Weiss |
 Melfi Melfi |
- | - | - |
Comment
6  Anonymous over 4 years
these builds don't even come close to being the best honestly its insulting to think these are the best when honestly all of them have the same armor that can only be obtained once AND it utilizes what is quite likely the last accessory people will obtain. the reality is these cant be considered the "best" because you have needed to completed the absolute(hardmode) entire game and stuff is used to the degree of "well what do i give tifa if all the gear is on cloud?" this is more a peacock build
Author

Best Build for Each Character (Intergrade Updated)
Please participate in our site
improvement survey
03/2026
improvement survey
03/2026
Would you assist in
improving Game8's site?
improving Game8's site?

×
We are listening to our users' valuable opinions and discussing how to act on them.
The information collected through this survey will be used for the purpose of improving our services. In addition, the information will only be disclosed a part of a statistic in a format that will not allow identification of personal information.
Begin Survey
Not Now
×
Please rate each item regarding Game8.co's Advertisements.
Amount of Ads
Very Dissatisfied
Somewhat Dissatisfied
Fine
Somewhat Satisfied
Highly Satisfied
Placement of Ads
Timing of Ad Display
Ad Loading Speed
Safeness of Ads
Content of Ads
×
Please rate each item regarding Game8.co's Quality of Articles.
Amount of information
Very Dissatisfied
Somewhat Dissatisfied
Fine
Somewhat Satisfied
Highly Satisfied
Frequency of updates
Speed of new information
Accuracy of articles
Understandibility of articles
Readability of sentences
×
Please rate each item regarding Game8.co's Usability of the Site.
Ease of finding information
Very Dissatisfied
Somewhat Dissatisfied
Fine
Somewhat Satisfied
Highly Satisfied
Loading Speed
Use of Color
Font Size
Visibility of Images
Easy to Understand Layout
×
Please rate each item regarding Game8.co's Message Boards, Comments.
Ease of Writing
Very Dissatisfied
Somewhat Dissatisfied
Fine
Somewhat Satisfied
Highly Satisfied
Readability
Ease in Finding Information
Comment Quality
Comment Quantity
Admin Response
×
Please rate each item regarding Game8.co's Site's new design.
Please rate our site's new design
Very Dissatisfied
Somewhat Dissatisfied
Fine
Somewhat Satisfied
Highly Satisfied
Do you think that the website's design change makes the site easier to use?
Has the new design made it easier for you to find information on the site?
Has the new design improved the overall visual appeal of the site?
How would you rate your overall satisfaction with the new design of the site?
×
How likely are you to recommend Game8 to someone you know?
Very Unlikely
0
1
2
3
4
5
6
7
8
9
10
Very Likely
If you have other opinions regarding potential improvement to the website, please share them with us. We would appreciate your honest opinion.
Note: This is a free response section, so you can proceed without entering anything.
Note: Please be sure not to enter any kind of personal information into your response.
Note: Please be sure not to enter any kind of personal information into your response.
×
Thank You
×
Thank you for participating in our survey! Your answers will help us to improve the quality of our website and services.
We hope you continue to make use of Game8.
We hope you continue to make use of Game8.
Close
Rankings
Gaming News


![Monster Hunter Stories 3 Review [First Impressions] | Simply Rejuvenating](https://img.game8.co/4438641/2a31b7702bd70e78ec8efd24661dacda.jpeg/thumb)
Popular Games

Genshin Impact Walkthrough & Guides Wiki
Honkai: Star Rail Walkthrough & Guides Wiki
Umamusume: Pretty Derby Walkthrough & Guides Wiki
Pokemon Pokopia Walkthrough & Guides Wiki
Resident Evil Requiem (RE9) Walkthrough & Guides Wiki
Monster Hunter Wilds Walkthrough & Guides Wiki
Wuthering Waves Walkthrough & Guides Wiki
Arknights: Endfield Walkthrough & Guides Wiki
Pokemon FireRed and LeafGreen (FRLG) Walkthrough & Guides Wiki
Pokemon TCG Pocket (PTCGP) Strategies & Guides Wiki


Recommended Games
Diablo 4: Vessel of Hatred Walkthrough & Guides Wiki
Cyberpunk 2077: Ultimate Edition Walkthrough & Guides Wiki
Fire Emblem Heroes (FEH) Walkthrough & Guides Wiki
Yu-Gi-Oh! Master Duel Walkthrough & Guides Wiki
Super Smash Bros. Ultimate Walkthrough & Guides Wiki
Pokemon Brilliant Diamond and Shining Pearl (BDSP) Walkthrough & Guides Wiki
Elden Ring Shadow of the Erdtree Walkthrough & Guides Wiki
Monster Hunter World Walkthrough & Guides Wiki
The Legend of Zelda: Tears of the Kingdom Walkthrough & Guides Wiki
Persona 3 Reload Walkthrough & Guides Wiki


All rights reserved
© SQUARE ENIX CO., LTD. All Rights Reserved.
CHARACTER DESIGN:TETSUYA NOMURA/ROBERTO FERRARI
The copyrights of videos of games used in our content and other intellectual property rights belong to the provider of the game.
The contents we provide on this site were created personally by members of the Game8 editorial department.
We refuse the right to reuse or repost content taken without our permission such as data or images to other sites.
First of all, the build use late game items but only good for normal mode. The build is more similar to helping someone do normal when they finished hard already. Some item is limited and the number of character use it is more than what you can get. Secondly, Yuffie 4 star shuriken make her healing output not high enough but she have too much mana with no where yo use, it is much better to use Magic UP instead of MP up for her.