Chapter 15: The Day Midgar Stood Still Story Guide & Walkthrough
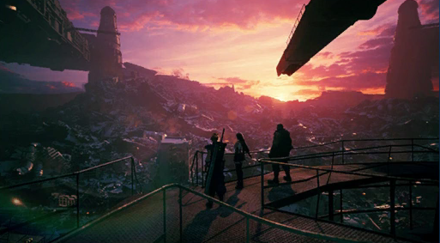
This is a guide and walkthrough to Chapter 15: The Day Midgar Stood Still, a story chapter in the game Final Fantasy 7 Remake (FF7R). Read on to learn locations of items, rewards for completing this chapter, as well as useful tips and strategies for getting through this part of the story.
| Previous Chapter | In Search of Hope |
|---|---|
| Current Chapter | The Day Midgar Stood Still |
| Next Chapter | The Belly of the Beast |
List of Contents
List of Main Scenario Objectives
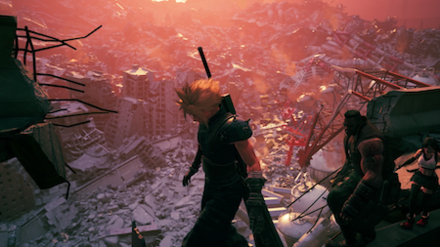
| No. | Title | Description |
|---|---|---|
| 1 | A Broken City | People's cries echo throughout the ruined town. Ignoring the citizen's words of caution, they head toward the debris. |
| 2 | The Climb | Using the grappling gun, the three make their way up. However, the area is crawling with Shinra troopers looking for Avalanche. |
| 3 | Hiding in Plain Sight | They cut through the patrolling Shinra units and reach a towering building. |
| 4 | The Path to Greater Heights | The team continue their way up, but the Valkyrie appears and stands in their way. |
| 4-1 | The Crumbling Building | Infiltrate the building. Continue along the only path that leads topside. |
| 5 | Flight of the Valkyrie | They escape the Valkyrie, but not Shinra is alerted to their presence. |
| 5-1 | To the Stairs | Cut through the gunfire and escape to the stairs. |
| 6 | In Hot Pursuit | They manage to escape the troopers and stop to take in the destruction of Sector 7 as the sun sets over the horizon. |
| 7 | To the Top of the Plate | After defeating the Valkyrie, the party arrives topside. The three steel themselves for infiltrating the Shinra Building and rescuing Aerith. |
Chapter 15: The Day Midgar Stood Still Walkthrough
Collapsed Sector 7 Plate

| Objectives | |
|---|---|
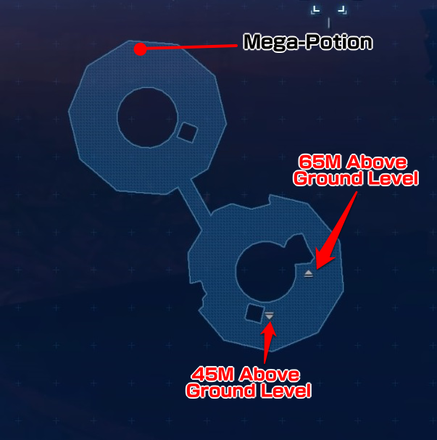
| 1 | Continue ahead and hop over the fallen beam. Go ahead under the fallen wall. Use the rest area here – This vending machine is the first to sell Time Materia. |
| 2 | Climb the ladder. You'll fight three Byobapolis at the top. Climb the next ladder, and another. |
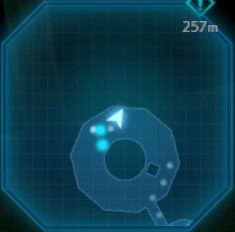 Go across the bridge on the floor after the second ladder to find a chest with a Mega-Potion. However, you'll have to fight two Byobapolis. Go across the bridge on the floor after the second ladder to find a chest with a Mega-Potion. However, you'll have to fight two Byobapolis. |
|
| 3 | At the top, you'll fight two Cerulean Drakes. Continue ahead and climb up the ladder. |
| 4 | Continue ahead under the fallen beam. After the cutscene, aim the grappling gun at the platform above and press the Square button to fire. Continue ahead and you'll fight two 3-C SOLDIER Operators. Pick up the Radio dropped by one of the SOLDIERs. |
| 5 | Just ahead across the path and continue ahead until you reach a point to use the Grappling Gun. On the other side, fight two Elite Security Officers and a Guard Dog, followed by two more Elite Security Officers and a Helitrooper. Ahead, you'll fight two more Elite Security Officers and two Elite Grenadiers. Next, you'll fight a Helitrooper, two Elite Security Officers, and two Elite Grenadiers. |
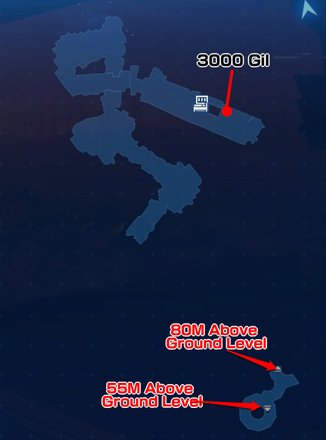
| 6 | Wrap around and climb up the ladder. You'll find a rest area. Go up the staircase here. You can buy Music Disc #5: Lurking in the Darkness from the vending machine here. |
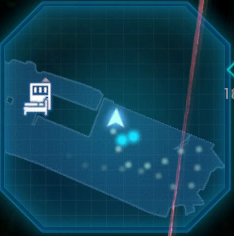 At the end of the path on the left side is a chest with 3,000 Gil. However, you'll have to fight a Helitrooper and two 3-C SOLDIER Operators. At the end of the path on the left side is a chest with 3,000 Gil. However, you'll have to fight a Helitrooper and two 3-C SOLDIER Operators.
| |
| 7 | Go under the cylindrical scaffolding in the middle of the room and look up. There will be a platform above you can Grapple to. On the next floor, you'll fight three Slug-Rays and two Shock-Rays. Continue to the far left end and look up to find another platform to Grapple to. |
| 8 | On the next floor, you'll fight two Shock-Rays and two Slug-Rays. Turn around and look left for a staircase to climb up. |
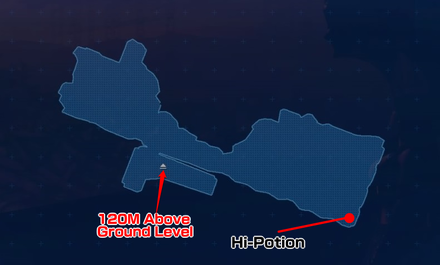
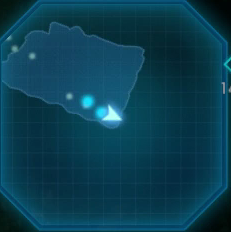 Open the chest in the far right to get a Hi-Potion. Open the chest in the far right to get a Hi-Potion. |
|
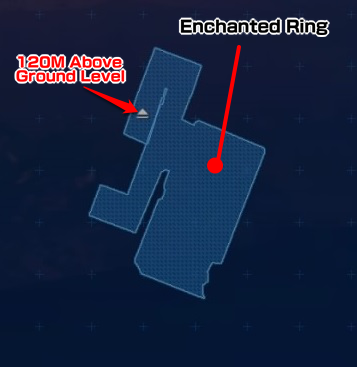
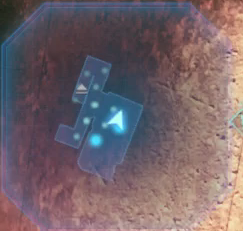 Against the back wall near the stairs up, look up and right to find a platform you can Grapple to. Go outside to the fire escape and go around the building to find a staircase down. Go back inside to find a chest with an Enchanted Ring and a platform to Grapple back up to where you started. Against the back wall near the stairs up, look up and right to find a platform you can Grapple to. Go outside to the fire escape and go around the building to find a staircase down. Go back inside to find a chest with an Enchanted Ring and a platform to Grapple back up to where you started. |
|
| 9 | Follow the path around and outside. You'll fight a Blast-Ray. Climb the ladder ahead. |
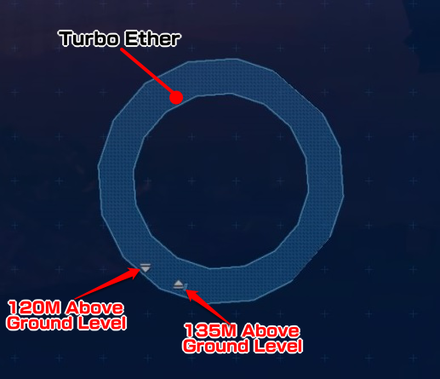
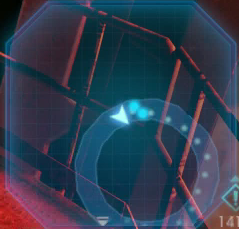 After climbing the ladder, go around the donut to find a chest with a Turbo Ether. After climbing the ladder, go around the donut to find a chest with a Turbo Ether. |
|
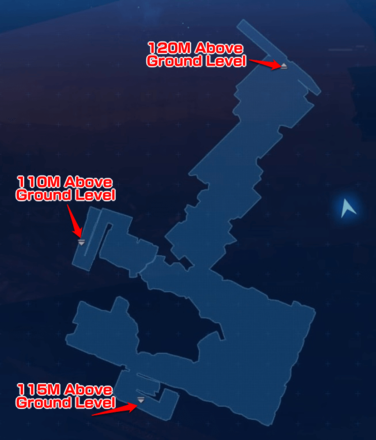
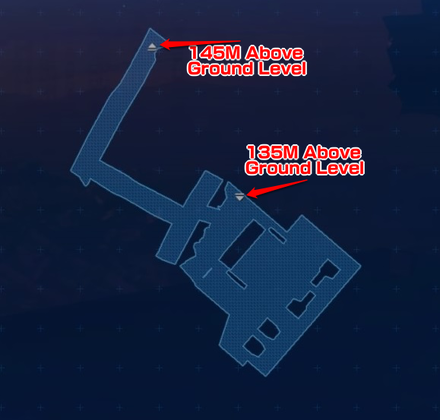
| 10 | Climb the next ladder up, then go around to find another ladder. Check the Mini-map to find the path jutting out. Find a ladder at the end. |
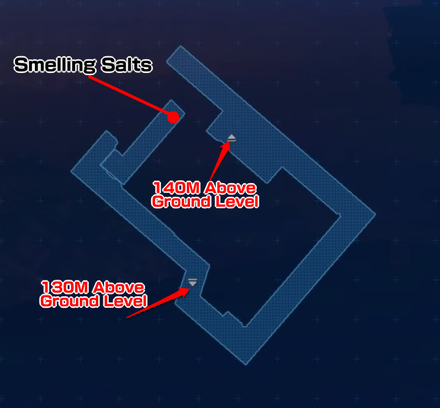
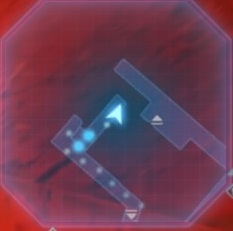 After climbing the first ladder, climb another ladder to your left and open the chest nearby to obtain a package of Smelling Salts. After climbing the first ladder, climb another ladder to your left and open the chest nearby to obtain a package of Smelling Salts. |
Collapsed Highway

| Objectives | |
|---|---|
| 1 | Squeeze through the narrow passages ahead. Walk along the narrow beam. Turn left at the end to fight two Byobapolis and a Cerulean Drake. |
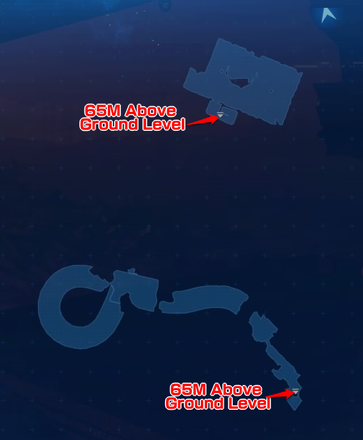
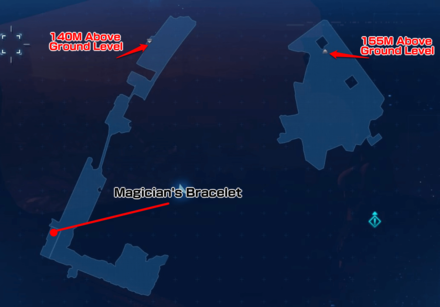
 From the left side of the platform on the far right, look up at it. You'll be able to grapple up to get a chest with a Magician's Bracelet. From the left side of the platform on the far right, look up at it. You'll be able to grapple up to get a chest with a Magician's Bracelet. |
|
| 2 | Continue along to the end, where you'll find another narrow path to walk across. Ahead, you'll fight a Byobapolis. Walk across the bridge and a cutscene will begin. |
| 3 | Time your dashes to run between the buildings protecting you from the bullets. Run down the stairs as fast as possible to stay out of the bullets' range. You'll fight two Blast-Rays at the bottom. |
| 4 | On the far-right of the room, you'll find a ladder to climb up. Go up and fight two Helitroopers. On the left end, hop over the fallen beam to find a rest area. |
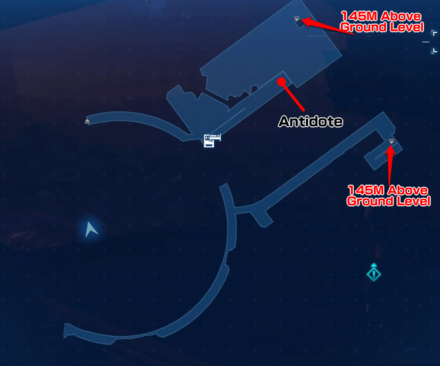
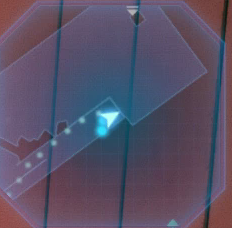 Climb the stairs next to the rest area to find a chest with an Antidote. Climb the stairs next to the rest area to find a chest with an Antidote. |
|
| 5 | Check the Mini-map to see the path jutting out from the side (left on the Mini-map). Continue on the path and up the stairs. |
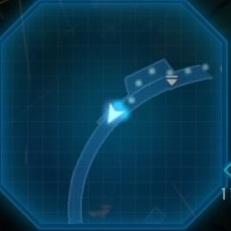 Before you go up the stairs, open the chest behind it to obtain a Remedy. Before you go up the stairs, open the chest behind it to obtain a Remedy. |
|
| 6 | Go to the opposite end and stand on the rope, then look up to see a platform to Grapple to. On the next platform up, do the same thing. |
| Boss 7 |
Run ahead while dodging bullets. At the end of the path, the boss battle with The Valkyrie will begin. When you defeat it, a cutscene will end the chapter. You'll get a Cog Bangle for defeating The Valkyrie. How to Beat The Valkyrie |
Maps and Obtainable Items
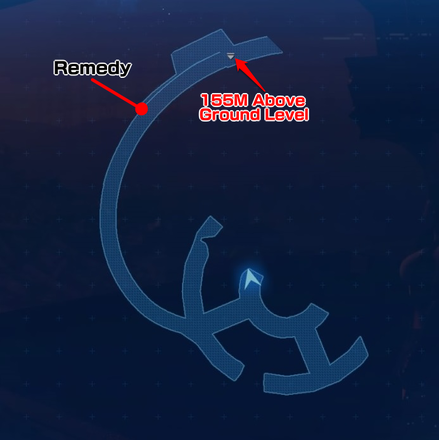
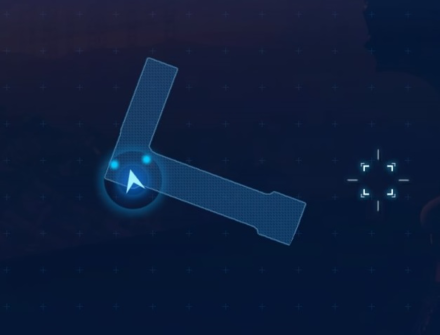
Maps
| List of Maps | |
|---|---|
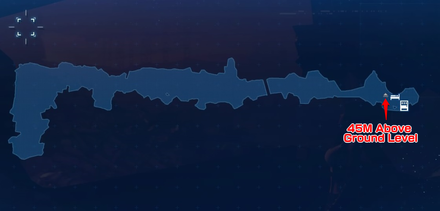 |
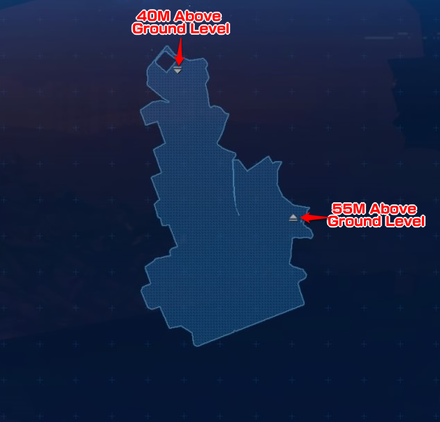 |
 |
 |
 |
 |
 |
 |
 |
 |
 |
 |
 |
 |
 |
 |
Obtainable Items
| Collapsed Sector 7 Plate | ||
|---|---|---|
| Mega-Potion x1 | 3000 Gil | Hi-Potion x1 |
| Enchanted Ring | Turbo Ether x1 | Smelling Salts x1 |
| Collapsed Highway | ||
| Magician's Bracelet | Antidote x1 | Remedy x1 |
Shops & Vending Machines
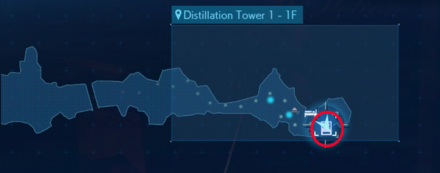
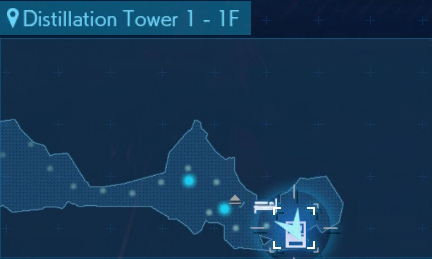
Vending Machine - Distillation Tower 1 - 1F
 |
 |
| Items | Price |
|---|---|
| Potion | 50 Gil |
| Hi-Potion | 300 Gil |
| Mega-Potion | 700 Gil |
| Ether | 500 Gil |
| Phoenix Down | 300 Gil |
| Antidote | 80 Gil |
| Echo Mist | 100 Gil |
| Smelling Salts | 80 Gil |
| Remedy | 600 Gil |
| Weapons / Armor | Price |
|---|---|
| Gothic Bangle | 3000 Gil |
| Magician's Bracelet | 4800 Gil |
| Heavy-Duty Bracer | 4800 Gil |
| Sorcerer's Armlet | 4800 Gil |
| Accessories | Price |
|---|---|
| Power Wristguards | 800 Gil |
| Bulletproof Vest | 800 Gil |
| Earrings | 800 Gil |
| Talisman | 800 Gil |
| Supernatural Wristguards | 5000 Gil |
| Survival Vest | 5000 Gil |
| Platinum Earrings | 5000 Gil |
| Timeworn Talisman | 5000 Gil |
| Star Pendant | 1500 Gil |
| Headband | 1500 Gil |
| Revival Earrings | 500 Gil |
| Materia | Price |
|---|---|
| Healing Materia | 600 Gil |
| Cleansing Materia | 1500 Gil |
| Revival Materia | 3000 Gil |
| Fire Materia | 500 Gil |
| Ice Materia | 500 Gil |
| Lightning Materia | 500 Gil |
| Poison Materia | 1500 Gil |
| Barrier Materia | 1500 Gil |
| Binding Materia | 3000 Gil |
| Subversion Materia | 3000 Gil |
| Time Materia | 5000 Gil |
| HP Up Materia | 2000 Gil |
| MP Up Materia | 2000 Gil |
| Deadly Dodge Materia | 600 Gil |
Vending Machine - Central Tower - 1F
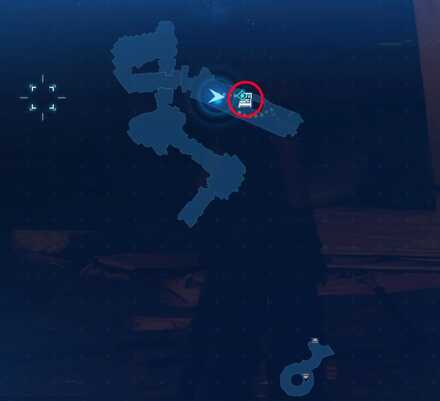 |
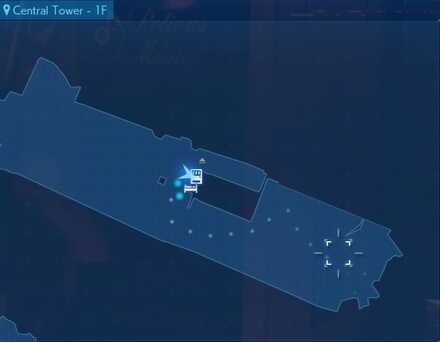 |
| Items | Price |
|---|---|
| 5. Lurking in the Darkness (Stock: 1) | 50 Gil |
| Potion | 50 Gil |
| Hi-Potion | 300 Gil |
| Mega-Potion | 700 Gil |
| Mega-Potion (Stock: 3) | 300 Gil |
| Ether | 500 Gil |
| Ether (Stock: 2) | 100 Gil |
| Phoenix Down | 300 Gil |
| Phoenix Down (Stock: 2) | 100 Gil |
| Antidote | 80 Gil |
| Echo Mist | 100 Gil |
| Smelling Salts | 80 Gil |
| Remedy | 600 Gil |
| Weapons / Armor | Price |
|---|---|
| Gothic Bangle | 3000 Gil |
| Magician's Bracelet | 4800 Gil |
| Heavy-Duty Bracer | 4800 Gil |
| Sorcerer's Armlet | 4800 Gil |
| Accessories | Price |
|---|---|
| Power Wristguards | 800 Gil |
| Bulletproof Vest | 800 Gil |
| Earrings | 800 Gil |
| Talisman | 800 Gil |
| Supernatural Wristguards | 5000 Gil |
| Survival Vest | 5000 Gil |
| Platinum Earrings | 5000 Gil |
| Timeworn Talisman | 5000 Gil |
| Star Pendant | 1500 Gil |
| Headband | 1500 Gil |
| Revival Earrings | 500 Gil |
| Materia | Price |
|---|---|
| Healing Materia | 600 Gil |
| Cleansing Materia | 1500 Gil |
| Revival Materia | 3000 Gil |
| Fire Materia | 500 Gil |
| Ice Materia | 500 Gil |
| Lightning Materia | 500 Gil |
| Poison Materia | 1500 Gil |
| Barrier Materia | 1500 Gil |
| Binding Materia | 3000 Gil |
| Subversion Materia | 3000 Gil |
| Time Materia | 5000 Gil |
| HP Up Materia | 2000 Gil |
| MP Up Materia | 2000 Gil |
| Deadly Dodge Materia | 600 Gil |
Vending Machine - Industrial Tank Scaffolding
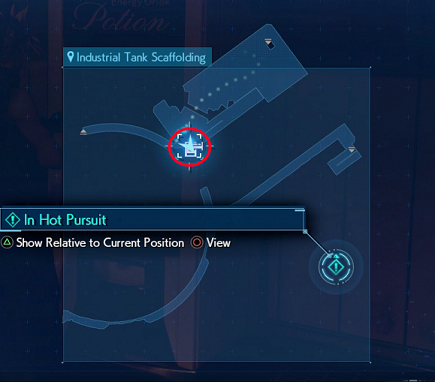 |
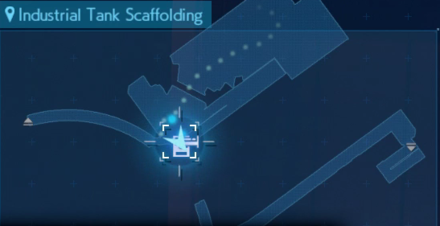 |
| Items | Price |
|---|---|
| Potion | 50 Gil |
| Hi-Potion | 300 Gil |
| Mega-Potion | 700 Gil |
| Mega-Potion (Stock: 3) | 300 Gil |
| Ether | 500 Gil |
| Ether (Stock: 2) | 100 Gil |
| Phoenix Down | 300 Gil |
| Phoenix Down (Stock: 2) | 100 Gil |
| Antidote | 80 Gil |
| Echo Mist | 100 Gil |
| Smelling Salts | 80 Gil |
| Remedy | 600 Gil |
| Weapons / Armor | Price |
|---|---|
| Gothic Bangle | 3000 Gil |
| Magician's Bracelet | 4800 Gil |
| Heavy-Duty Bracer | 4800 Gil |
| Sorcerer's Armlet | 4800 Gil |
| Accessories | Price |
|---|---|
| Power Wristguards | 800 Gil |
| Bulletproof Vest | 800 Gil |
| Earrings | 800 Gil |
| Talisman | 800 Gil |
| Supernatural Wristguards | 5000 Gil |
| Survival Vest | 5000 Gil |
| Platinum Earrings | 5000 Gil |
| Timeworn Talisman | 5000 Gil |
| Star Pendant | 1500 Gil |
| Headband | 1500 Gil |
| Revival Earrings | 500 Gil |
| Materia | Price |
|---|---|
| Healing Materia | 600 Gil |
| Cleansing Materia | 1500 Gil |
| Revival Materia | 3000 Gil |
| Fire Materia | 500 Gil |
| Ice Materia | 500 Gil |
| Lightning Materia | 500 Gil |
| Poison Materia | 1500 Gil |
| Barrier Materia | 1500 Gil |
| Binding Materia | 3000 Gil |
| Subversion Materia | 3000 Gil |
| Time Materia | 5000 Gil |
| HP Up Materia | 2000 Gil |
| MP Up Materia | 2000 Gil |
| Deadly Dodge Materia | 600 Gil |
Tips and Strategies
Equip Wind Materia
Many of the enemies in this section are weak to Wind Materia. Both the Dragon enemies as well as the Helitroopers will be knocked down and easily Staggered with these attacks.
Boss Strategy Guide
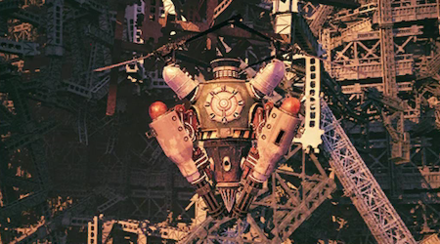
The Valkyrie
| The Valkyrie | |
|---|---|
|
|
| Where it Appears | Weaknesses |
| Collapsed Highway | Thunder |
Because The Valkyrie mostly stays in the air and out of reach, it'll be hard for most characters except Barret to reach him. Be sure to combo Barret's weapon with Elemental Materia and Lightning Materia so his shots will hit for increased damage.
How to Defeat The Valkyrie - Key Points
- Hide behind the wall to avoid its bullets and rockets
- Equip Elemental Materia + Lightning Materia to Barret to deal consistent damage
- Dodge out of the way of its laser
Story Walkthrough Related Links
| Chapter 1 | The Destruction of Mako Reactor 1 |
|---|---|
| Chapter 2 | Fateful Encounters |
| Chapter 3 | Home Sweet Slum |
| Chapter 4 | Mad Dash |
| Chapter 5 | Dogged Pursuit |
| Chapter 6 | Light the Way |
| Chapter 7 | A Trap is Sprung |
| Chapter 8 | Budding Bodyguard |
| Chapter 9 | The Town That Never Sleeps |
| Chapter 10 | Rough Waters |
| Chapter 11 | Haunted |
| Chapter 12 | Fight for Survival |
| Chapter 13 | A Broken World |
| Chapter 14 | In Search of Hope |
| Chapter 15 | The Day Midgar Stood Still |
| Chapter 16 | The Belly of the Beast |
| Chapter 17 | Deliverance from Chaos |
| Chapter 18 | Destiny's Crossroads |
| INTERmission Chapters | |
|---|---|
| Chapter 1 | Wutai's Finest |
| Chapter 2 | Covert Ops |
Author
Chapter 15: The Day Midgar Stood Still Story Guide & Walkthrough
Rankings
Gaming News
Popular Games

Genshin Impact Walkthrough & Guides Wiki

Umamusume: Pretty Derby Walkthrough & Guides Wiki

Crimson Desert Walkthrough & Guides Wiki

Monster Hunter Stories 3: Twisted Reflection Walkthrough & Guides Wiki

Honkai: Star Rail Walkthrough & Guides Wiki

Pokemon Pokopia Walkthrough & Guides Wiki

The Seven Deadly Sins: Origin Walkthrough & Guides Wiki

Wuthering Waves Walkthrough & Guides Wiki

Zenless Zone Zero Walkthrough & Guides Wiki

Arknights: Endfield Walkthrough & Guides Wiki
Recommended Games

Fire Emblem Heroes (FEH) Walkthrough & Guides Wiki

Diablo 4: Vessel of Hatred Walkthrough & Guides Wiki

Cyberpunk 2077: Ultimate Edition Walkthrough & Guides Wiki

Yu-Gi-Oh! Master Duel Walkthrough & Guides Wiki

Super Smash Bros. Ultimate Walkthrough & Guides Wiki

Pokemon Brilliant Diamond and Shining Pearl (BDSP) Walkthrough & Guides Wiki

Elden Ring Shadow of the Erdtree Walkthrough & Guides Wiki

Monster Hunter World Walkthrough & Guides Wiki

The Legend of Zelda: Tears of the Kingdom Walkthrough & Guides Wiki

Persona 3 Reload Walkthrough & Guides Wiki
All rights reserved
© SQUARE ENIX CO., LTD. All Rights Reserved.
CHARACTER DESIGN:TETSUYA NOMURA/ROBERTO FERRARI
The copyrights of videos of games used in our content and other intellectual property rights belong to the provider of the game.
The contents we provide on this site were created personally by members of the Game8 editorial department.
We refuse the right to reuse or repost content taken without our permission such as data or images to other sites.


