How to Beat Mark II Monodrive | Boss Fight Guide
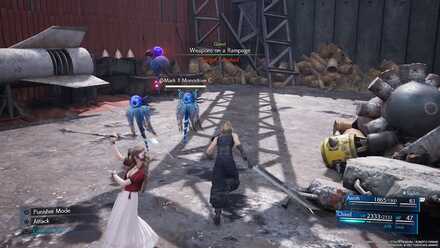
This is a guide to beating the Boss Mark II Monodrive in the game Final Fantasy 7 Remake (FF7R). This article explains Mark II Monodrive's attack patterns, weaknesses, and tips and strategies for defeating it.
List of Contents
Mark II Monodrive Stats and Information
Basic Information
| Mark II Monodrive | ||
|---|---|---|
|
Species | Movement | Type |
| Artificial Life | Flying | Normal |
Description
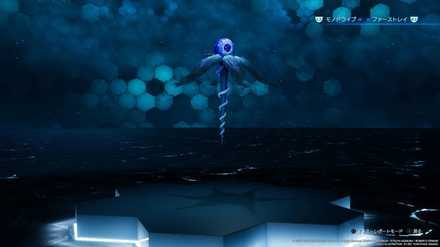
Modified version of the monodrive. Not only did these creatures survive the Mako Reactor 5 explosion, the mako spill caused them to grow in both size and strength.
Assess (Tips)
They are resistant to physical attacks until pelted with magic.
Mark II Monodrive Stats
| Easy | Normal | Hard | |
|---|---|---|---|
| HP | 2026~3590 | 3684~6528 | 9432 |
| Attack | 140~223 | 373 | |
| Magic Attack | 140~223 | 373 | |
| Defense | 17~31 | 45 | |
| Magic Defense | 17~31 | 45 | |
Mark II Monodrive Weaknesses & Resistances
| Weakness / Status Ailments | Wind | |
|---|---|---|
| Lesser Resistances | - | |
| Greater Resistances | - | |
| Immunities | Stop | |
| Absorbed Elements | - | |
Stagger Rates
| ×1 | ×1 | ×1 | ×1 |
| - | |||
| ×1 | ×1 | ×1 | - |
Stagger Length
| Stagger Length | 10 seconds |
|---|
Rewards
| Easy/Normal | Hard | |
|---|---|---|
| Gil | 101~300 | 787 |
| AP | 4 | 12 |
| Exp | 32~90 | 476 |
| Items Dropped | Hi-Potion (12%) | |
| Rare Items Dropped | Turbo Ether (5%) | |
| Steal | Turbo Ether (5%) | |
Learnable Enemy Skills
No Enemy Skills can be learned from Mark II Monodrive.
Mark II Monodrive Boss Fight Guide
Mark II Monodrive Abilities and Attack Patterns
| Name | Element | Blockable? | Knockdown? | Status |
|---|---|---|---|---|
|
|
- | Yes | No | - |
| Spins and charges towards a target, stabbing with their tentacle. | ||||
|
|
- | Yes | Yes | - |
| Digs into the ground and stabs up under a target's feet. | ||||
|
|
|
Yes | No | - |
| Casts Fire at a target. | ||||
|
|
|
Yes | No | - |
| Casts Fire three times at a target. | ||||
|
Indurate
|
- | - | - | - |
| Creates a barrier around itself that halves physical damage it takes. | ||||
*Status Effects and Ailments Guide
Best Characters for This Boss
Available Characters
 Cloud Cloud
|
 Aerith Aerith
|
The Mark II Monodrive is encountered in the Weapons on a Rampage Odd Job in Chapter 8. During this chapter, Cloud and Aerith are available.
Best Equipment for Characters
 Cloud Cloud |
Role: Attacker Weapon: Buster Sword Armor: Caliginous Bracelet Accessory: Power Wristguards |
|---|---|
 Aerith Aerith |
Role: Support Weapon: Silver Staff Armor: Mythril Armlet Accessory: Crescent Moon Charm |
Best Materia for Cloud
| Weapon (3 Slots) | |
|---|---|
| Armor (3 Slots) | |
| Summon | |
As usual, spam Triple Slash. If your target has a physical barrier up, cast Aero (or higher) on it to break the barrier. You can also stand on Aerith's Arcane Ward before casting it as long as you have enough MP.
Best Materia for Aerith
| Weapon (3 Slots) | |
|---|---|
| Armor (2 Slots) | |
| Summon | |
Set an Arcane Ward for Cloud's Aero as soon as you can. Save ATB charges for Prayer to heal both Cloud and Aerith. If you only need healing on one character, just use spells from the Healing materia.
Mark II Monodrive Attack Phases
| Objectives | |
|---|---|
| 1 | Mark II Monodrives will put up a barrier that blocks either physical or magic attacks at the beginning. |
| 2 | They will start attacking by charging or striking from underground while also using their abilities. |
Tips & Strategies for Beating Mark II Monodrive
| ★Strategy Checklist★ | ||
|---|---|---|
|
|
Use Wind-elemental Attacks
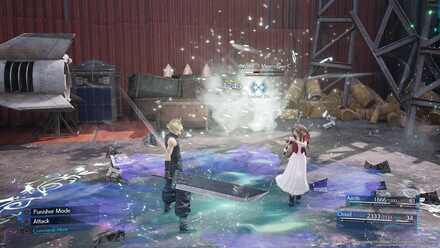
They are all weak against Wind attacks so equip Elemental + Wind materias on either Cloud or Aerith's weapons to infuse basic attacks with Wind damage. Remember to spam Aero (or higher) whenever you can.
Pay Attention to Its Barrier Shift
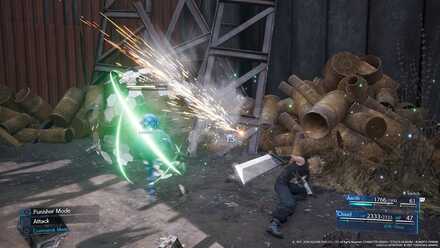
Mark II Monodrives can gain resistance or immunity against physical or magic attacks but they are breakable by the opposite attack type. Use physical attacks to break green barriers and magic attacks to break mirror-like barriers.
Sometimes, they can have both barriers at once. When this happens, just attack it with physical attacks (even if it deals reduced damage) or wait until it wears off.
Block All of Its Attacks
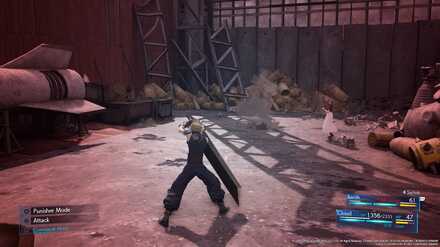
All of Mark II Monodrive's attacks are difficult to dodge, which would make it better if you just guard against them. Pay extra attention to when it dives underground and prepare to block before it submerges as this attack can knock your character airborne and deal heavy damage.
Boss Fight Related Articles
Major Story Bosses
| All Major Story Bosses | |
|---|---|
| Chapter 1 | Scorpion Sentinel |
| Chapter 4 | Roche |
| Chapter 5 | Crab Warden |
| Chapter 7 | Airbuster |
| Chapter 8 | Reno Rude |
| Chapter 9 | Hell House |
| Chapter 10 | Abzu |
| Chapter 11 | Ghoul Eligor |
| Chapter 13 | Failed Experiment |
| Chapter 14 | Abzu (2nd Fight) |
| Chapter 15 | The Valkyrie |
| Chapter 16 | Specimen H0512 |
| Chapter 17 | Jenova Dreamweaver Rufus The Arsenal |
| Chapter 18 | Motor Ball Whisper Harbinger Sephiroth |
VR Mission Bosses
| All VR Mission Bosses | |
|---|---|
| Chapter 8 | Shiva |
| Chapter 9 | Fat Chocobo |
| Chapter 13 | Leviathan |
| Secret Boss | Bahamut |
| Superboss | Pride and Joy Prototype |
Story Sub-Bosses
| All Story Sub-Bosses | |
|---|---|
| Chapter 2 | The Huntsman |
| Chapter 3 | The Hoodlums |
| Chapter 4 | Enigmatic Spectre |
| Chapter 12 | Enigmatic Spectre |
| Chapter 17 | M.O.T.H. Unit Brain Pod Swordipede |
Monster Variants & Optional Sub-Bosses
| All Monster Variants & Optional Sub-Bosses | |
|---|---|
| Chapter 3 | Doomrat Cerulean Drake Wrath Hound |
| Chapter 8 | Hedgehog Pie King Mark II Monodrive Venomantis Chromogger |
| Chapter 14 | Rust Drake Tonberry Trypapolis Type-0 Behemoth |
| Chapter 17 | Malboro |
Author
How to Beat Mark II Monodrive | Boss Fight Guide
improvement survey
03/2026
improving Game8's site?

Your answers will help us to improve our website.
Note: Please be sure not to enter any kind of personal information into your response.

We hope you continue to make use of Game8.
Rankings
- We could not find the message board you were looking for.
Gaming News
Popular Games

Genshin Impact Walkthrough & Guides Wiki

Honkai: Star Rail Walkthrough & Guides Wiki

Umamusume: Pretty Derby Walkthrough & Guides Wiki

Pokemon Pokopia Walkthrough & Guides Wiki

Resident Evil Requiem (RE9) Walkthrough & Guides Wiki

Monster Hunter Wilds Walkthrough & Guides Wiki

Wuthering Waves Walkthrough & Guides Wiki

Arknights: Endfield Walkthrough & Guides Wiki

Pokemon FireRed and LeafGreen (FRLG) Walkthrough & Guides Wiki

Pokemon TCG Pocket (PTCGP) Strategies & Guides Wiki
Recommended Games

Diablo 4: Vessel of Hatred Walkthrough & Guides Wiki

Cyberpunk 2077: Ultimate Edition Walkthrough & Guides Wiki

Fire Emblem Heroes (FEH) Walkthrough & Guides Wiki

Yu-Gi-Oh! Master Duel Walkthrough & Guides Wiki

Super Smash Bros. Ultimate Walkthrough & Guides Wiki

Pokemon Brilliant Diamond and Shining Pearl (BDSP) Walkthrough & Guides Wiki

Elden Ring Shadow of the Erdtree Walkthrough & Guides Wiki

Monster Hunter World Walkthrough & Guides Wiki

The Legend of Zelda: Tears of the Kingdom Walkthrough & Guides Wiki

Persona 3 Reload Walkthrough & Guides Wiki
All rights reserved
© SQUARE ENIX CO., LTD. All Rights Reserved.
CHARACTER DESIGN:TETSUYA NOMURA/ROBERTO FERRARI
The copyrights of videos of games used in our content and other intellectual property rights belong to the provider of the game.
The contents we provide on this site were created personally by members of the Game8 editorial department.
We refuse the right to reuse or repost content taken without our permission such as data or images to other sites.


![Monster Hunter Stories 3 Review [First Impressions] | Simply Rejuvenating](https://img.game8.co/4438641/2a31b7702bd70e78ec8efd24661dacda.jpeg/thumb)


