Chapter 10: Rough Waters Story Guide & Walkthrough
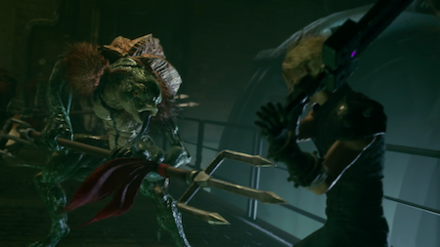
This is a guide and walkthrough to Chapter 10: Rough Waters, a story chapter in the game Final Fantasy 7 Remake. Read on to learn locations of items, rewards for completing this chapter, as well as useful tips and strategies for getting through this part of the story.
| Previous Chapter | The Town That Never Sleeps |
|---|---|
| Current Chapter | Rough Waters |
| Next Chapter | Haunted |
List of Contents
- List of Main Scenario Objectives
- Chapter 10: Rough Waters Walkthrough
- Sector 6 - Aqueduct 1
- Sector 6 - Aqueduct 2
- Settling Basin Corridor
- Main Aqueduct
- Sector 7 - Aqueduct 2
- Sewer System - Primary Treatment
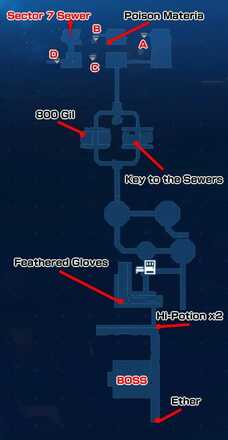
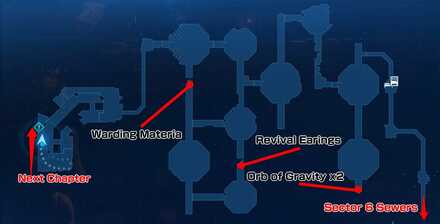
- Maps and Obtainable Items
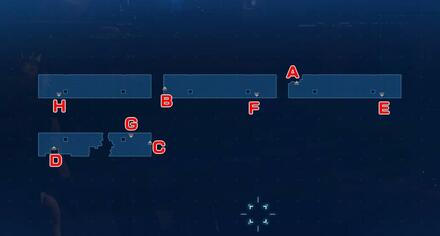
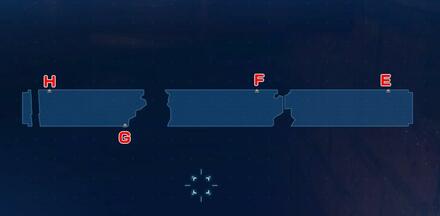
- Maps
- Obtainable Items
- Shops & Vending Machines
- Tips and Strategies
- Boss Strategy Guide
- Abzu
- Story Walkthrough Related Links
List of Main Scenario Objectives
| No. | Title | Description |
|---|---|---|
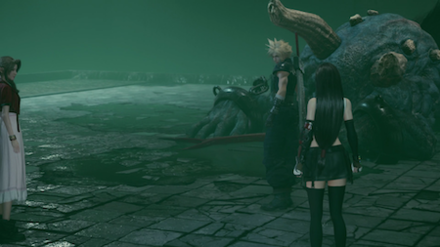
| 1 | Escape to the Surface | In a stroke of luck, Abzu's rampage has cleared the way forward. The group follows the aqueduct toward the Sector 7 slums. |
| 2 | Follow the Waterway | The group arrives at the trunk line that marks the boundary between Sectors 6 and 7. They look for a way to get across to the Sector 7 side. |
| 2-1 | Find the Skeleton Key | The group gets the power working and opens the sluice gate. Theey find the skeleton key that Avalanche had hidden in advance. |
| 3 | Crossing the Trunk Line | Helping each other out of trouble, the group manages to cross the trunk line and reach the door to the Sector 7 slums. |
| 3-1 | Crossing the Sluice Gate | The group uses the sluice gate as a bridge to cross the sewer line |
| 4 | To the Sector 7 Slums | The three find their way to a water storage tank underneath the Sector 7 slums. Nearby, they can see a ladder leading to the surface. |
| 5 | To the Surface | Just before the exit, the group is assailed by a group of Sahagin. Working together, they fend off the beasts and hurry toward the surface. |
| 5-1 | Operating the Pump | Tifa and Aerith work the pump and clear the wastewater pipe blockage. | ★ | On the Other Side | The team recovers the materia by taking a detour through the tunnels. |
★This objective is labeled as a Discovery. It's unlocked after going an alternate path in Aqueduct 2 to get a Warding Materia.
Chapter 10: Rough Waters Walkthrough
Sector 6 - Aqueduct 1
| Objectives | |
|---|---|
| 1 | Prepare for a fight, then speak with Aerith or Tifa. Whoever you choose to talk to first will have her affection increase toward Cloud.Who Should You Talk to First in the Sewers? |
| Boss 2 |
Fight the Abzu. Defeating it will get you 840 EXP, 10 AP, and a Phoenix Down. How to Beat Abzu |
| 3 | Go ahead into the hole left by Abzu and turn left. |
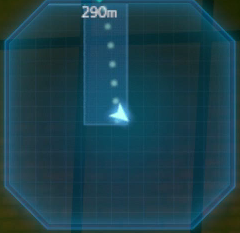 Go down the dead end to your right for a chest with an Ether. Go down the dead end to your right for a chest with an Ether. |
|
| 4 | Proceed down the hallway, taking out the Sahagin as you go, and go up the ladder. |
 Open the chest at the end of the pathway to get 2 Hi-Potions. Open the chest at the end of the pathway to get 2 Hi-Potions. |
|
| 7 | Keep following the path and interact with the lever to lower the water level. |
| 8 | Go down the stairs to the now accessible area and go under the gate. |
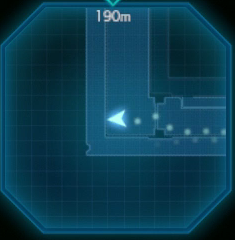 Open up the chest immediately in front of you for a pair of Feathered Gloves. Open up the chest immediately in front of you for a pair of Feathered Gloves. |
|
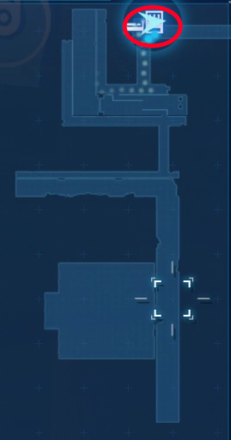
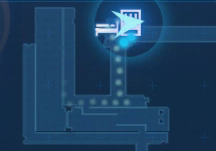
| 9 | Go up the ladder and go through the door to find a rest area. You can buy CD #9: The Oppressed from the Vending Machine here. |
Sector 6 - Aqueduct 2
| Objectives | |
|---|---|
| 1 | Take the ladder down and go left. You'll fight three Wererats. |
| 2 | Follow the path and fight a two Wererats and a Scissorclaw, then go straight ahead until you reach a ladder. The path to the right will have a locked door at the end. |
| 3 | Take the ladder up and into the Settling Basin Corridor. |
Settling Basin Corridor
| Objectives | |
|---|---|
| 1 | Take either path to the end – you'll arrive at the same room. Open the door behind you to find a power generator. Interact with the generator to turn the power on. |
| 2 | Interact with the locked door for a cutscene. Take the path to the right on the Map. Beat up the two pesky Scissorclaws here, and pull the switch on the wall to lower the water. |
| 3 | 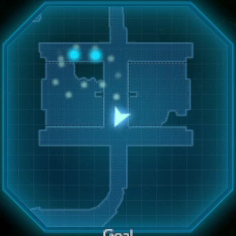 Take the right path, find a switch that lowers the water, and take the ladder down and pick up the Skeleton Key from under the bridge. Take the right path, find a switch that lowers the water, and take the ladder down and pick up the Skeleton Key from under the bridge. |
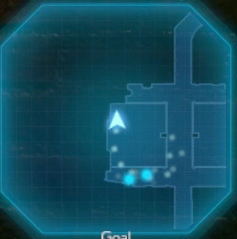 Take the left path, find a switch that lowers the water, and take the ladder down to find a chest with 800 gil. Take the left path, find a switch that lowers the water, and take the ladder down to find a chest with 800 gil. |
|
| 4 | Return to the locked down and make your way into the Main Aqueduct connecting Sectors 6 and 7. |
Main Aqueduct
| Objectives | |
|---|---|
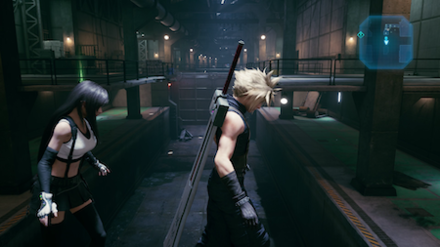
| 1 | Follow the path to the right and take out the Blugu and two Wererats. |
| 2 | Take the ladder down and interact with the switch at the other end of the platform to lower the water. Take the next ladder down and fight a Blugu and two Scissorclaws. Duck under the wall to fight another Blugu and two Scissorclaws. |
| 3 | Take the ladder on the right side up and continue to the left. Interact with the switch on the wall, then take the next ladder. |
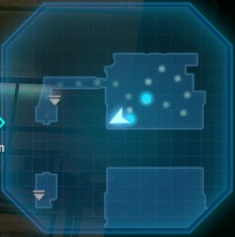 Go up the stairs to the right and through the door onto the other platform to find a Poison Materia. Go up the stairs to the right and through the door onto the other platform to find a Poison Materia. |
|
| 4 | Return to the gate and walk across it, taking the next two ladders down. Fight the Sahagin. |
| 5 | Climb the ladder and hit the switch to raise the water level. A bridge will raise up and float on the water. Walk across it for a cutscene. |
| 6 | Go up the next ladder and another cutscene will begin. Follow the path to the rest area. Proceed down the ladder into Sector 7's Aqueduct 2. |
Sector 7 - Aqueduct 2
| Objectives | |
|---|---|
| 1 | In the first room, go through the door to the right and climb up the ladder. |
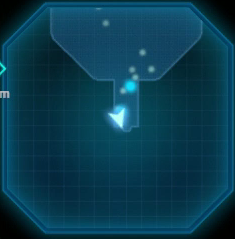 Follow the path straight down instead to fight five Wererats, and find a treasure chest with 2 Orbs of Gravity. Follow the path straight down instead to fight five Wererats, and find a treasure chest with 2 Orbs of Gravity. |
|
| 2 | Shimmy your way through the room to the right and take out two Scissorclaws. Head down the ladder and in the next room, turn right to find another ladder up. Take the path to the right to continue. |
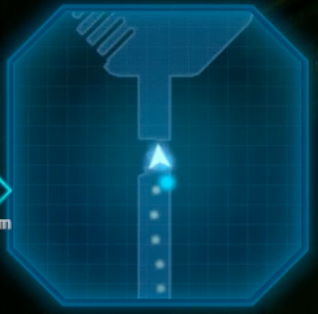 Take the left path and fight four Wererats and a Blugu. Continue to the right and go down the ladder. Go right to get a Warding Materia. Take the left path and fight four Wererats and a Blugu. Continue to the right and go down the ladder. Go right to get a Warding Materia. |
|
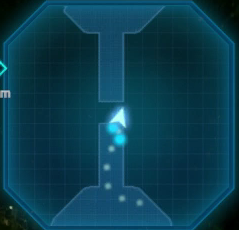 From the Warding Materia location, go the opposite way and find a ladder. Fight a Sahagin and Blugu. You can find a chest with Revival Earrings. From the Warding Materia location, go the opposite way and find a ladder. Fight a Sahagin and Blugu. You can find a chest with Revival Earrings. |
|
| 3 | Fight two Wererats, a Blugu, and a Scissorclaw. Go down the ladder to your left, and go straight ahead to climb another ladder. |
| 4 | Follow the narrow passage south into the Primary Treatment area. |
Sewer System - Primary Treatment
| Objectives | |
|---|---|
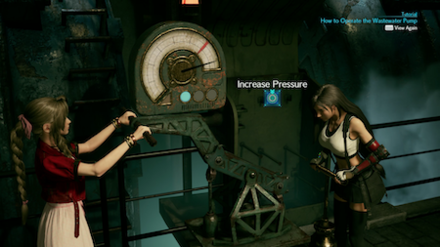
| 1 | Enter the office room and pull the lever. You will take control of Aerith to fix the pump. Push up on
|
| 2 | Head back to Cloud and the pump will be turned on. Leave and fight the two Sahagin. Proceed down the ladder. |
| 3 | Follow the path and fight two Blugu and a Sahagin. Go up the ladder and fight another Sahagin. Go up the stairs, and approach the door, and a cutscene will begin to end the chapter. |
Maps and Obtainable Items
Maps
| List of Maps | |
|---|---|
 |
 |
 |
 |
Obtainable Items
| Sector 6 - Aqueduct 1 | ||
|---|---|---|
| Ether | Hi-Potion x2 | Feathered Gloves |
| Sector 6 - Aqueduct 2 | ||
| No items in this area. | ||
| Settling Basin Corridor | ||
| 800 Gil | - | - |
| Main Aqueduct | ||
| Poison Materia | - | - |
| Sector 7 - Aqueduct 1 | ||
| Orb of Gravity x2 | Warding Materia | Revival Earrings |
Shops & Vending Machines
Vending Machine - Aqueduct 1
 |
 |
| Items | Price |
|---|---|
| 9. The Oppressed (Stock: 1) | 50 Gil |
| Potion | 50 Gil |
| Hi-Potion | 300 Gil |
| Ether | 500 Gil |
| Phoenix Down | 300 Gil |
| Antidote | 80 Gil |
| Echo Mist | 100 Gil |
| Smelling Salts | 80 Gil |
| Weapons / Armor | Price |
|---|---|
| Titanium Bangle | 2000 Gil |
| Caliginous Bracelet | 3200 Gil |
| Studded Bracer | 3200 Gil |
| Mythril Armlet | 3200 Gil |
| Accessories | Price |
|---|---|
| Power Wristguards | 800 Gil |
| Bulletproof Vest | 800 Gil |
| Earrings | 800 Gil |
| Talisman | 800 Gil |
| Supernatural Wristguards | 5000 Gil |
| Survival Vest | 5000 Gil |
| Platinum Earrings | 5000 Gil |
| Timeworn Talisman | 5000 Gil |
| Star Pendant | 1500 Gil |
| Headband | 1500 Gil |
| Revival Earrings | 500 Gil |
| Materia | Price |
|---|---|
| Healing Materia | 600 Gil |
| Cleansing Materia | 1500 Gil |
| Revival Materia | 3000 Gil |
| Fire Materia | 500 Gil |
| Ice Materia | 500 Gil |
| Lightning Materia | 500 Gil |
| Poison Materia | 1500 Gil |
| Barrier Materia | 1500 Gil |
| Binding Materia | 3000 Gil |
| HP Up Materia | 2000 Gil |
| MP Up Materia | 2000 Gil |
| Deadly Dodge Materia | 600 Gil |
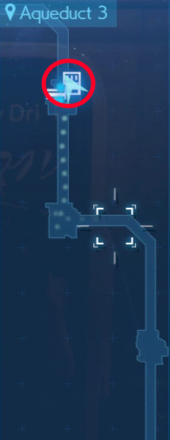
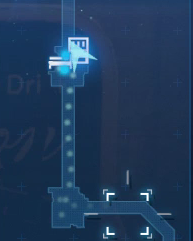
Vending Machine - Aqueduct 3
 |
 |
| Item | Price |
|---|---|
| Potion | 50 Gil |
| Hi-Potion | 300 Gil |
| Ether | 500 Gil |
| Phoenix Down | 300 Gil |
| Antidote | 80 Gil |
| Echo Mist | 100 Gil |
| Smelling Salts | 80 Gil |
| Weapon / Armor | Price |
|---|---|
| Titanium Bangle | 2000 Gil |
| Caliginous Bracelet | 3200 Gil |
| Studded Bracer | 3200 Gil |
| Mythril Armlet | 3200 Gil |
| Accessory | Price |
|---|---|
| Power Wristguards | 800 Gil |
| Bulletproof Vest | 800 Gil |
| Earrings | 800 Gil |
| Talisman | 800 Gil |
| Supernatural Wristguards | 5000 Gil |
| Survival Vest | 5000 Gil |
| Platinum Earrings | 5000 Gil |
| Timeworn Talisman | 5000 Gil |
| Star Pendant | 1500 Gil |
| Headband | 1500 Gil |
| Revival Earrings | 500 Gil |
| Materia | Price |
|---|---|
| Healing Materia | 600 Gil |
| Cleansing Materia | 1500 Gil |
| Revival Materia | 3000 Gil |
| Fire Materia | 500 Gil |
| Ice Materia | 500 Gil |
| Lightning Materia | 500 Gil |
| Poison Materia | 1500 Gil |
| Barrier Materia | 1500 Gil |
| Binding Materia | 3000 Gil |
| HP Up Materia | 2000 Gil |
| MP Up Materia | 2000 Gil |
| Deadly Dodge Materia | 600 Gil |
Tips and Strategies
Buy Maiden's Kiss
The Sahagin is a tough enemy in this area who has the ability to turn your party into Frogs. Be sure to stock up on the Maiden's Kiss item at the vending machines to make sure you can recover from this state, or you'll have no choice but to hop away from the battle.
Raise Aerith or Tifa's Affection

At the very beginning of this chapter, you will see both Aerith and Tifa laying unconscious on the ground. Depending on who you talk to first will have an effect on their affection toward Cloud.
Check the guide below to see the effects of both choices!
Who Should You Talk to First in the Sewers?
Boss Strategy Guide
Abzu
| Abzu | |
|---|---|
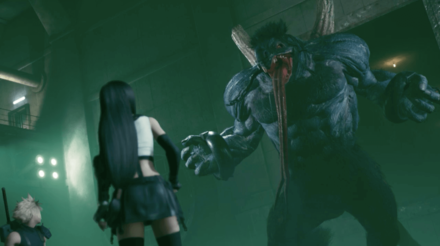 |
How to Defeat Abzu - Key Points
- Weak against Fire
- Use Guard to survive the heavy physical damage
- Horns turn red when Enrage is used
- Stay away from the puddles on the ground
Story Walkthrough Related Links
| Chapter 1 | The Destruction of Mako Reactor 1 |
|---|---|
| Chapter 2 | Fateful Encounters |
| Chapter 3 | Home Sweet Slum |
| Chapter 4 | Mad Dash |
| Chapter 5 | Dogged Pursuit |
| Chapter 6 | Light the Way |
| Chapter 7 | A Trap is Sprung |
| Chapter 8 | Budding Bodyguard |
| Chapter 9 | The Town That Never Sleeps |
| Chapter 10 | Rough Waters |
| Chapter 11 | Haunted |
| Chapter 12 | Fight for Survival |
| Chapter 13 | A Broken World |
| Chapter 14 | In Search of Hope |
| Chapter 15 | The Day Midgar Stood Still |
| Chapter 16 | The Belly of the Beast |
| Chapter 17 | Deliverance from Chaos |
| Chapter 18 | Destiny's Crossroads |
| INTERmission Chapters | |
|---|---|
| Chapter 1 | Wutai's Finest |
| Chapter 2 | Covert Ops |
Author
Chapter 10: Rough Waters Story Guide & Walkthrough
Rankings
- We could not find the message board you were looking for.
Gaming News
Popular Games

Genshin Impact Walkthrough & Guides Wiki

Honkai: Star Rail Walkthrough & Guides Wiki

Arknights: Endfield Walkthrough & Guides Wiki

Umamusume: Pretty Derby Walkthrough & Guides Wiki

Wuthering Waves Walkthrough & Guides Wiki

Pokemon TCG Pocket (PTCGP) Strategies & Guides Wiki

Abyss Walkthrough & Guides Wiki

Zenless Zone Zero Walkthrough & Guides Wiki

Digimon Story: Time Stranger Walkthrough & Guides Wiki

Clair Obscur: Expedition 33 Walkthrough & Guides Wiki
Recommended Games

Fire Emblem Heroes (FEH) Walkthrough & Guides Wiki

Pokemon Brilliant Diamond and Shining Pearl (BDSP) Walkthrough & Guides Wiki

Diablo 4: Vessel of Hatred Walkthrough & Guides Wiki

Super Smash Bros. Ultimate Walkthrough & Guides Wiki

Yu-Gi-Oh! Master Duel Walkthrough & Guides Wiki

Elden Ring Shadow of the Erdtree Walkthrough & Guides Wiki

Monster Hunter World Walkthrough & Guides Wiki

The Legend of Zelda: Tears of the Kingdom Walkthrough & Guides Wiki

Persona 3 Reload Walkthrough & Guides Wiki

Cyberpunk 2077: Ultimate Edition Walkthrough & Guides Wiki
All rights reserved
© SQUARE ENIX CO., LTD. All Rights Reserved.
CHARACTER DESIGN:TETSUYA NOMURA/ROBERTO FERRARI
The copyrights of videos of games used in our content and other intellectual property rights belong to the provider of the game.
The contents we provide on this site were created personally by members of the Game8 editorial department.
We refuse the right to reuse or repost content taken without our permission such as data or images to other sites.


Immediately after fighting the wererats and bluglu or whatever it's called in the room between the two sectors' sewers, I am told WARNING and have to go back, even though the only thing I can do is go forward to the ladder headed down. Is anyone else having this issue? I am blocked in to a very small area. The game will not even allow me to go back beyond the door I just unlocked. I don't know what's happening, but it seems like the game is totally glitching.