Chapter 11: Haunted Story Guide & Walkthrough
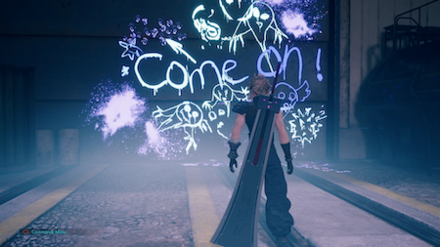
This is a guide and walkthrough to Chapter 11: Haunted, a story chapter in the game Final Fantasy 7 Remake. Read on to learn locations of items, rewards for completing this chapter, as well as useful tips and strategies for getting through this part of the story.
| Previous Chapter | Rough Waters |
|---|---|
| Current Chapter | Haunted |
| Next Chapter | Fight for Survival |
List of Contents
- List of Main Scenario Objectives
- Chapter 11: Haunted Walkthrough
- Train Graveyard - Outside
- Abandoned Station - Maintenance Facility
- Train Graveyard - Outside (Part 2)
- Maps and Obtainable Items
- Maps
- Obtainable Items
- Shops & Vending Machines
- Tips and Strategies
- Boss Strategy Guide
- Ghoul
- Eligor
- Story Walkthrough Related Links
List of Main Scenario Objectives

| No. | Title | Description |
|---|---|---|
| 1 | A Train Wreck | Guided by someone or something, the group arrives at the maintenance facility. Though unnerved by the strange things they see, they head inside. |
| 1-1 | Toward the Light | Tifa tells the others about the rumors she has heard regarding this place as they follow the dim light through the gloom. |
| 1-2 | Someone's There | The party cannot shake the feeling that someone else is in the graveyard. Cautiously, they move forward. |
| 2 | Pass Through the Maintenance Facility | Although the party was not able to tell what the ghosts wanted, they do make it out of the maintenance facility. Hopefully it will not take much longer to reunite with the others in Sector 7. |
| 2-1 | All Aboard for the Graveyard | They make their way into the train car and head further inside to look for an exit. |
| 2-2 | Shadow in the Control Room | The three use the control room terminal to restore power to the crane. |
| 2-3 | Crane Game | The party uses the crane to link the train cars. |
| 2-4 | Head for the Exit | The party makes its way through the connected train cars and heads for the exit. |
| 3 | Back Amongst Friends | The three are finally back in the Sector 7 slums. Shinra choppers circle the support pillar, and the sound of gunfire rings out. There's not a moment to spare. |
| 3-1 | Blocked Road | The intercepted radio message is confirmation that Shinra's plan is real. But first, they must leave the graveyard. |
| 3-2 | Clear the Way | The party moves the cars and secures a way out of the graveyard, hoping they are not too late. |
Chapter 11: Haunted Walkthrough
Train Graveyard - Outside
| Objectives | |
|---|---|
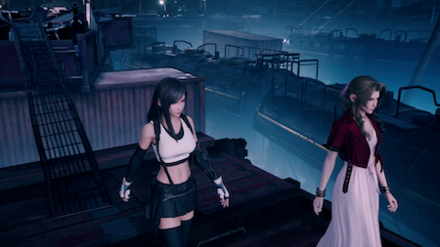
| 1 | Follow Tifa and Aerith over the train and watch the brief scene. Head through the train and take out the group of Wererats. |
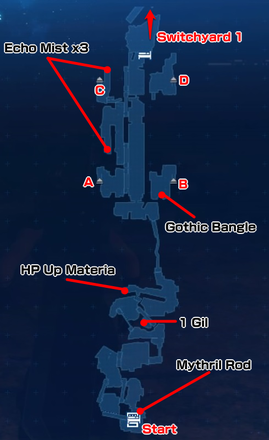
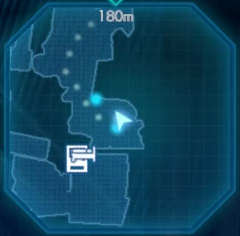 Go through the opposite train, turn right and go down the path to find a chest with a Mythril Rod. Go through the opposite train, turn right and go down the path to find a chest with a Mythril Rod. |
|
| 2 | Climb up the ladder ahead and to the right, then climb down the opposite side of the train. After the door shakes, go close to it. Fight the Cripshays that burst out of the building. Proceed through the building. |
| 3 | Duck under the scaffolding to the left and continue along the path. In the next train, shimmy along the right side. Outside, fight a group of Cripshays and Wererats. Go through the train to the left, if you please, for a chest with 1 measly gil. |
| 4 | Take the ladder to the right, then go down the other. Fight the five Cripshays, then take the ladder at the end of the path. |
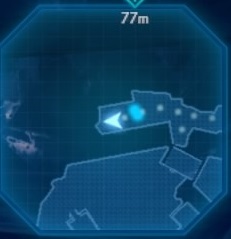 After the fight with the Cripshays, go left and pick up the HP Up Materia at the end of the path. After the fight with the Cripshays, go left and pick up the HP Up Materia at the end of the path. |
|
| 5 | Walk straight ahead across the path made of junk until a cutscene begins. Go through the graffiti-covered door to the building and head inside the Abandoned Station. |
Abandoned Station - Maintenance Facility
| Objectives | |
|---|---|
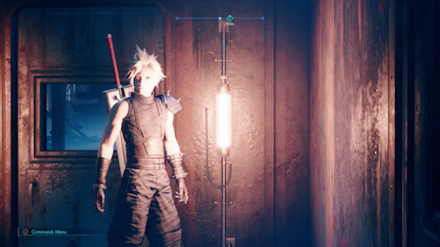
| 1 | Watch the scene then get Ghostbustin'. After defeating the Ghost, continue ahead and watch the cutscene. |
| 2 | Head back to the entrance and fight two Cripshays. The doors will close ahead of you. Wait for the train to your right to light up. All aboard! |
| 3 | Pass through the train and go up the stairs ahead and to your right. Go to the console ahead and to the left. Continue ahead for a short cutscene, and the bridge on the right will magically be repaired. Go across it and into the office on your left. Inside, you'll bust another group of Ghosts. |
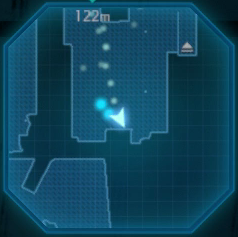 Go down the staircase in front of the office entrance to find a Lesser Drake and a chest with a Gothic Bangle. Go down the staircase in front of the office entrance to find a Lesser Drake and a chest with a Gothic Bangle. |
|
| 4 | Go out the other door of the office and turn right. Opposite the first office, go in the door to another office and fight a Ghost, then exit through the door on the right. You'll find two staircases, one going up and one going down. Take the one on the left, going down. The door at the top of the staircase going up will be locked. |
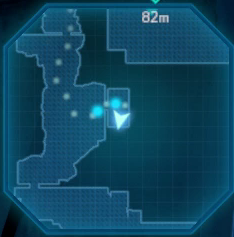 After fighting the ghost, go out the door to on the left side, then out the other door to your immediate left for a chest with 2 Mega-Potions. After fighting the ghost, go out the door to on the left side, then out the other door to your immediate left for a chest with 2 Mega-Potions. |
|
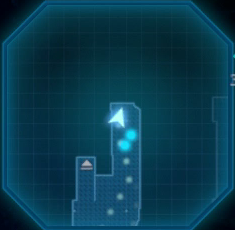 At the bottom of the staircase, go around to the back wall to find a chest with 3 Echo Mists. At the bottom of the staircase, go around to the back wall to find a chest with 3 Echo Mists. |
|
| 5 | Climb up the ladder. Follow the path to another ladder down into an open area with a group of Cripshays. |
| 6 | Go up the staircase to your right, then go up the stairs opposite you, where you will find a rest area. |
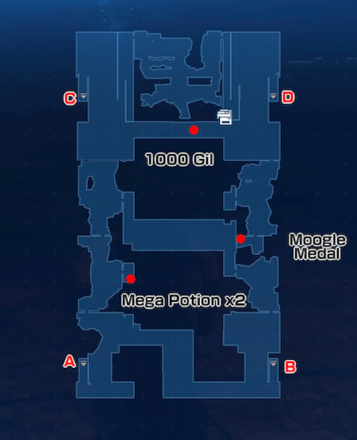
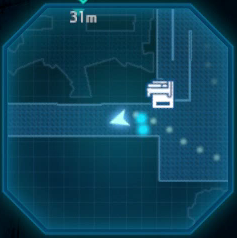 On the floor between the two staircases, you can go past the staircase going up then turn right to find a treasure chest with 1,000 Gil. On the floor between the two staircases, you can go past the staircase going up then turn right to find a treasure chest with 1,000 Gil. |
|
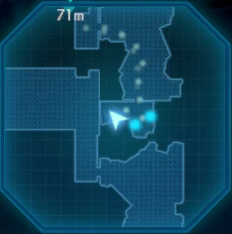 Pass through the office on the same floor and exit the door opposite the entrance. You'll find a treasure chest containing a Moogle Medal. Pass through the office on the same floor and exit the door opposite the entrance. You'll find a treasure chest containing a Moogle Medal. |
|
| 7 | Go along the path into the control room and interact with the panel for a cutscene. |
| Boss 8 |
Fight the Ghoul. Defeating the Ghoul will get you a Subversion Materia. How to Beat the Ghoul |
| 8 | Go through the opposite door, which will take you back to the top of the staircase from step 4. Head downstairs and into the nearby office. Go through to the far door, which will now be unlocked. There will be a console to operate a crane on the other side. |
| 9 | Go down the nearby staircase and into the newly-placed train. Go through the left door of the train, and go out the door on the right in the other car. |
 Fight the two Lesser Drakes and continue around to the left to find a chest with 3 Echo Mists. Fight the two Lesser Drakes and continue around to the left to find a chest with 3 Echo Mists. |
Train Graveyard - Outside (Part 2)
| Objectives | |
|---|---|
| 1 | Once outside, go to the console ahead and to the left to activate the turntable. Head right and fight five Wererats, four Cripshays, and two Ghosts. Cross the turntable and climb up the ladder. |
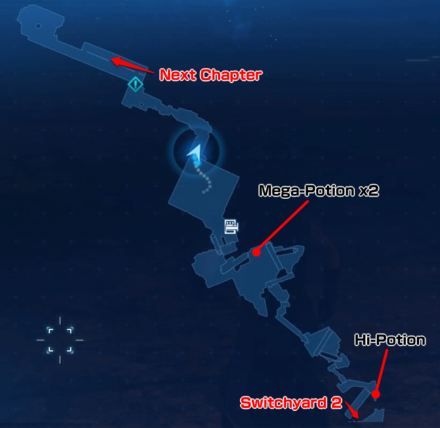
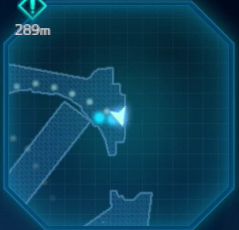 After crossing the turntable, go back and to the right to find a chest with a Hi-Potion. After crossing the turntable, go back and to the right to find a chest with a Hi-Potion. |
|
| 2 | Go down the ladder and climb the next ladder up into the train control room. Interact with the lever to start the train and open a path. |
| 3 | After the cutscene, go back down the ladder. Climb the ladder onto the train to the right and go along the path, then go down the ladder. Go through the next train and you'll find another train you can move. Circle back around to the other side and take out the Lesser Drake and Cerulean Drake before continuing along the path. |
 After you push the train, you can find a treasure chest with 2 Mega-Potions in the newly-opened gap to the right. After you push the train, you can find a treasure chest with 2 Mega-Potions in the newly-opened gap to the right.
| |
| 4 | Once you reach another dead end you will find a third train that move to create a bridge. Go back two trains to find a ladder to climb up, and continue along the trains to a ladder leading down to a rest area. Prepre yourself before moving on to another boss fight. |
| Boss 5 |
Fight Eligor. Defeating Eligor will get you 1040 EXP, 10 AP, 1,200 Gil, and a bottle of Echo Mist. How to Beat Eligor |
| 6 | Continue along the path to finally escape the Train Graveyard. |
Maps and Obtainable Items
Maps
| List of Maps | |
|---|---|
 |
 |
 |
|
Obtainable Items
| Train Graveyard | ||
|---|---|---|
| Mythril Rod | HP Up Materia | - |
| Maintenance Facility | ||
| Gothic Bangle | Mega-Potion x2 | Echo Mist x3 |
| Moogle Medal | - | - |
| Train Graveyard 2 | ||
| Hi-Potion | Mega-Potion x2 | - |
Shops & Vending Machines
Vending Machine - Switchyard 2 - Section C
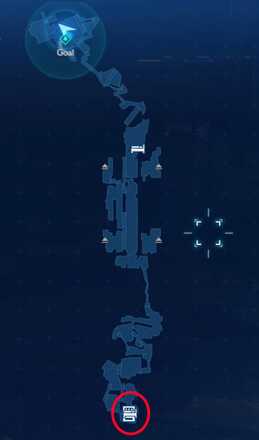 |
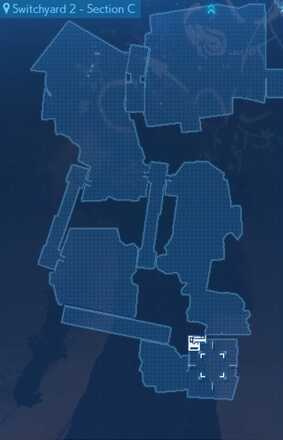 |
| Item | Price |
|---|---|
| Potion | 50 Gil |
| Hi-Potion | 300 Gil |
| Ether | 500 Gil |
| Phoenix Down | 300 Gil |
| Antidote | 80 Gil |
| Echo Mist | 100 Gil |
| Smelling Salts | 80 Gil |
| Weapon / Armor | Price |
|---|---|
| Titanium Bangle | 2000 Gil |
| Caliginous Bracelet | 3200 Gil |
| Studded Bracer | 3200 Gil |
| Mythril Armlet | 3200 Gil |
| Accessory | Price |
|---|---|
| Power Wristguards | 800 Gil |
| Bulletproof Vest | 800 Gil |
| Earrings | 800 Gil |
| Talisman | 800 Gil |
| Supernatural Wristguards | 5000 Gil |
| Survival Vest | 5000 Gil |
| Platinum Earrings | 5000 Gil |
| Timeworn Talisman | 5000 Gil |
| Star Pendant | 1500 Gil |
| Headband | 1500 Gil |
| Revival Earrings | 500 Gil |
| Materia | Price |
|---|---|
| Healing Materia | 600 Gil |
| Cleansing Materia | 1500 Gil |
| Revival Materia | 3000 Gil |
| Fire Materia | 500 Gil |
| Ice Materia | 500 Gil |
| Lightning Materia | 500 Gil |
| Poison Materia | 1500 Gil |
| Barrier Materia | 1500 Gil |
| Binding Materia | 3000 Gil |
| HP Up Materia | 2000 Gil |
| MP Up Materia | 2000 Gil |
| Deadly Dodge Materia | 600 Gil |
Vending Machine - Maintenance Facility
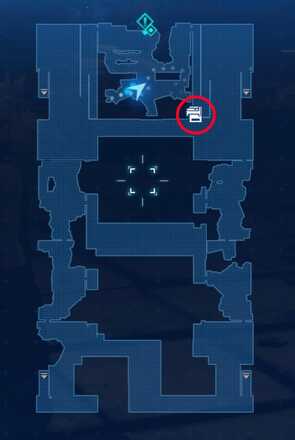 |
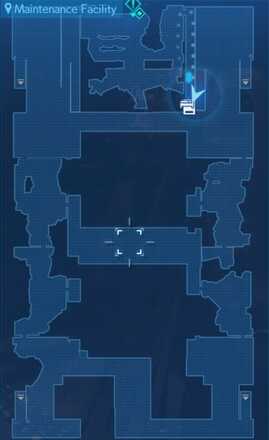 |
| Item | Price |
|---|---|
| 6. Let the Battles Begin! (Stock: 1) | 50 Gil |
| Potion | 50 Gil |
| Hi-Potion | 300 Gil |
| Mega-Potion (Stock: 3) | 300 Gil |
| Ether | 500 Gil |
| Ether (Stock: 2) | 100 Gil |
| Phoenix Down | 300 Gil |
| Phoenix Down (Stock: 2) | 100 Gil |
| Antidote | 80 Gil |
| Echo Mist | 100 Gil |
| Smelling Salts | 80 Gil |
| Weapon / Armor | Price |
|---|---|
| Titanium Bangle | 2000 Gil |
| Caliginous Bracelet | 3200 Gil |
| Studded Bracer | 3200 Gil |
| Mythril Armlet | 3200 Gil |
| Accessory | Price |
|---|---|
| Power Wristguards | 800 Gil |
| Bulletproof Vest | 800 Gil |
| Earrings | 800 Gil |
| Talisman | 800 Gil |
| Supernatural Wristguards | 5000 Gil |
| Survival Vest | 5000 Gil |
| Platinum Earrings | 5000 Gil |
| Timeworn Talisman | 5000 Gil |
| Star Pendant | 1500 Gil |
| Headband | 1500 Gil |
| Revival Earrings | 500 Gil |
| Materia | Price |
|---|---|
| Healing Materia | 600 Gil |
| Cleansing Materia | 1500 Gil |
| Revival Materia | 3000 Gil |
| Fire Materia | 500 Gil |
| Ice Materia | 500 Gil |
| Lightning Materia | 500 Gil |
| Poison Materia | 1500 Gil |
| Barrier Materia | 1500 Gil |
| Binding Materia | 3000 Gil |
| HP Up Materia | 2000 Gil |
| MP Up Materia | 2000 Gil |
| Deadly Dodge Materia | 600 Gil |
Vending Machine - Freight Storage
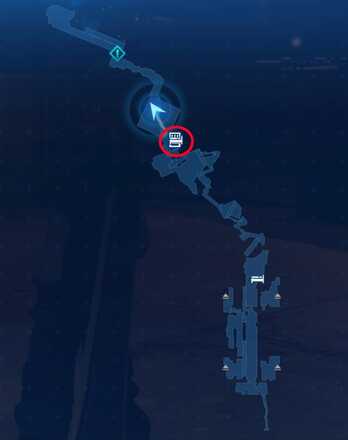 |
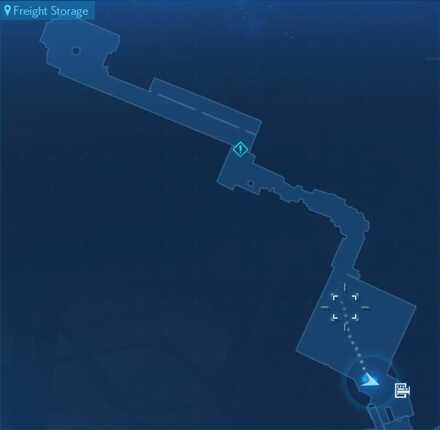 |
| Item | Price |
|---|---|
| Potion | 50 Gil |
| Hi-Potion | 300 Gil |
| Mega-Potion (Stock: 3) | 300 Gil |
| Ether | 500 Gil |
| Ether (Stock: 2) | 100 Gil |
| Phoenix Down | 300 Gil |
| Phoenix Down (Stock: 2) | 100 Gil |
| Antidote | 80 Gil |
| Echo Mist | 100 Gil |
| Smelling Salts | 80 Gil |
| Weapon / Armor | Price |
|---|---|
| Titanium Bangle | 2000 Gil |
| Caliginous Bracelet | 3200 Gil |
| Studded Bracer | 3200 Gil |
| Mythril Armlet | 3200 Gil |
| Accessory | Price |
|---|---|
| Power Wristguards | 800 Gil |
| Bulletproof Vest | 800 Gil |
| Earrings | 800 Gil |
| Talisman | 800 Gil |
| Supernatural Wristguards | 5000 Gil |
| Survival Vest | 5000 Gil |
| Platinum Earrings | 5000 Gil |
| Timeworn Talisman | 5000 Gil |
| Star Pendant | 1500 Gil |
| Headband | 1500 Gil |
| Revival Earrings | 500 Gil |
| Materia | Price |
|---|---|
| Healing Materia | 600 Gil |
| Cleansing Materia | 1500 Gil |
| Revival Materia | 3000 Gil |
| Fire Materia | 500 Gil |
| Ice Materia | 500 Gil |
| Lightning Materia | 500 Gil |
| Poison Materia | 1500 Gil |
| Barrier Materia | 1500 Gil |
| Binding Materia | 3000 Gil |
| HP Up Materia | 2000 Gil |
| MP Up Materia | 2000 Gil |
| Deadly Dodge Materia | 600 Gil |
Tips and Strategies
Ghosts
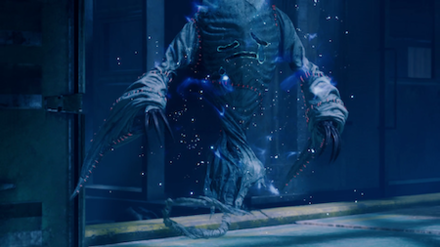
These crafty little buggers will cast Shield if you attack them with physical attacks or Reflect when hit with magic, so go after them with one and then switch to the other. They are weak to fire and resistant to ice. If possible, hit them with magic first so you can more easily take them out with physical attacks.
Ghost Weaknesses and Obtainable Items
Equip Fire Materia
Except for the last boss of the chapter, Eligor, almost all the enemies in this chapter will be weak to Fire. Be sure to equip all the Fire Materia you have, and consider buying more frrom a Vending Machine so you can equip your whole party with Fire.
Boss Strategy Guide
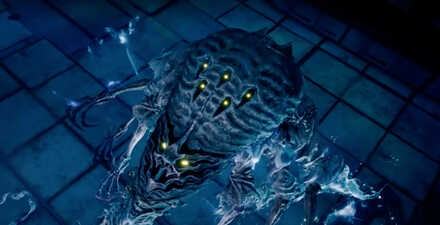
Ghoul
| Ghoul | |
|---|---|
 |
|
| Where it Appears | Weaknesses |
| Maintenance Facility | Fire |
How to Defeat the Ghoul - Key Points
- Weak against Fire
- Hit it with physical attacks while blue, magic when red
- Stay away from the blue flames
- Avoid it when it uses Telekenesis
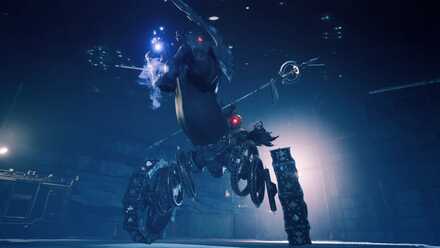
Eligor
| Eligor | |
|---|---|
|
|
| Where it Appears | Weaknesses |
| Train Graveyard - Outside | Ice, Wind |
How to Defeat Eligor - Key Points
- Weak against Ice, wind while in the sky
- Don't target its wheels until phase 3
- Hide behind the container during Javelin Bolts
- Get close and dodge Sweeping Gaze
Story Walkthrough Related Links
| Chapter 1 | The Destruction of Mako Reactor 1 |
|---|---|
| Chapter 2 | Fateful Encounters |
| Chapter 3 | Home Sweet Slum |
| Chapter 4 | Mad Dash |
| Chapter 5 | Dogged Pursuit |
| Chapter 6 | Light the Way |
| Chapter 7 | A Trap is Sprung |
| Chapter 8 | Budding Bodyguard |
| Chapter 9 | The Town That Never Sleeps |
| Chapter 10 | Rough Waters |
| Chapter 11 | Haunted |
| Chapter 12 | Fight for Survival |
| Chapter 13 | A Broken World |
| Chapter 14 | In Search of Hope |
| Chapter 15 | The Day Midgar Stood Still |
| Chapter 16 | The Belly of the Beast |
| Chapter 17 | Deliverance from Chaos |
| Chapter 18 | Destiny's Crossroads |
| INTERmission Chapters | |
|---|---|
| Chapter 1 | Wutai's Finest |
| Chapter 2 | Covert Ops |
Comment
Equip Steal materia to steal Bladed Staff from Eligor. Last boss before chapter ends.
Author
Chapter 11: Haunted Story Guide & Walkthrough
improvement survey
03/2026
improving Game8's site?

Your answers will help us to improve our website.
Note: Please be sure not to enter any kind of personal information into your response.

We hope you continue to make use of Game8.
Rankings
- We could not find the message board you were looking for.
Gaming News
Popular Games

Genshin Impact Walkthrough & Guides Wiki

Honkai: Star Rail Walkthrough & Guides Wiki

Umamusume: Pretty Derby Walkthrough & Guides Wiki

Pokemon Pokopia Walkthrough & Guides Wiki

Resident Evil Requiem (RE9) Walkthrough & Guides Wiki

Monster Hunter Wilds Walkthrough & Guides Wiki

Wuthering Waves Walkthrough & Guides Wiki

Arknights: Endfield Walkthrough & Guides Wiki

Pokemon FireRed and LeafGreen (FRLG) Walkthrough & Guides Wiki

Pokemon TCG Pocket (PTCGP) Strategies & Guides Wiki
Recommended Games

Diablo 4: Vessel of Hatred Walkthrough & Guides Wiki

Fire Emblem Heroes (FEH) Walkthrough & Guides Wiki

Yu-Gi-Oh! Master Duel Walkthrough & Guides Wiki

Super Smash Bros. Ultimate Walkthrough & Guides Wiki

Pokemon Brilliant Diamond and Shining Pearl (BDSP) Walkthrough & Guides Wiki

Elden Ring Shadow of the Erdtree Walkthrough & Guides Wiki

Monster Hunter World Walkthrough & Guides Wiki

The Legend of Zelda: Tears of the Kingdom Walkthrough & Guides Wiki

Persona 3 Reload Walkthrough & Guides Wiki

Cyberpunk 2077: Ultimate Edition Walkthrough & Guides Wiki
All rights reserved
© SQUARE ENIX CO., LTD. All Rights Reserved.
CHARACTER DESIGN:TETSUYA NOMURA/ROBERTO FERRARI
The copyrights of videos of games used in our content and other intellectual property rights belong to the provider of the game.
The contents we provide on this site were created personally by members of the Game8 editorial department.
We refuse the right to reuse or repost content taken without our permission such as data or images to other sites.


If you're playing Hard Mode and are low on mana, do NOT use Soul Drain on Ghosts. I was trying to recover mana before Eligor and Soul Drained a staggered Ghost -> straight to 0 mana. Eligor is was easy as heck compared to earlier Hard mode bosses, luckily.