Chapter 13: A Broken World Story Guide & Walkthrough
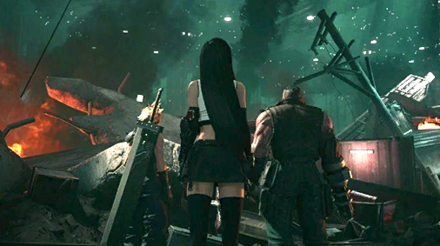
This is a guide and walkthrough to Chapter 13: A Broken World, a story chapter in the game Final Fantasy 7 Remake. Read on to learn locations of items, rewards for completing this chapter, as well as useful tips and strategies for getting through this part of the story.
| Previous Chapter | Fight for Survival |
|---|---|
| Current Chapter | A Broken World |
| Next Chapter | In Search of Hope |
List of Contents
- List of Main Scenario Objectives
- Chapter 13: A Broken World Walkthrough
- Sector 6 Slums
- Sector 5 Slums - Central District
- Sector 6 Slums - Collapsed Expressway
- Sector 6 Slums - Evergreen Park
- Sector 7 Slums
- Shinra Underground Test Site
- Sector 7 Slums (Part 2)
- Maps and Obtainable Items
- Maps
- Obtainable Items
- Shops & Vending Machines
- Tips and Strategies
- Boss Strategy Guide
- Failed Experiment
- Story Walkthrough Related Links
List of Main Scenario Objectives
| No. | Title | Description |
|---|---|---|
| 1 | Through the Rubble | Cloud tells the stricken Barret that Marlene is safe. Revitalized by Aerith's gift of hope, they continue on. |
| 2 | Words of Hope | To protect Marlene, Aerith agreed to go with the Shinra agents. At Elmyra's urging, the party decides to wait for her return. In the meantime, they head to the Sector 7 slums to check on their friends. |
| 3 | Checking on Friends | The group is back at the gate near the Sector 7 slums. Fearful of what they are about to find, they head into the sector via the underground passage. |
| 3-1 | Onward to Sector 7 | Cloud and the others leave Sector 5 and arrive at the collapsed road. The gate to the Sector 7 slums is up ahead. |
| 4 | Crawling to the Surface | They crawl through the underground passage and clamber up to the surface in the Sector 7 slums. Beyond the curling black smoke is empty sky, where the plate once was. |
| 5 | Home Is Where the Heart Is | Led by Wedge's cat, who they find amongst the ruins of Seventh Heaven, Cloud and his companions arrive at a strange underground facility. They spot Wedge on the ground and rush toward him, but the facility collapses around them and they fall deeper into the depths. |
| 6 | In Solitude | Now that Barret has joined up with Tifa, they hurry back to where they last saw Wedge. |
| 6-1 | Reunite with Tifa | The bugaboo nest is successfully destroyed. Now Barret must join Tifa in slaying the remaining bugaboo. |
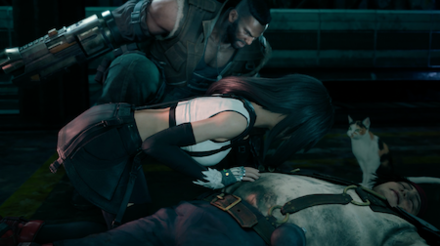
| 7 | Finding Wedge | The party manages to defeat the mysterious monsters and rescue Wedge from the underground facility. Relieved, they hurry out of there. |
| 7-1 | Beyond the Fracture | On the other side of a facility wall, they find traces of human experimentation. However, they're forced out by mysterious spectres lurking in the darkness. |
| 8 | Return | They manage to save Wedge, but were unable to do anything for Biggs and Jessie. Weighed down by the responsibility and guilt, Barret pushes on through the wreckage and rubble. |
Chapter 13: A Broken World Walkthrough
Sector 6 Slums
| Objectives | |
|---|---|
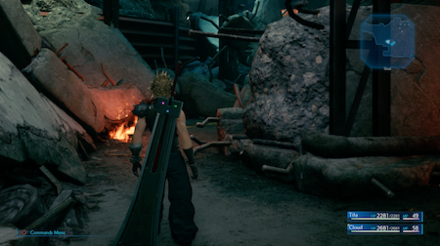
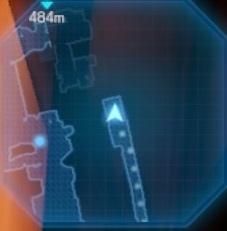
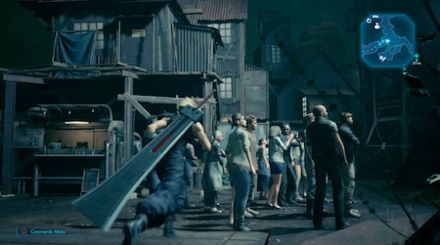
| 1 | Duck under the rubble ahead and interact with the wall to help Tifa push. A cutscene will occur and Barret and Tifa will join the party. Head right on path and squeeze through the rocks. Keep heading straight towards the objective marker, watching the cutscenes as they occur. |
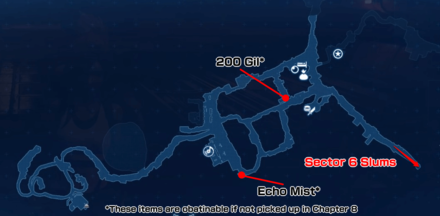
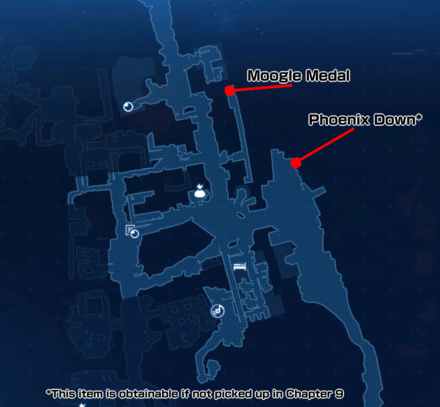
 From the Item Shop, walk a little north until you see a narrow path to your right then squeeze through it. Continue up the alley and open the chest at the end for a Moogle Medal. From the Item Shop, walk a little north until you see a narrow path to your right then squeeze through it. Continue up the alley and open the chest at the end for a Moogle Medal. |
Sector 5 Slums - Center District
| Objectives | |
|---|---|
| 1 | Continue along the path to Aerith's house. A cutscene will begin. |
| 2 | After the scene, leave the house and make your way back on the road you came on until a cutscene begins. Take the path and go under the rubble to enter the Collapsed Expressway. |
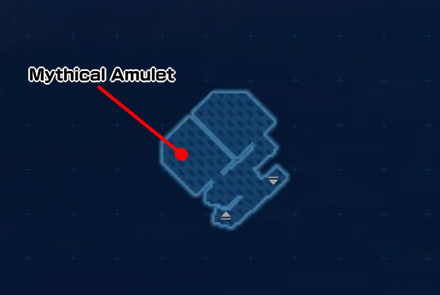
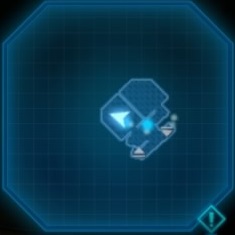 Go up to the room where Marlene is and open the chest beside the bed to obtain a Mythical Amulet Go up to the room where Marlene is and open the chest beside the bed to obtain a Mythical Amulet |
Sector 6 Slums - Collapsed Expressway

| Objectives | |
|---|---|
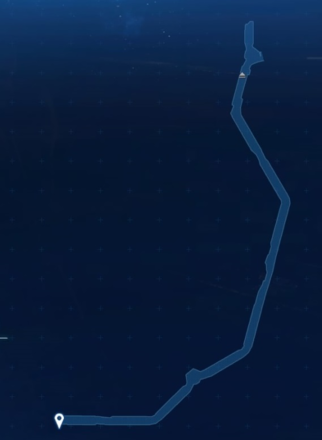
| 1 | Go up the ladder and take out the group of four Gorgers. Keep straight along the path and squeeze through the debris. |
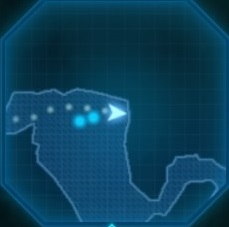 Open the chest directly ahead for a Mega-Potion. Open the chest directly ahead for a Mega-Potion. |
|
| 2 | Follow the path and fight two Ringmaw and two Varghidpolis on the way, then another group of two Terpsicolts and two Varghidpolis. You will come upon an open area with a Sweeper Prototype and a Smogger. Defeat them and take the ladder down. |
| 3 | Go around the train to the right and mow through some Bandits. |
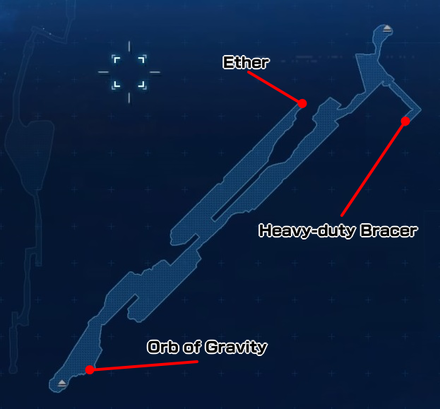
 If you make a quick detour down the hallway to the left, you will find a treasure chest with a Heavy-Duty Bracer. If you make a quick detour down the hallway to the left, you will find a treasure chest with a Heavy-Duty Bracer. |
|
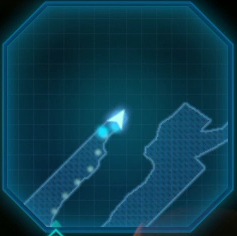 While going along the road, when a gap appears in the barrier between lanes, make a u-turn back to find a chest with an Ether. While going along the road, when a gap appears in the barrier between lanes, make a u-turn back to find a chest with an Ether. |
|
| 4 | As you continue you will run into the bandits Beck, Burke and Butch, as well as a Grungy Bandit. They go down as easy as the rest, so keep on moving. |
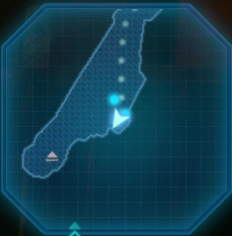 Near the end of the hallway you will find a treasure chest with an Orb of Gravity. Near the end of the hallway you will find a treasure chest with an Orb of Gravity. |
|
| 5 | Take the ladder at the end of the path and keep moving. You'll fight three Ringmaw. Go down a ladder, then go up the other ladder at the end, and another ladder right after. Continue along the path until you reach the park. |
Sector 6 Slums - Evergreen Park
| Objectives | |
|---|---|
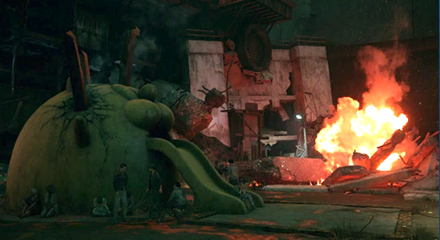
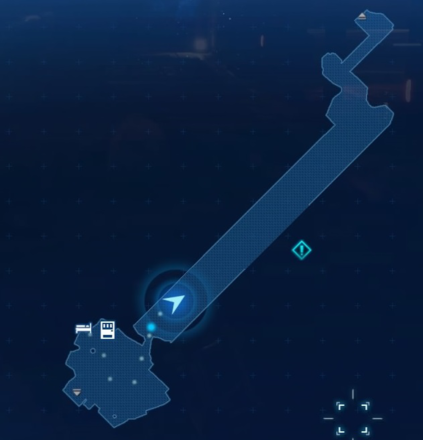
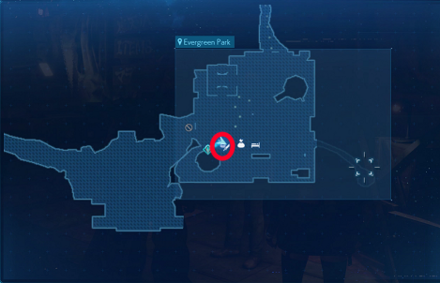
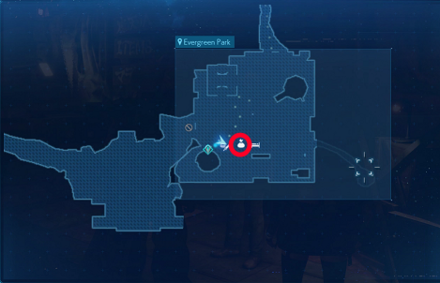
| 1 | Once you arrive at the park, you can speak to your friends and do a bit of shopping before moving on. A bench, item shop, and weapon and armor shop are available. Be sure to pick up the Big Bertha for Barret. You can buy Music Disc #15, On Our Way, from the Item Shop here. |
| 2 | When you're ready, interact with the play structure next to the Weapons Vendor to head underground. |
| 3 | Head through the service tunnel, following Barret up the ladder. Enter the Sector 7 Slums. |
Sector 7 Slums
| Objectives | |
|---|---|
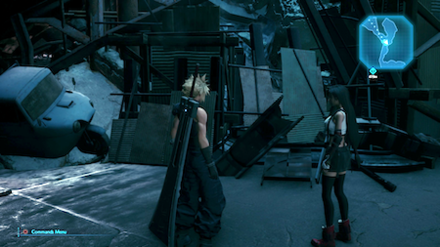
| 1 | Make your way through the ruins of the Sector 7 Slums towards Wedge's house and watch a cutscene. Follow Wedge's cat through the debris. Step on the arrow pad to drop down into the hole and you will enter the Shinra Underground Test Site. |
Shinra Underground Test Site
| Objectives | |
|---|---|
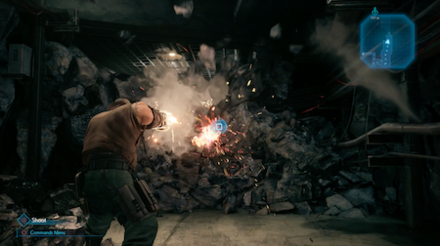
| 1 | You will take control of Barret. Destroy the debris in your way by holding the attack button. |
| 2 | Ahead, you'll fight three Bugaboos, then three Wererats, then four more Bugaboos. |
| 3 | Destroy the debris to your left. In the next room, there will be two Bloodhounds. |
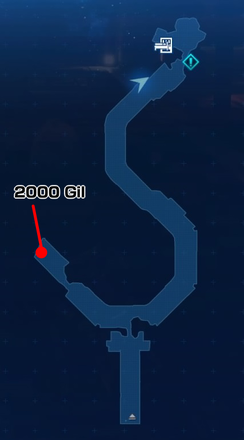
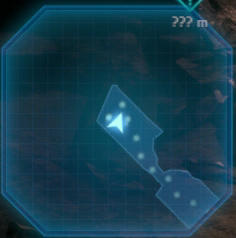 Before going left, destroy the debris ahead of you with the attack button. There will be a chest ahead with 2,000 gil. Before going left, destroy the debris ahead of you with the attack button. There will be a chest ahead with 2,000 gil. |
|
| 5 | Continue up the stairs ahead and climb up the ladder. Go left on the path and continue up the stairs, then left again and up the stairs. You'll fight three Bugaboos and a Bloodhound. |
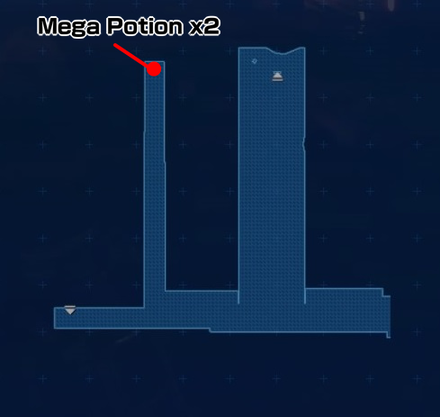
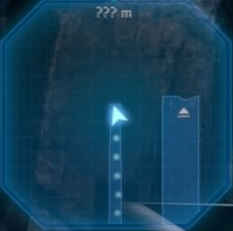 After climbing the ladder, go left and fight 2 Bugaboos. Shoot the crane ahead to make it drop a bridge then open the chest for 2 Mega-Potions. After climbing the ladder, go left and fight 2 Bugaboos. Shoot the crane ahead to make it drop a bridge then open the chest for 2 Mega-Potions. |
|
| 6 | Climb up the ladder and enter the door on the right. Shoot away the debris to your right. There will be two Gorgers ahead. |
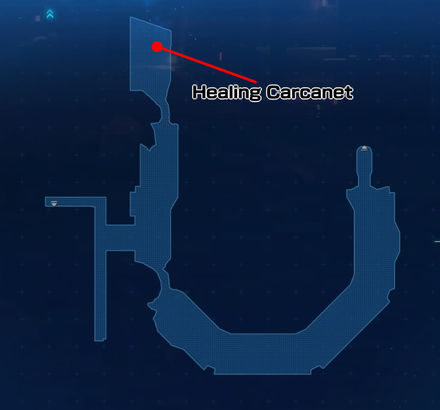
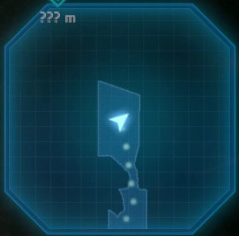 Before going right, shoot away the debris to your left to find a chest with a Healing Carcanet. Before going right, shoot away the debris to your left to find a chest with a Healing Carcanet. |
|
| 7 | Continue ahead to find another Gorger and two Bugaboos. Hold the attack button to stop the fan. Go past it and climb the ladder. |
| 8 | Defeat the two Wererats and two Bugaboos ahead, then go up the stairs ahead on the right. Go up to the top platform and shoot the big yellow crane to destroy the nest. |
| 9 | Go down, around and climb up the stairs to where Tifa is. Defeat seven Bugaboos along with Tifa. |
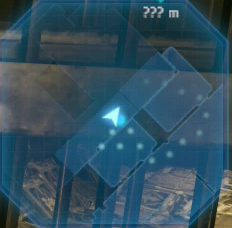
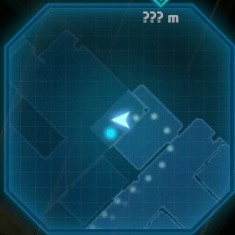
| 10 | Climb up the stairs to the right and shoot the middle fan to stop it. Go through the fan and fight two Bloodhounds. |
  |
|
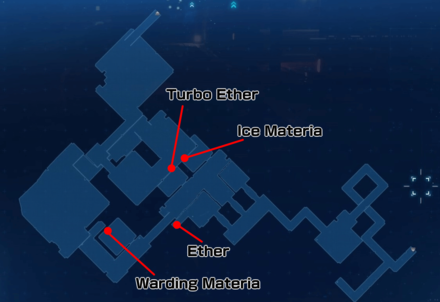
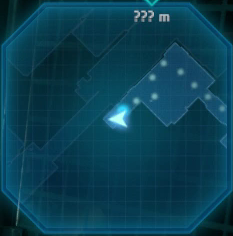 Stop the fan on the far left to find a chest with an Ether. Stop the fan on the far left to find a chest with an Ether. |
|
| 11 | Go up the stairs and up the ladder at the end. You'll fight a Cutter and two Monodrives. Climb down the ladder on the opposite side. |
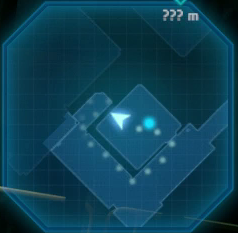 Shoot through another metal door at the top of the stairs to get a Warding Materia. Shoot through another metal door at the top of the stairs to get a Warding Materia. |
|
| 12 | Climb up the stairs and fight two Varghidpolises and a Bloodhound. |
| 13 | Continue climbing up the stairs and fight 16 Bugaboos at the top. |
| 14 | Keep heading up the stairs. You'll find a rest area at the top. |
| 15 | Step on the arrow pad at the other end of the rest area to squeeze through the door. In the next room, a cutscene will begin. |
| 16 | Continue climbing up the stairs and fight 16 Bugaboos at the top. Climb the next set of stairs to find a rest area. You can buy Music Disc #14, Main Theme of FFVII, from the Item Shop here. |
| 17 | Step on the arrow platform to squeeze through, starting a cutscene. |
| Boss 18 |
Fight the Failed Experiment. You'll get Mythril Claws for defeating it. How to Beat Failed Experiment |
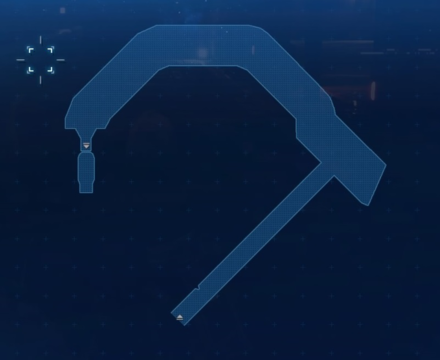
| 19 | Shoot the wall to escape from the Test Site. |
Sector 7 Slums (Part 2)
| Objectives | |
|---|---|
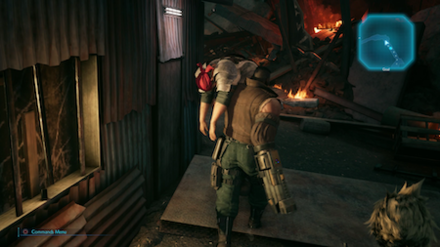
| 1 | Carry Wedge toward his house until a cutscene ends the chapter. |
Maps and Obtainable Items
Maps
| List of Maps | |
|---|---|
 |
 |
 |
 |
 |
 |
 |
 |
 |
 |
 |
 |
 |
 |
Obtainable Items
| Sector 6 Slums | ||
|---|---|---|
| Moogle Medal | - | - |
| Central District | ||
| Mythical Amulet | - | - |
| Collapsed Expressway | ||
| Mega-Potion x1 | Heavy-Duty Bracer | Orb of Gravity x1 |
| Ether x1 | - | - |
| Shinra Underground Test Site | ||
| Healing Carcanet | Turbo Ether x1 | Ice Materia |
| Ether x1 | Warding Materia | Mythril Claws |
| 2,000 Gil | Mega-Potion x2 | - |
Shops & Vending Machines
Item Shop - Wall Market
 |
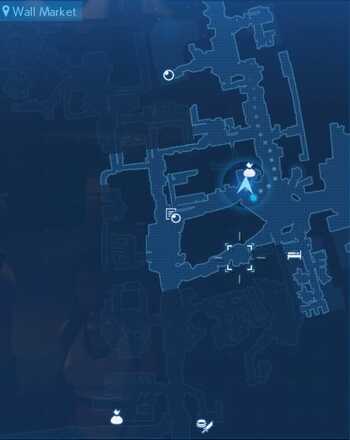 |
| Items | Price |
|---|---|
| 10. Honeybee Inn (Stock: 1) | 50 Gil |
| Potion | 50 Gil |
| Hi-Potion | 300 Gil |
| Mega-Potion | 700 Gil |
| Ether | 500 Gil |
| Phoenix Down | 300 Gil |
| Antidote | 80 Gil |
| Echo Mist | 100 Gil |
| Smelling Salts | 80 Gil |
| Remedy | 600 Gil |
Materia Shop - Wall Market
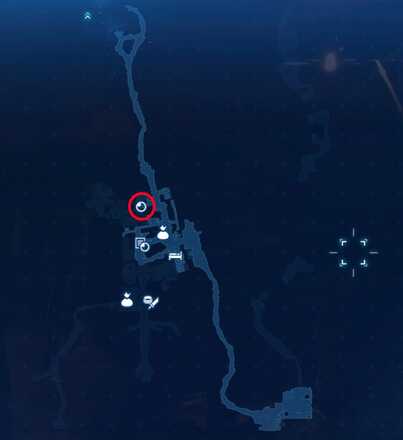 |
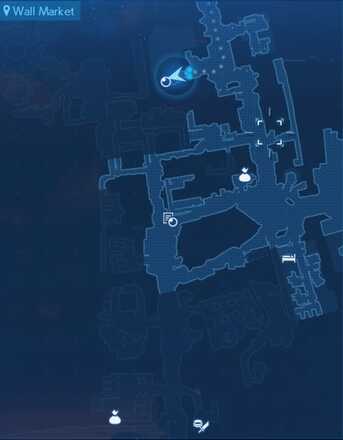 |
| Materia | Price |
|---|---|
| Healing Materia | 600 Gil |
| Cleansing Materia | 1500 Gil |
| Revival Materia | 3000 Gil |
| Fire Materia | 500 Gil |
| Ice Materia | 500 Gil |
| Lightning Materia | 500 Gil |
| Poison Materia | 1500 Gil |
| Barrier Materia | 1500 Gil |
| Binding Materia | 3000 Gil |
| Subversion Materia | 3000 Gil |
| HP Up Materia | 2000 Gil |
| MP Up Materia | 2000 Gil |
| Deadly Dodge Materia | 600 Gil |
Weapons Store - Center District
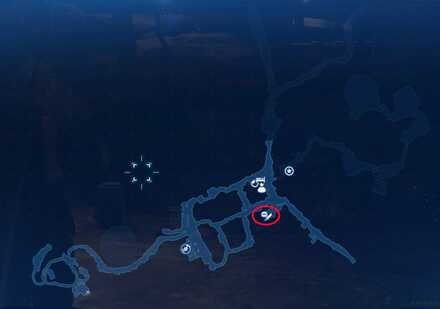 |
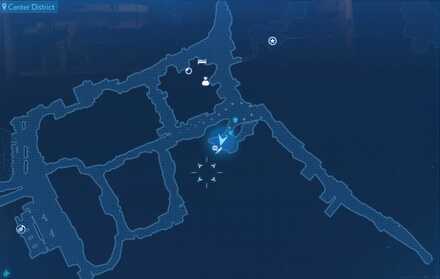 |
| Weapons / Armor | Price |
|---|---|
| Nail Bat (Stock: 1) | - |
| Sonic Strikers (Stock: 1) | - |
| Arcane Scepter (Stock: 1) | - |
| Mythril Rod (Stock: 1) | - |
| Gothic Bangle | 3000 Gil |
| Magician's Bracelet | 4800 Gil |
| Heavy-Duty Bracer | 4800 Gil |
| Sorcerer's Amulet | 4800 Gil |
| Accessories | Price |
|---|---|
| Power Wristguards | 800 Gil |
| Bulletproof Vest | 800 Gil |
| Earrings | 800 Gil |
| Talisman | 800 Gil |
| Supernatural Wristguards | 5000 Gil |
| Survival Vest | 5000 Gil |
| Platinum Earrings | 5000 Gil |
| Timeworn Talisman | 5000 Gil |
| Star Pendant | 1500 Gil |
| Headband | 1500 Gil |
| Revival Earrings | 500 Gil |
Item Shop - Center District
 |
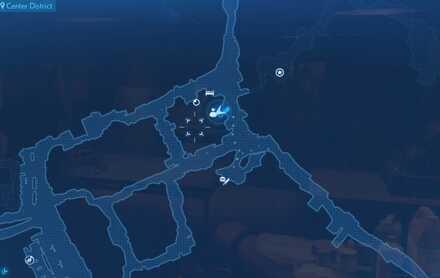 |
| Items | Price |
|---|---|
| Potion | 50 Gil |
| Hi-Potion | 300 Gil |
| Mega-Potion | 700 Gil |
| Ether | 500 Gil |
| Phoenix Down | 300 Gil |
| Antidote | 80 Gil |
| Echo Mist | 100 Gil |
| Smelling Salts | 80 Gil |
| Remedy | 600 Gil |
Materia Shop - Center District
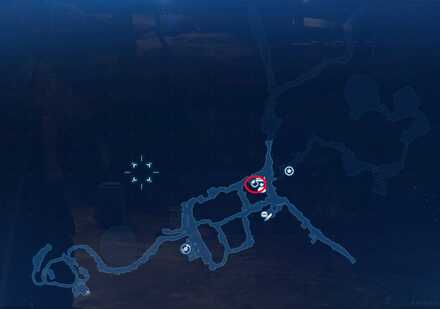 |
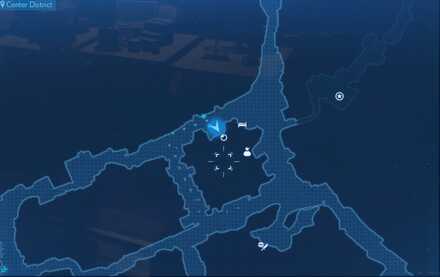 |
| Items | Price |
|---|---|
| 19. Costa del Sol (Stock: 1) | 50 Gil |
| Materia | Price |
|---|---|
| Healing Materia | 600 Gil |
| Cleansing Materia | 1500 Gil |
| Revival Materia | 3000 Gil |
| Fire Materia | 500 Gil |
| Ice Materia | 500 Gil |
| Lightning Materia | 500 Gil |
| Poison Materia | 1500 Gil |
| Barrier Materia | 1500 Gil |
| Binding Materia | 3000 Gil |
| Subversion Materia | 3000 Gil |
| HP Up Materia | 2000 Gil |
| MP Up Materia | 2000 Gil |
| Deadly Dodge Materia | 600 Gil |
Weapons Store - Evergreen Park
 |
 |
| Weapons / Armor | Price |
|---|---|
| Big Bertha (Stock: 1) | 2500 Gil |
| Gothic Bangle | 3000 Gil |
| Magician's Bracelet | 4800 Gil |
| Heavy-Duty Bracer | 4800 Gil |
| Sorcerer's Amulet | 4800 Gil |
| Accessories | Price |
|---|---|
| Power Wristguards | 800 Gil |
| Bulletproof Vest | 800 Gil |
| Earrings | 800 Gil |
| Talisman | 800 Gil |
| Supernatural Wristguards | 5000 Gil |
| Survival Vest | 5000 Gil |
| Platinum Earrings | 5000 Gil |
| Timeworn Talisman | 5000 Gil |
| Star Pendant | 1500 Gil |
| Headband | 1500 Gil |
| Revival Earrings | 500 Gil |
Item Shop - Evergreen Park
 |
 |
| Items | Price |
|---|---|
| 15. On Our Way (Stock: 1) | 50 Gil |
| Potion | 50 Gil |
| Hi-Potion | 300 Gil |
| Mega-Potion | 700 Gil |
| Ether | 500 Gil |
| Phoenix Down | 300 Gil |
| Antidote | 80 Gil |
| Echo Mist | 100 Gil |
| Smelling Salts | 80 Gil |
| Remedy | 600 Gil |
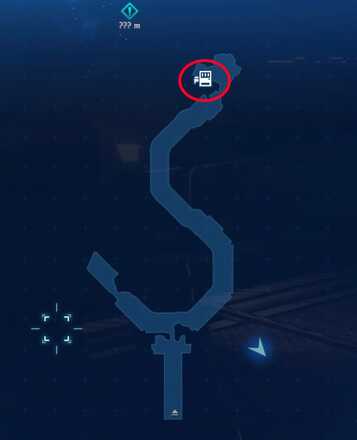
Vending Machine - Waste Processing Chamber
 |
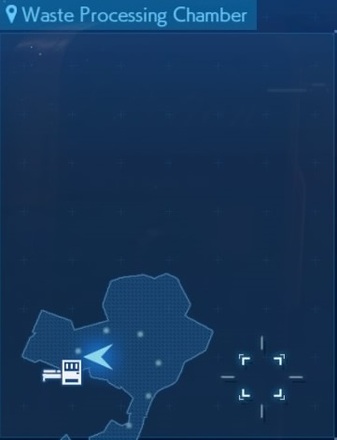 |
| Items | Price |
|---|---|
| Potion | 50 Gil |
| Hi-Potion | 300 Gil |
| Mega-Potion | 700 Gil |
| Ether | 500 Gil |
| Phoenix Down | 300 Gil |
| Antidote | 80 Gil |
| Echo Mist | 100 Gil |
| Smelling Salts | 80 Gil |
| Remedy | 600 Gil |
| Weapons / Armor | Price |
|---|---|
| Gothic Bangle | 3000 Gil |
| Magician's Bracelet | 4800 Gil |
| Heavy-Duty Bracer | 4800 Gil |
| Sorcerer's Amulet | 4800 Gil |
| Accessories | Price |
|---|---|
| Power Wristguards | 800 Gil |
| Bulletproof Vest | 800 Gil |
| Earrings | 800 Gil |
| Talisman | 800 Gil |
| Supernatural Wristguards | 5000 Gil |
| Survival Vest | 5000 Gil |
| Platinum Earrings | 5000 Gil |
| Timeworn Talisman | 5000 Gil |
| Star Pendant | 1500 Gil |
| Headband | 1500 Gil |
| Revival Earrings | 500 Gil |
| Materia | Price |
|---|---|
| Healing Materia | 600 Gil |
| Cleansing Materia | 1500 Gil |
| Revival Materia | 3000 Gil |
| Fire Materia | 500 Gil |
| Ice Materia | 500 Gil |
| Lightning Materia | 500 Gil |
| Poison Materia | 1500 Gil |
| Barrier Materia | 1500 Gil |
| Binding Materia | 3000 Gil |
| Subversion Materia | 3000 Gil |
| HP Up Materia | 2000 Gil |
| MP Up Materia | 2000 Gil |
| Deadly Dodge Materia | 600 Gil |
Vending Machine - Break Room
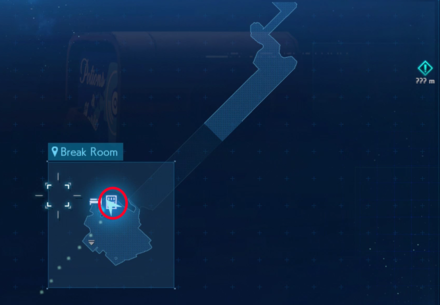 |
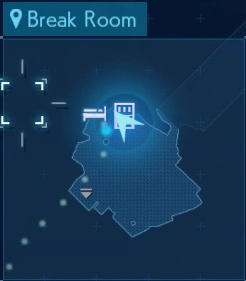 |
| Items | Price |
|---|---|
| 14. Main Theme of FFVII (Stock: 1) | 50 Gil |
| Potion | 50 Gil |
| Hi-Potion | 300 Gil |
| Mega-Potion | 700 Gil |
| Mega-Potion (Stock: 3) | 300 Gil |
| Ether | 500 Gil |
| Ether (Stock: 2) | 100 Gil |
| Phoenix Down | 300 Gil |
| Phoenix Down (Stock: 2) | 100 Gil |
| Antidote | 80 Gil |
| Echo Mist | 100 Gil |
| Smelling Salts | 80 Gil |
| Remedy | 600 Gil |
| Weapons / Armor | Price |
|---|---|
| Gothic Bangle | 3000 Gil |
| Magician's Bracelet | 4800 Gil |
| Heavy-Duty Bracer | 4800 Gil |
| Sorcerer's Amulet | 4800 Gil |
| Accessories | Price |
|---|---|
| Power Wristguards | 800 Gil |
| Bulletproof Vest | 800 Gil |
| Earrings | 800 Gil |
| Talisman | 800 Gil |
| Supernatural Wristguards | 5000 Gil |
| Survival Vest | 5000 Gil |
| Platinum Earrings | 5000 Gil |
| Timeworn Talisman | 5000 Gil |
| Star Pendant | 1500 Gil |
| Headband | 1500 Gil |
| Revival Earrings | 500 Gil |
| Materia | Price |
|---|---|
| Healing Materia | 600 Gil |
| Cleansing Materia | 1500 Gil |
| Revival Materia | 3000 Gil |
| Fire Materia | 500 Gil |
| Ice Materia | 500 Gil |
| Lightning Materia | 500 Gil |
| Poison Materia | 1500 Gil |
| Barrier Materia | 1500 Gil |
| Binding Materia | 3000 Gil |
| Subversion Materia | 3000 Gil |
| HP Up Materia | 2000 Gil |
| MP Up Materia | 2000 Gil |
| Deadly Dodge Materia | 600 Gil |
Tips and Strategies
Talk to Chadley
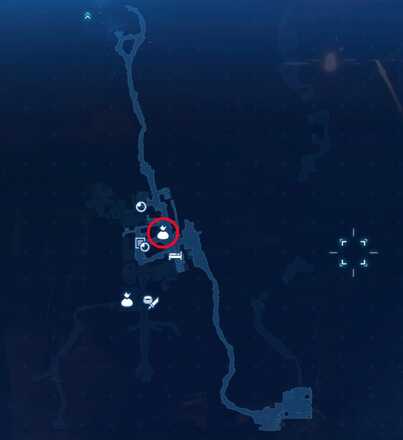
When passing through the Central District, you'll pass by Chadley. This is the first chance you've had to meet him in a few chapters, so you'll probably have unlocked some new useful Materia, such as the essential First Strike Materia and ATB Boost Materia.
Boss Strategy Guide
Failed Experiment
| Failed Experiment | |
|---|---|
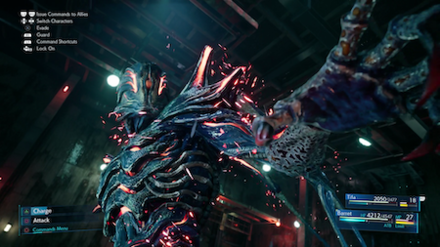
|
|
| Where They Appear | Weaknesses |
| Sector 7 Pillar | Reno: None Rude: Wind, Poison |
Story Walkthrough Related Links
| Chapter 1 | The Destruction of Mako Reactor 1 |
|---|---|
| Chapter 2 | Fateful Encounters |
| Chapter 3 | Home Sweet Slum |
| Chapter 4 | Mad Dash |
| Chapter 5 | Dogged Pursuit |
| Chapter 6 | Light the Way |
| Chapter 7 | A Trap is Sprung |
| Chapter 8 | Budding Bodyguard |
| Chapter 9 | The Town That Never Sleeps |
| Chapter 10 | Rough Waters |
| Chapter 11 | Haunted |
| Chapter 12 | Fight for Survival |
| Chapter 13 | A Broken World |
| Chapter 14 | In Search of Hope |
| Chapter 15 | The Day Midgar Stood Still |
| Chapter 16 | The Belly of the Beast |
| Chapter 17 | Deliverance from Chaos |
| Chapter 18 | Destiny's Crossroads |
| INTERmission Chapters | |
|---|---|
| Chapter 1 | Wutai's Finest |
| Chapter 2 | Covert Ops |
Comment
there are 2 medals in the boxes! just keep following the path shooting the boxes you will get the other its kinda near the 2k gil. to respawn the boxes just save and reload...yw!
Author
Chapter 13: A Broken World Story Guide & Walkthrough
Rankings
Gaming News
Popular Games

Genshin Impact Walkthrough & Guides Wiki

Umamusume: Pretty Derby Walkthrough & Guides Wiki

Crimson Desert Walkthrough & Guides Wiki

Monster Hunter Stories 3: Twisted Reflection Walkthrough & Guides Wiki

Honkai: Star Rail Walkthrough & Guides Wiki

Pokemon Pokopia Walkthrough & Guides Wiki

The Seven Deadly Sins: Origin Walkthrough & Guides Wiki

Wuthering Waves Walkthrough & Guides Wiki

Zenless Zone Zero Walkthrough & Guides Wiki

Arknights: Endfield Walkthrough & Guides Wiki
Recommended Games

Fire Emblem Heroes (FEH) Walkthrough & Guides Wiki

Diablo 4: Vessel of Hatred Walkthrough & Guides Wiki

Cyberpunk 2077: Ultimate Edition Walkthrough & Guides Wiki

Yu-Gi-Oh! Master Duel Walkthrough & Guides Wiki

Super Smash Bros. Ultimate Walkthrough & Guides Wiki

Pokemon Brilliant Diamond and Shining Pearl (BDSP) Walkthrough & Guides Wiki

Elden Ring Shadow of the Erdtree Walkthrough & Guides Wiki

Monster Hunter World Walkthrough & Guides Wiki

The Legend of Zelda: Tears of the Kingdom Walkthrough & Guides Wiki

Persona 3 Reload Walkthrough & Guides Wiki
All rights reserved
© SQUARE ENIX CO., LTD. All Rights Reserved.
CHARACTER DESIGN:TETSUYA NOMURA/ROBERTO FERRARI
The copyrights of videos of games used in our content and other intellectual property rights belong to the provider of the game.
The contents we provide on this site were created personally by members of the Game8 editorial department.
We refuse the right to reuse or repost content taken without our permission such as data or images to other sites.


![Death Stranding 2: On The Beach [PC] Review | A Port That Delivers](https://img.game8.co/4447392/15310a0c9aa1b6843bb713b2ea216930.jpeg/show)





after doing several runs it's random. The least i have gotten is 2 medals most was 5 in one run plus several hi potions antidotes phoenix downs and so on