List of Limit Breaks | Limit Break Guide (Intergrade Updated)
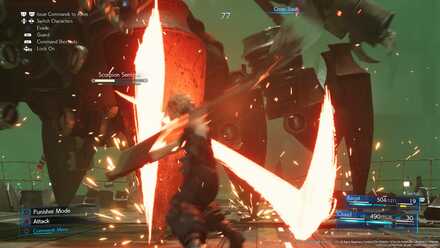
This is a guide to all the Limit Breaks in the game Final Fantasy 7 Remake (FF7R) and Intergrade's INTERmission DLC for PS5. Learn how to unlock all Limit Breaks for Cloud, Barret, Tifa, and Aerith, Yuffie, and Sonon, and the effects of each Limit Break.
List of Contents
What Are Limit Breaks?
Use the Limit Gauge to Unleash Ultimate Attacks
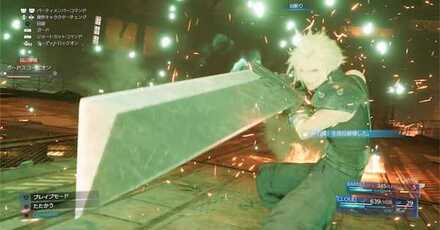
Every character has unique ultimate attacks called Limit Breaks. These powerful attacks can be unleashed when the Limit Gauge, located at the end of your ATB Gauge, is full.
The gauge is filled by various things, like taking damage or Staggering enemies, and the Limit Break command will show up as the first option once the gauge is full.
Get Limit Breaks from Materia
Some Limit Breaks, such as Refocus, can be obtained and used by equipping Materia, and these can be used by all characters.
How to Get the Refocus Materia
Get new Limit Breaks from the Corneo Colosseum
In addition to each character's starting Limit Break, they can learn a level two Limit Break by completing Battle Challenges in the Corneo Colosseum. Clearing the 1 Star Difficulty challenge for each character will earn you their new limit breaks!
Corneo Colosseum Rewards and Battle Challenges
How to Charge the Limit Gauge
Limit Gauge Charge Ranking
| Way to Charge | Amount of Limit Gauge | |
|---|---|---|
| ★ | Gotterdammerung | Max at the start of battle and slowly increases throughout. |
| ① | Stagger an enemy | Large |
| ② | Take damage | Mid (Depends on amount of damage taken) |
| ③ | Spectral Cogwheel | Small (Depends on amount of MP used) |
| ④ | Equip the Transference Module and use ATB abiltiies |
Small (Depends on amount of ATB used) |
| ⑤ | Use an Adrenaline or equip the Fury Ring |
Induces Fury※ |
※While under the Fury status your limit gauge will charge quicker
Gotterdammerung is Most Effective
Equipping the Gotterdammerung will allow you to start a battle with a full limit gague as well as cause it to gradually fill on its own while in battle, making it the best way to get more Limit Breaks off.
Cloud's Limit Breaks
List of Cloud Limit Breaks
| Ability | Effect and Where to Get |
|---|---|
 Cross-Slash Cross-Slash |
Effect: Damage your foe while making an ominous symbol with your slashes. Obtained: Learned from the start. |
 Ascension Ascension |
Effect: Focus on a single enemy and deliver several powerful strikes. significantly increases stagger. Obtained: Clear Party Member vs. Wild Animals in Corneo Colosseum. |
Recommended Limit Break
Ascension's attack animation is long and its stagger rate is high. Cross-Slash has its merits as well, but due to the nature of the game in staggering enemies, Ascension is the best choice for Cloud
Cloud Strife - Weapons and Abilities
Barret's Limit Breaks
List of Barret Limit Breaks
| Ability | Effect and Where to Get |
|---|---|
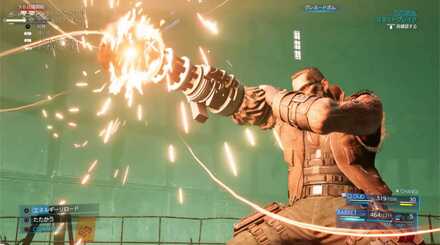 Fire in the Hole Fire in the Hole |
Effect: Shoot an orb of energy that creates a large explosion. Obtained: Learned from the start. |
 Catastrophe Catastrophe |
Effect: Marshal all your strength and channel it into a concentrated beam of energy. Significantly increases stagger. Obtained: Clear Party Member vs. Wild Animals in Corneo Colosseum. |
Recommended Limit Break
Due to Barret's attacks being long range, both of his Limit Breaks will always hit their target, but Catastrophe puts Barret in the air, making him more difficult to hit during the animation. With an increased stagger rate as well, Catastrophe is a no-brainer for Barret.
Barret Wallace - Weapons and Abilities
Tifa's Limit Breaks
List of Tifa Limit Breaks
| Ability | Effect and Where to Get |
|---|---|
 Somersault Somersault |
Effect: Launch an enemy high into the air with a Zangan-style swift kick. Obtained: Learned from the start. |
 Dolphin Flurry Dolphin Flurry |
Effect: Unleash an unrelenting stream of acrobatic attacks. Significantly increases stagger. Obtained: Clear Party Member vs. Wild Animals in Corneo Colosseum. |
Recommended Limit Break
Dolphin Flurry has a high stagger rate and a long reach, putting it above Somersault, making it the better choice. Use it when you aim to stagger an enemy to really dish out the damage.
Tifa Lockhart - Weapons and Abilities
Aerith's Limit Breaks
List of Aerith Limit Breaks
| Ability | Effect and Where to Get |
|---|---|
 Healing Wind Healing Wind |
Effect: Summon a soothing breeze to restore a moderate amount of HP to all party members. Obtained: Learned from the start. |
 Planet's Protection Planet's Protection |
Effect: Entreat the planet’s favor to nullify physical damage dealt to all party members. Obtained: Clear Party Member vs. Wild Animals in Corneo Colosseum. |
Recommended Limit Break
While both of Aerith's Limit Breaks are powerful in their own right, Planet's Protection's ability to nullify physical damage outdoes the healing of Healing Wind. Healing Wind can be useful in a pinch or when you want to preserve MP, but its effects pale in comparison to a fully powered up Magnify Materia linked to a Healing Materia.
Aerith Gainsborough - Weapons and Abilities
List of Shared Limit Breaks
| Name | Description |
|---|---|
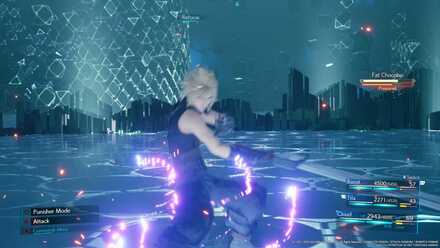
| Refocus | Partition your ATB gauge into three segments, allowing for faster charge accumulation. |
Intergrade Limit Breaks
List of Yuffie Limit Breaks
| Ability | Effect |
|---|---|
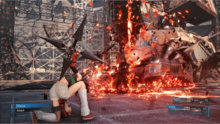 Blood Bath |
Effect: Unleash a flurry of slashes on the target with Yuffie's giant throwing star. Obtained: INTERmission DLC |
List of Sonon Limit Breaks
| Ability | Effect |
|---|---|
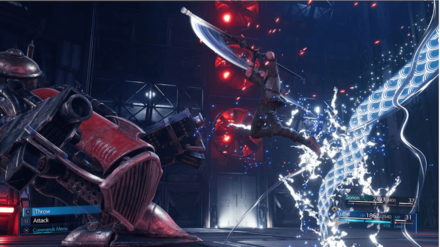 Dance of the Dragon |
Effect: A string of blows finishing with a powerful strike trailed by a water-like dragon. Obtained: INTERmission DLC - Start of game |
List of Synchronized Limit Breaks
| Ability | Effect |
|---|---|
 Limit Synch |
Effect: In unison with Sonon, unleash a devastating flurry of attacks on the target. Obtained: Unlock Sonon's Synchronized Limit Breaks Weapon Upgrade for the Marshalist's Staff |
How to Change Limit Breaks
Through Battle Settings
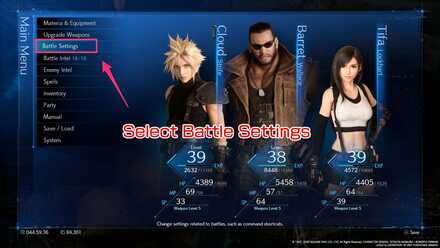
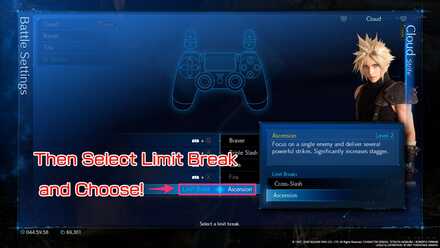
When you obtain a new Limit Break you won't be able to use it unless you switch Limit Breaks. To do so, open the main menu and select Battle Settings. From there scroll down to Limit Break, select it, and choose which Limit Break you'd like to equip!
Changing Limit Breaks
| ① |
|---|
 Enlarge Enlarge |
| ② |
 Enlarge Enlarge |
Things to Watch Out For
| Things to Watch Out For | ||
|---|---|---|
|
|
Using a Limit Break Doesn't Make You Invulnerable
When using a Limit Break you are not invulnerable to damage, so make sure you are in a good position to execute it. If you are at low health and use a Limit Break you can die and waste it!
Limit Breaks Can Miss
Other than Barret's long range Limit Breaks, if you use a Limit Break on an enemy that's moving around too much it can and will miss. Wait until an enemy is immobile while pressured or staggered to get the most bang for your buck.
Level Determines How Fast the Gauge Fills
Each Limit Break has a level and depending on the level, the limit gauge will fill faster or slower. The higher the level the longer it will take to fill up. Choose the best Limit Break for your playstyle.
Related Links
Comment
Cloud's ascencion limit (not sure if I spelled that right) is basically climhazzard with extra steps.
Author
List of Limit Breaks | Limit Break Guide (Intergrade Updated)
improvement survey
04/2026
improving Game8's site?

Your answers will help us to improve our website.
Note: Please be sure not to enter any kind of personal information into your response.

We hope you continue to make use of Game8.
Rankings
- We could not find the message board you were looking for.
Gaming News
Popular Games

Genshin Impact Walkthrough & Guides Wiki

Crimson Desert Walkthrough & Guides Wiki

Umamusume: Pretty Derby Walkthrough & Guides Wiki

Honkai: Star Rail Walkthrough & Guides Wiki

Monster Hunter Stories 3: Twisted Reflection Walkthrough & Guides Wiki

Wuthering Waves Walkthrough & Guides Wiki

The Seven Deadly Sins: Origin Walkthrough & Guides Wiki

Pokemon TCG Pocket (PTCGP) Strategies & Guides Wiki

Pokemon Pokopia Walkthrough & Guides Wiki

Zenless Zone Zero Walkthrough & Guides Wiki
Recommended Games

Monster Hunter World Walkthrough & Guides Wiki

Fire Emblem Heroes (FEH) Walkthrough & Guides Wiki

Pokemon Brilliant Diamond and Shining Pearl (BDSP) Walkthrough & Guides Wiki

Super Smash Bros. Ultimate Walkthrough & Guides Wiki

Diablo 4: Vessel of Hatred Walkthrough & Guides Wiki

Cyberpunk 2077: Ultimate Edition Walkthrough & Guides Wiki

Yu-Gi-Oh! Master Duel Walkthrough & Guides Wiki

Elden Ring Shadow of the Erdtree Walkthrough & Guides Wiki

The Legend of Zelda: Tears of the Kingdom Walkthrough & Guides Wiki

Persona 3 Reload Walkthrough & Guides Wiki
All rights reserved
© SQUARE ENIX CO., LTD. All Rights Reserved.
CHARACTER DESIGN:TETSUYA NOMURA/ROBERTO FERRARI
The copyrights of videos of games used in our content and other intellectual property rights belong to the provider of the game.
The contents we provide on this site were created personally by members of the Game8 editorial department.
We refuse the right to reuse or repost content taken without our permission such as data or images to other sites.


![Forza Horizon 6 Review [Preview] | Beautiful Roads With a Whole Lot of Oversteer](https://img.game8.co/4460981/a7254c24945c43fbdf6ad9bea52b5ce9.png/show)


![Forza Horizon 6 Review [Preview] | Beautiful Roads With a Whole Lot of Oversteer](https://img.game8.co/4460981/a7254c24945c43fbdf6ad9bea52b5ce9.png/thumb)


The item you want is the Götterdämmerung. You will start a battle a full limit break and slowly increases throughout automatically. It is obtained by beating all the Corneo battles (Arena) in Normal and Hard Mode, as well as the VR Battle Simulator battles in chapter 17 in Hard Mode.