How to Beat Motor Ball | Boss Fight Guide

This is a guide to beating the Boss Motor Ball in the game Final Fantasy 7 Remake (FF7R). This article explains Motor Ball's attack patterns, weaknesses, and tips and strategies for defeating them.
List of Contents
Motor Ball Boss Fight Guide
Motor Ball Abilities and Attack Patterns
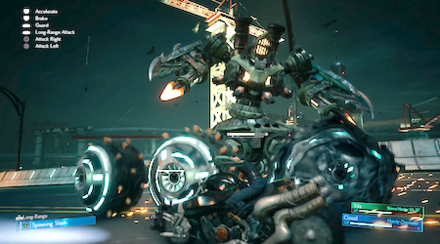
As Motor Ball is fought during the Bike Minigame, there's no way to Assess it, and all its Abilities are unlabeled. As such, all these Ability names are unofficial.
All Phases
| Name | Description |
|---|---|
| Gunfire | Faces the target and fires rounds from the two guns on its face. |
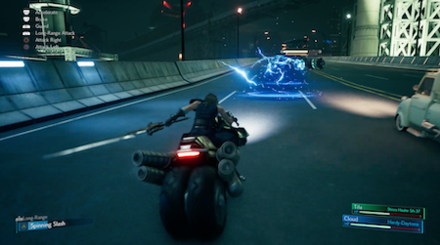
| Electric Bombs | Motor Ball will throw bombs onto the road behind it to damage targets who run into them. |
| Wheel Slam | Motor Ball will lift one side of its body into the air, then slam three of its wheels down onto the target. |
| Flame Spin | Motor Ball's top half will spin around shooting flames in all directions. |
Starting in Phase 2
| Name | Description |
|---|---|
| Charge Laser | Motor Ball will lift its arms and build red electricity around them, then fire a huge beam to one side. |
Best Characters for This Boss
Available Characters
 Cloud Cloud
|
Recommended Characters
The other characters will be riding alongside you, but you'll be controlling Cloud and his sword for this fight. The controls are different from other battles, so recall your training battling Roche on the bike in Chapter 4 to win this fight.
Motor Ball Attack Phases
Phase 1
| Phase Point Summary | |
|---|---|
| 1 | Motor Ball will appear directly ahead of Cloud. It will be immune to all attacks, and each of its 6 Wheels will have a health bar. |
| 2 | Lower all its wheels' health bars to 0, and then it will be staggered. |
| 3 | While it's staggered, attack it mercilessly from any angle to increase its Stagger % and deal damage. When the gauge is filled, use Spinning Slash to deal more damage. |
Phase 2
| Phase Point Summary | |
|---|---|
| 1 | Follow the same process as Phase 1. Motor Ball will start to use Charge Laser. |
Tips & Strategies for Beating Motor Ball
| ★ Strategy Checklist ★ (Click to jump) |
||
|---|---|---|
|
|
Knock out the wheels one by one

In order to deal damage to Motor Ball, you'll first need to defeat each of its Wheels. The Wheels which still need to be knocked out are easily recognizable by their shining blue lights – once you've already knocked out a wheel, it will turn black. At this point, continuing to attack a broken Wheel will have no effect on Motor Ball, so head for the next Wheel right away.
After you've knocked out all three Wheels on one side, Motor Ball will be kind enough to flip itself around and allow you to attack other three Wheels, so there's no need to circle around to hit all six Wheels.
Once you've knocked out all six of its wheels, Motor Ball will automatically be Staggered, so save up your Unique Ability to hit him hard with Spinning Slash!
Stagger Bonus Not Counted for Trophy or Enemy Intel
Although Motor Ball's Stagger Attack Bonus will go as high as 500% near the end of the battle, you won't be able to receive the Staggering Feat trophy for getting the Attack Bonus up to 300%, or Battle Intel 12: The Stagger Effect Pt. 3 for getting the Attack Bonus up to 200% during the Motor Ball battle, so you can take it out without worrying about the numbers displayed.
How to Get Stagger Attack Bonus to 200%
Brake when it prepares an attack

Most of Motor Ball's killer moves are highly telegraphed. Although it doesn't show Ability names like typical enemies, once you've gotten used to its patterns, you'll be able to take down Motor Ball without too much damage.
- When he lifts his wheels in the air, brake before he slams them down to avoid it.
- When he starts charging his flame blast attack, brake before it launches to avoid it.
- When he starts shooting at you, press R1 to guard. This is the hardest attack to avoid taking damage from.
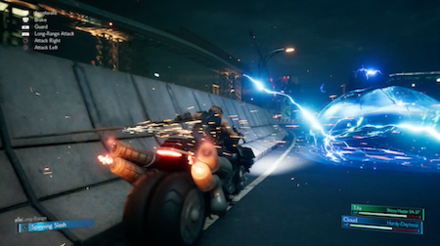
- When he moves ahead, hug the sides to avoid his electric bombs.
Don't get too far behind

If you fall too far behind Motor Ball to try to take a breather, you won't get one – Motor Ball will start throwing electric bombs back at you which are difficult to avoid and can cost you unnnecessary HP. Since you won't be able to attack Motor Ball easily from a distance, there's no reason to put yourself in this position, so try to stay close behind Motor Ball for the duration of the fight.
When behind, hug the sides

Cloud narrowly avoiding one of Motor Ball's electric bombs.
When you're hugging the sides of the road, it will make a scraping noise, but Cloud actually won't take any damage. This position will help you avoid damage when Motor Ball starts throwing its Electric Bombs.
Boss Fight Related Articles
Major Story Bosses
| All Major Story Bosses | |
|---|---|
| Chapter 1 | Scorpion Sentinel |
| Chapter 4 | Roche |
| Chapter 5 | Crab Warden |
| Chapter 7 | Airbuster |
| Chapter 8 | Reno Rude |
| Chapter 9 | Hell House |
| Chapter 10 | Abzu |
| Chapter 11 | Ghoul Eligor |
| Chapter 13 | Failed Experiment |
| Chapter 14 | Abzu (2nd Fight) |
| Chapter 15 | The Valkyrie |
| Chapter 16 | Specimen H0512 |
| Chapter 17 | Jenova Dreamweaver Rufus The Arsenal |
| Chapter 18 | Motor Ball Whisper Harbinger Sephiroth |
VR Mission Bosses
| All VR Mission Bosses | |
|---|---|
| Chapter 8 | Shiva |
| Chapter 9 | Fat Chocobo |
| Chapter 13 | Leviathan |
| Secret Boss | Bahamut |
| Superboss | Pride and Joy Prototype |
Story Sub-Bosses
| All Story Sub-Bosses | |
|---|---|
| Chapter 2 | The Huntsman |
| Chapter 3 | The Hoodlums |
| Chapter 4 | Enigmatic Spectre |
| Chapter 12 | Enigmatic Spectre |
| Chapter 17 | M.O.T.H. Unit Brain Pod Swordipede |
Monster Variants & Optional Sub-Bosses
| All Monster Variants & Optional Sub-Bosses | |
|---|---|
| Chapter 3 | Doomrat Cerulean Drake Wrath Hound |
| Chapter 8 | Hedgehog Pie King Mark II Monodrive Venomantis Chromogger |
| Chapter 14 | Rust Drake Tonberry Trypapolis Type-0 Behemoth |
| Chapter 17 | Malboro |
Comment
just use the break and this guy is easy when you kill the tires he will rear up, break and go to the other side and kill the tires, when he does his flame thrower, break and pull back to a safe distance when he does his lazer beam, brake and go to the other side when he does take off and does his blue ground bombs just ride to the side till he starts to slow down and then start killing the tires again, repete till hethe cutscene
Author
How to Beat Motor Ball | Boss Fight Guide
Rankings
- We could not find the message board you were looking for.
Gaming News
Popular Games

Genshin Impact Walkthrough & Guides Wiki

Honkai: Star Rail Walkthrough & Guides Wiki

Umamusume: Pretty Derby Walkthrough & Guides Wiki

Pokemon Pokopia Walkthrough & Guides Wiki

Resident Evil Requiem (RE9) Walkthrough & Guides Wiki

Monster Hunter Wilds Walkthrough & Guides Wiki

Wuthering Waves Walkthrough & Guides Wiki

Arknights: Endfield Walkthrough & Guides Wiki

Pokemon FireRed and LeafGreen (FRLG) Walkthrough & Guides Wiki

Pokemon TCG Pocket (PTCGP) Strategies & Guides Wiki
Recommended Games

Diablo 4: Vessel of Hatred Walkthrough & Guides Wiki

Cyberpunk 2077: Ultimate Edition Walkthrough & Guides Wiki

Fire Emblem Heroes (FEH) Walkthrough & Guides Wiki

Yu-Gi-Oh! Master Duel Walkthrough & Guides Wiki

Super Smash Bros. Ultimate Walkthrough & Guides Wiki

Pokemon Brilliant Diamond and Shining Pearl (BDSP) Walkthrough & Guides Wiki

Elden Ring Shadow of the Erdtree Walkthrough & Guides Wiki

Monster Hunter World Walkthrough & Guides Wiki

The Legend of Zelda: Tears of the Kingdom Walkthrough & Guides Wiki

Persona 3 Reload Walkthrough & Guides Wiki
All rights reserved
© SQUARE ENIX CO., LTD. All Rights Reserved.
CHARACTER DESIGN:TETSUYA NOMURA/ROBERTO FERRARI
The copyrights of videos of games used in our content and other intellectual property rights belong to the provider of the game.
The contents we provide on this site were created personally by members of the Game8 editorial department.
We refuse the right to reuse or repost content taken without our permission such as data or images to other sites.


![Monster Hunter Stories 3 Review [First Impressions] | Simply Rejuvenating](https://img.game8.co/4438641/2a31b7702bd70e78ec8efd24661dacda.jpeg/thumb)


It's literally how the original ended in Midgar...lol. This boss wasnt intended to be an endgame boss' only a fun getaway sequence that forced you to leave Midgar. It is awkward tho' for first timers' storywise. Think of it as a sendoff. A farewell to Midgar' and part 1. :)