This survey will take about 1 minute.
Your answers will help us to improve our website.
FF7 Remake
Chapter 17: Deliverance from Chaos Story Guide & Walkthrough

This is a guide and walkthrough to Chapter 17: Deliverance from Chaos, a story chapter in the game Final Fantasy 7 Remake (FF7R). Read on to learn locations of items, rewards for completing this chapter, as well as useful tips and strategies for getting through this part of the story.
| Previous Chapter | The Belly of the Beast |
|---|---|
| Current Chapter | Deliverance from Chaos |
| Next Chapter | Destiny's Crossroads |
List of Contents
- List of Main Scenario Objectives
- Chapter 17: Deliverance from Chaos Walkthrough
- Hojo's Laboratory
- 68th Floor - Hojo's Laboratory: Restricted Area
- Classified Research - The Drum
- The Drum - 1st Ward
- The Drum - 3rd Ward
- The Drum - 2nd Ward
- The Drum - 4th Ward
- 70th Floor - President's Office
- 59th Floor - Skyview Hall
- Maps and Obtainable Items
- Maps
- Obtainable Items
- Shops & Vending Machines
- Tips and Strategies
- Boss Strategy Guide
- Jenova Dreamweaver
- Rufus Shinra
- The Arsenal
- Brain Pod (sub-boss)
- Swordipede (sub-boss)
- Story Walkthrough Related Links
List of Main Scenario Objectives
| No. | Title | Description |
|---|---|---|
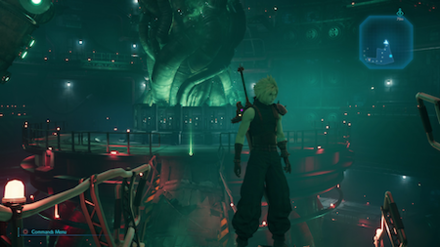
| 1 | A Way Out | Jenova, a mysterious life-form, is kept deep within the Shinra Building. As the party approaches the creature, they are intercepted by Sephiroth, who sends Cloud hurtling to the lower levels. |
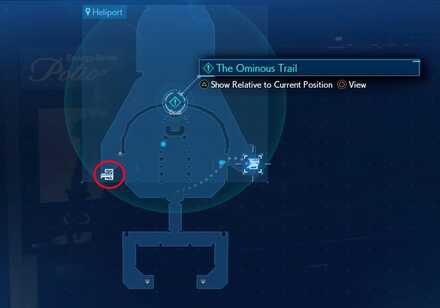
| 2 | Find the Others | Someone has stolen Jenova. They follow an ominous-looking trail to the elevator, which they use to get up to the roof. |
At this point, the party will be split up into two groups.
Cloud
| No. | Title | Description |
|---|---|---|
| 2-1 | Find Barret | Cloud and Red XIII reunite with Barret, and the trio searches for Tifa and Aerith. |
| 2-2 | Use the Central Terminal | The door to the 3rd ward is now unlocked, allowing Tifa and Aerith to explore the area. |
| 2-3 | 2nd Ward | Cloud and the others finish exploring the 2nd ward, but are unable to find a way back to the upper level. |
| 2-4 | 4th Ward | They defeat the swordipede, thus stopping Hojo's interference. |
| 2-5 | Rescuing Red XIII | Cloud informs Aerith and Tifa that Red XIII is in trouble. The two rush to his aid. |
Tifa
| No. | Title | Description |
|---|---|---|
| 2-1 | Research the 3rd Ward | Aerith and Tifa finish exploring the 3rd ward, but are unable to find a way back to the upper level. |
| 2-2 | Rescuing Red XIII | Tifa and Aerith fight their way through Hojo's experiments and reunite with Red XIII. |
| 2-3 | To the Central Terminal | The 4th ward is now unlocked. Leave it to Cloud and Barret to explore the area. |
| 2-4 | A Way Up | Hojo's "trial" now concluded, he reactivates the elevator. Tifa, Aerith, and Red XIII board the lift and make for the upper level. |
| 2-5 | Source of the Sound | After defeating Hojo's experiments, they're all back together and ready to head to the roof. |
Back Together
| No. | Title | Description |
|---|---|---|
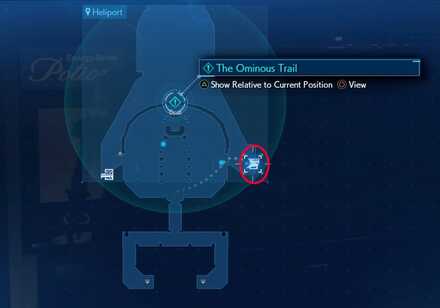
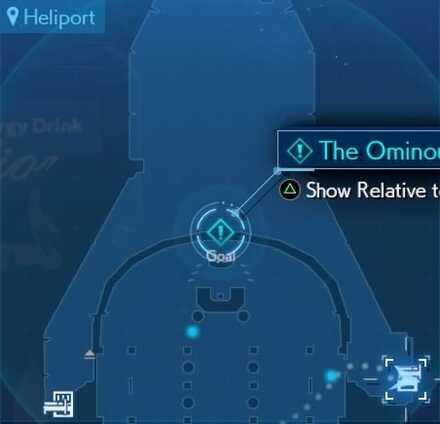
| 3 | The Ominous Trail | They arrive at the president's office and watch as President Shinra is murdered. Sephiroth reclaims Jenova and disappears into the skies above the Shinra Building. |
| 4 | The Showdown | Cloud faces off against Rufus Shinra, who escapes by helicopter. Cloud is blown off the helipad, but is saved by Tifa. |
| 5 | The Great Escape | Barret and the others escape the Arsenal and reach the building's entrance, only to be caught by Heidegger. However, just when it seems all is lost, the roar of an engine rips through the air. |
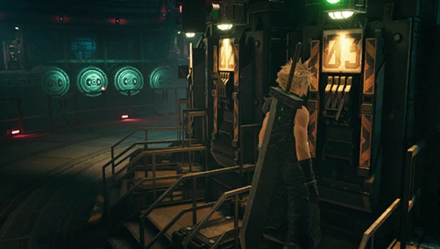
Chapter 17: Deliverance from Chaos Walkthrough
Hojo's Laboratory
| Objectives | |
|---|---|
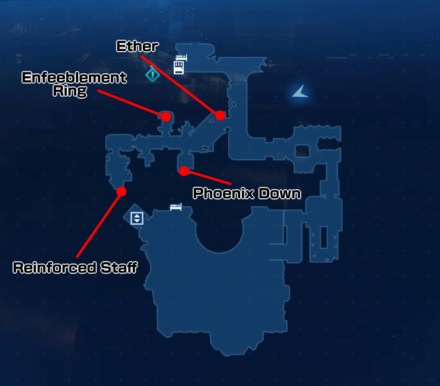
| 1 | In Aerith's room, talk to her twice to start a cutscene. At the end, you'll be able to leave the room. |
 Open the chest here to get a Reinforced Staff, Aerith's final weapon. Open the chest here to get a Reinforced Staff, Aerith's final weapon. |
|
 Inside the third room is a chest containing an Enfeeblement Ring. Inside the third room is a chest containing an Enfeeblement Ring. |
|
 Inside the fourth room to your right is a chest with a Phoenix Down. Inside the fourth room to your right is a chest with a Phoenix Down. |
|
 You will find another chest past the rooms. Open it to get an Ether. You will find another chest past the rooms. Open it to get an Ether. |
|
| 2 | Follow Red XIII along the path. Take advantage of the rest area in the final room and press the elevator switch on the far-left wall to ride the elevator. |
| 3 | Follow the others ahead until a cutscene begins. You'll fight four Unknown Entities. |
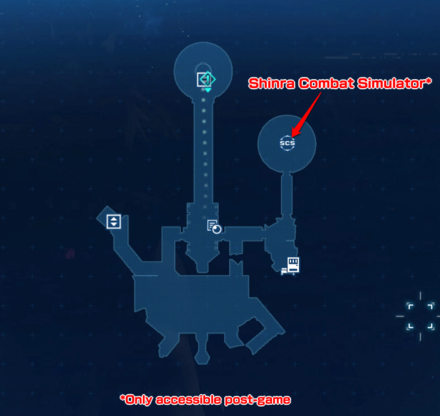
| 4 | Take the staircase directly ahead and go through the door on the right, then left. Continue ahead to the elevator and hit the switch. If you come back again with Chapter Select after beating the game, you can find Chadley here. Go straight into the next room and turn left to find the Shinra Combat Simulator with new challenges. |
68th Floor - Hojo's Laboratory: Restricted Area
| Objectives | |
|---|---|
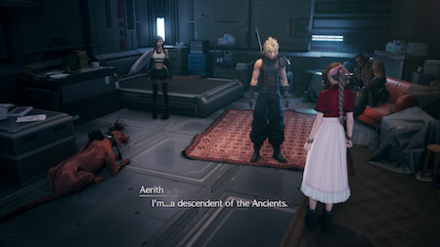
| 1 | Go along the path and across the path until a cutscene begins. After the cutscene, Aerith and Tifa will leave the party. |
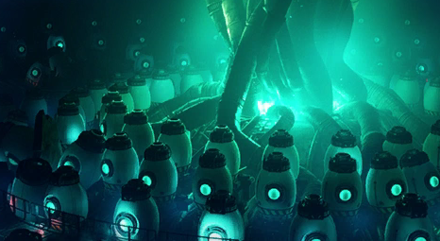
Classified Research - The Drum
| Objectives | |
|---|---|
| 1 | Head to the right and pull the lever at the end. Run across the tops of the pods that come out and down the stairs. You'll fight two Monodrives ahead. |
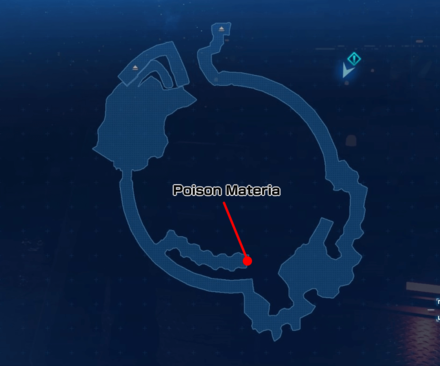
 At the fork, turn right to get a Poison Materia. At the fork, turn right to get a Poison Materia. |
|
| 2 | Duck under the obstacle and fight two Unknown Entities. Red XIII will join your party. |
| 3 | Head straight along the steep path ahead to the right, then up the stairs. At the top, press Triangle to have Red XIII run across the gap. |
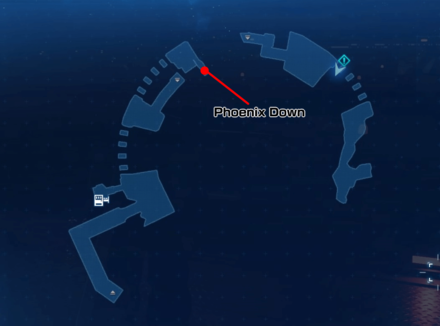
 Run across the set of pods behind you and open the nearby chest for a Phoenix Down. Run across the set of pods behind you and open the nearby chest for a Phoenix Down. |
|
| 4 | Run across the tops of the test pods and into the gate labeled 01. |
The Drum - 1st Ward

| Objectives | |
|---|---|
| 1 | Run up the stairs and through the gate. Fight two Monodrives and two Mark II Monodrives. Barret will join your party. |
| 2 | Next, two Unknown Entities will emerge from their pods. Battle them. |
| 3 | Last, you'll fight a more powerful enemy, M.O.T.H. Unit. Use Lightning attacks and stay out of the range of its blades. |
| 4 | Go through the gate that opens. The door will close and lock behind you. Go up the stairs and to the left. |
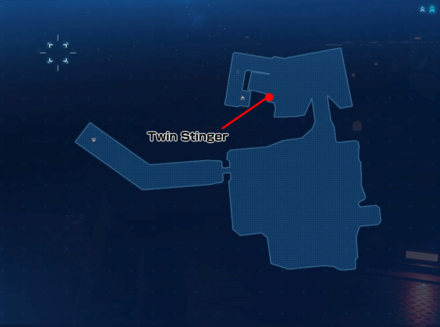
 At the bottom of the staircase to the left is a chest with Twin Stinger, Cloud's final weapon. At the bottom of the staircase to the left is a chest with Twin Stinger, Cloud's final weapon. |
|
| 5 | Press Triangle to have Red XIII run across and hit the switch. Run across the tops of the test pods. |
| 6 | Go around the room Aerith and Tifa are in and interact with the Terminal. After the cutscene, select Yes. to switch parties. |
 After running across the pods, enter the room to your right and open the chest to obtain 3,000 Gil. After running across the pods, enter the room to your right and open the chest to obtain 3,000 Gil. |
|
| 7 | You'll be controlling Tifa with Aerith in your party. Run up the stairs and go out the door. Continue along the stairs and up the path until you reach the gate labeled 03. Pull the lever on the left side wall and use the Terminal to the right to call Cloud. Take advantage of the rest area next to the Terminal. |
 After pulling the lever, hop across the test pods to find a chest with an ether here. After pulling the lever, hop across the test pods to find a chest with an ether here. |
|
| 8 | You'll be controlling Cloud with Barret and Red XIII in your party. Run across the test pods to the left and fight a Blast-Ray and two Shock-Rays. Pull the lever to reveal a bridge to the central platform. Pull the switch labeled 03 and interact with the Terminal. |
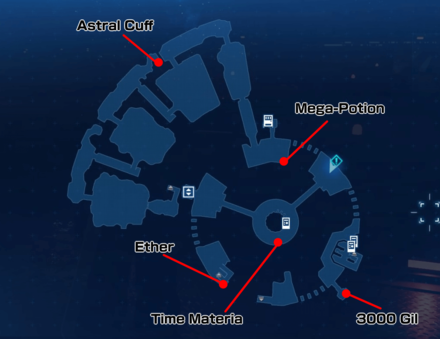
 Go to the left side of the central platform to get a Time Materia. Go to the left side of the central platform to get a Time Materia. |
|
| 9 | You'll be controlling Tifa with Aerith in your party. Go inside the gate labeled 03. |
The Drum - 3rd Ward
| Objectives | |
|---|---|
| 1 | Go through the door and pull the switch. Go into the next room and fight three Unknown Entities. |
| 2 | Go through the gap in the gate ahead. Go along the path and through the door at the end. |
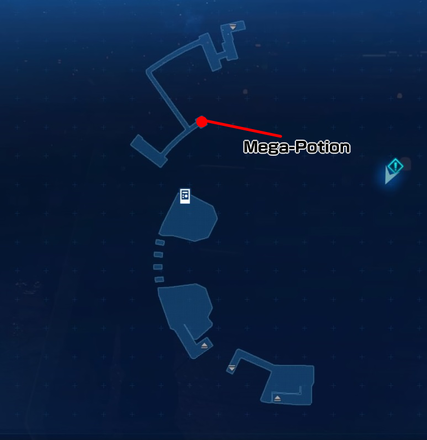
 At the fork, go back behind the boxes to find a chest with a Mega-Potion. At the fork, go back behind the boxes to find a chest with a Mega-Potion. |
|
| 3 | Go right and into the next door. At the end of the path, you'll fight six Bloodhounds. Duck under the obtacles ahead. |
| 4 | Go into the next room. At the end of the path, you'll fight a Zenene. |
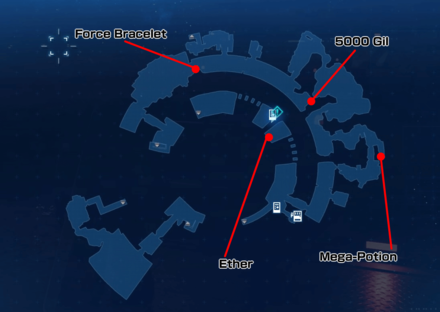
 Outside the room with the Bloodhounds, go left and open the chest containing 5,000 Gil. Outside the room with the Bloodhounds, go left and open the chest containing 5,000 Gil. |
|
| 5 | Go in the door and follow the path. Pull the switch at the end to open the door. |
| 6 | Go through the door and up the stairs inside. Walk across the pipe in the next room. |
| 7 | The pipe will collapse and Tifa and Aerith will fall. Fight the two Zenene. |
 Open the gate behind you for a chest containing a Force Bracelet. Open the gate behind you for a chest containing a Force Bracelet. |
|
 Climb the ladder ahead of you and to the end of the path to reach a chest with a Mega-Potion. Climb the ladder ahead of you and to the end of the path to reach a chest with a Mega-Potion. |
|
| 8 | Go under the lowered gate and out the door. The door will close and lock behind you. |
| 9 | Go down the stairs and to the left. You'll fight three Sentry Launchers. |
 Go right instead and down the stairs for a chest containing an Ether. Go right instead and down the stairs for a chest containing an Ether. |
|
| 10 | Climb the ladder and go to the end of the path. Pull the lever on the left side. Hop across the test pods and call Cloud on the Terminal. |
| 11 | You'll be with Cloud, Barret and Red XIII again. Pull the lever labeled 02. Go off the central platform and to the left. Hop across the pods and go into the gate labeled 02. |
 On the platform with the Ward 2 Gate, you'll find a chest with a Mega-Potion. On the platform with the Ward 2 Gate, you'll find a chest with a Mega-Potion. |
The Drum - 2nd Ward

| Objectives | |
|---|---|
| 1 | Continue ahead. You'll fight two Zenenes. |
| 2 | After the cutscene, go through the door to the right, then to the left at the fork. |
 Go right around the boxes instead to find an Astral Cuff. Go right around the boxes instead to find an Astral Cuff. |
|
| 3 | Go left into the next room toward the M.O.T.H. Unit on the far left side. You'll fight the M.O.T.H. Unit and three Shock-Rays. |
| 4 | After the cutscene, go through the door to the right, then to the left at the fork. |
| 5 | Go left into the next room. After the cutscene, fight three Sledgeworms. |
| 6 | Duck under the gate and follow the path. After the cutscene, go left an up the stairs. |
 Go right and open the chest in the 2nd room to obtain 2 Remedies. Go right and open the chest in the 2nd room to obtain 2 Remedies. |
|
 Before you go up the stairs, check the far right side of the room for a Chain Bangle. Before you go up the stairs, check the far right side of the room for a Chain Bangle. |
|
| Boss 7 |
At the end of the path, the door will close ahead of you and you'll fight a Brain Pod. Partway through the battle, it will divide into 12 Brain Pods. Defeat them all. How to Beat Brain Pod |
| 8 | Go through the now-open door. The door will close and lock behind you. Go up the stairs to the right and follow the path to the gate labeled 04. Go through the door next to the Ward 4 Gate for a rest area. |
| 9 | Go down the stairs to the right. Press Triangle to have Red XIII jump across and pull the lever. Fight two Unknown Entities that come out – only Cloud and Barret will be there to fight. |
| 10 | After the battle, Red XIII will be knocked down to a lower level. Run across the test pods and interact with the Terminal. |
| 11 | You'll be controlling Tifa and Aerith. Just across the test pods and fight two Sledgeworms. |
| 12 | Go down the ladder and you'll fight two Enhanced Shock Troopers. Duck under the test pods on the opposite side and fight five Unknown Entities. You'll reunite with Red XIII. |
| 13 | Go down the stairs on the opposite side. Ask Red XIII to run across and pull the lever. Run across the test pods and pull the lever opposite the central platform. You'll fight two Shock-Rays and two Slug-Rays. |
| 14 | A bridge will expand allowing you to continue to the central platform. Pull the laver labeled 04 and interact with the Terminal. |
| 15 | You'll be controlling Cloud and Barret. Go back to the gate labeled 04. |
The Drum - 4th Ward
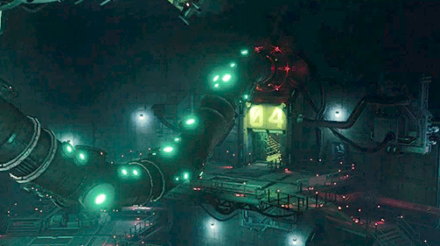
| Objectives | |
|---|---|
| 1 | Go up the stairs and into the pipe, then turn right. Pull the lever at the end. |
 Go to the left in the pipe. At the end, you'll find a chest with 2 Mega-Potions. Go to the left in the pipe. At the end, you'll find a chest with 2 Mega-Potions. |
|
| 2 | Go through the door and down the ladder. Climb up the ladder on the opposite side and go into the pipe. |
| Boss 3 |
After the cutscene, a battle with Swordipede will begin. Partway through the battle, Swordipede will leave the room and go to where Aerith and Tifa are, and you'll finish it off with Aerith and Tifa. At the end of the fight, Red XIII will join you. How to Beat Swordipede |
| 4 | As Aerith and Tifa, go across the bridge and the door to the end of the pipe. Pull the lever to open the door and reunited with Cloud and Barret. |
| 5 | You'll be controlling Cloud with Aerith and Tifa in your party. Go to the end of the pipe ahead and through the door on the right. Interact with the button of the left side of the door at the end to open the elevator. |
| 6 | On the next floor, you'll watch a cutscene. Follow the trail of ooze into the elevator to the roof and select Yes. to head for the roof. |
| 7 | Continue following the trail into the next room and through the 69th Floor - Executive Suite area. |
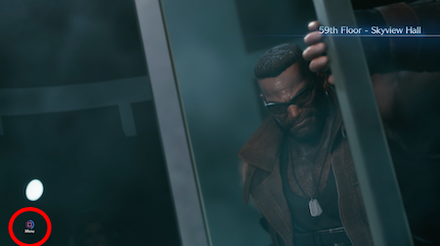
70th Floor - President's Office

| Objectives | |
|---|---|
| 1 | You'll hear a voice calling out for help. Go out the door on the right side. Use the rest area outside the President's Office before going to help him. |
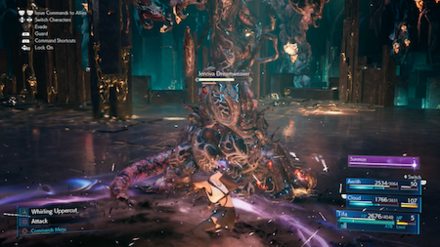
| Boss 2 |
Continue walking outside and a cutscene will begin. At the end of the cutscene, you'll fight Jenova Dreamweaver with Cloud, Aerith and Tifa. How to Beat Jenova Dreamweaver |
| 3 | After the battle, you'll be controlling Cloud. Aerith and Tifa will leave the party. Go around the opposite side of the building. Climb up the ladder here. There's a rest area on the opposite side of the building as well. |
| Boss 4 |
After the cutscene, walk straight ahead. A battle will start with Rufus Shinra. You'll only have Cloud in your party. How to Beat Rufus |
58th Floor - Skyview Atrium
| Objectives | |
|---|---|
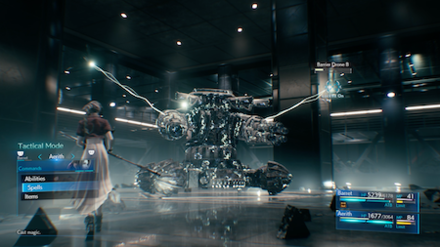
| Boss 1 |
After the cutscene, you'll immediately start a fight with The Arsenal, controlling Barret and Aerith with Red XIII assisting. During the cutscene before the fight, there will be a point where you can hold the Square button to opt to access the menu at the end of the cutscene. This will allow you to arrange Barret and Aerith's equipment. How to Beat The Arsenal |
| 2 | After a final cutscene with Heidegger, the chapter will end. |
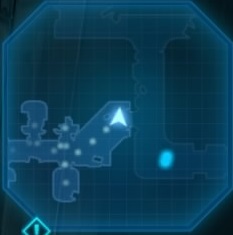
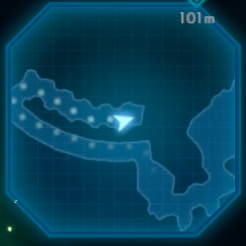
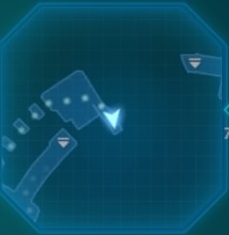
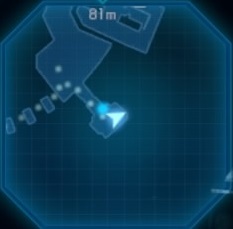
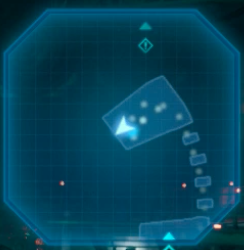
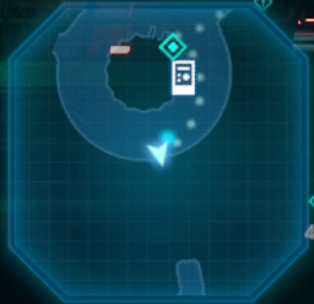
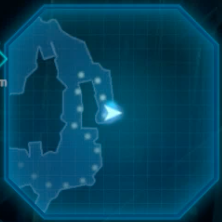
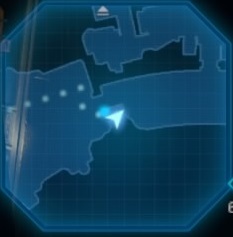
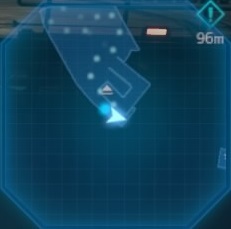
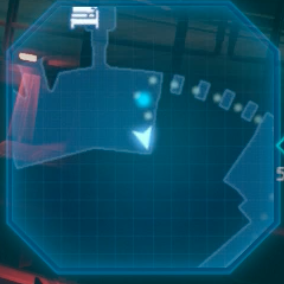
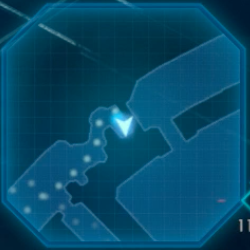
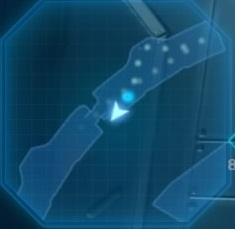
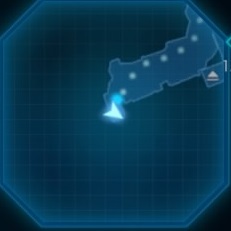
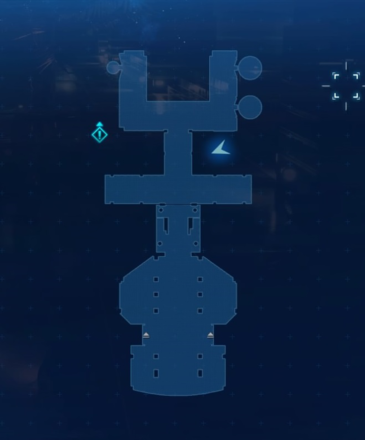
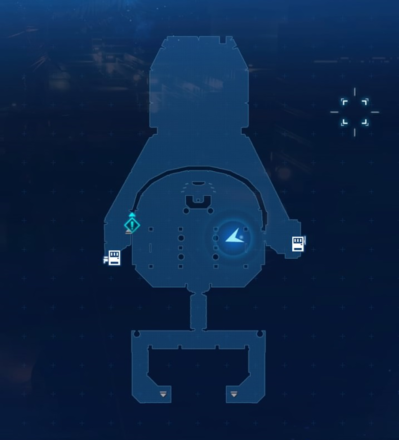
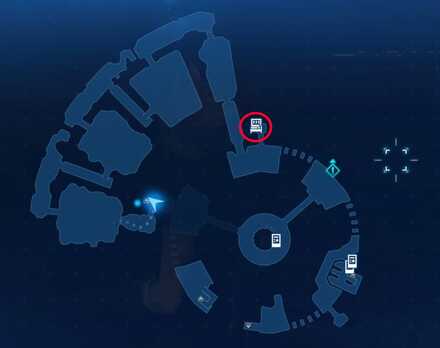
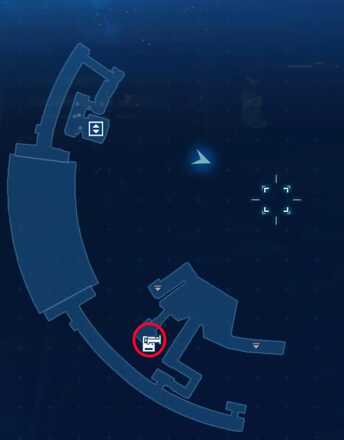
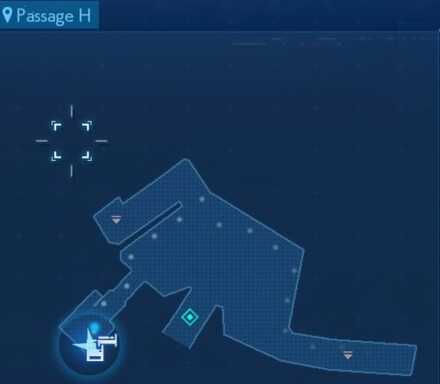
Maps and Obtainable Items
Maps
| List of Maps | |
|---|---|
 |
 |
 |
 |
 |
 |
 |
 |
 |
 |
 |
 |
 |
- |
Obtainable Items
| 65F - Hojo's Laboratory Sublevel | ||
|---|---|---|
| Ether | Enfeeblement Ring | Reinforced Staff |
| Phoenix Down | - | - |
| The Drum - Level 1 | ||
| Poison Materia | - | - |
| The Drum - Level 2 | ||
| Phoenix Down | - | - |
| The Drum - Level 3 | ||
| Twin Stinger | - | - |
| The Drum - Level 4 | ||
| Astral Cuff | Ether | Time Materia |
| Mega-Potion | 3000 Gil | - |
| The Drum - Level 5 | ||
| Remedy x2 | Chain Bangle | - |
| The Drum - Level 6 | ||
| Force Bracelet | Ether | 5000 Gil |
| Mega-Potion | - | - |
| The Drum - Level 7 | ||
| Mega-Potion | - | - |
| The Drum - Level 8 | ||
| Mega-Potion | - | - |
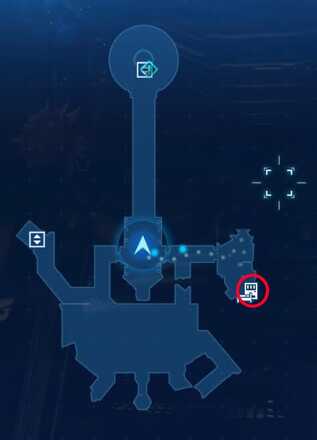
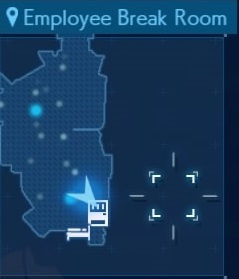
Shops & Vending Machines
Vending Machine - Employee Break Room
 |
 |
| Items | Price |
|---|---|
| Potion | 50 Gil |
| Hi-Potion | 300 Gil |
| Mega-Potion | 700 Gil |
| Ether | 500 Gil |
| Phoenix Down | 300 Gil |
| Antidote | 80 Gil |
| Maiden's Kiss | 150 Gil |
| Echo Mist | 100 Gil |
| Smelling Salts | 80 Gil |
| Remedy | 600 Gil |
| Weapons / Armor | Price |
|---|---|
| Cog Bangle | 4000 Gil |
| Geometric Bracelet | 6400 Gil |
| Supreme Bracer | 6400 Gil |
| Rune Armlet | 6400 Gil |
| Accessories | Price |
|---|---|
| Power Wristguards | 800 Gil |
| Bulletproof Vest | 800 Gil |
| Earrings | 800 Gil |
| Talisman | 800 Gil |
| Supernatural Wristguards | 5000 Gil |
| Survival Vest | 5000 Gil |
| Platinum Earrings | 5000 Gil |
| Timeworn Talisman | 5000 Gil |
| Star Pendant | 1500 Gil |
| Headband | 1500 Gil |
| Revival Earrings | 500 Gil |
| Materia | Price |
|---|---|
| Healing Materia | 600 Gil |
| Cleansing Materia | 1500 Gil |
| Revival Materia | 3000 Gil |
| Fire Materia | 500 Gil |
| Ice Materia | 500 Gil |
| Lightning Materia | 500 Gil |
| Poison Materia | 1500 Gil |
| Barrier Materia | 1500 Gil |
| Binding Materia | 3000 Gil |
| Subversion Materia | 3000 Gil |
| Time Materia | 5000 Gil |
| HP Up Materia | 2000 Gil |
| MP Up Materia | 2000 Gil |
| Deadly Dodge Materia | 600 Gil |
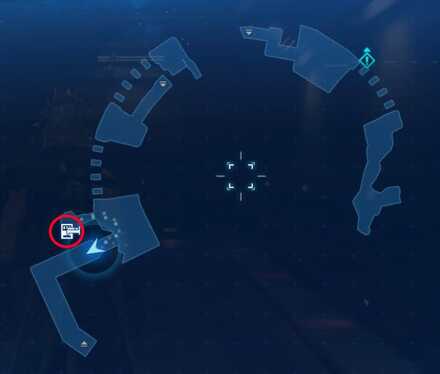
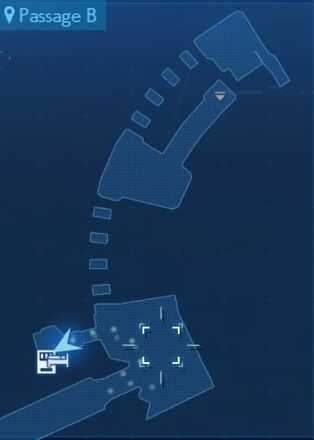
Vending Machine - Passage B
 |
 |
| Items | Price |
|---|---|
| Potion | 50 Gil |
| Hi-Potion | 300 Gil |
| Mega-Potion | 700 Gil |
| Mega-Potion (Stock: 3) | 300 Gil |
| Ether | 500 Gil |
| Ether (Stock: 2) | 100 Gil |
| Phoenix Down | 300 Gil |
| Antidote | 80 Gil |
| Echo Mist | 100 Gil |
| Smelling Salts | 80 Gil |
| Remedy | 600 Gil |
| Weapons / Armor | Price |
|---|---|
| Cog Bangle | 4000 Gil |
| Geometric Bracelet | 6400 Gil |
| Supreme Bracer | 6400 Gil |
| Rune Armlet | 6400 Gil |
| Accessories | Price |
|---|---|
| Power Wristguards | 800 Gil |
| Bulletproof Vest | 800 Gil |
| Earrings | 800 Gil |
| Talisman | 800 Gil |
| Supernatural Wristguards | 5000 Gil |
| Survival Vest | 5000 Gil |
| Platinum Earrings | 5000 Gil |
| Timeworn Talisman | 5000 Gil |
| Star Pendant | 1500 Gil |
| Headband | 1500 Gil |
| Revival Earrings | 500 Gil |
| Materia | Price |
|---|---|
| Healing Materia | 600 Gil |
| Cleansing Materia | 1500 Gil |
| Revival Materia | 3000 Gil |
| Fire Materia | 500 Gil |
| Ice Materia | 500 Gil |
| Lightning Materia | 500 Gil |
| Poison Materia | 1500 Gil |
| Barrier Materia | 1500 Gil |
| Binding Materia | 3000 Gil |
| Subversion Materia | 3000 Gil |
| Time Materia | 5000 Gil |
| HP Up Materia | 2000 Gil |
| MP Up Materia | 2000 Gil |
| Deadly Dodge Materia | 600 Gil |
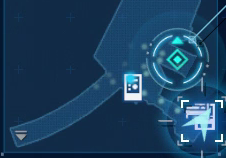
Vending Machine - Passage F
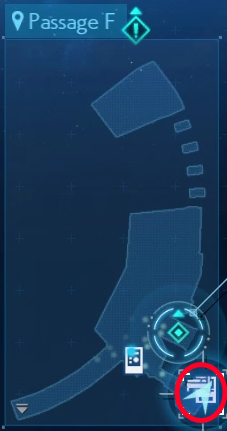 |
 |
| Items | Price |
|---|---|
| Potion | 50 Gil |
| Hi-Potion | 300 Gil |
| Mega-Potion | 700 Gil |
| Mega-Potion (Stock: 3) | 300 Gil |
| Ether | 500 Gil |
| Ether (Stock: 2) | 100 Gil |
| Phoenix Down | 300 Gil |
| Antidote | 80 Gil |
| Echo Mist | 100 Gil |
| Smelling Salts | 80 Gil |
| Remedy | 600 Gil |
| Weapons / Armor | Price |
|---|---|
| Cog Bangle | 4000 Gil |
| Geometric Bracelet | 6400 Gil |
| Supreme Bracer | 6400 Gil |
| Rune Armlet | 6400 Gil |
| Accessories | Price |
|---|---|
| Power Wristguards | 800 Gil |
| Bulletproof Vest | 800 Gil |
| Earrings | 800 Gil |
| Talisman | 800 Gil |
| Supernatural Wristguards | 5000 Gil |
| Survival Vest | 5000 Gil |
| Platinum Earrings | 5000 Gil |
| Timeworn Talisman | 5000 Gil |
| Star Pendant | 1500 Gil |
| Headband | 1500 Gil |
| Revival Earrings | 500 Gil |
| Materia | Price |
|---|---|
| Healing Materia | 600 Gil |
| Cleansing Materia | 1500 Gil |
| Revival Materia | 3000 Gil |
| Fire Materia | 500 Gil |
| Ice Materia | 500 Gil |
| Lightning Materia | 500 Gil |
| Poison Materia | 1500 Gil |
| Barrier Materia | 1500 Gil |
| Binding Materia | 3000 Gil |
| Subversion Materia | 3000 Gil |
| Time Materia | 5000 Gil |
| HP Up Materia | 2000 Gil |
| MP Up Materia | 2000 Gil |
| Deadly Dodge Materia | 600 Gil |
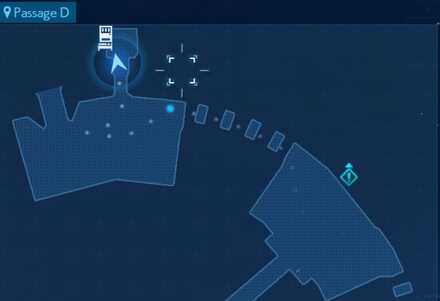
Vending Machine - Passage D
 |
 |
| Items | Price |
|---|---|
| Potion | 50 Gil |
| Hi-Potion | 300 Gil |
| Mega-Potion | 700 Gil |
| Mega-Potion (Stock: 3) | 300 Gil |
| Ether | 500 Gil |
| Ether (Stock: 2) | 100 Gil |
| Phoenix Down | 300 Gil |
| Antidote | 80 Gil |
| Echo Mist | 100 Gil |
| Smelling Salts | 80 Gil |
| Remedy | 600 Gil |
| Weapons / Armor | Price |
|---|---|
| Cog Bangle | 4000 Gil |
| Geometric Bracelet | 6400 Gil |
| Supreme Bracer | 6400 Gil |
| Rune Armlet | 6400 Gil |
| Accessories | Price |
|---|---|
| Power Wristguards | 800 Gil |
| Bulletproof Vest | 800 Gil |
| Earrings | 800 Gil |
| Talisman | 800 Gil |
| Supernatural Wristguards | 5000 Gil |
| Survival Vest | 5000 Gil |
| Platinum Earrings | 5000 Gil |
| Timeworn Talisman | 5000 Gil |
| Star Pendant | 1500 Gil |
| Headband | 1500 Gil |
| Revival Earrings | 500 Gil |
| Materia | Price |
|---|---|
| Healing Materia | 600 Gil |
| Cleansing Materia | 1500 Gil |
| Revival Materia | 3000 Gil |
| Fire Materia | 500 Gil |
| Ice Materia | 500 Gil |
| Lightning Materia | 500 Gil |
| Poison Materia | 1500 Gil |
| Barrier Materia | 1500 Gil |
| Binding Materia | 3000 Gil |
| Subversion Materia | 3000 Gil |
| Time Materia | 5000 Gil |
| HP Up Materia | 2000 Gil |
| MP Up Materia | 2000 Gil |
| Deadly Dodge Materia | 600 Gil |
Vending Machine - Passage H
 |
 |
| Items | Price |
|---|---|
| Potion | 50 Gil |
| Hi-Potion | 300 Gil |
| Mega-Potion | 700 Gil |
| Mega-Potion (Stock: 3) | 300 Gil |
| Ether | 500 Gil |
| Ether (Stock: 2) | 100 Gil |
| Phoenix Down | 300 Gil |
| Antidote | 80 Gil |
| Echo Mist | 100 Gil |
| Smelling Salts | 80 Gil |
| Remedy | 600 Gil |
| Weapons / Armor | Price |
|---|---|
| Cog Bangle | 4000 Gil |
| Geometric Bracelet | 6400 Gil |
| Supreme Bracer | 6400 Gil |
| Rune Armlet | 6400 Gil |
| Accessories | Price |
|---|---|
| Power Wristguards | 800 Gil |
| Bulletproof Vest | 800 Gil |
| Earrings | 800 Gil |
| Talisman | 800 Gil |
| Supernatural Wristguards | 5000 Gil |
| Survival Vest | 5000 Gil |
| Platinum Earrings | 5000 Gil |
| Timeworn Talisman | 5000 Gil |
| Star Pendant | 1500 Gil |
| Headband | 1500 Gil |
| Revival Earrings | 500 Gil |
| Materia | Price |
|---|---|
| Healing Materia | 600 Gil |
| Cleansing Materia | 1500 Gil |
| Revival Materia | 3000 Gil |
| Fire Materia | 500 Gil |
| Ice Materia | 500 Gil |
| Lightning Materia | 500 Gil |
| Poison Materia | 1500 Gil |
| Barrier Materia | 1500 Gil |
| Binding Materia | 3000 Gil |
| Subversion Materia | 3000 Gil |
| Time Materia | 5000 Gil |
| HP Up Materia | 2000 Gil |
| MP Up Materia | 2000 Gil |
| Deadly Dodge Materia | 600 Gil |
Vending Machine (East) - Heliport
 |
 |
| Items | Price |
|---|---|
| Potion | 50 Gil |
| Hi-Potion | 300 Gil |
| Mega-Potion | 700 Gil |
| Mega-Potion (Stock: 3) | 300 Gil |
| Ether | 500 Gil |
| Ether (Stock: 2) | 100 Gil |
| Phoenix Down | 300 Gil |
| Phoenix Down (Stock: 2) | 100 Gil |
| Antidote | 80 Gil |
| Echo Mist | 100 Gil |
| Smelling Salts | 80 Gil |
| Remedy | 600 Gil |
| Weapons / Armor | Price |
|---|---|
| Cog Bangle | 4000 Gil |
| Geometric Bracelet | 6400 Gil |
| Supreme Bracer | 6400 Gil |
| Rune Armlet | 6400 Gil |
| Accessories | Price |
|---|---|
| Power Wristguards | 800 Gil |
| Bulletproof Vest | 800 Gil |
| Earrings | 800 Gil |
| Talisman | 800 Gil |
| Supernatural Wristguards | 5000 Gil |
| Survival Vest | 5000 Gil |
| Platinum Earrings | 5000 Gil |
| Timeworn Talisman | 5000 Gil |
| Star Pendant | 1500 Gil |
| Headband | 1500 Gil |
| Revival Earrings | 500 Gil |
| Materia | Price |
|---|---|
| Healing Materia | 600 Gil |
| Cleansing Materia | 1500 Gil |
| Revival Materia | 3000 Gil |
| Fire Materia | 500 Gil |
| Ice Materia | 500 Gil |
| Lightning Materia | 500 Gil |
| Poison Materia | 1500 Gil |
| Barrier Materia | 1500 Gil |
| Binding Materia | 3000 Gil |
| Subversion Materia | 3000 Gil |
| Time Materia | 5000 Gil |
| HP Up Materia | 2000 Gil |
| MP Up Materia | 2000 Gil |
| Deadly Dodge Materia | 600 Gil |
Vending Machine (West) - Heliport
 |
 |
| Items | Price |
|---|---|
| Potion | 50 Gil |
| Hi-Potion | 300 Gil |
| Mega-Potion | 700 Gil |
| Mega-Potion (Stock: 3) | 300 Gil |
| Ether | 500 Gil |
| Ether (Stock: 2) | 100 Gil |
| Phoenix Down | 300 Gil |
| Phoenix Down (Stock: 2) | 100 Gil |
| Antidote | 80 Gil |
| Echo Mist | 100 Gil |
| Smelling Salts | 80 Gil |
| Remedy | 600 Gil |
| Weapons / Armor | Price |
|---|---|
| Cog Bangle | 4000 Gil |
| Geometric Bracelet | 6400 Gil |
| Supreme Bracer | 6400 Gil |
| Rune Armlet | 6400 Gil |
| Accessories | Price |
|---|---|
| Power Wristguards | 800 Gil |
| Bulletproof Vest | 800 Gil |
| Earrings | 800 Gil |
| Talisman | 800 Gil |
| Supernatural Wristguards | 5000 Gil |
| Survival Vest | 5000 Gil |
| Platinum Earrings | 5000 Gil |
| Timeworn Talisman | 5000 Gil |
| Star Pendant | 1500 Gil |
| Headband | 1500 Gil |
| Revival Earrings | 500 Gil |
| Materia | Price |
|---|---|
| Healing Materia | 600 Gil |
| Cleansing Materia | 1500 Gil |
| Revival Materia | 3000 Gil |
| Fire Materia | 500 Gil |
| Ice Materia | 500 Gil |
| Lightning Materia | 500 Gil |
| Poison Materia | 1500 Gil |
| Barrier Materia | 1500 Gil |
| Binding Materia | 3000 Gil |
| Subversion Materia | 3000 Gil |
| Time Materia | 5000 Gil |
| HP Up Materia | 2000 Gil |
| MP Up Materia | 2000 Gil |
| Deadly Dodge Materia | 600 Gil |
Tips and Strategies
Return to Hojo's Lab after finishing the Story to meet Chadley

After finishing the story, you'll unlock the Chapter Selection feature to jump to any Chapter you wish on any time, as well as the Hard difficulty setting.
After beating the game, use Chapter Selection to visit Chapter 17 again, and you'll find Chadley in Hojo's Lab near the start of the chapter. He'll allow you to use the Shinra Combat Simulator from Chapter 16, in addition to new challenges which are only available to fight on a Hard difficulty setting. Because it's very close to the start of the chapter, using the Combat Simulator here is much more convenient than going through Chapter 16 to meet Chadley on the 64th floor.
One thing to note is that there is no requirement to play the chapter on Hard difficulty to fight the Hard-only challenges. You'll be able to choose the difficulty from the Combat Simulator menu regardless of what difficulty you chose to play the chapter on.
Shinra Combat Simulator Guide and Rewards
Hold Square before The Arsenal
During the cutscene before fighting the Arsenal, for a short time, a Square button's image will appear in the bottom left. Hold the button down to access the menu before the boss fight. Otherwise, you'll be forced to fight The Arsenal without being able to change out Barret and Aerith's equipment and Materia.
Boss Strategy Guide
Jenova Dreamweaver
| Jenova Dreamweaver | |
|---|---|
|
|
| Where it Appears | Weaknesses |
| President Shinra's Office | None |
How to Defeat Jenova Dreamweaver - Key Points
- Avoid Magic attacks and focus on Physical attacks
- Cripple its tentacles and Silence it to disable it
- Use Tifa to knock out the Phase 2 & 3 Tentacles fast
How to Beat Jenova Dreamweaver
Rufus Shinra
| Rufus | |
|---|---|

|
|
| Where he Appears | Weaknesses |
| Outside President Shinra's Office | None |
How to Defeat Rufus - Key Points
- Avoid using offensive Magic against Rufus
- Equip Cloud with the Twin Stinger and use Counterstance to handle Darkstar's Abilities
- Cast Haste to increase your chances to use Counterstance
- In Phase 3, wait for him to Reload and then hit hard
The Arsenal
| The Arsenal | |
|---|---|
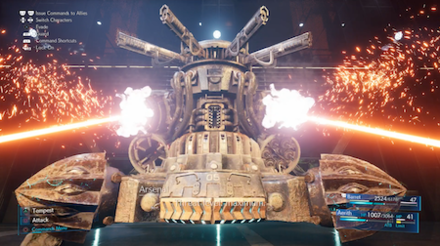
|
|
| Where he Appears | Weaknesses |
| 58th Floor - Skyview Atrium | Fire, Ice, Lightning, Wind |
How to Defeat The Arsenal - Key Points
- Take out its Drones first
- From Phase 2 on, watch its Defense Protocols to see what element it resists
- Hide behind pillars to avoid gunfire
- Focus your attacks on The Arsenal directly after defeating the Drones
Brain Pod (sub-boss)
| Brain Pod | |
|---|---|
|
|
| Where it Appears | Weaknesses |
| The Drum - 2nd Ward | Lightning |
How to Beat Brain Pod - Key Points
- Prepare against Stop and Poison
- Use area attacks like Magnified Thundaga or Deadly Dodge
Swordipede (sub-boss)
| Swordipede | |
|---|---|

|
|
| Where it Appears | Weaknesses |
| The Drum - 4th Ward | None |
How to Beat Swordipede - Key Points
- Focus on using long-ranged attackers on both phases (Barret and Aerith)
- Remove auto-lock during Energy Volley
- Pay attention to the Saw-Toothed Spin's attack pattern
Story Walkthrough Related Links
| Chapter 1 | The Destruction of Mako Reactor 1 |
|---|---|
| Chapter 2 | Fateful Encounters |
| Chapter 3 | Home Sweet Slum |
| Chapter 4 | Mad Dash |
| Chapter 5 | Dogged Pursuit |
| Chapter 6 | Light the Way |
| Chapter 7 | A Trap is Sprung |
| Chapter 8 | Budding Bodyguard |
| Chapter 9 | The Town That Never Sleeps |
| Chapter 10 | Rough Waters |
| Chapter 11 | Haunted |
| Chapter 12 | Fight for Survival |
| Chapter 13 | A Broken World |
| Chapter 14 | In Search of Hope |
| Chapter 15 | The Day Midgar Stood Still |
| Chapter 16 | The Belly of the Beast |
| Chapter 17 | Deliverance from Chaos |
| Chapter 18 | Destiny's Crossroads |
| INTERmission Chapters | |
|---|---|
| Chapter 1 | Wutai's Finest |
| Chapter 2 | Covert Ops |
Author

Chapter 17: Deliverance from Chaos Story Guide & Walkthrough
Please participate in our site
improvement survey
03/2026
improvement survey
03/2026
Would you assist in
improving Game8's site?
improving Game8's site?

×
We are listening to our users' valuable opinions and discussing how to act on them.
The information collected through this survey will be used for the purpose of improving our services. In addition, the information will only be disclosed a part of a statistic in a format that will not allow identification of personal information.
Begin Survey
Not Now
×
Please rate each item regarding Game8.co's Advertisements.
Amount of Ads
Very Dissatisfied
Somewhat Dissatisfied
Fine
Somewhat Satisfied
Highly Satisfied
Placement of Ads
Timing of Ad Display
Ad Loading Speed
Safeness of Ads
Content of Ads
×
Please rate each item regarding Game8.co's Quality of Articles.
Amount of information
Very Dissatisfied
Somewhat Dissatisfied
Fine
Somewhat Satisfied
Highly Satisfied
Frequency of updates
Speed of new information
Accuracy of articles
Understandibility of articles
Readability of sentences
×
Please rate each item regarding Game8.co's Usability of the Site.
Ease of finding information
Very Dissatisfied
Somewhat Dissatisfied
Fine
Somewhat Satisfied
Highly Satisfied
Loading Speed
Use of Color
Font Size
Visibility of Images
Easy to Understand Layout
×
Please rate each item regarding Game8.co's Message Boards, Comments.
Ease of Writing
Very Dissatisfied
Somewhat Dissatisfied
Fine
Somewhat Satisfied
Highly Satisfied
Readability
Ease in Finding Information
Comment Quality
Comment Quantity
Admin Response
×
Please rate each item regarding Game8.co's Site's new design.
Please rate our site's new design
Very Dissatisfied
Somewhat Dissatisfied
Fine
Somewhat Satisfied
Highly Satisfied
Do you think that the website's design change makes the site easier to use?
Has the new design made it easier for you to find information on the site?
Has the new design improved the overall visual appeal of the site?
How would you rate your overall satisfaction with the new design of the site?
×
How likely are you to recommend Game8 to someone you know?
Very Unlikely
0
1
2
3
4
5
6
7
8
9
10
Very Likely
If you have other opinions regarding potential improvement to the website, please share them with us. We would appreciate your honest opinion.
Note: This is a free response section, so you can proceed without entering anything.
Note: Please be sure not to enter any kind of personal information into your response.
Note: Please be sure not to enter any kind of personal information into your response.
×
Thank You
×
Thank you for participating in our survey! Your answers will help us to improve the quality of our website and services.
We hope you continue to make use of Game8.
We hope you continue to make use of Game8.
Close
Rankings
- We could not find the message board you were looking for.
Gaming News


Popular Games

Genshin Impact Walkthrough & Guides Wiki
Honkai: Star Rail Walkthrough & Guides Wiki
Umamusume: Pretty Derby Walkthrough & Guides Wiki
Pokemon Pokopia Walkthrough & Guides Wiki
Resident Evil Requiem (RE9) Walkthrough & Guides Wiki
Monster Hunter Wilds Walkthrough & Guides Wiki
Wuthering Waves Walkthrough & Guides Wiki
Arknights: Endfield Walkthrough & Guides Wiki
Pokemon FireRed and LeafGreen (FRLG) Walkthrough & Guides Wiki
Pokemon TCG Pocket (PTCGP) Strategies & Guides Wiki


Recommended Games
Diablo 4: Vessel of Hatred Walkthrough & Guides Wiki
Fire Emblem Heroes (FEH) Walkthrough & Guides Wiki
Yu-Gi-Oh! Master Duel Walkthrough & Guides Wiki
Super Smash Bros. Ultimate Walkthrough & Guides Wiki
Pokemon Brilliant Diamond and Shining Pearl (BDSP) Walkthrough & Guides Wiki
Elden Ring Shadow of the Erdtree Walkthrough & Guides Wiki
Monster Hunter World Walkthrough & Guides Wiki
The Legend of Zelda: Tears of the Kingdom Walkthrough & Guides Wiki
Persona 3 Reload Walkthrough & Guides Wiki
Cyberpunk 2077: Ultimate Edition Walkthrough & Guides Wiki


All rights reserved
© SQUARE ENIX CO., LTD. All Rights Reserved.
CHARACTER DESIGN:TETSUYA NOMURA/ROBERTO FERRARI
The copyrights of videos of games used in our content and other intellectual property rights belong to the provider of the game.
The contents we provide on this site were created personally by members of the Game8 editorial department.
We refuse the right to reuse or repost content taken without our permission such as data or images to other sites.
The chest that is supposed to be the force bracelet is a potion for me. I never got a force bracelet. Still don't have one and I beat the game already.