This survey will take about 1 minute.
Your answers will help us to improve our website.
FF7 Remake
How to Beat Swordipede | Boss Guide

This is a guide to beating the Boss Swordipede in the game Final Fantasy 7 Remake (FF7R). This article explains Swordipede's attack patterns, weaknesses, and tips and strategies for defeating them.
List of Contents
Swordipede Basic Information
Stats and Weaknesses
| Swordipede | ||
|---|---|---|

|
Species | Movement | Type |
| Artificial Life | Flying | Boss |
Description
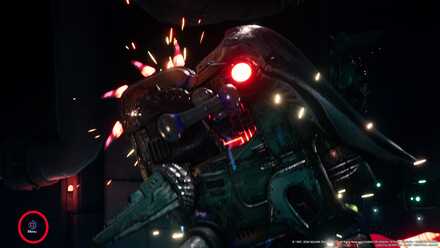
A bionic species created by Shinra's R&D Division. These specimens are difficult to control, as their behavior regulation mechanisms have not yet been perfected. They circle in the sky searching for quarry, then swoop down to attack.
Assess (Tips)
Tactical data not available.
Swordipede Stats
| Easy | Normal | Hard | |
|---|---|---|---|
| HP | 10771 | 19584 | 28296 |
| Attack | 297 | 508 | |
| Magic Attack | 223 | 373 | |
| Defense | 132 | 194 | |
| Magic Defense | 132 | 194 | |
Swordipede Weaknesses & Resistances
| Weakness / Status Ailments | - | |
|---|---|---|
| Lesser Resistances | - | |
| Greater Resistances | - | |
| Immunities | Stop | |
| Absorbed Elements | - | |
Stagger Rates
| ×1 | ×1 | ×1 | ×1 |
| - | |||
| ×1 | ×1 | ×1 | - |
Stagger Length
| Stagger Length | 10 seconds |
|---|
Rewards
| Easy/Normal | Hard | |
|---|---|---|
| Gil | 1250 | 3280 |
| AP | 12 | 36 |
| Exp | 900 | 4752 |
| Items Dropped | Force Bracelet (100%) | |
| Rare Items Dropped | - | |
| Steal | - | |
Learnable Enemy Skills
No Enemy Skills can be learned from Swordipede.
Swordipede Boss Battle Guide
Swordipede Abilities and Attack Patterns
| Name | Element | Blockable? | Knockdown? | Status |
|---|---|---|---|---|
|
|
- | Yes | No | - |
| Deals damage with the sawblades on its bottom side. | ||||
|
|
- | Yes | No | - |
| Starts the saw blade in its mouth up and goes after a target. | ||||
|
|
|
Yes | No | - |
| Envelops itself in electricity before dashing wildly toward your party members. | ||||
|
|
- | Yes | No | - |
| After spinning around wildly, comes to a slow and drops balls of energy around the arena. | ||||
|
|
- | Yes | Yes | - |
| Turns its body into a giant saw and spins around the arena. | ||||
*Status Effects and Ailments Guide
Best Characters for This Boss
Available Characters
 Cloud Cloud
|
 Barret Barret
|
 Tifa Tifa
|
 Aerith Aerith
|
 Yuffie Yuffie
|
 Sonon Sonon
|
Best Characters and Equipment
During the first phase, you should use Barret as your main attacker and Cloud as your support since there will come to a point where Swordipede will fly higher. After its HP drops to about half of the bar during the first phase, it will get enraged and will move on to the second phase where the others will finish it off.
Before the second phase, you will have an opportunity to open the menu and change your equipment. Use Aerith as your main attacker and Tifa as your support as Aerith's long range attacks will be much effective in this battle.
Swordipede Attack Phases
Phase 1
| Phase Point Summary | |
|---|---|
| 1 | Cloud and Barret will fight it first. It will occasionally use Saw Blade and Live Wire while floating around. |
| 2 | It will fly higher and use Energy Volley while moving around before going down again. |
Phase 2
| Phase Point Summary | |
|---|---|
| 1 | Tifa, Aerith, and Red XIII will fight it this time. It will now use Saw-Toothed Spin in addition to Live Wire and Energy Volley |
| 2 | It will fly higher like on the previous battle before using Energy Volley and going back down again. |
Tips & Strategies for Beating Swordipede
| ★ Strategy Checklist ★ (Click to jump) |
||
|---|---|---|
|
|
Use Barret in the First Phase

Cloud will have a hard time damaging Swordipede in the first phase as you will need to hit its head to deal a noticeable damage, otherwise it will just be "blocked". Attacking it head on will just make it easier for Swordipede to damage you with its circular saw so using Barret would be your best bet.
Remove Auto-Lock During Energy Volley

Locking-in to Swordipede's head will make it easier to damage it but it will also make it more difficult to dodge the orbs from Energy Volley. Remove your auto-lock by pressing R3 again and adjust your camera angle so that you will see where each of the orbs will hit.
Open the Menu Before the Second Phase
During the cutscene after the first phase, you will be given an opportunity to open the menu and prepare for the next phase by holding the square button. Take advantage of this to optimize Tifa and Aerith's equipments. You can also transfer equipments and materias from Cloud and Barret!
Use Aerith in the Second Phase

Same as Barret during the first phase, Aerith will make it much easier to deal damage with her long-ranged attacks during the second phase. Increase her damage output by equipping her Magic Up materia and your highest leveled elemental materia. Lightning materia is recommended as it is easier to hit and will strike through the pillar in the middle. To make it more devastating, use Arcane Ward on Aerith before casting your Thundaga!
Watch Out for the Saw-Toothed Spin
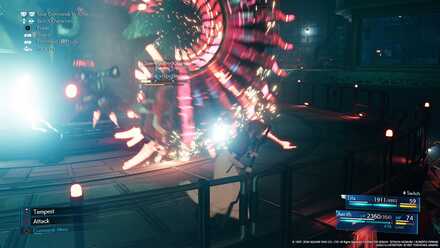
Saw-Toothed Spin is a very quick attack so you cannot run away from it unlike Live Wire and Energy Volley. Instead, you should watch where it spins. Each spin will either be through the inner or outer area of the circle. It will move really quick so you need to focus on where it spins. After spinning, Swordipede will stop for a while so unleash your most powerful attacks before it moves again.
Boss Battle Related Articles
Major Story Bosses
| All Major Story Bosses | |
|---|---|
| Chapter 1 | Scorpion Sentinel |
| Chapter 4 | Roche |
| Chapter 5 | Crab Warden |
| Chapter 7 | Airbuster |
| Chapter 8 | Reno Rude |
| Chapter 9 | Hell House |
| Chapter 10 | Abzu |
| Chapter 11 | Ghoul Eligor |
| Chapter 13 | Failed Experiment |
| Chapter 14 | Abzu (2nd Fight) |
| Chapter 15 | The Valkyrie |
| Chapter 16 | Specimen H0512 |
| Chapter 17 | Jenova Dreamweaver Rufus The Arsenal |
| Chapter 18 | Motor Ball Whisper Harbinger Sephiroth |
VR Mission Bosses
| All VR Mission Bosses | |
|---|---|
| Chapter 8 | Shiva |
| Chapter 9 | Fat Chocobo |
| Chapter 13 | Leviathan |
| Secret Boss | Bahamut |
| Superboss | Pride and Joy Prototype |
Story Sub-Bosses
| All Story Sub-Bosses | |
|---|---|
| Chapter 2 | The Huntsman |
| Chapter 3 | The Hoodlums |
| Chapter 4 | Enigmatic Spectre |
| Chapter 12 | Enigmatic Spectre |
| Chapter 17 | M.O.T.H. Unit Brain Pod Swordipede |
Monster Variants & Optional Sub-Bosses
| All Monster Variants & Optional Sub-Bosses | |
|---|---|
| Chapter 3 | Doomrat Cerulean Drake Wrath Hound |
| Chapter 8 | Hedgehog Pie King Mark II Monodrive Venomantis Chromogger |
| Chapter 14 | Rust Drake Tonberry Trypapolis Type-0 Behemoth |
| Chapter 17 | Malboro |
Comment
1  Anonymous almost 6 years
I initially thought its name is swordipie. 9 yr old army hyperventilates.
Author

How to Beat Swordipede | Boss Guide
Please participate in our site
improvement survey
03/2026
improvement survey
03/2026
Would you assist in
improving Game8's site?
improving Game8's site?

×
We are listening to our users' valuable opinions and discussing how to act on them.
The information collected through this survey will be used for the purpose of improving our services. In addition, the information will only be disclosed a part of a statistic in a format that will not allow identification of personal information.
Begin Survey
Not Now
×
Please rate each item regarding Game8.co's Advertisements.
Amount of Ads
Very Dissatisfied
Somewhat Dissatisfied
Fine
Somewhat Satisfied
Highly Satisfied
Placement of Ads
Timing of Ad Display
Ad Loading Speed
Safeness of Ads
Content of Ads
×
Please rate each item regarding Game8.co's Quality of Articles.
Amount of information
Very Dissatisfied
Somewhat Dissatisfied
Fine
Somewhat Satisfied
Highly Satisfied
Frequency of updates
Speed of new information
Accuracy of articles
Understandibility of articles
Readability of sentences
×
Please rate each item regarding Game8.co's Usability of the Site.
Ease of finding information
Very Dissatisfied
Somewhat Dissatisfied
Fine
Somewhat Satisfied
Highly Satisfied
Loading Speed
Use of Color
Font Size
Visibility of Images
Easy to Understand Layout
×
Please rate each item regarding Game8.co's Message Boards, Comments.
Ease of Writing
Very Dissatisfied
Somewhat Dissatisfied
Fine
Somewhat Satisfied
Highly Satisfied
Readability
Ease in Finding Information
Comment Quality
Comment Quantity
Admin Response
×
Please rate each item regarding Game8.co's Site's new design.
Please rate our site's new design
Very Dissatisfied
Somewhat Dissatisfied
Fine
Somewhat Satisfied
Highly Satisfied
Do you think that the website's design change makes the site easier to use?
Has the new design made it easier for you to find information on the site?
Has the new design improved the overall visual appeal of the site?
How would you rate your overall satisfaction with the new design of the site?
×
How likely are you to recommend Game8 to someone you know?
Very Unlikely
0
1
2
3
4
5
6
7
8
9
10
Very Likely
If you have other opinions regarding potential improvement to the website, please share them with us. We would appreciate your honest opinion.
Note: This is a free response section, so you can proceed without entering anything.
Note: Please be sure not to enter any kind of personal information into your response.
Note: Please be sure not to enter any kind of personal information into your response.
×
Thank You
×
Thank you for participating in our survey! Your answers will help us to improve the quality of our website and services.
We hope you continue to make use of Game8.
We hope you continue to make use of Game8.
Close
Rankings
- We could not find the message board you were looking for.
Gaming News


![Everwind Review [Early Access] | The Shaky First Step to A Very Long Journey](https://img.game8.co/4440226/ab079b1153298a042633dd1ef51e878e.png/thumb)

![Monster Hunter Stories 3 Review [First Impressions] | Simply Rejuvenating](https://img.game8.co/4438641/2a31b7702bd70e78ec8efd24661dacda.jpeg/thumb)
Popular Games

Genshin Impact Walkthrough & Guides Wiki
Honkai: Star Rail Walkthrough & Guides Wiki
Umamusume: Pretty Derby Walkthrough & Guides Wiki
Pokemon Pokopia Walkthrough & Guides Wiki
Resident Evil Requiem (RE9) Walkthrough & Guides Wiki
Monster Hunter Wilds Walkthrough & Guides Wiki
Wuthering Waves Walkthrough & Guides Wiki
Arknights: Endfield Walkthrough & Guides Wiki
Pokemon FireRed and LeafGreen (FRLG) Walkthrough & Guides Wiki
Pokemon TCG Pocket (PTCGP) Strategies & Guides Wiki


Recommended Games
Diablo 4: Vessel of Hatred Walkthrough & Guides Wiki
Fire Emblem Heroes (FEH) Walkthrough & Guides Wiki
Yu-Gi-Oh! Master Duel Walkthrough & Guides Wiki
Super Smash Bros. Ultimate Walkthrough & Guides Wiki
Pokemon Brilliant Diamond and Shining Pearl (BDSP) Walkthrough & Guides Wiki
Elden Ring Shadow of the Erdtree Walkthrough & Guides Wiki
Monster Hunter World Walkthrough & Guides Wiki
The Legend of Zelda: Tears of the Kingdom Walkthrough & Guides Wiki
Persona 3 Reload Walkthrough & Guides Wiki
Cyberpunk 2077: Ultimate Edition Walkthrough & Guides Wiki


All rights reserved
© SQUARE ENIX CO., LTD. All Rights Reserved.
CHARACTER DESIGN:TETSUYA NOMURA/ROBERTO FERRARI
The copyrights of videos of games used in our content and other intellectual property rights belong to the provider of the game.
The contents we provide on this site were created personally by members of the Game8 editorial department.
We refuse the right to reuse or repost content taken without our permission such as data or images to other sites.
Fight is a joke with elemental Materia and lightning in an amour slot. Hwsls you as you fight