This survey will take about 1 minute.
Your answers will help us to improve our website.
FF7 Remake
Chapter 8: Budding Bodyguard Story Guide & Walkthrough
This is a guide and walkthrough to Chapter 8: Budding Bodyguard, a story chapter in the game Final Fantasy 7 Remake. Read on to learn locations of items, rewards for completing this chapter, as well as useful tips and strategies for getting through this part of the story.
| Previous Chapter | A Trap is Sprung |
|---|---|
| Current Chapter | Budding Bodyguard |
| Next Chapter | The Town That Never Sleeps |
List of Contents
- List of Main Scenario Objectives
- Chapter 8: Budding Bodyguard Walkthrough
- Sector 5 Slums - Church
- The Church Attic
- Outside the Church: Rooftops
- Outside the Church: On the Ground
- Sector 5 Slums - Station
- Sector 5 Slums - Scrapyard
- Sector 5 Slums - Center District
- Sector 5 - Undeveloped Area
- Sector 5 Slums - Center District (Part 2)
- Maps and Obtainable Items
- Maps
- Obtainable Items
- Shops & Vending Machines
- Tips and Strategies
- Boss Strategy Guide
- Reno
- Rude
- Optional: Shiva
- Story Walkthrough Related Links
List of Main Scenario Objectives

| No. | Title | Description |
|---|---|---|
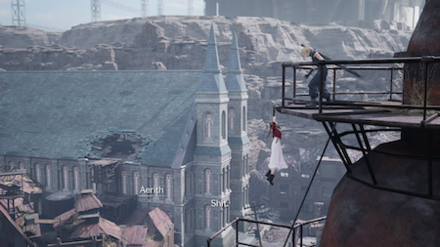
| 1 | Second Chance Meeting | Cloud becomes Aerith's bodyguard and fends off the Turk who attacks them. As he's about to finish him off, the ghostly beings from Sector 8 appear before them. |
| 2 | Escape from the Church | The Turk withdraws from the church, and the strange beings disappear. Puzzled but determined to keep moving, Cloud and Aerith make their way outside through the attic. |
| 2-1 | Rescue Aerith | Cloud and Aerith find each other, and together, they head for the attic. |
| 2-2 | To the Attic | They reach the attic and head toward the exit to escape the Turk. |
| 3 | Head for the Station | Cloud and Aerith arrive at the Sector 5 station. The trains aren't moving due to the destruction of the reactor. |
| 4 | The Station | Cloud and Aerith spot another Turk. To avoid him, they take a detour and make for the Sector 5 slums. |
| 5 | Through the Backstreets | The two arrive in the Sector 5 slums to see residents gathered by the monitor located in the middle of the town. |
| 5-1 | Avoid the Turk | Cloud and Aerith make their way through the scrapyard, dealing with any fiends that appear. |
| 5-2 | Around the Gate | Cloud opens the gate from the other side, allowing Aerith to follow him through the backstreets. |
| 6 | Sector 5 Slums Monitor | Cloud watches the news segment and learns that the members of Avalanche are safe. Relieved, he and Aerith continue through the slums. |
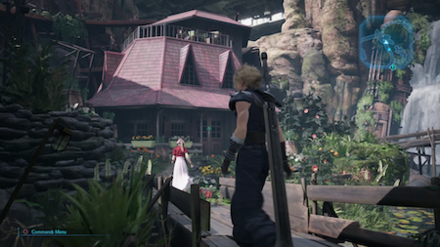
| 7 | To Aerith's House | Cloud takes Aerith home. Once there, Aerith insists on going with him to Sector 7. |
| 8 | Leaf House Delivery | Oates finds Aerith and asks for her help. Cloud and Aerith follow him to the secret hideout. |
| 9 | Danger in the Hideout | Cloud defeats the monsters and rescues the children, who stare at him in awe. They all return to the secret hideout together. |
| 10 | Escort the Children | A man in a black robe wanders into the hideout. As he grabs Cloud's arm, Cloud is plagued with visions and mutters that Sephiroth is alive–a statement that Aerith barely acknowledges. |
| 11 | Requests for the Mercenary | Rude ambushes the two on the way to Aerith's house, but Cloud drives him away. Upon returning, Cloud speaks with Aerith's mother, Elmyra, who does not take too kindly to him. Cloud has been asked to leave town after nightfall without Aerith. |
| 12 | The Price of Strength | Aerith ambushes Cloud at the edge of town, intimating she wants to spend more time together. As she walks on ahead toward the Sector 7 slums, Cloud feels his heart skip a beat. |
Chapter 8: Budding Bodyguard Walkthrough
Sector 5 Slums - Church
| Objectives | |
|---|---|
| 1 | You'll start a fight with three Elite Security Officers. Reno won't start fighting you immediately. |
| 2 | An Elite Security Officer and two Security Officers will come in through the door. |
| Boss 3 |
After you've beaten all the Security Officers, the fight with Reno will begin. How to Beat Reno |
| 4 | A cutscene will begin after the fight. |
| 5 | Follow Aerith up the stairs. |
 If you look through the door to the right, you'll see a Chakra Materia – however, you won't be able to obtain this until later in this chapter. If you look through the door to the right, you'll see a Chakra Materia – however, you won't be able to obtain this until later in this chapter. |
|
| 6 | Follow Aerith along the path on the right side. |
 Go down the stairs and open the chest to obtain a Talisman. Go down the stairs and open the chest to obtain a Talisman. |
|
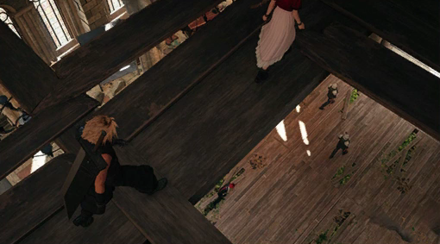
| 7 | Climb up the stairs to head for the hole in the attic. |
| 8 | Walk slowly across the narrow plank ahead of you. |
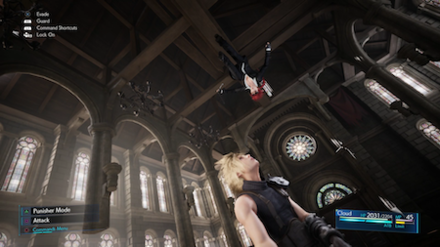
| 9 | Turn the corner to the left and run onto the arrow panel to climb onto the ceiling. |
| 10 | Climb across the ceiling toward the chandelier in the middle of the room. Tilt the camera angle up to check which parts of the ceiling can be grabbed onto. |
| 11 | Interact with the chandelier in the middle of the room. The Security Officers below will start shooting at you. Don't worry about the bullets – they deal minimal damage. |
| 12 | Climb to the other arrow panel across the room, where Aerith is waiting. |
| 13 | Press the indicated button to lift the dresser blocking the path. |
| 14 | Climb up the ladder to the attic. |
The Church Attic
| Objectives | |
|---|---|
| 1 | Continue ahead to walk across the narrow planks. |
 At the start, to your left, you'll find a chest with Smelling Salts. At the start, to your left, you'll find a chest with Smelling Salts. |
|
| 2 | Walk through the hole in the side of the Church. |
Outside the Church: Rooftops
| Objectives | |
|---|---|
| 1 | Climb down the ladder. Hop across the platform and onto the adjacent roof. |
| 2 | Continue along the bridges and climb the ladder on the other roof. |
 Before the roof with the large pipe, turn left and open a chest at the end of the path for a Moogle Medal. Before the roof with the large pipe, turn left and open a chest at the end of the path for a Moogle Medal. |
|
| 3 | Slide along the pipe and across the bridge. |
| 4 | Walk into the building and on the arrow panel inside to climb the ladder. |
| 5 | Walk along the path then onto the arrow panel to go down the ladder. Then, climb down the ladder ahead. |
| 6 | Walk onto the next arrow panel to jump onto the adjacent building. Go back to where Aerith is waiting, and she'll jump over too. Climb up the ladder ahead. |
| 7 | Go to the left and climb up the ladder at the end. |
 Go to the right instead and open the chest at the end of the path to get an Ether. Go to the right instead and open the chest at the end of the path to get an Ether. |
|
| 8 | Press the button to pull Aerith up. A cutscene will begin. |
| 9 | After the cutscene, walk down both flights of stairs. Walk across the pipe after Aerith, and go down the slide at the end. |
| 10 | Walk up the ramp and step on the arrow tile at the end to jump down. Aerith will join your party. |
Outside the Church: On the Ground
| Objectives | |
|---|---|
| 1 | Go straight ahead and you'll fight a Hedgehog Pie. |
| 2 | Run through the door into the shed. You'll fight a Hedgehog Pie and two Wererats inside. |
| 3 | Go out the door on the opposite side and continue down the path. |
| 4 | Step on the arrow tile in front of the broken chain fence to go through. |
Sector 5 Slums - Station

| Objectives | |
|---|---|
| 1 | Go straight forward and down the short stairs, then turn right around the corner. |
 Turn back from your original position to find a chest with 500 gil. Turn back from your original position to find a chest with 500 gil. |
|
| 2 | Continue ahead and a cutscene will begin. |
 After the cutscene, go all the away back to the church and from the area after your fight with Reno, enter the room to your right and pick up the Chakra Materia. After the cutscene, go all the away back to the church and from the area after your fight with Reno, enter the room to your right and pick up the Chakra Materia. |
|
| 3 | Head straight on the backstreet. |
Sector 5 Slums - Scrapyard
| Objectives | |
|---|---|
| 1 | Continue straight ahead. You'll encounter three Wererats. |
| 2 | Ahead, you'll fight three Gorgers. Turn right at the fork. |
| 3 | Pull the lever Aerith stops next to. The door won't open. |
| 4 | Follow Aerith over to the Shinra crate and hold the button to push it. Go through and continue on the path. |
| 5 | When you go near the ladder, you'll be ambushed by three Hedgehog Pies. |
| 6 | Climb up the ladder on the right side and continue up the stairs. |
 Before continuing to the stairs, go right up the ladder and climb along the monkey bars to get a Caliginous Bracelet on the other side. Before continuing to the stairs, go right up the ladder and climb along the monkey bars to get a Caliginous Bracelet on the other side. |
|
| 7 | Go through the tunnel and continue heading up the series of ramps. |
| 8 | Go down the path to your left. At the bottom, you'll encounter two Gorgers and a Hedgehog Pie. |
 Immediately to your left after the fight, you'll be able to climb along some monkey bars to find a chest with a Remedy. Immediately to your left after the fight, you'll be able to climb along some monkey bars to find a chest with a Remedy. |
|
| 9 | Go right onto the lower path. The door up the stairs will be locked. Instead, go into the shed and press the button to open the chain fence ahead. |
| 10 | You'll fight a Smogger in the next area. |
| 11 | Climb up the ladder in the middle of the right wall (the wall closer to the gate) and push the container all the way forward. |
| 12 | Climb up the two ladders at the back-left, then step on the arrow pad to climb the monkey bars. If you moved the container in the last step, you'll be able to get all the way across. |
| 13 | Climb down the ladder ahead, then press the switch to your left to let Aerith through. |
| 14 | At the fork, take the path to the right through the tunnel. |
| 15 | Continue straight ahead until you hit another fork, then turn left. |
Sector 5 Slums - Center District
| Objectives | |
|---|---|
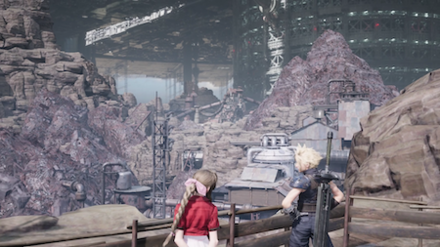
| 1 | In the town area, take a left at the fork and head toward the crowd. A cutscene will begin. |
| 2 | Turn right and follow Aerith down the path. You won't be able to visit other areas right now. You'll pass through a few conversation cutscenes, including one with a kid named Oates. |
| 3 | Continue following Aerith on the path to her house. Head inside and a cutscene will start. |
| 4 | Go up the stairs to the rooftop. After you come back downstairs, Aerith will return. |
| 5 | Outside the house, follow Aerith along the path. |
| 6 | Press the indicated button next to a patch of flowers to pick them. Do this for three patches of flowers. The flowers you pick will determine the resulting floral arrangement outside the Leaf House. What Flowers Should You Choose? |
| 7 | Continue back on the path to the Leaf House. When you arrive, Aerith will leave the party. |
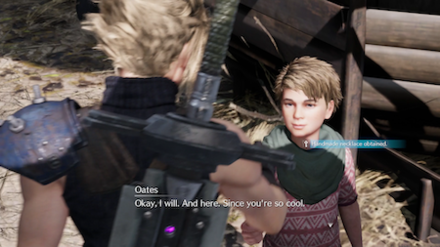
| 8 | Go back to where Aerith was talking with the kid named Oates earlier in step 2 and talk to him. Go outside and a bit to the left of the Leaf House. A cutscene will start with Aerith and Oates. |
  |
|
 Inside the Leaf House, you can find a chest with an Ether. Inside the Leaf House, you can find a chest with an Ether. |
|
 At the far end of the area with the Leaf House, you can find a chest with an Echo Mist. At the far end of the area with the Leaf House, you can find a chest with an Echo Mist. |
|
 Between the two paths in the town, you can find a chest with 200 Gil. Between the two paths in the town, you can find a chest with 200 Gil. |
|
| 9 | Follow Oates down the path into the kids' hideout. |
 Open the chest in the kids' hideout to get a Moogle Medal. Open the chest in the kids' hideout to get a Moogle Medal. |
Sector 5 - Undeveloped Area

| 1 | Duck through the hole and continue down the path to fight three Hedgehog Pies. |
|---|---|
| 2 | Climb down the ladder. You'll fight four Wererats and a Hedgehog Pie. |
 Go up the slope on the right to find a chest with a Mega-Potion. Go up the slope on the right to find a chest with a Mega-Potion. |
|
| 3 | Step on the arrow pad ahead and to the left to squeeze through the boxes. On the other side, you'll fight four Wererats. Ahead you'll fight ten more Wererats and two Hedgehog Pies. |
| 4 | Climb down the ladder ahead and continue down the path on the left. You'll fight two Hedgehog Pies and a Smogger. |
| 5 | Continuing ahead, you'll fight four more Hedgehog Pies and another Smogger. |
| 6 | Continue ahead on the path. A cutscene will begin. |
| 7 | Head back on the path you came on. You'll fight another Smogger, followed by three Hedgehog Pies. |
| 8 | Continue ahead on the path and climb the ladder. A short cutscene will occur. Return to the kids' hideout. You'll receive a Handmade Necklace. After the cutscene, talk to Oates. He'll give you optional Odd Jobs to complete. Unlike in Chapter 3, there's no requirement to finish any Odd Jobs to continue the story. Chapter 8 Side Quest Guides |
Sector 5 Slums - Center District (Part 2)
| Objectives | |
|---|---|
| 1 | Go back to the Leaf House. Outside and to the left of the building, a cutscene will start with the Housemother, talking about Rude. |
| Boss 2 |
Head back to Aerith's house. On your way home, you'll encounter Rude and a boss fight will begin. You'll get a Mega-Potion for defeating him. How to Beat Rude |
| 3 | Continue ahead on the path. A cutscene will begin. |
| 4 | After defeating Rude, continue back to Aerith's house. Follow her into the flower fields. |
 At the far end of the flower patch, you'll find an MP Up Materia. At the far end of the flower patch, you'll find an MP Up Materia. |
|
| 5 | Go into Aerith's house. A cutscene will begin. At this point, you won't be able to complete any of the Odd Jobs from this chapter again. |
| 6 | That night, leave your room and go downstairs. If you knock into something, Aerith will wake up and make you go back to your room. After talking to Elmyra, leave Aerith's house. |
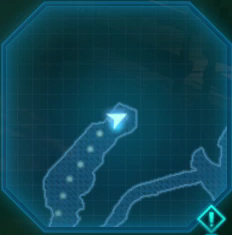
| 7 | Take the path back to the Center District. Follow the path indicated on the Mini-map. You'll encounter Aerith and the new chapter will begin. |
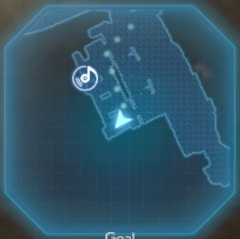
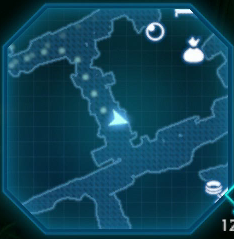
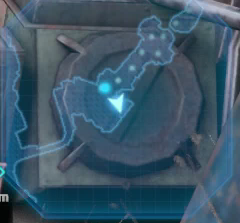
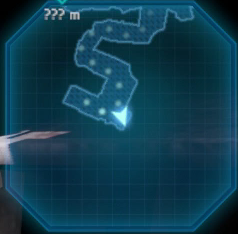
Maps and Obtainable Items
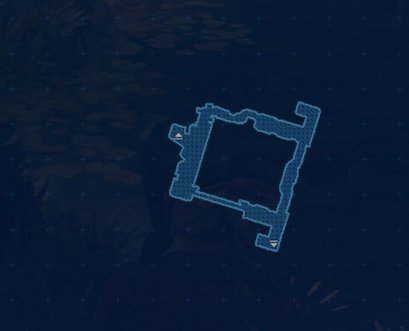
Maps
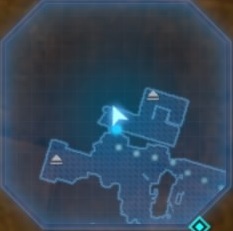
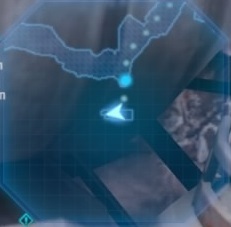
Sector 5 Slums
| Other Maps | |
|---|---|
 |
 |
 |
 |
Obtainable Items
| Sector 5 Slums - Church | ||
|---|---|---|
| Talisman | - | - |
| The Church Attic | ||
| Smelling Salts x1 | - | - |
| Outside the Church: Rooftops | ||
| Moogle Medal x1 | Ether x1 | - |
| Sector 5 Slums - Station | ||
| Chakra Materia | - | - |
| Sector 5 Slums - Scrapyard | ||
| Caliginous Bracelet | Remedy x1 | - |
| Sector 5 Slums - Center District | ||
| Celeris x1 | Tango of Tears | Ether x1 |
| Echo Mist x1 | MP Up Materia | - |
| Kids' Hideout | ||
| Moogle Medal x1 | Mega Potion x1 | - |
Shops & Vending Machines
Vending Machine - Sector 5 Undercity Station
| Items | Price |
|---|---|
| 21. Cait Sith's Theme (Stock: 1) | 50 Gil |
| Potion | 50 Gil |
| Hi-Potion | 300 Gil |
| Ether | 500 Gil |
| Phoenix Down | 300 Gil |
| Antidote | 80 Gil |
| Echo Mist | 100 Gil |
| Smelling Salts | 80 Gil |
| Weapons / Armor | Price |
|---|---|
| Iron Bangle | 1000 Gil |
| Star Bracelet | 1600 Gil |
| Leather Bracer | 1600 Gil |
| Mesmeric Armlet | 1600 Gil |
| Accessories | Price |
|---|---|
| Power Wristguards | 800 Gil |
| Bulletproof Vest | 800 Gil |
| Earrings | 800 Gil |
| Talisman | 800 Gil |
| Materia | Price |
|---|---|
| Healing Materia | 600 Gil |
| Cleansing Materia | 1500 Gil |
| Fire Materia | 500 Gil |
| Ice Materia | 500 Gil |
| Lightning Materia | 500 Gil |
| Poison Materia | 1500 Gil |
| Barrier Materia | 1500 Gil |
| HP Up Materia | 2000 Gil |
| MP Up Materia | 2000 Gil |
| Deadly Dodge Materia | 600 Gil |
Weapons Store - Center District
| Weapons / Armor | Price |
|---|---|
| Leather Bracer | 1600 Gil |
| Mesmeric Armlet | 1600 Gil |
| Titanium Bangle | 2000 Gil |
| Caliginous Bracelet | 3200 Gil |
| Accessories | Price |
|---|---|
| Power Wristguards | 800 Gil |
| Bulletproof Vest | 800 Gil |
| Earrings | 800 Gil |
| Talisman | 800 Gil |
| Star Pendant | 1500 Gil |
Item Shop - Center District
| Items | Price |
|---|---|
| Potion | 50 Gil |
| Hi-Potion | 300 Gil |
| Ether | 500 Gil |
| Phoenix Down | 300 Gil |
| Antidote | 80 Gil |
| Echo Mist | 100 Gil |
| Smelling Salts | 80 Gil |
Materia Shop - Center District
| Items | Price |
|---|---|
| 19. Costa del Sol (Stock: 1) | 50 Gil |
| Materia | Price |
|---|---|
| Healing Materia | 600 Gil |
| Cleansing Materia | 1500 Gil |
| Revival Materia | 3000 Gil |
| Fire Materia | 500 Gil |
| Ice Materia | 500 Gil |
| Lightning Materia | 500 Gil |
| Poison Materia | 1500 Gil |
| Barrier Materia | 1500 Gil |
| HP Up Materia | 2000 Gil |
| MP Up Materia | 2000 Gil |
| Deadly Dodge Materia | 600 Gil |
The Moogle Emporium - Children's Secret Hideout
| Items | Price |
|---|---|
| Moogle Membership Card (Stock: 1) | 1 MM |
| 20. Gold Saucer (Stock: 1) | 1 MM |
| Ether | 2 MM |
| Graveyard Key (Stock: 1) | 1 MM |
| The Art of Swordplay Vol. I (Stock: 1) | 5 MM |
| Sharpshooter's Companion Vol. I (Stock: 1) | 5 MM |
| Way of the Fist Vol. I (Stock: 1) | 5 MM |
| Telluric Scriptures Vol. I (Stock: 1) | 5 MM |
| Weapons / Armor | Price |
|---|---|
| Silver Staff (Stock: 1) | 2 MM |
| Accessories | Price |
|---|---|
| Whistlewind Scarf (Stock: 1) | 3 MM |
| Salvation Badge (Stock: 1) | 1 MM |
Tips and Strategies
Odd Jobs
In Chapters 3, 8, 9, and 14, the player will have access to a set of Odd Job sidequests for that chapter. After you continue to a certain point in each chapter, you won't be able to complete any of the Odd Jobs any more. That said, the game will notify you at this point, so there's no worry of missing your chance on accident.
Unlock a Different Dress for Aerith in Chapter 9

Aerith's dress in Chapter 9 changes depending on how many Chapter 8 Odd Jobs you complete. The exact amount you'll need to complete for each dress is detailed below.
Dress Types and Choices
| Dress Type | How to Unlock |
|---|---|
| Pink Dress | Complete 0 to 2 Odd Jobs |
| Shocking Pink Dress | Complete 3 to 5 Odd Jobs |
| Red Dress | Complete all 6 Odd Jobs |
Check out our complete guide to learn how to get the alternate dress choices for Tifa and Cloud as well.
Guides for each Chapter 8 Side Quest (Odd Job)
Check out our individual guides below to learn how to finish each Odd Job in Chapter 8!
| Quest | Reward | |
|---|---|---|
| 1 |  The Mysterious Moogle Merchant The Mysterious Moogle Merchant |
Access to the Moogle Emporium |
| 2 |  Kids on Patrol Kids on Patrol |
Nail Bat |
| 3 |  Weapons on a Rampage Weapons on a Rampage |
Protective Boots |
| 4 |  A Verified Hero A Verified Hero |
Elixir |
| 5 |  The Angel of the Slum The Angel of the Slum |
2,000 Gill |
| 6 |  Paying Respects Paying Respects |
Studded Bracer |
Watch out for Smoggers
Smoggers' Haywire Haze attack will cause them to spin around in a frenzy and hit your party for heavy damage. Try to keep your distance when this attack begins and dodge out of the way.
In addition, they will Self-Destruct when they are defeated, so after you've finished off their health meter, move out of the way fast!
Spend your Moogle Medals at the Moogle Emporium
The time to spend your hard-acquired Moogle Medals has finally arrived.
Purchase the Graveyard Key
From the Moogle Emporium, you can buy a Graveyard Key for 1 Moogle Medal. This will allow you to enter the Sector 5 Slums Graveyard to complete the Missing Children Side Quest, which can't be entered in any other way.
Missing Children (Side Quest 16) Walkthrough
How to Get the Materia in the Church

On the right side of the bottom floor of the Church, you'll see a Chakra Materia which the Whispers will block you from reaching. You'll be able to obtain this Materia later in the chapter if you come back to this same location after the cutscene in Sector 5 Slums - Station.
The route back to the Church is a bit out of the way, so you can also simply wait until Chapter 14 to get it. You'll have a chance to grab this Materia on your way through when completing the Tomboy Bandit Side Quest.
Tomboy Bandit (Side Quest 22) Walkthrough
Boss Strategy Guide
Reno
| Reno | |
|---|---|

|
How to Defeat Reno - Key Points
- No elemental weaknesses
- Guard can be effective
- Take out the EM Mines
Rude
| Rude | |
|---|---|
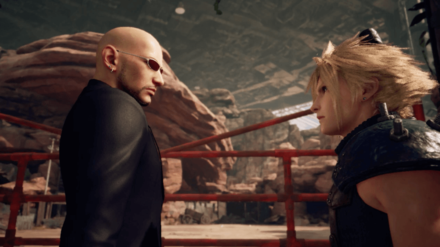 |
How to Defeat Rude - Key Points
- Weak to Wind
- Won't attack Aerith
- Dodge instead of Guarding
- Aim for Stagger to get in physical damage
Optional: Shiva
| Shiva | |
|---|---|
 |
How to Defeat Shiva - Key Points
- Weak to Fire
- Summon Ifrit as soon as possible
- Bring Aerith
Story Walkthrough Related Links
| Chapter 1 | The Destruction of Mako Reactor 1 |
|---|---|
| Chapter 2 | Fateful Encounters |
| Chapter 3 | Home Sweet Slum |
| Chapter 4 | Mad Dash |
| Chapter 5 | Dogged Pursuit |
| Chapter 6 | Light the Way |
| Chapter 7 | A Trap is Sprung |
| Chapter 8 | Budding Bodyguard |
| Chapter 9 | The Town That Never Sleeps |
| Chapter 10 | Rough Waters |
| Chapter 11 | Haunted |
| Chapter 12 | Fight for Survival |
| Chapter 13 | A Broken World |
| Chapter 14 | In Search of Hope |
| Chapter 15 | The Day Midgar Stood Still |
| Chapter 16 | The Belly of the Beast |
| Chapter 17 | Deliverance from Chaos |
| Chapter 18 | Destiny's Crossroads |
| INTERmission Chapters | |
|---|---|
| Chapter 1 | Wutai's Finest |
| Chapter 2 | Covert Ops |
Comment
3  Anonymous almost 6 years
For anyone reading this^ I spent 40 min looking for the Mythril Armlet. It is in the middle next to a vehicle.
Author

Chapter 8: Budding Bodyguard Story Guide & Walkthrough
Please participate in our site
improvement survey
03/2026
improvement survey
03/2026
Would you assist in
improving Game8's site?
improving Game8's site?

×
We are listening to our users' valuable opinions and discussing how to act on them.
The information collected through this survey will be used for the purpose of improving our services. In addition, the information will only be disclosed a part of a statistic in a format that will not allow identification of personal information.
Begin Survey
Not Now
×
Please rate each item regarding Game8.co's Advertisements.
Amount of Ads
Very Dissatisfied
Somewhat Dissatisfied
Fine
Somewhat Satisfied
Highly Satisfied
Placement of Ads
Timing of Ad Display
Ad Loading Speed
Safeness of Ads
Content of Ads
×
Please rate each item regarding Game8.co's Quality of Articles.
Amount of information
Very Dissatisfied
Somewhat Dissatisfied
Fine
Somewhat Satisfied
Highly Satisfied
Frequency of updates
Speed of new information
Accuracy of articles
Understandibility of articles
Readability of sentences
×
Please rate each item regarding Game8.co's Usability of the Site.
Ease of finding information
Very Dissatisfied
Somewhat Dissatisfied
Fine
Somewhat Satisfied
Highly Satisfied
Loading Speed
Use of Color
Font Size
Visibility of Images
Easy to Understand Layout
×
Please rate each item regarding Game8.co's Message Boards, Comments.
Ease of Writing
Very Dissatisfied
Somewhat Dissatisfied
Fine
Somewhat Satisfied
Highly Satisfied
Readability
Ease in Finding Information
Comment Quality
Comment Quantity
Admin Response
×
Please rate each item regarding Game8.co's Site's new design.
Please rate our site's new design
Very Dissatisfied
Somewhat Dissatisfied
Fine
Somewhat Satisfied
Highly Satisfied
Do you think that the website's design change makes the site easier to use?
Has the new design made it easier for you to find information on the site?
Has the new design improved the overall visual appeal of the site?
How would you rate your overall satisfaction with the new design of the site?
×
How likely are you to recommend Game8 to someone you know?
Very Unlikely
0
1
2
3
4
5
6
7
8
9
10
Very Likely
If you have other opinions regarding potential improvement to the website, please share them with us. We would appreciate your honest opinion.
Note: This is a free response section, so you can proceed without entering anything.
Note: Please be sure not to enter any kind of personal information into your response.
Note: Please be sure not to enter any kind of personal information into your response.
×
Thank You
×
Thank you for participating in our survey! Your answers will help us to improve the quality of our website and services.
We hope you continue to make use of Game8.
We hope you continue to make use of Game8.
Close
Rankings
- We could not find the message board you were looking for.
Gaming News


![Everwind Review [Early Access] | The Shaky First Step to A Very Long Journey](https://img.game8.co/4440226/ab079b1153298a042633dd1ef51e878e.png/thumb)

![Monster Hunter Stories 3 Review [First Impressions] | Simply Rejuvenating](https://img.game8.co/4438641/2a31b7702bd70e78ec8efd24661dacda.jpeg/thumb)
Popular Games

Genshin Impact Walkthrough & Guides Wiki
Honkai: Star Rail Walkthrough & Guides Wiki
Umamusume: Pretty Derby Walkthrough & Guides Wiki
Pokemon Pokopia Walkthrough & Guides Wiki
Resident Evil Requiem (RE9) Walkthrough & Guides Wiki
Monster Hunter Wilds Walkthrough & Guides Wiki
Wuthering Waves Walkthrough & Guides Wiki
Arknights: Endfield Walkthrough & Guides Wiki
Pokemon FireRed and LeafGreen (FRLG) Walkthrough & Guides Wiki
Pokemon TCG Pocket (PTCGP) Strategies & Guides Wiki


Recommended Games
Diablo 4: Vessel of Hatred Walkthrough & Guides Wiki
Fire Emblem Heroes (FEH) Walkthrough & Guides Wiki
Yu-Gi-Oh! Master Duel Walkthrough & Guides Wiki
Super Smash Bros. Ultimate Walkthrough & Guides Wiki
Pokemon Brilliant Diamond and Shining Pearl (BDSP) Walkthrough & Guides Wiki
Elden Ring Shadow of the Erdtree Walkthrough & Guides Wiki
Monster Hunter World Walkthrough & Guides Wiki
The Legend of Zelda: Tears of the Kingdom Walkthrough & Guides Wiki
Persona 3 Reload Walkthrough & Guides Wiki
Cyberpunk 2077: Ultimate Edition Walkthrough & Guides Wiki


All rights reserved
© SQUARE ENIX CO., LTD. All Rights Reserved.
CHARACTER DESIGN:TETSUYA NOMURA/ROBERTO FERRARI
The copyrights of videos of games used in our content and other intellectual property rights belong to the provider of the game.
The contents we provide on this site were created personally by members of the Game8 editorial department.
We refuse the right to reuse or repost content taken without our permission such as data or images to other sites.
Thank you soooooo much! Almost gave up thinking I got it. To clarify further for anyone it is in the "Station Way" as marked on the ingame map, a hallway and is located about half way between "Center District" and "Sector 5 Undercity Station". There are red floor mats everywhere and the M. Armlet chest is next to a blue bulldozer!