This survey will take about 1 minute.
Your answers will help us to improve our website.
FF7 Remake
Pride and Joy Mk 0.5: Yuffie & Sonon vs. Top Secrets Boss Guide
This is a guide to completing the Yuffie & Sonon vs. Top Secrets battle in the Shinra Combat Simulator in Final Fantasy 7 Remake (FF7R) Intergrade's INTERmission DLC for PS5. Learn how to beat Bahamut, Ifrit, Ramuh, and Pride and Joy Mk 0.5, with best Materia and equipment builds for Yuffie and Sonon.
List of Contents
How to Unlock Pride and Joy Mk 0.5
Complete both chapters of INTERmission

After completing the INTERmission DLC, the Shinra Combat Simulator will become available at the very beginning of Chapter 2.
Upon completing the first two battles in the Shinra Combat Simulator on any difficulty, “Yuffie and Sonon vs. Top Secrets” will be unlocked for Hard difficulty only.
In this gauntlet, you'll face three opponents – Bahamut, who is joined halfway through by Ifrit; Ramuh; and finally, Pride and Joy Mk 0.5.
Pride and Joy Mk 0.5 Reward
Two Gotterdammerungs
 Gotterdammerung Gotterdammerung |
At the start of any battle, your Limit Gauge will be automatically filled. Your Limit Gauge will increase automatically throughout the battle. |
|---|
In the original game, only a single Gotterdammerung was available, but similar to the Weiss battle, completing this challenge will yield two of this legendary Accessory, one for both Yuffie and Sonon. With the ability to gradually increase your Limit Gauge throughout the battle, it's often considered the best accessory in the game.
Gotterdammerung Effect and Stats
Best Equipment and Materia
Best Party Setup
 Yuffie Yuffie |
Role: Attacker Weapon: Boomerang Armor: Chthonian Armlet Accessory: Ribbon |
|---|---|
 Sonon Sonon |
Role: Synergy attacks, Life support for Yuffie Weapon: Marshalist's Staff Armor: Firebird Armlet Accessory: Kindred Cord |
Yuffie should continue attacking
Yuffie's role is to continue dealing chip damage throughout the fight. Since she will be keeping a distance and using Ninjutsu for the majority of the fight, the Boomerang, the weapon with the highest Magic Attack, is the best choice. As for the armor, anything with at least one connected slot will do fine.
When the enemy is Pressured, use Synergy
Sonon's primary role will be joining for powerful Synergy attacks when the enemy is pressured. This can be used to prevent Bahamut's Mega Flare, making keeping Sonon alive critical for this stage.
Best Materia
| Having this setup equipped on both Yuffie and Sonon will make your position much more secure. Generally, stick to Curaga every time it's used. | |
| Equip to Yuffie. Use to heal Sonon when he dies. Sonon will always use Self-Sacrifice immediately so he cannot use this Materia. | |
| Essential to this fight. Equip this to Yuffie to prevent damage from Bahamut's fire attacks, Ifrit's attacks, and Pride and Joy's napalm bombs. Be sure to raise Elemental to level 2 in advance. | |
| Equip for Pride and Joy Mk 0.5 just to be sure. | |
| You'll want both Yuffie and Sonon to have around 7000 HP. Essential for surviving Pride and Joy's beam attack. | |
| Spells like Curaga will consume over 10 MP apiece, so you'll want to be sure you don't run out. | |
| Best to start the battle with 1 ATB gauge already filled. | |
| Equip to Sonon to increase his survivability. | |
| Prevents running out of ATB when enemies are stagged and not being able to use Abilities. Good to have, but not essential. | |
| Wait until Pride and Joy to summon. Hits with its weak element for massive damage. |
Yuffie & Sonon vs. Top Secrets Video Guide
Our Japan team prepared a video guide for defeating this difficult series of bosses. Consult this while reading the guide to better understand its contents!
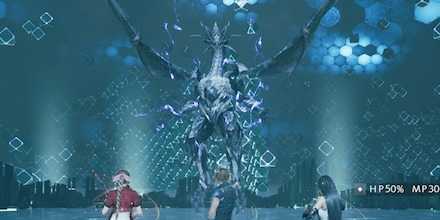
How to Beat Bahamut (Battle #1)
|
|||
|---|---|---|---|
| Weakness | None | ||
Bahamut Tips & Strategies
| ★Bahamut Tips & Strategies★ | ||
|---|---|---|
|
|
Use Synergy attacks during the countdown

Each time Bahamut starts counting, it's an opening to attack. Execute Synergized Art of War right away, increasing the damage of following attacks. If you pull this off, you can get Bahamut in a Pressured state during this phase, but this becomes harder to execute with just Synergized Art of War later in the battle.
While Pressured, consider mashing Square while synergized to hit it with physical attacks and push its Stagger Gauge up and up.
Inflict Stagger to prevent Mega Flare
When the Countdown hits zero, Bahamut will execute its ultimate attack Mega Flare, dealing 9999 damage to all party members. This can be avoided by Staggering Bahamut before it execute Mega Flare. Aim to prevent its first Mega Flare this way, and finish off Bahamut before it can prepare a second.
In the later stages, if your Limit Gauge maxes out, this is the time to use it!
Use Brumal Form to evade attacks

Aside from Mega Flare, Brumal Form can be used to evade any of Bahamut's attacks. Perfect blocking will work as well, but Brumal Form is easier to execute and as it can be executed from the Abilities menu, players weak on timing dodges can simply open the menu when needed to use it.
Using Brumal Form successfully also boosts ATB, making it an offensive and defensive tool and allowing for continuous use of Brumal Form.
It's best to try to have 1 ATB gauge filled consistently so that Brumal Form can be used whenever needed.
| Attacks to avoid at all costs | |
|---|---|
 |
Do a quick evade when each of the two orbs is about to land. Can also use Brumal Form for the first and dodge for the second to get the timing right. |
 |
Go towards the light beams instead of away from them. This will register as a perfect dodge and your ATB will get a nice boost. |
 |
If you manage to dodge the first one, you'll be able to dodge all the rest if the timing is right. |
 |
Dodge right when it's about to strike the ground. |
Ignore Ifrit and go for Bahamut

When Bahamut's HP gets down to half, it will summon Ifrit to join the fight. As long as you have Elemental × Fire Materia equipped to your armor, its attacks are near-useless, so you can easily ignore it and focus all your attention on Bahamut.
Handle it quickly with Ice Ninjutsu and Ice Banishment
Ifrit's weakness is Ice, so after defeating Bahamut, finish it off with Ice Ninjutsu and hit hard with Ice Banishment.
How to Beat Ramuh (Battle #2)

|
|||
|---|---|---|---|
| Weaknesses | Wind | ||
Ramuh Tips & Strategies
| ★Ramuh Tips & Strategies★ | ||
|---|---|---|
|
|
Use Wind Abilities to fill the Stagger Gauge
Use Yuffie's Abilities Wind Ninjutsu and Windstorm to deal Wind damage to Ramuh, hitting its weakness. These attacks will cause its Stagger Gauge to increase quickly.
Perfect blocking Voltaic Lance adds Stagger

When Ramuh uses Voltaic Lance, a perfectly-timed block will nullify all damage and give a big jump to Ramuh's Stagger Gauge. If nothing else, try practicing to make sure you can perfectly block this attack every time.
Defeat the Sparks to Stagger

When Ramuh summons his Sparks, he will gain access to more powerful abilities that can deal a lot of damage to you. Not only will destroying the Sparks disable those attacks but Ramuh will also go into the staggered state. You can choose to ignore them when he is low health, but if you think you can't beat him right away, synergize with Sonon and focus on the Sparks.
Once Staggered, use Synergized Windstorm twice

Once Ramuh has been stagged, two hits with Synergized Windstorm will hit it hard. This both hits its elemental weakness and causes its Stagger % to go up. Pulling this off should be enough to take Ramuh out once you've managed to Stagger him.
How to Beat Pride and Joy Mk 0.5 (Battle #3)

|
|||
|---|---|---|---|
| Weakness | Lightning | ||
Pride and Joy Mk 0.5 Tips & Strategy
| ★Pride and Joy Mk 0.5 Tips & Strategy★ | ||
|---|---|---|
|
|
Use Lightning Ninjutsu during the entire fight

Like its predecessor, Pride and Joy Mk0.5 is weak to Lightning, so set up Lightning Ninjutsu from the start and hit it with chip damage throughout the fight.
Attack from a distance for safety
It's possible to avoid attacks by staying behind its back, but those who are less used to its attack patterns can get inflicted with status effects and stun, so it's a risky strategy.
The easiest and safest way to handle the fight is to keep a distance throughout the fight and continue flinging Ninjutsu. It will fire napalm bombs throughout the fight, which leave flaming areas where they hit, but the damage from these areas is negated by having Elemental + Fire Materia on your armor, so you can roll over them freely.
Avoid Beam Cannon with Brumal Form or going close-range

When Pride and Joy Mk 0.5 readies its Beam Cannon, you can move behind it in close range to avoid the attack.
When far away, the attack will always hit even if you try to avoid it; however, it can still be avoided using Brumal Form. Keep both your ATB gauges filled and ready, and when it looks like it's getting ready to fire, it can be fully avoided with repeated uses of Brumal Form.
Keep at least 6000 HP
Beam Cannon deals 5000 damage if it lands, so be sure to keep your HP at around 6000 or above throughout hte fight. Even if you fail to avoid it, this will allow you to survive and heal up.
If Sonon is bound, attack the right arm

Pride and Joy can use its Catch attack to bind one of your party members. When this occurs, target the right arm and use Lightning Ninjutsu repeatedly. If you can't rescue Sonon in time, he will usually end up knocked out, so be sure you have enough ATB to cast Life.
Synergize to Avoid Grab

If you activate Synergy while away from Sonon he will always teleport towards you. You can use this Synergy effect to teleport Sonon away from Pride and Joy and it will not be able to grab Sonon.
Summon Ramuh

If you've saved up Ramuh until this fight, this is the time to use him. Pride and Joy Mk 0.5 is weak to lightning, so Ramuh can deal heavy damage while he is around.
Use Thundaga when Pressured

When Pride and Joy Mk 0.5 is pressured, or it seems like the Stagger Gauge is close to being filled, use Thundaga to raise the gauge significantly.
If you manage to Stagger it, use Synergized Windstorm to increase the Stagger %, then hit with hard attacks like Limit Breaks, and victory will be in sight.
FF7 Remake Intergrade Related Links
Intergrade and INTERmission Guide
Intergrade Story Walkthrough
| Chapter 1 | Chapter 2 |
|---|---|
 Chapter 1: Wutai's Finest Chapter 1: Wutai's Finest
|
 Chapter 2: Covert Ops Chapter 2: Covert Ops
|
Intergrade Boss Fights
| Chapter 1 | Levrikon Gigantipede Ramuh |
|---|---|
| Chapter 2 | Scarlet & The Crimson Mare Projector Nero the Sable |
| Shinra Combat Simulator | vs. Shinra's Dark Secrets vs. Midgarian Monsters Weiss the Immaculate Pride and Joy Mk 0.5 (Top Secrets) |
Intergrade Side Content
 Happy Turtle Flyers Happy Turtle Flyers
|
 Shinra Box Buster Shinra Box Buster
|
Fort Condor Minigame
 Fort Condor Guide Fort Condor Guide
|
Condor Coin Farming |
| Fort Condor Units | |
| Fort Condor Boards |
Intergrade Guides
Author

Pride and Joy Mk 0.5: Yuffie & Sonon vs. Top Secrets Boss Guide
Please participate in our site
improvement survey
03/2026
improvement survey
03/2026
Would you assist in
improving Game8's site?
improving Game8's site?

×
We are listening to our users' valuable opinions and discussing how to act on them.
The information collected through this survey will be used for the purpose of improving our services. In addition, the information will only be disclosed a part of a statistic in a format that will not allow identification of personal information.
Begin Survey
Not Now
×
Please rate each item regarding Game8.co's Advertisements.
Amount of Ads
Very Dissatisfied
Somewhat Dissatisfied
Fine
Somewhat Satisfied
Highly Satisfied
Placement of Ads
Timing of Ad Display
Ad Loading Speed
Safeness of Ads
Content of Ads
×
Please rate each item regarding Game8.co's Quality of Articles.
Amount of information
Very Dissatisfied
Somewhat Dissatisfied
Fine
Somewhat Satisfied
Highly Satisfied
Frequency of updates
Speed of new information
Accuracy of articles
Understandibility of articles
Readability of sentences
×
Please rate each item regarding Game8.co's Usability of the Site.
Ease of finding information
Very Dissatisfied
Somewhat Dissatisfied
Fine
Somewhat Satisfied
Highly Satisfied
Loading Speed
Use of Color
Font Size
Visibility of Images
Easy to Understand Layout
×
Please rate each item regarding Game8.co's Message Boards, Comments.
Ease of Writing
Very Dissatisfied
Somewhat Dissatisfied
Fine
Somewhat Satisfied
Highly Satisfied
Readability
Ease in Finding Information
Comment Quality
Comment Quantity
Admin Response
×
Please rate each item regarding Game8.co's Site's new design.
Please rate our site's new design
Very Dissatisfied
Somewhat Dissatisfied
Fine
Somewhat Satisfied
Highly Satisfied
Do you think that the website's design change makes the site easier to use?
Has the new design made it easier for you to find information on the site?
Has the new design improved the overall visual appeal of the site?
How would you rate your overall satisfaction with the new design of the site?
×
How likely are you to recommend Game8 to someone you know?
Very Unlikely
0
1
2
3
4
5
6
7
8
9
10
Very Likely
If you have other opinions regarding potential improvement to the website, please share them with us. We would appreciate your honest opinion.
Note: This is a free response section, so you can proceed without entering anything.
Note: Please be sure not to enter any kind of personal information into your response.
Note: Please be sure not to enter any kind of personal information into your response.
×
Thank You
×
Thank you for participating in our survey! Your answers will help us to improve the quality of our website and services.
We hope you continue to make use of Game8.
We hope you continue to make use of Game8.
Close
Rankings
- We could not find the message board you were looking for.
Gaming News


![Everwind Review [Early Access] | The Shaky First Step to A Very Long Journey](https://img.game8.co/4440226/ab079b1153298a042633dd1ef51e878e.png/thumb)

![Monster Hunter Stories 3 Review [First Impressions] | Simply Rejuvenating](https://img.game8.co/4438641/2a31b7702bd70e78ec8efd24661dacda.jpeg/thumb)
Popular Games

Genshin Impact Walkthrough & Guides Wiki
Honkai: Star Rail Walkthrough & Guides Wiki
Umamusume: Pretty Derby Walkthrough & Guides Wiki
Pokemon Pokopia Walkthrough & Guides Wiki
Resident Evil Requiem (RE9) Walkthrough & Guides Wiki
Monster Hunter Wilds Walkthrough & Guides Wiki
Wuthering Waves Walkthrough & Guides Wiki
Arknights: Endfield Walkthrough & Guides Wiki
Pokemon FireRed and LeafGreen (FRLG) Walkthrough & Guides Wiki
Pokemon TCG Pocket (PTCGP) Strategies & Guides Wiki


Recommended Games
Diablo 4: Vessel of Hatred Walkthrough & Guides Wiki
Fire Emblem Heroes (FEH) Walkthrough & Guides Wiki
Yu-Gi-Oh! Master Duel Walkthrough & Guides Wiki
Super Smash Bros. Ultimate Walkthrough & Guides Wiki
Pokemon Brilliant Diamond and Shining Pearl (BDSP) Walkthrough & Guides Wiki
Elden Ring Shadow of the Erdtree Walkthrough & Guides Wiki
Monster Hunter World Walkthrough & Guides Wiki
The Legend of Zelda: Tears of the Kingdom Walkthrough & Guides Wiki
Persona 3 Reload Walkthrough & Guides Wiki
Cyberpunk 2077: Ultimate Edition Walkthrough & Guides Wiki


All rights reserved
© SQUARE ENIX CO., LTD. All Rights Reserved.
CHARACTER DESIGN:TETSUYA NOMURA/ROBERTO FERRARI
The copyrights of videos of games used in our content and other intellectual property rights belong to the provider of the game.
The contents we provide on this site were created personally by members of the Game8 editorial department.
We refuse the right to reuse or repost content taken without our permission such as data or images to other sites.
Flare Breath is not fire elemental. It is non-elemental so Elemental + Fire combo will not help with it at all. In addition, Ifrit can be killed in under 10 seconds using synergized Art of War due to its astoundingly low health and defense so ignoring it only benefits using it to heal you, but as an alternative you could kill it immediately and use elemental + thunder to completely neutralize the Ramah fight.