Intergrade Chapter 1: Wutai's Finest Walkthrough

Welcome to Game8's story walkthrough of Chapter 1: Wutai's Finest, featured in the INTERmission DLC of FF7 Remake Intergrade, the FF7 Remake upgrade for the PS5 that released on June 10th, 2021. For a step-by-step guide of the new Yuffie episode including meeting up with Avalanche, how to unlock the Fort Condor minigame, how to unlock the Happy Turtle side quest, and how to beat Gigantipede, read on!
| Previous Chapter | - |
|---|---|
| Current Chapter | Wutai's Finest |
| Next Chapter | Covert Ops |
List of Contents
- List of Main Scenario Objectives
- Discovery
- INTERmission Chapter 1
- Outskirts
- Abandoned Warehouse
- Abandoned Warehouse Exterior
- Sector 7 Slums
- Follow Nayo
- Shipping Facility
- Storage Depot
- Waste Disposal Plant
- Main Pillar Maintenance
- Maps and Obtainable Items
- Maps
- Obtainable Items
- Shops & Vending Machines
- Tips and Strategies
- Boss Strategy Guide
- Related Links
List of Main Scenario Objectives
| No. | Title | Description |
|---|---|---|
| 1 | First Challenge | Follow the Moogle posters to find the Avalanche member in the Moogle hat. |
| 2 | Power...Down? | Make your way through the Abandoned Warehouse. |
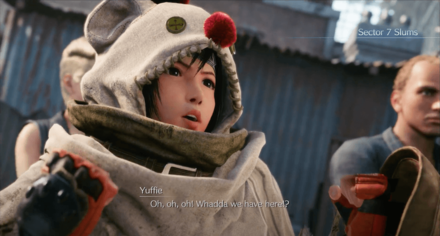
| 3 | Don't Fear, Yuffie's Here | Rescue the robed man. |
| 4 | Esteemed Avalanche Colleagues | Meet with the other Avalanche members and talk to each of them. |
| 5 | Scout out Sector 7 | Meet with Old Snapper, check out the Shinra Combat Simulator, and explore the Sector 7 Slums. |
| 8 | The Handoff | Follow Nayo and fight Corneo's Lackeys for your Interplate ID cards |
| 9 | Back to Base | Head back to Avalanche's Base |
| 10 | Change of Plans | Follow Nayo after she gets a message from Zhijie. |
| 11 | After Him | Follow Zhijie and the Security Officers into the Shipping Facility. |
| 12 | Tracking Zhijie | Pursue Zhijie and try to save him from the Security Officers. |
| 13 | Main Pillar Maintenance | Use your shuriken to hit switches and wall running skills to proceed through the area. |
| 14 | Save Zhijie | Rescue Zhijie and defeat the Gigantipede. |
| 15 | Shinra Building or Bust | When you are fully ready, take the train and head to the Shinra Building. |
Discovery
| No. | Title | Description |
|---|---|---|
| 1 | Chadley's Research | Complete new Shinra Combat Simulations. |
| 2 | Mastering Fort Condor | Defeat opponents throughout the Sector 7 Slums in Fort Condor. |
| 3 | The Happy Turtle Ad Campaign | Collect all 6 Happy Turtle flyers. |
INTERmission Chapter 1
Outskirts

| Objectives | |
|---|---|
| 1 |  View the Yuffie's Strengths Tutorial and fight the two Toxirat's blocking the way. |
| 2 | 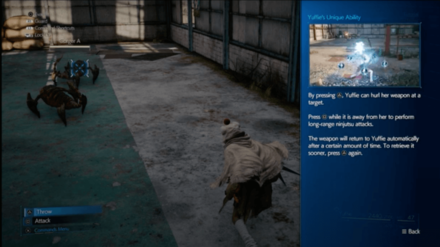 Enter the building through the window and View Yuffie's Unique Ability Tutorial and fight the 2 Gorgers. |
| 3 | 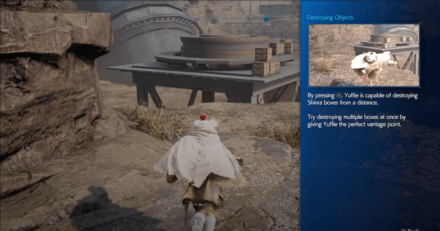 Go out the window and view the Destroying Objects Tutorial. Destroy the boxes nearby. |
| 6 |  View the Elemental Ninjutsu Tutorial and fight a Lesser Drake and 2 Toxirats. Duck under the slightly open door to enter a factory. |
Abandoned Warehouse

| Objectives | |
|---|---|
| 1 | 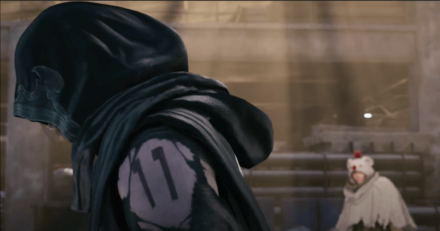 Continue straight and to the left to trigger a cutscene with a robed man. |
| 2 | 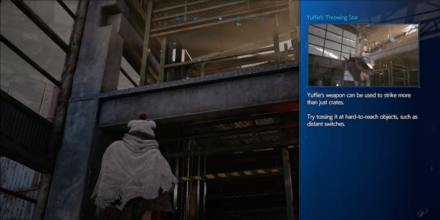 View Yuffie's Throwing Star Tutorial and throw Yuffie's shurikan to activate the lift and go up to the next floor. |
| 3 | 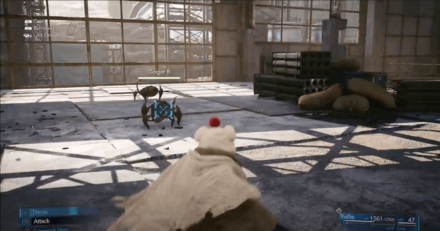 Fight 2 more Gorgers at the top of the lift. |
| 4 | 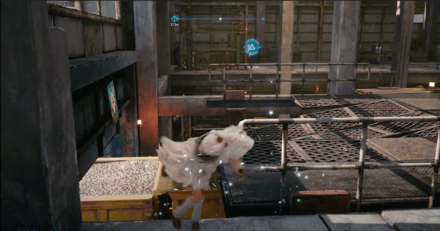 Hop over the nearby factory supplies. To your left is the path to progress, but go straight to see another lift you can activate. |
| 5 | 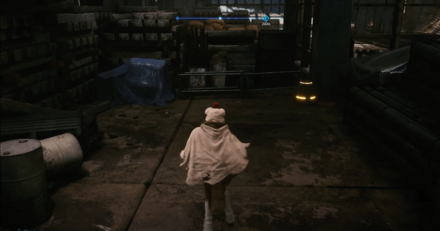 Activate the lift and go down the ladder. Pick up the chest to the right for 2 hi-potions, then go up the lift. |
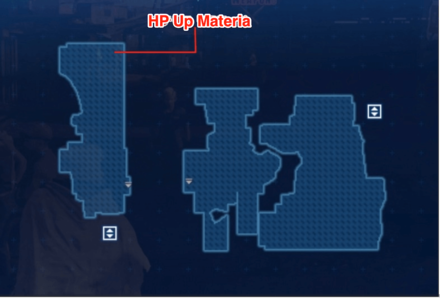
| 6 | 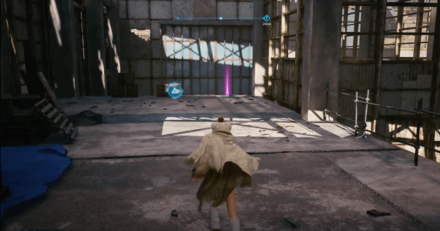 Go straight ahead to get HP Up materia and some Shinra boxes. |
| 7 |  Go back the way you came and hop down using the pole to your left. Go up the ladder and go right to exit the Abandoned Warehouse. |
Abandoned Warehouse Exterior

| Objectives | |
|---|---|
| 1 | 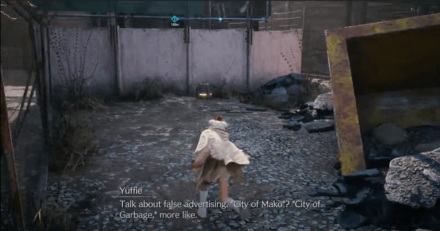 Exit the factory and get to ground level, to your right is a chest with Power Wristguards. Continue ahead to a ladder. There are also Shinra boxes in the area left of the ladder. |
| 2 | 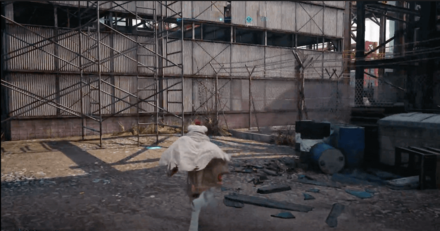 Climb the ladder, go across the roof, and go down the next ladder. |
| 3 | 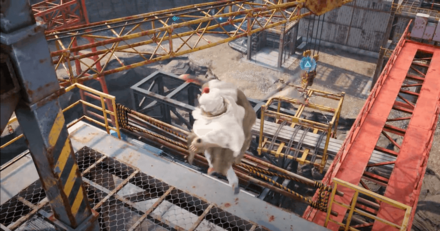 Yuffie will spot a robed man in trouble. Climb the ladders to the top of the tower to your right, throw your shuriken at the crane and slide down the pole. |
| 4 | Cross over the beam you knocked down and swing across the gap to fight 2 Wayward Wolves. Be careful they put up a good fight, but are weak to Ice-based attacks. |
| 5 | 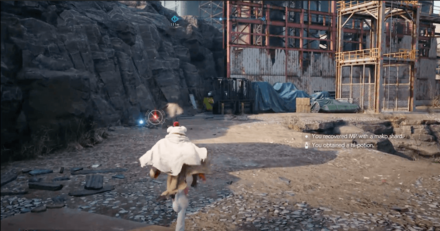 Save the robed man and continue to the right. There will be some Shinra boxes, and a ladder on your left. |
| 6 | 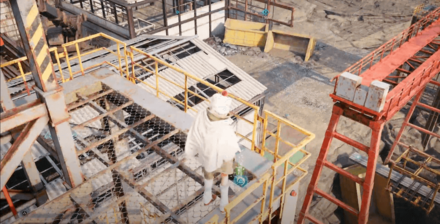 Climb to the top of the structure for an orb of Wind Materia. |
| 7 | 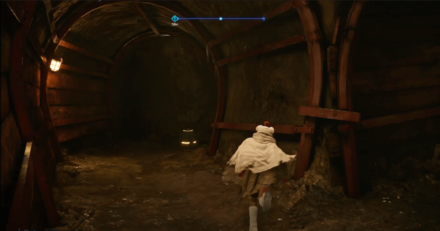 Return to the robed man and go through the tunnel. There is a chest straight ahead with 1000 gil. Collect it and go right. |
| 8 | 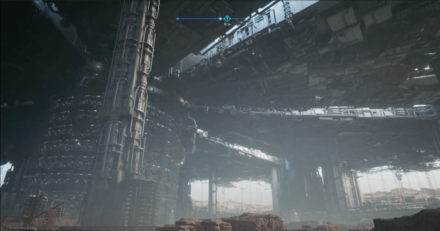 Follow the path and slide through the slightly open door for a shot of Midgar and more Shinra boxes to your left. |
| 9 | 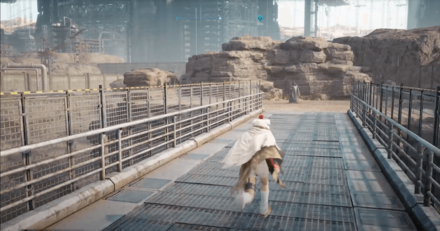 Cross the bridge to find another robed man. Open the gate to the right to trigger a cutscene. |
| 10 | 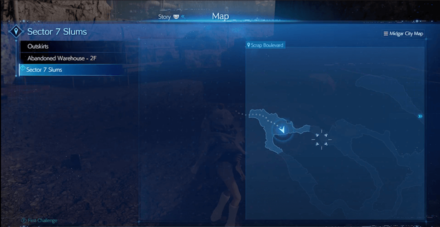 Follow the path and you will reach a fork in the road. Both paths reach the same area with Shinra boxes along the path. |
| 11 | 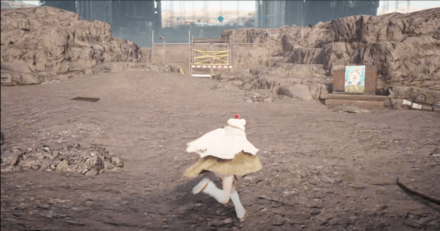 Once you see the Moogle sign next to a locked gate, go to the cave to the left, there is MP Up Materia inside. |
| 12 | 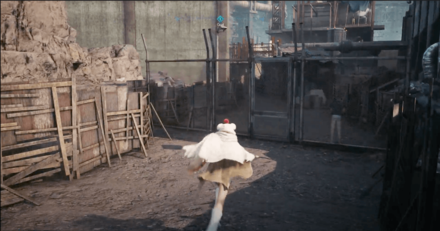 Go through the cave and turn right. Open the gate to Enter the Sector 7 Slums, continue forward and trigger a cutscene. |
Sector 7 Slums
| Objectives | |
|---|---|
| 1 | 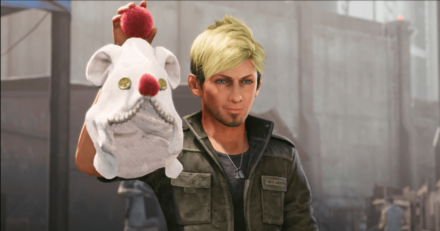 Meet up with Zhijie and follow him to the Sector 7 Clinic, which is Avalanche's Base. |
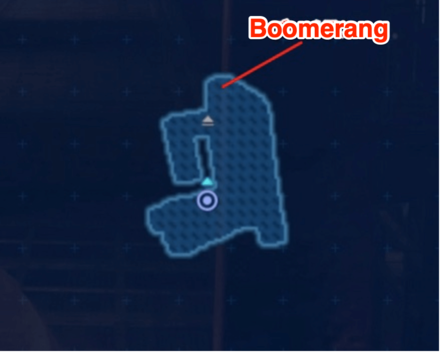
| 2 | 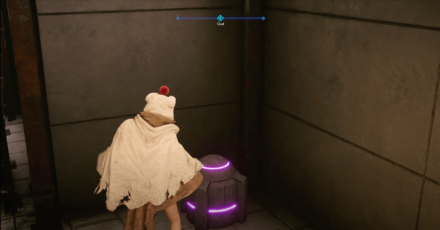 Go down the stairs, and to your left is a chest with a Boomerang for Yuffie. |
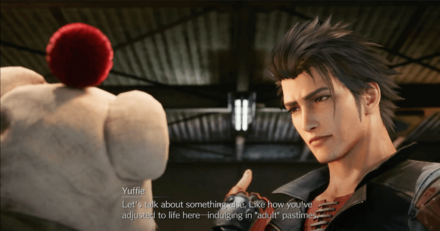
| 3 | 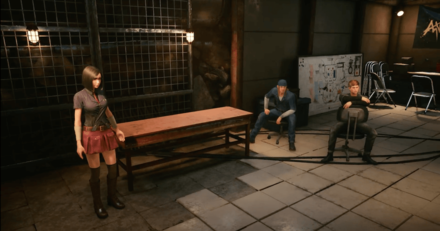 Turn right for a cutscene introducing the Avalanche members. |
| 4 | 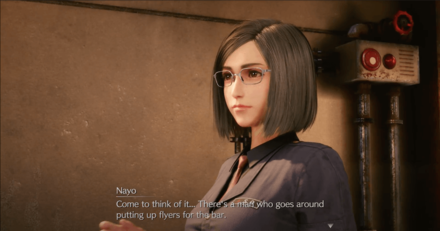 Talk to Nayo about Old Snapper, Billy Bob about the Shinra Combat Simulator, and Polk to unlock the Fort Condor Minigame and Fort Condor Starter Pack. |
| 5 | 
Go through the Fort Condor Tutorial. Win to obtain Sorcerer Board I and Helitrooper (Vanguard). |
| 6 | 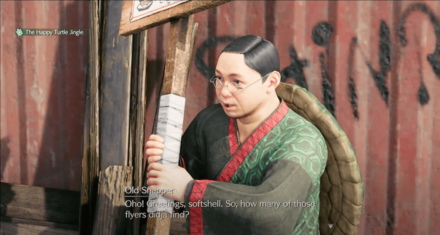
Go left out of the Clinic and talk to Old Snapper to start the Happy Turtle flyer collecting quest and get the List of Flyer Clues. |
| 7 |  Go around the block, and on opposite side from the Clinic and go through the tunnel with the cats. Follow the path and you'll find the Warding Materia. |
| 8 | 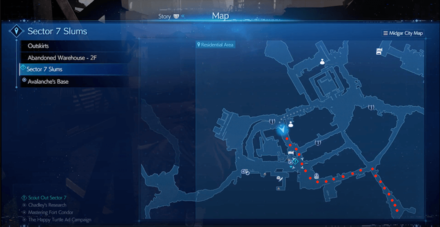 Go left around the corner from Old Snapper and take a right at the intersection to find a chest by Wedge containing Riot Trooper Barracks (Defense). |
| 9 | 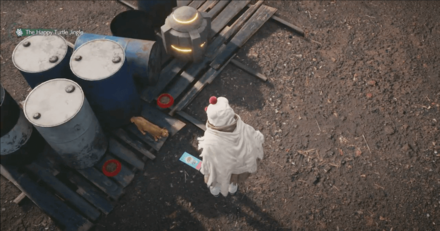 In the small alcove area to the left of 7th Heaven is a chest containing 2 hi-potions near one of the Happy Turtle flyer locations. |
| 10 | 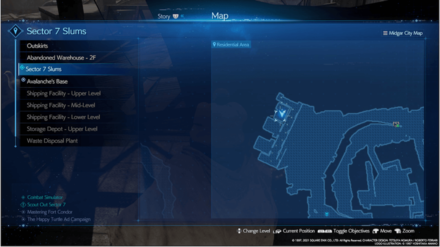 At the top of the Inn where Tifa and Cloud stayed, you will find an orb of Chakra Materia near another Happy Turtle flyer location. |
| Boss 11 |

Talk to Chadley to unlock the Ramuh battle simulation. Beat it to get the Ramuh Summon Materia. Highly recommended to wait until Sonon is in your party. How to Beat Ramuh |
| 12 | 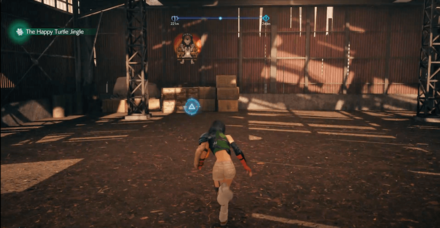 In the Abandoned Talagger Factory is a chest with the Monodrive (Ranged) Fort Condor piece hidden behind some Shinra boxes by a Stamp poster. |
| 13 | 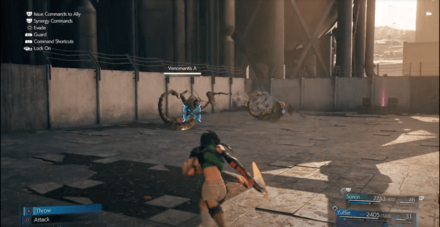 In a side path of the Abandoned Talagger Factory is an orb of First Strike Materia that is guarded by a pair of Venomantis, which are weak to ice-based attacks. |
| 14 | 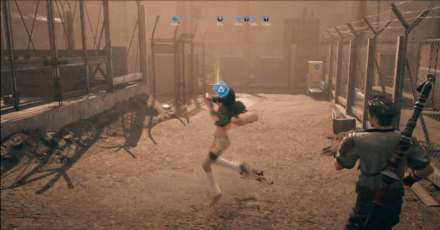 After getting the First Strike Materia, go back to the previous room and go straight, fight 2 Terpsicolts and go left to find some more Chakra Materia. |
| 15 | 
After exploring Sectory 7, return to the Clinic to trigger a cutscene to meet up with Sonon and he'll join the party. |
Meet With Sonon and Follow Nayo
| Objectives | |
|---|---|
| 1 |  Once Sonon joins you, go upstairs and talk to Nayo when you are ready and follow her. After a walk you'll get a cutscene with Tifa and Barret. |
| 2 |  Continue forward for another scene and a fight with 3 of Corneo's Lackeys. View the Fighting alongside Sonon Tutorial and take them down. You get a Chthonian Armlet for beating the lackeys. |
| 3 | 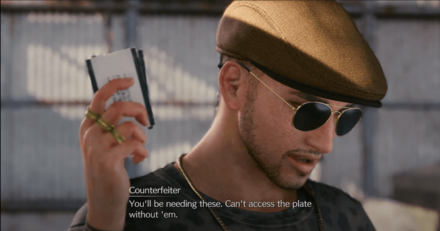 Continue forward to trigger another cutscene and receive your Interplate ID. |
| 4 | 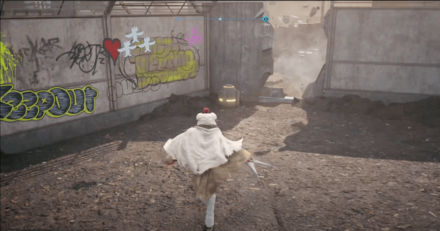 Continue out of the warehouse past the robed man and on the left side of the path is a chest with a Kindred Cord near a breakable wall. |
| 5 |  Go back out the way you entered the area to trigger a scene where you get a message via carrier pigeon and continue following Nayo. |
| 6 | 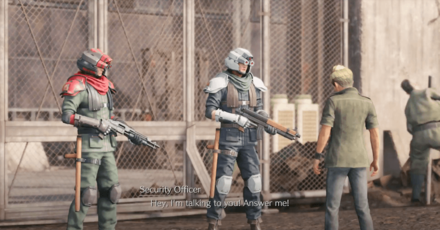 Trigger a scene to start chasing Zhijie. |
Chasing Zhijie into Shipping Facility
| Objectives | |
|---|---|
| 1 | 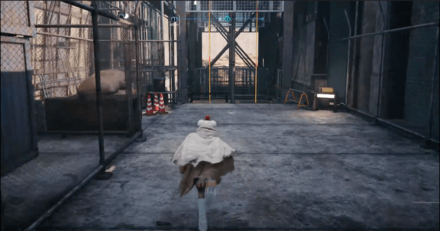 Follow the path and on your right side will be a chest with an Indurate Staff for Sonon. Continue forward and slide down the pole into the Shipping Facility. |
| 2 |  Go down the stairs, cross the small bridge and fight 2 Cripshays. |
| 3 | 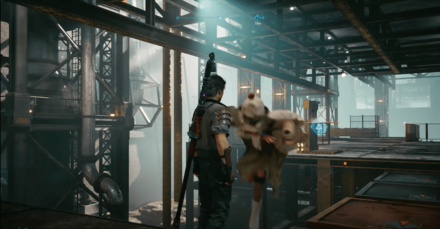 Use your shuriken to stop the conveyor belt to make another bridge and cross over. |
| 4 | 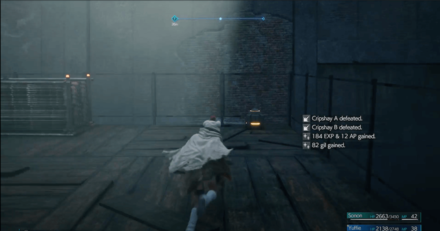 Go straight and down the stairs with the Shinra boxes on the right to fight 3 more Cripshays. There's a chest with the Sweeper (Ranged) Fort Condor piece. |
| 5 | 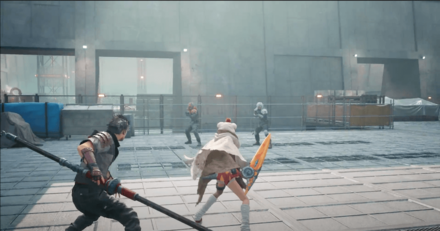 Go back up the stairs and slide up the poles on your right. Destroy the Shinra boxes and fight the Elite Security Officer and Security Officer. |
| 6 | 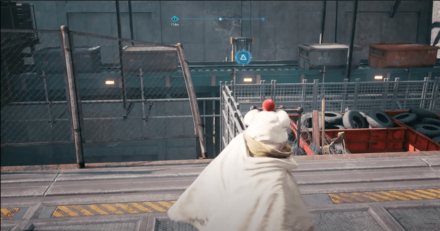 To shut down the next conveyor belt turn around and stand near the ladder. Look left to see a the switch and use your shuriken on it. |
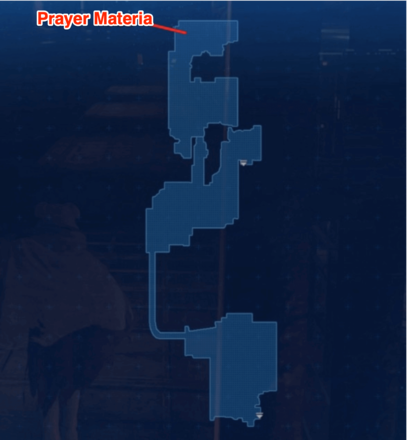
| 7 | 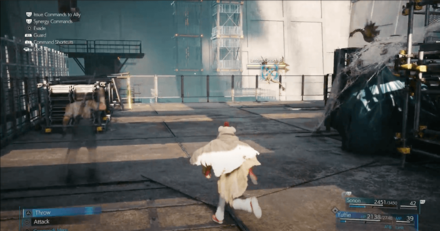 Go down the ladder for a fight with two Lesser Drakes which are weak to wind-based attacks and pick up the orb of Prayer Materia. |
| 8 | 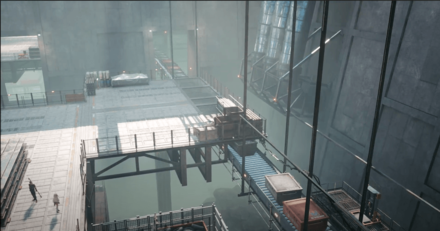 Go back to the conveyor belt and continue forward. Go down the next set of poles in the next room. |
| 9 | 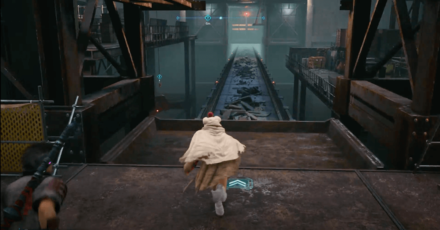 Go to the next conveyor belt and activate it. There will be more Shinra boxes on the sides. |
| 10 | 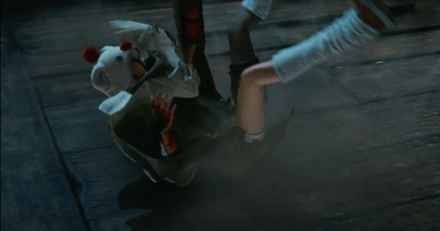 Get off the conveyor belt and go forward to trigger a scene where you fall to the lower level. |
| 11 | 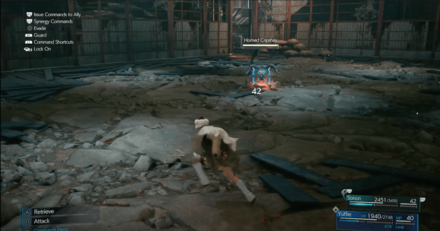 Collect the Shinra boxes and hop over the debris for a fight with 1 Horned Cripshay and 3 Cripshays. |
| 12 | 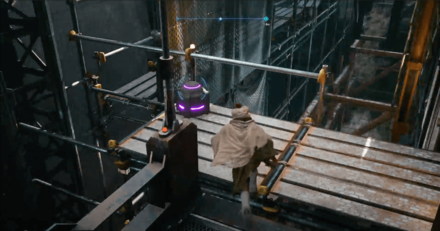 Go up the next set of poles and on the left side of the path is a chest with the Steel Reaper weapon for Yuffie. |
| 13 | 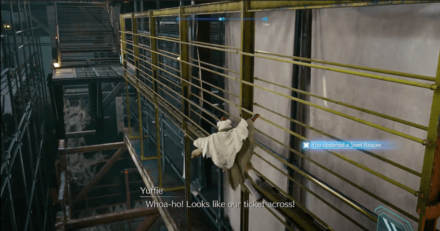 Run across the wall ninja style and go up the stairs for a fight with an Elite Grenadier and an Elite Security Officer. |
| 14 | 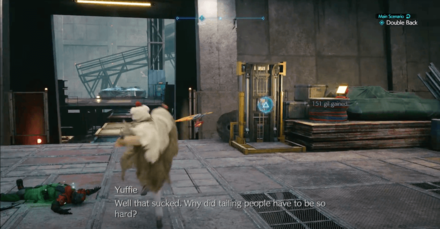 Hit the switch to turn off the conveyor belt and go across it to enter the Storage Depot. |
Storage Depot
| Objectives | |
|---|---|
| 1 |  Run across another wall, climb up and to the left to get a view of the Pillar. |
| 2 |  Hit both switches, the one on your side and the one across the way. Run across the wall, climb down and to the left to get to the other side. |
| 3 |  Go up the stairs and fight 3 more Toxirats. |
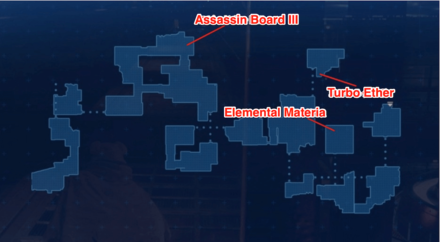
| 4 | 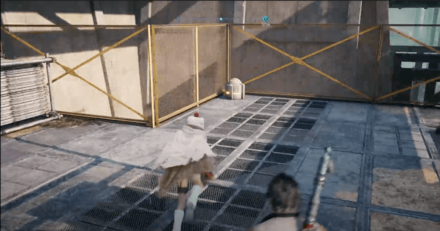 There are two staircases leading up to the same place, but the one on the left has a chest with the Assassin Board III. |
| 5 | 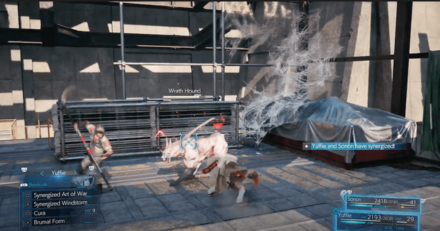 Continue up and fight the Wrath Hound. |
| 6 | 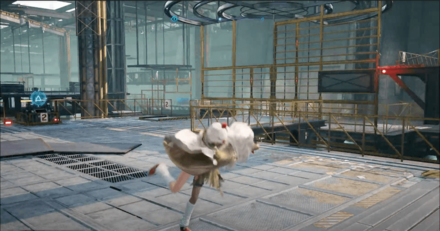 Hit the switch and run across the wall labeled 2-1. Break the Shinra boxes, and go up the stairs. |
| 7 | 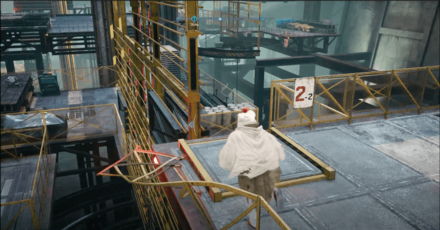 Hit the same switch below and run across the 2-2 wall, climb down and to the right to reach the other side. |
| 8 | 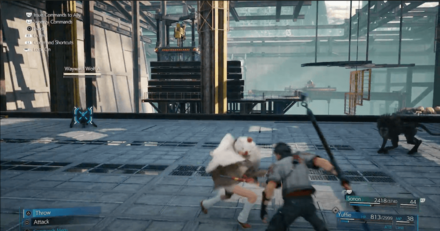 Break more Shinra boxes, go up the stairs and fight 2 Wayward Wolves. |
| 9 |  Hit the switch in the center and run across the 1-3 wall to the left to fight 3 Gorgers and get a chest with a Turbo Ether. |
| 10 | 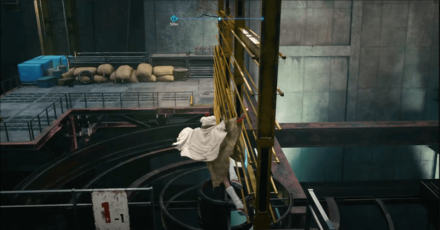 Go back down the way you came and run across the 1-1 to the right and break some Shinra boxes. Hit the switch to turn the 1-2 wall, run across it and climb up the middle to the 2F. |
| 10 | 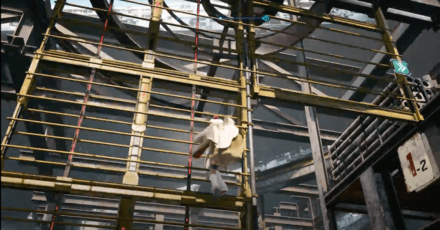 Hit the switch to turn the 1-2 wall, run across it and climb up the middle to the 2F. |
| 11 | 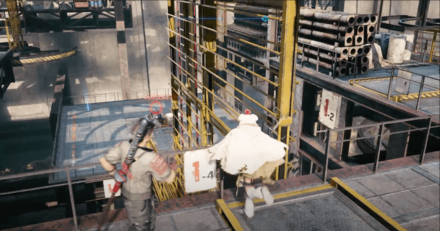 Hit the switch below in the center of the room to turn the 1-4 wall sideways, run across and climb down to get an orb of Elemental Materia. |
| 12 | 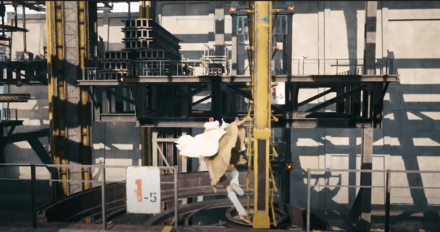 Go back up the way you came and slide down the next pole. Continue across wall 1-5 and slide down another pole to enter the Waste Disposal Plant. |
Waste Disposal Plant

| Objectives | |
|---|---|
| Boss 1 |

Continue forward for a fight with a Levrikon which is weak to both fire and ice attacks. How to Beat Levrikon |
| 2 | 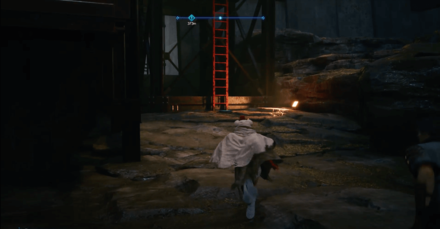 Proceed down the path and climb the red ladder. |
| 3 | 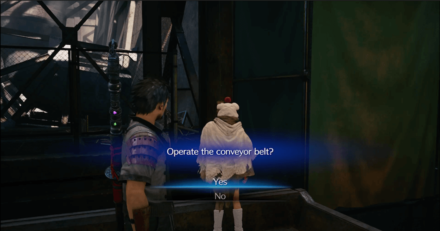 Turn left and break a large Shinra box to obtain a Note from Zhijie, then activate the conveyor belt. |
| 4 |  Break as many Shinra boxes as you can along the conveyor belt as part of the Operation Container Carnage challenge. |
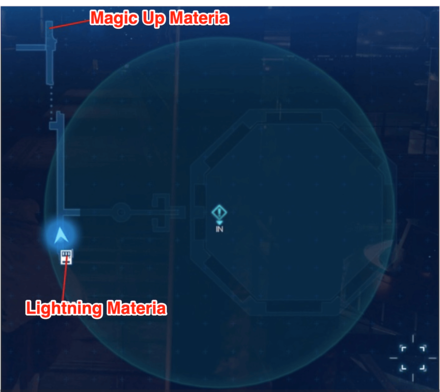
| 5 | 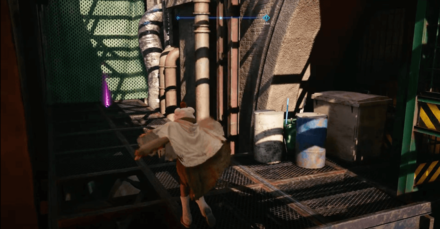 Follow the path of the next inactive conveyor belt into a tunnel. To the left is an orb of Magic Up Materia. |
| 6 | 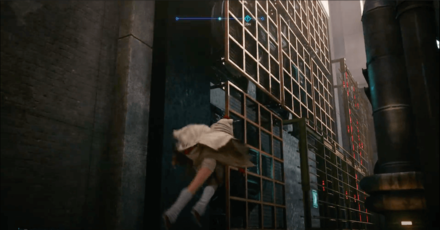 Go to the right and run across another wall, then climb up and to the right to enter Main Pillar Maintenance. |
Main Pillar Maintenance

| Objectives | |
|---|---|
| 1 | 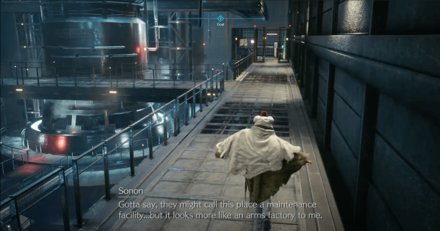 Follow the path, at the turn there is a rest area with some Lightning Materia.Exit the rest area and continue right and follow the path. |
| Boss 2 |

Time for a boss fight with Gigantipede! Take it down to rescue Zhijie and receive the Shinra Employee ID Card. How to Beat Gigantipede |
| 3 | 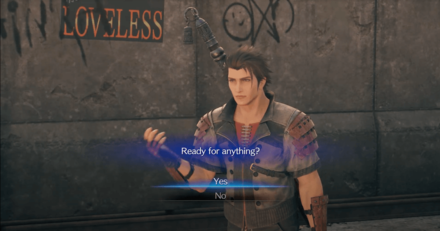 After the scene you will automatically return to the Sector 7 Slums.Head to the train station when you are ready to continue and board the train to end Chapter 1 of the INTERmission DLC. |
Maps and Obtainable Items
Maps
Sector 7 Slums
Other Maps
| Outskirts | Abandoned Warehouse |
|---|---|
 |
 |
| Avalanche's Base | Shipping Facility - Mid Level |
 |
 |
| Shipping Facility - Upper Level | Shipping Facility - Lower Level |
 |
 |
| Storage Depot - Upper Level | Waste Disposal Plant |
 |
 |
| Main Pillar Maintenance | |
 |
|
Obtainable Items
| Outskirts | ||
|---|---|---|
| Hi-Potion | Power Wristguards | Wind Materia |
| 1000 Gil | - | - |
| Abandoned Warehouse | ||
| HP Up Materia | - | - |
| Sector 7 Slums | ||
| Happy Turtle Flyers x6 | MP Up Materia | Warding Materia |
| Chakra Materia | First Strike Materia | Kindred Cord |
| Indurate Staff | Monodrive (Ranged) | Riot Trooper Barracks (Defense) |
| Avalanche's Base | ||
| Boomerang | - | - |
| Shipping Facility - Mid Level | ||
| Sweeper (Ranged) | Steel Reaper | - |
| Shipping Facility - Upper Level | ||
| Prayer Materia | - | - |
| Storage Depot | ||
| Assassin Board III | Elemental Materia | Turbo Ether |
| Main Pillar Maintenance | ||
| Lightning Materia | Magic Up Materia | - |
Shops & Vending Machines
Sector 7 Slums - Item Shop
| Items | Price |
|---|---|
| Potion | 50 Gil |
| Hi-Potion | 300 Gil |
| Phoenix Down | 300 Gil |
| Antidote | 80 Gil |
| Healing Materia | 600 Gil |
| Cleansing Materia | 1500 Gil |
| Revival Materia | 3000 Gil |
| Fire Materia | 500 Gil |
| Ice Materia | 500 Gil |
| Lightning Materia | 500 Gil |
| Poison Materia | 1500 Gil |
| Barrier Materia | 1500 Gil |
| Binding Materia | 3000 Gil |
| Subversion Materia | 3000 Gil |
| HP Up Materia | 2000 Gil |
| Deadly Dodge Materia | 600 Gil |
Sector 7 Slums - Weapons Store
| Items | Price |
|---|---|
| Potion | 50 Gil |
| Hi-Potion | 300 Gil |
| Phoenix Down | 300 Gil |
| Antidote | 80 Gil |
| Iron Bangle | 1000 Gil |
| Star Bracelet | 1600 Gil |
| Gothic Bangle | 3000 Gil |
| Magician's Bracelet | 4800 Gil |
| Heavy-Duty Bracer | 4800 Gil |
| Sorcerer's Armlet | 4800 Gil |
| Geometric Armlet | 6400 Gil |
| Supreme Bracer | 6400 Gil |
| Rune Armlet | 6400 Gil |
| Power Wristguards | 800 Gil |
| Bulletproof Vest | 800 Gil |
| Earrings | 800 Gil |
| Talisman | 800 Gil |
| Supernatural Wristguards | 5000 Gil |
| Survival Vest | 5000 Gil |
| Platinum Earrings | 5000 Gil |
| Timeworm Talisman | 5000 Gil |
| Star Pendant | 1500 Gil |
| Revival Earrings | 500 Gil |
Sector 7 Slums - Junk Shop
| Items | Price |
|---|---|
| Potion | 30 Gil |
| Elixer | 1000 Gil |
| Missile Launcher | 500 Gil |
| M.O.T.H. Unit (Defense) | 500 Gil |
Vending Machine - Municipal Storage Area
| Items | Price |
|---|---|
| Potion | 50 Gil |
| Hi-Potion | 300 Gil |
| Phoenix Down | 300 Gil |
| Antidote | 80 Gil |
| Healing Materia | 600 Gil |
| Cleansing Materia | 1500 Gil |
| Revival Materia | 3000 Gil |
| Fire Materia | 500 Gil |
| Ice Materia | 500 Gil |
| Lightning Materia | 500 Gil |
| Poison Materia | 1500 Gil |
| Barrier Materia | 1500 Gil |
| Binding Materia | 3000 Gil |
| Subversion Materia | 3000 Gil |
| HP Up Materia | 2000 Gil |
| Deadly Dodge Materia | 600 Gil |
Vending Machine - Abandoned Talagger Factory
| Items | Price |
|---|---|
| Potion | 50 Gil |
| Hi-Potion | 300 Gil |
| Phoenix Down | 300 Gil |
| Antidote | 80 Gil |
| Healing Materia | 600 Gil |
| Cleansing Materia | 1500 Gil |
| Revival Materia | 3000 Gil |
| Fire Materia | 500 Gil |
| Ice Materia | 500 Gil |
| Lightning Materia | 500 Gil |
| Poison Materia | 1500 Gil |
| Barrier Materia | 1500 Gil |
| Binding Materia | 3000 Gil |
| Subversion Materia | 3000 Gil |
| HP Up Materia | 2000 Gil |
| Deadly Dodge Materia | 600 Gil |
Vending Machine - Main Pillar Maintenance
| Items | Price |
|---|---|
| Potion | 50 Gil |
| Hi-Potion | 300 Gil |
| Phoenix Down | 300 Gil |
| Antidote | 80 Gil |
| Healing Materia | 600 Gil |
| Cleansing Materia | 1500 Gil |
| Revival Materia | 3000 Gil |
| Fire Materia | 500 Gil |
| Ice Materia | 500 Gil |
| Lightning Materia | 500 Gil |
| Poison Materia | 1500 Gil |
| Barrier Materia | 1500 Gil |
| Binding Materia | 3000 Gil |
| Subversion Materia | 3000 Gil |
| HP Up Materia | 2000 Gil |
| Deadly Dodge Materia | 600 Gil |
| Iron Bangle | 1000 Gil |
| Star Bracelet | 1600 Gil |
| Gothic Bangle | 3000 Gil |
| Magician's Bracelet | 4800 Gil |
| Heavy-Duty Bracer | 4800 Gil |
| Sorcerer's Armlet | 4800 Gil |
| Geometric Armlet | 6400 Gil |
| Supreme Bracer | 6400 Gil |
| Rune Armlet | 6400 Gil |
| Power Wristguards | 800 Gil |
| Bulletproof Vest | 800 Gil |
| Earrings | 800 Gil |
| Talisman | 800 Gil |
| Supernatural Wristguards | 5000 Gil |
| Survival Vest | 5000 Gil |
| Platinum Earrings | 5000 Gil |
| Timeworm Talisman | 5000 Gil |
| Star Pendant | 1500 Gil |
| Revival Earrings | 500 Gil |
Tips and Strategies
| 1 | Use Assess together with Elemental Ninjutsu. |
|---|---|
| 2 | Get the Magnify Materia by clearing the Happy Turtle quest. |
| 3 | Get Ramuh from Chadley. |
| 4 | Buy rare Materia at the Junk Shop. |
| 5 | Finish up all loose ends before getting on the train. |
Use Assess together with Elemental Ninjutsu
Knowing what attacks your enemies are weak to is crucial, especially if you are playing on hard mode. If you are struggling with a tough enemy, check if they are weak to an element or status ailment using the Assess Materia.
Yuffie's Elemental Ninjutsu Ability allows her to imbue her attacks with one of the four main elements: fire, ice, lightning, or wind. After using Assess to find out the enemy's weakness, switch Yuffie's Ninjutsu to match that element. Keep in mind that this will only effect her Ninjutsu attacks, which are used when pressing □ after Yuffie has thrown the shuriken.
Get the Magnify Materia by Clearing the Happy Turtle Quest
By clearing the Happy Turtle quest you can receive some Magnify Materia which will increase the range of the spell that it is linked with.
Get Ramuh from Chadley
Ramuh is a very powerful summon and will be very useful in upcoming bossfights. First talk to Chadley and challenge Ramuh in the Shinra Battle Simulator. Defeat Ramuh to receive the Ramuh Summon Materia.
Buy Rare Materia at the Junk Shop

The Junk Shop located in the silo on the street north of Seventh Heaven, despite its name, has some great finds. These include Materia obtainable only here, including the Wind Materia, Luck Up Materia, HP Absorption Materia, and MP Absorption Materia. The Junk Shop also sells three Fort Condor Units which can only be obtained here.
Note that the items sold at the Junk Shop change depending on your story and Fort Condor progress. It's easy to reset the Junk Shop's merchandise by challenging Jessie (or any other player) to a Fort Condor match, immediately forfeiting, and returning to the store. Run this process three times to easily obtain all available items!
| Set | Materia | Units | Armor/Other |
|---|---|---|---|
| 1 | Wind | - | Iron Maiden, Potion, Ether |
| 2 | HP Absorption | Security Officer Barracks, M.O.T.H. Unit |
Astral Cuff, Potion, Hi-Potion |
| 3 | MP Absorption | Security Officer Barracks, Missile Launcher |
Force Bracelet, Potion, Phoenix Down |
| 4 | Luck Up | Missile Launcher, M.O.T.H. Unit |
Force Bracelet, Iron Maiden, Astral Cuff, Potion, Elixir |
Finish up All Loose Ends Before Getting on the Train
Getting on the train will start Chapter 2 of INTERmission and is a point of no return. Make sure all business in the Sector 7 Slums has been taken care of before moving on!
INTERmission Chapter 2: Covert Ops
Hard Mode Tips and Strategies
As is the case with the main game, before doing a hard mode playthrough you ideally want to be at level 50. Keep in mind that you cannot use items and MP does not recover at rest areas on hard mode. Fully upgrading Materia and weapons will also help minimize the risk of getting a game over.
How to Grind EXP and AP for Hard Mode
The fastest way to get to max level while also leveling up Materia is to change the difficulty to Easy, equip an EXP Up Materia and an AP Up Materia, and then repeat battles in the Shinra Combat Simulator.
Intergrade: How to Level Up Fast and AP Farm
Boss Strategy Guide
Ramuh
| Ramuh | |
|---|---|

|
|
| Location | Weaknesses |
| VR Mission | Wind |
How to Beat Ramuh - Key Points
- Fight him when Sonon joins your party
- Use Wind to Stagger
- Destroy his lightning orbs to pressure him
How to Beat Ramuh | Boss Guide
Levirkon
| Levrikon | |
|---|---|

|
|
| Location | Weaknesses |
| Sector 7 Slums | Ice, Fire |
How to Beat Levrikon - Key Points
- Weak to Ice and Fire
- Avoid its Brutalize attack
- Take turns attacking when it is holding a rock
How to Beat Levrikon | Boss Guide
Gigantipede
| Gigantipede | |
|---|---|
|
|
| Location | Weaknesses |
| Main Pillar Maintenance Facility | Lightning |
- Use lightning-based Ninjutsu and spells and target its tail
- Destory the Containment Drones
- Use physical attacks on its head
- Summon Ramuh to deal heavy lightning damage
- Hard Mode Tip - Recommended Materia: HP Up, Healing, Revival, Chakra, Prayer, MP Up, Steadfast Block, ATB Stagger, and Synergy.
- Hard Mode Tip - Containment Drones: Containment Drones are now protected by Shield or Protect on Hard Mode.
FF7 Remake Intergrade Related Links
Intergrade and INTERmission Guide
Intergrade Story Walkthrough
| Chapter 1 | Chapter 2 |
|---|---|
| Chapter 1: Wutai's Finest
|
 Chapter 2: Covert Ops Chapter 2: Covert Ops
|
Intergrade Boss Fights
| Chapter 1 | Levrikon Gigantipede Ramuh |
|---|---|
| Chapter 2 | Scarlet & The Crimson Mare Projector Nero the Sable |
| Shinra Combat Simulator | vs. Shinra's Dark Secrets vs. Midgarian Monsters Weiss the Immaculate Pride and Joy Mk 0.5 (Top Secrets) |
Intergrade Side Content
 Happy Turtle Flyers Happy Turtle Flyers
|
 Shinra Box Buster Shinra Box Buster
|
Fort Condor Minigame
 Fort Condor Guide Fort Condor Guide
|
Condor Coin Farming |
| Fort Condor Units | |
| Fort Condor Boards |
Intergrade Guides
Author

Intergrade Chapter 1: Wutai's Finest Walkthrough
Rankings
- We could not find the message board you were looking for.
Gaming News
![Neverness to Everness (NTE) Review [Beta Co-Ex Test] | Rolling the Dice on Something Special](https://img.game8.co/4414628/dd3192c8f1f074ea788451a11eb862a7.jpeg/show)


Popular Games

Genshin Impact Walkthrough & Guides Wiki
Honkai: Star Rail Walkthrough & Guides Wiki
Arknights: Endfield Walkthrough & Guides Wiki
Umamusume: Pretty Derby Walkthrough & Guides Wiki
Wuthering Waves Walkthrough & Guides Wiki
Pokemon TCG Pocket (PTCGP) Strategies & Guides Wiki
Abyss Walkthrough & Guides Wiki
Zenless Zone Zero Walkthrough & Guides Wiki
Digimon Story: Time Stranger Walkthrough & Guides Wiki
Clair Obscur: Expedition 33 Walkthrough & Guides Wiki


Recommended Games
Fire Emblem Heroes (FEH) Walkthrough & Guides Wiki
Pokemon Brilliant Diamond and Shining Pearl (BDSP) Walkthrough & Guides Wiki
Diablo 4: Vessel of Hatred Walkthrough & Guides Wiki
Super Smash Bros. Ultimate Walkthrough & Guides Wiki
Yu-Gi-Oh! Master Duel Walkthrough & Guides Wiki
Elden Ring Shadow of the Erdtree Walkthrough & Guides Wiki
Monster Hunter World Walkthrough & Guides Wiki
The Legend of Zelda: Tears of the Kingdom Walkthrough & Guides Wiki
Persona 3 Reload Walkthrough & Guides Wiki
Cyberpunk 2077: Ultimate Edition Walkthrough & Guides Wiki


All rights reserved
© SQUARE ENIX CO., LTD. All Rights Reserved.
CHARACTER DESIGN:TETSUYA NOMURA/ROBERTO FERRARI
The copyrights of videos of games used in our content and other intellectual property rights belong to the provider of the game.
The contents we provide on this site were created personally by members of the Game8 editorial department.
We refuse the right to reuse or repost content taken without our permission such as data or images to other sites.