Grymforge Maps and Points of Interest
★ All Updates for Patch 5
☆ Beginner Guides for All Starter Players
★ Simple Character Creation Guide for beginners
☆ A Full Guide to Multiclassing
★ All Side Quests and Event Points
☆ All Races and Subraces
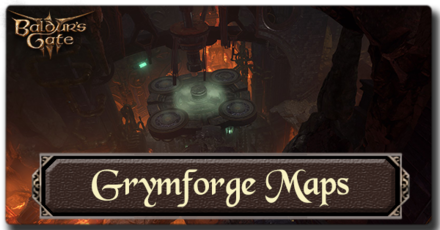
The Grymforge is an area in Baldurs Gate (BG3) and is found in the Underdark where you'll find the Adamantine Forge. It also contains one of the passages to the Moonrise Towers. Read on to view the maps of the Grymforge and the Adamantine Forge, and to find out all the points of interest in these areas.
List of Contents
Grymforge Maps
| Grymforge | Adamantine Forge |
Grymforge Abandoned Refuge Map
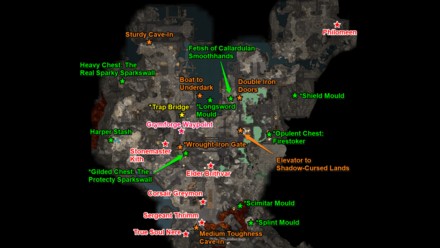
The northern part of the Grymforge is the Abandoned Refuge, where you'll find True Soul Nere, the druegar soldiers cooperating with him, and the gnomes that they have enslaved.
Note that the Grymforge has higher floor areas; these are indicated in the map above with the asterisk beside the point of interest.
How to Get to the Grymforge
Adamantine Forge Map
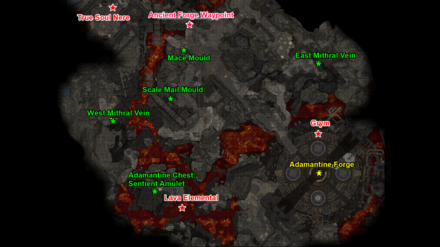
The Adamantine Forge is the area where you can forge Adamantine Items. This area is guarded by the boss enemy, Grym.
From the northern Grymforge, you can reach the Adamantine Forge by going through the Sturdy Cave-In, then passing through the bridge filled with fire traps and riding the lever-operated floating platforms. There's also shortcuts that you can take by using spells like Misty Step.
How to Find the Adamantine Forge
Grymforge Points of Interest
| Grymforge Points of Interest |
|---|
|
・Nere
|
Grymforge Waypoint
| Grymforge Waypoint |
|---|
 |
| Coordinates: (-645, 379) |
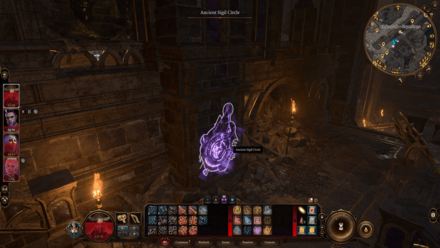
The Grymforge Waypoint is located just near the boats. Upon first arriving in the area coming from the main Underdark area, you'll find this waypoint immediately.
Entrances
Elevator to Shadow-Cursed Lands
| Elevator to Shadow-Cursed Lands |
|---|
 |
| Coordinates: (-600, 381) |
The Elevator to the Shadow-Cursed Lands is located east from the waypoint, located behind the Wrought-Iron Gate.
Make sure to have all your quests done for Act 1 before entering this passage, since riding this elevator begins Act 2 and will cancel many of your Act 1 quests.
How to Get to the Shadow-Cursed Lands
Boat to Underdark
| Boat to Underdark |
|---|
 |
| Coordinates: (-635, 408) |
The Grymforge can be reached by riding the Underdark Druegar Boat; you can ride this back to return to the main Underdark area. You can also ride the other boat nearby, the Zurkhwood Skiff, to do the same.
Sturdy Cave-In
| Sturdy Cave-In |
|---|
 |
| Coordinates: (-674, 447) |
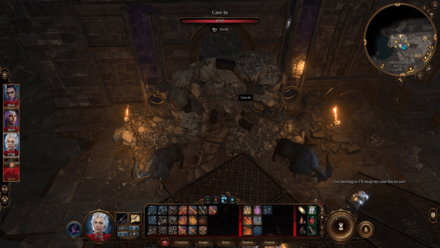
There are two cave-ins in the Grymforge; the northern one has Sturdy toughness, meaning it can be destroyed with only at least 10 HP damage.
You'll find a bunch of druegars forcing a couple of Rothes to destroy this wall. You can order the Rothes to join you in battle against the druegar, order them to destroy the wall, or attack the Rothes yourself. Whichever you do, it will end up with the druegar attacking you.
Behind this cave-in, you'll find the way up to the upper area of the Grymforge.
Medium Toughness Cave-In
| Medium Toughness Cave-In |
|---|
 |
| Coordinates: (-634, 309) |
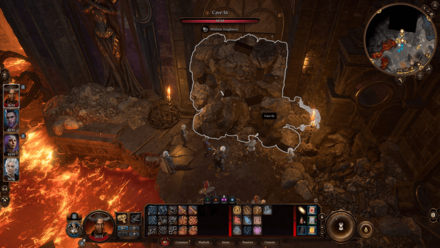
The other cave-in in the Grymforge is located south; this one has Medium Toughness, meaning it can only be destroyed with at least 20 HP damage. Nere is located behind this cave-in, slwoly dying to the poison gas inside.
This one is a bit more difficult to destroy; you likely won't be able to destroy it yourself. There are areas in the Grymforge that you can get explosives to destroy this cave-in, such as using the Runepowder Vial from Philomeen, or the Smokepowder Bombs in the Smokepowder Reserve.
Double Iron Doors
| Double Iron Doors |
|---|
 |
| Coordinates: (-602, 409) |
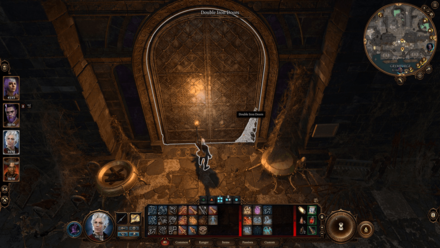
There's a locked Double Iron Doors entrance in the lower area near the boats; behind this door is the long path full of doors and enemies, leading to Philomeen's Hiding Spot.
Beings of Interest
Nere
| Nere |
|---|
 |
| Coordinates: (-644, 302) |
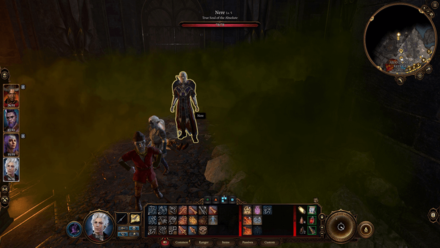
The evil drow, True Soul Nere, can be found behind the Cave-In in the south area. Freeing him is a timed event; leaving the area or taking a Long Rest before freeing him will likely cause him to die behind the cave-in. If you free him, you'll have to choose between fighting him or letting the enslaved gnomes die.
Defeating him is a necessary action to finish the quest given by the Myconid Sovereign to bring Nere's Head to them, as well as freeing the enslaved gnomes.
You can also loot a Mind Flayer Parasite Specimen from him, as well as the very rare Disintegrating Night Walkers equipment.
Deliver Nere's Head: How to Beat Nere
Sergeant Thrinn
| Sergeant Thrinn |
|---|
 |
| Coordinates: (-634, 311) |
Sergeant Thrinn is the leader of the druegar in the Grymforge. If you've gotten the Boots of Speed from Thulla in the Ebonlake Grotto, delivering it to her will finish the Find the Missing Boots quest. She'll give you a reward of your choice between the Bracing Band and the Armour of Uninhibited Kushigo
If you didn't trick Nere into killing her, she'll fight with Nere.
How to Get Boots of Speed
Corsair Greymon
| Corsair Greymon |
|---|
 |
| Coordinates: (-630, 327) |
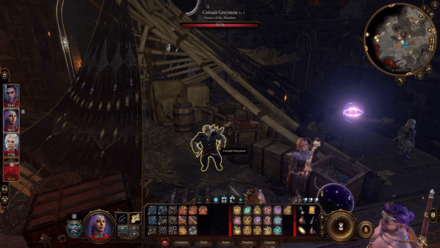
Corsair Greymon is the leader of the druegar that confronts you on your boat while you're sailing to the Grymforge. If you didn't kill him there and sailed peacefully, he will go near the area where Nere is and will be available as a trader, selling a few rare and uncommon weapons.
Corsair Greymon will fight with Nere if you decide to fight him.
Elder Brithvar
| Elder Brithvar |
|---|
 |
| Coordinates: (-626, 355) |
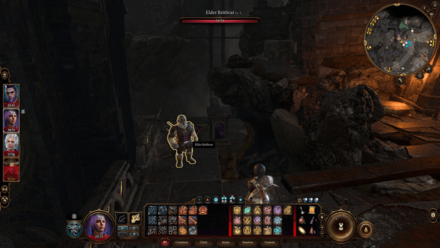
Elder Brithvar is a druegar that aims to rebel against Nere and Thrinn. You'll have to convince him to ally with you; he'll task you with killing the Scrying Eye floating nearby.
If you did what he asks, he'll ally with you in the confrontation against Nere. There are many other rebels nearby who'll join him in helping you fight Nere's forces. Otherwise, he and his fellow rebels will join to attack you instead.
If you sided with him and defeated Nere, you can convince him to release the gnomes in the Grymforge.
Stonemaster Kith
| Stonemaster Kith |
|---|
 |
| Coordinates: (-660, 375) |
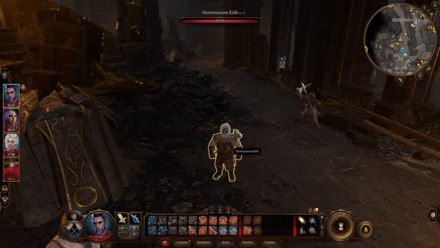
Stonemaster Kith is a druegar trader located near some rubble. If you pass the checks in helping him investigate, he'll give you an Infernal Alloy. If you didn't pass the checks, you can still purchase it from him; it will be in his trader inventory.
Philomeen
| Philomeen |
|---|
 |
| Coordinates: (-526, 463) |
Deep into the northeastern area of the Underforge, across many locked rooms and some enemies, you'll find Philomeen in her hiding spot. If you haven't gotten a quest to find her or if your conversation with her goes badly, she'll blow herself up and will likely kill you and your whole party.
Otherwise, if you pass the checks while talking to her, she'll give you the Runepowder Vial, which can blow up the Cave-In that trapped Nere.
Valuables
Fetish of Callardulan Smoothhands
| Fetish of Callardulan Smoothhands |
|---|
 |
| Coordinates: (-610, 410) |
The Fetish of Callardulan Smoothhands is a rare ring that can be gotten from one of the gnome corpses being thrown by the two druegar near the coast, Brathwen and Viss. You can trick them into leaving, letting you steal the ring from one of the corpses before continuing, or just attacking them.
Don't wait too long before trying to get the ring. If they manage to throw the corpse containing the ring into the water, you won't be able to get it anymore.
Fetish of Callarduran Smoothhands
Heavy Chest: The Real Sparky Sparkswall
| Heavy Chest: The Real Sparky Sparkswall |
|---|
 |
| Coordinates: (-693, 418) |
Located northwest of the area, after jumping through some cliffs, you'll find a trapped and locked Heavy Chest. This contains the Real Sparky Sparkswall, an uncommon shield.
How to Get The Real Sparky Sparkswall
Harper Stash
| Harper Stash |
|---|
 |
| Coordinates: (-698, 372) |
There's a Harper Stash in the western part of the area, behind some cliffs. At first, you'll see only three Chests; be careful as these aren't real chest and are actually Mimics who will attack you if you interact with any of them.
Find the tiny Toy Chest in the area tor reveal the Harper Stash chest. This chest contains a few gold and valuables inside.
Grymforge Upper Area Points of Interest
Trap Bridge
| Trap Bridge |
|---|
 |
| Coordinates: (-647, 380) |
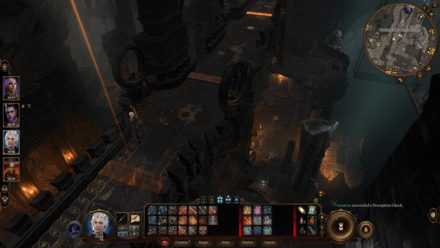
Behind the Sturdy Cave-In in the northwest part of the Grymforge area, you can go up to the higher areas of the Grymforge. The first one you'll encounter is a bridge, which is riddled with trap panels all across it. Stepping on any of these traps will trigger all the fire traps throughout the bridge.
You can disarm these panels or fire traps, but there are a lot of them so it isn't worth the effort. It's easier to just jump across these traps; make sure to ungroup your party so they don't accidentally walk into any traps.
In the middle of this bridge, you'll find a ladder going down to where the lever-controlled platform is. At the end of the bridge, you'll find the Wrought-Iron Gate; behind this, you'll find the lever that disable all the traps in the bridge.
Lever-Operated Platforms
| Lever-Operated Platforms |
|---|
 |
| Coordinates: (-638, 410) |
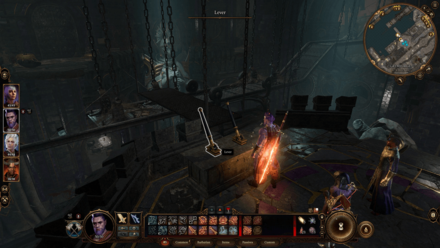
In the middle of the trap bridge, you can descend into a ladder that leads to a couple of levers and a platform nearby. These levers operate the platform, either being forward-backward, or higher-lower. You'll have to ungroup your party, have one operate the lever, while the others ride the platform to where you want them to go.
There's a second lever-operated platform at the end of the very long floating bridge. The levers for this one are located east, in another area in the upper floors.
At the end of this platform, you'll arrive in the Adamantine Forge area; you can activate the waypoint here and have the ones left behind to operate the levers to teleport to this waypoint and rejoin your party.
Wrought-Iron Gate (Trap Bridge)
| Wrought-Iron Gate (Trap Bridge) |
|---|
 |
| Coordinates: (-653, 370) |
The Wrought-Iron Gate is located at the other end of the trap bridge. This can't be lockpicked, and you'll have to think of other ways to get behind the gate.
One of the ways is using Misty Step to get behind the gate. It might not work immediately, so you'll have to find the correct position and camera rotation to find the spot you can Misty Step into.
Behind this gate, you'll find the lever that disables the traps in the Trap Bridge and opens the gate, an Idol of Shar which is an item of interest for Shadowheart, and a Gilded Chest.
Gilded Chest: The Protecty Sparkswall
| Gilded Chest: The Protecty Sparkswall |
|---|
 |
| Coordinates: (-645, 360) |
Behind the Wrought-Iron Gate, you'll find a Gilded Chest. This chest contains the rare The Protecty Sparkswall armor.
How to Get The Protecty Sparkswall
Opulent Chest: Firestoker
| Opulent Chest: Firestoker |
|---|
 |
| Coordinates: (-577, 383) |
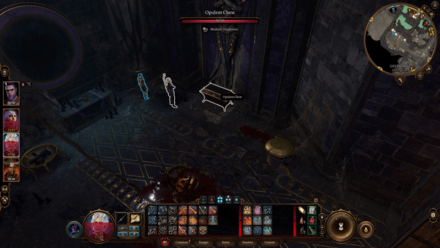
In the upper floors, across the lever-operated platform, you'll find a room with Hellbeasts. In this room, you'll also find an Opulent Chest, which contains the uncommon Firestoker weapon.
Adamantine Item Moulds
Longsword Mould
| Longsword Mould |
|---|
 |
| Coordinates: (-625, 404) |
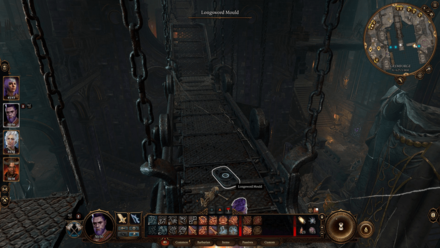
The Longsword Mould allows you to forge the Adamantine Longsword in the Adamantine Forge. It is on a floating bridge that you can get to by operating the first lever-operated platform.
How to Get Adamantine Longsword
Shield Mould
| Shield Mould |
|---|
 |
| Coordinates: (-557, 411) |
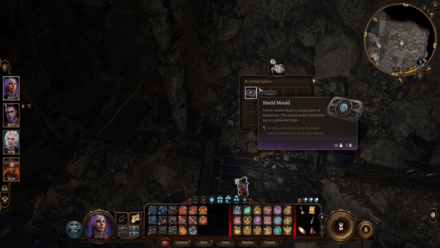
The Shield Mould allows you to forge the Adamantine Shield in the Adamantine Forge. It is on a skeleton in a room in the eastern part of the upper floors.
How to Get Adamantine Shield
Scimitar Mould
| Scimitar Mould |
|---|
 |
| Coordinates: (-606, 324) |
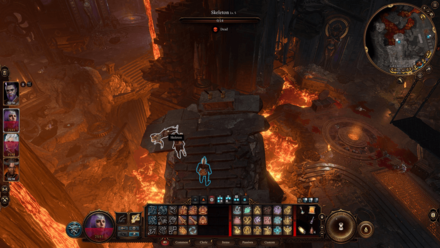
The Scimitar Mould allows you to forge the Adamantine Scimitar in the Adamantine Forge. It is on a skeleton beside the second set of levers in the upper floors.
How to Get Adamantine Scimitar
Splint Mould
| Splint Mould |
|---|
 |
| Coordinates: (-597, 309) |
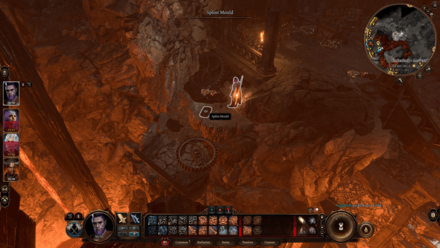
The Splint Mould allows you to forge the Adamantine Splint Armour in the Adamantine Forge. It is located in a tiny area northeast of the Ancient Forge waypoint, near one of the Mithral Veins.
How to Get Adamantine Splint Armour
Adamantine Forge Points of Interest
| Grymforge Points of Interest |
|---|
|
|
Adamantine Forge
| Adamantine Forge |
|---|
 |
| Coordinates: (-558, 231) |
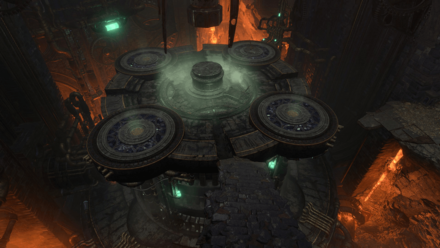
The Adamantine Forge is where you can forge Adamantine items. It has a chamber that will hold a mould, and a crucible that will hold the Mithral Ore.
There's a lever that brings down the hammer and lowers the platform the first time you do it, and a wheel that activates the Lava Valve and summons the Grym boss the first time you activate it.
How to Activate the Adamantine Forge
Ancient Forge Waypoint
| Ancient Forge Waypoint |
|---|
 |
| Coordinates: (-611, 294) |
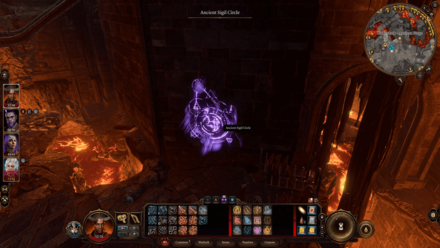
South of the main Grymforge area, north of the Adamantine Forge, you'll find the Ancient Forge Waypoint.
You can get here by going through the upper area of the Grymforge across the floating lever-operated platforms, but you can take a shortcut and get to the southmost point that you can get and use a spell to get across, like Misty Step.
Grym
| Grym |
|---|
 |
| Coordinates: (-546, 238) |
When you first use the Adamantine Forge, you'll encounter Grym, an extremely powerful boss.
It can only be damaged when it is heated, meaning that after the lava gets drained, you'll have to reactivate the Lava Valve after a few turns. You can also lure it to the hammer in the middle and activate it, dealing a huge amount of damage.
It will drop the Very Rare Grymskull Helm equipment upon defeat.
How to Beat Grym
Mithral Veins: Mithral Ore
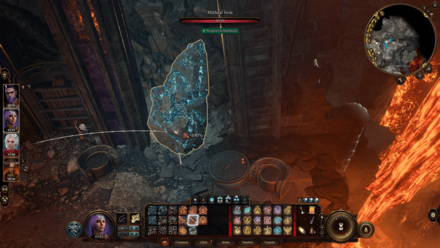
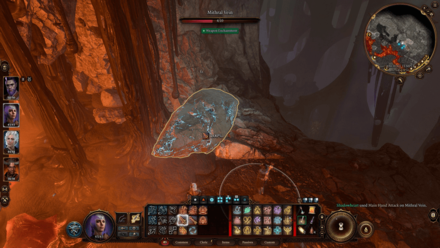
Before you can get forging, you'll need some Mithral Ore first, which you have to slot in the Forge's Crucible. The Mithral Ore can be mined inside the Mithral Veins; there are two of them in the game, both located in the Grymforge, meaning you can only have two Adamantine items in a playthrough.
East Mithral Vein
| East Mithral Vein |
|---|
 |
| Coordinates: (-554, 277) |
This Mithral Vein is located southeast of the Ancient Forge Waypoint, near the stairs leading to the forge, in an area with bookshelves. Along the way, you'll encounter a group of Magma Mephits that will ambush you in a surprise attack.
West Mithral Vein
| West Mithral Vein |
|---|
 |
| Coordinates: (-646, 254) |
This Mithral Vein is located southwest of the Ancient Forge Waypoint, in a named location called the Ancient Temple. You might have to fight the group of Animated Armor enemies along the way.
Adamantine Item Moulds
Mace Mould
| Mace Mould |
|---|
 |
| Coordinates: (-613, 283) |
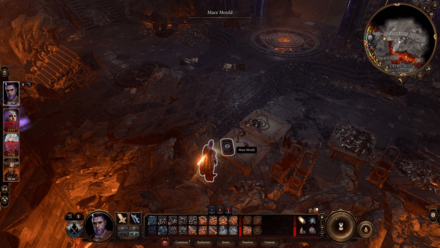
The Mace Mould allows you to forge the Adamantine Mace in the Adamantine Forge. It is located on a table near the Ancient Forge Waypoint.
Scale Mail Mould
| Scale Mail Mould |
|---|
 |
| Coordinates: (-617, 264) |
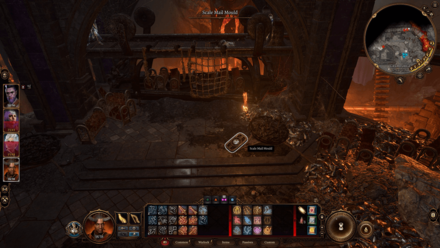
The Scale Mail Mould allows you to forge the Adamantine Scale Mail in the Adamantine Forge. It is found on the ground near the group of Animated Armor, southwest of the waypoint.
Lava Elemental
| Lava Elemental |
|---|
 |
| Coordinates: (-608, 222) |
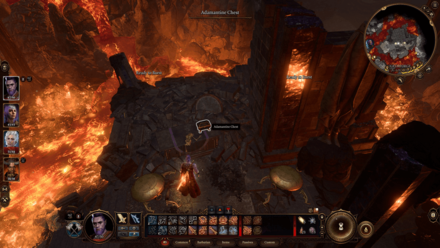
The Lava Elemental is a strong enemy patrolling the southwest area of the Adamantine Forge. It heals when it's on magma, so try to lure it in the areas where there's no magma. When you defeat it, the magma eruptions in the area will stop.
Adamantine Chest: Sentient Amulet
| Adamantine Chest: Sentient Amulet |
|---|
 |
| Coordinates: (-628, 222) |
In the area being patrolled by the Lava Elemental, you'll find the Adamantine Chest.
Inside, you'll find the Sentient Amulet, an accessory possessed by a spirit tied to the Help the Cursed Monk quest.
How to Get Sentient Amulet
Baldur's Gate 3 Related Guides
Faerûn All Locations
| Prologue Locations | |
|---|---|
| Nautiloid | |
| Act 1 Locations | |
| Wilderness | Chapel Ruins |
| Emerald Grove | Owlbear Nest |
| Blighted Village | Whispering Depths |
| Putrid Bog (Sunlit Wetlands) | Overgrown Tunnel |
| The Risen Road | Zhentarim Basement |
| Goblin Camp | Mountain Pass: Rosymorn Monastery |
| Creche Y'llek | Underdark |
| Arcane Tower | Grymforge |
| Act 2 Locations | |
| Shadow-Cursed Lands | Reithwin Town |
Comment
Author
Grymforge Maps and Points of Interest
improvement survey
03/2026
improving Game8's site?

Your answers will help us to improve our website.
Note: Please be sure not to enter any kind of personal information into your response.

We hope you continue to make use of Game8.
Rankings
- We could not find the message board you were looking for.
Gaming News
Popular Games

Genshin Impact Walkthrough & Guides Wiki

Honkai: Star Rail Walkthrough & Guides Wiki

Umamusume: Pretty Derby Walkthrough & Guides Wiki

Pokemon Pokopia Walkthrough & Guides Wiki

Resident Evil Requiem (RE9) Walkthrough & Guides Wiki

Monster Hunter Wilds Walkthrough & Guides Wiki

Wuthering Waves Walkthrough & Guides Wiki

Arknights: Endfield Walkthrough & Guides Wiki

Pokemon FireRed and LeafGreen (FRLG) Walkthrough & Guides Wiki

Pokemon TCG Pocket (PTCGP) Strategies & Guides Wiki
Recommended Games

Diablo 4: Vessel of Hatred Walkthrough & Guides Wiki

Cyberpunk 2077: Ultimate Edition Walkthrough & Guides Wiki

Fire Emblem Heroes (FEH) Walkthrough & Guides Wiki

Yu-Gi-Oh! Master Duel Walkthrough & Guides Wiki

Super Smash Bros. Ultimate Walkthrough & Guides Wiki

Pokemon Brilliant Diamond and Shining Pearl (BDSP) Walkthrough & Guides Wiki

Elden Ring Shadow of the Erdtree Walkthrough & Guides Wiki

Monster Hunter World Walkthrough & Guides Wiki

The Legend of Zelda: Tears of the Kingdom Walkthrough & Guides Wiki

Persona 3 Reload Walkthrough & Guides Wiki
All rights reserved
© 2023 Larian Studios. All rights reserved. Larian Studios is a registered trademark of arrakis nv, affiliate of Larian Studios Games ltd. All company names, brand names, trademarks and logos are the property of their respective owners. © 2020 Wizards of the coast. All rights reserved. Wizards of the coast, Baldur’s Gate, Dungeons & Dragons, D&D, and their respective logos. Are registered trademarks of wizards of the coast LLC
The copyrights of videos of games used in our content and other intellectual property rights belong to the provider of the game.
The contents we provide on this site were created personally by members of the Game8 editorial department.
We refuse the right to reuse or repost content taken without our permission such as data or images to other sites.


![Monster Hunter Stories 3 Review [First Impressions] | Simply Rejuvenating](https://img.game8.co/4438641/2a31b7702bd70e78ec8efd24661dacda.jpeg/thumb)


