How to Get the Orphic Hammer
★ All Updates for Patch 5
☆ Beginner Guides for All Starter Players
★ Simple Character Creation Guide for beginners
☆ A Full Guide to Multiclassing
★ All Side Quests and Event Points
☆ All Races and Subraces
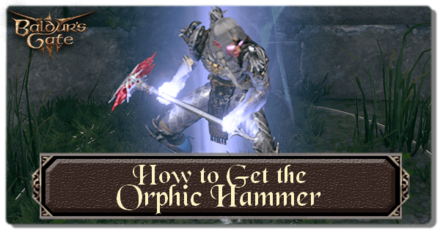
The Orphic Hammer is a Legendary Warhammer in Baldur's Gate 3 (BG3) that you can get by making a deal with Raphael or by stealing it from his House of Hope. Read on to learn more about the Orphic Hammer, including its stats, effects, as well as how to get it from the House of Hope in the Nine Hells!
 Heads up! Heads up! |
You are entering spoiler territory for a weapon that is closely tied to the main story. Proceed at your own risk, adventurer. You have been warned! |
|---|
List of Contents
- Overview
- How to Get
- Find a Way to Free Orpheus
- Go to Sharess' Caress to Meet Raphael
- Make a Deal for the Hammer
- Obtain a Pass to Enter Baldur's Gate
- Find Diabolist Helsik in the Lower City
- Go to the House of Hope
- Gain Access to the Boudoir
- Obtain the Pass Phrase for the Hammer
- Obtain the Orphic Hammer
- Free Hope from Her Prison
- Defeat Raphael
- Related Guides
Orphic Hammer Overview
| Orphic Hammer Info | ||
|---|---|---|
| Damage |
1d10 (1d8) |
4 |
| Weapon Type | ||
| Effect |
Spell Resistance: You have Advantage on Saving Throws against spells. Weapon Enchantment +3 |
|
| Unlockable Skills/Spells | ||
| Weapon Traits | ||
|
|
||
| Rarity | Weight | Price |
| Legendary | 2.7
|
770
|
How to Get the Orphic Hammer
Make a Deal with Raphael or Steal it From the House of Hope
| Orphic Hammer Location |
|---|
| Sign Raphael's Contract to get the hammer in exchange for the Crown controlling the Absolute or brave the House of Hope to steal the hammer from under Raphael's nose. |
How to Get the Orphic Hammer Summary
- Find a Way to Free Orpheus
- Go to Sharess' Caress to Meet Raphael
- Make a Deal for the Orphic Hammer (Optional)
- Obtain a Pass or Invitation to Enter Baldur's Gate
- Find Diabolist Helsik in the Lower City
- Go to the House of Hope
- Gain Access to the Boudoir
- Obtain the Pass Phrase for the Hammer
- Obtain the Orphic Hammer
- Free Hope from Her Prison (Optional)
- Defeat Raphael
Find a Way to Free Orpheus
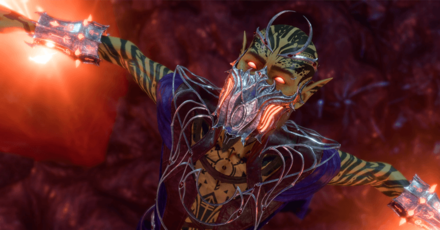
During the opening sequences of Act 3, you will find out that the Arcane Prism in your possession is in fact the prison of Orpheus - the son of Gith and the race's exiled prince. Once the Emperor explains this to you, you will receive the quest, Free Orpheus.
It is after getting this quest that we are able to meet with Raphael and find out about the Orphic Hammer - a powerful weapon that can be used to break the chains holding Orpheus captive.
Go to Sharess' Caress to Meet Raphael
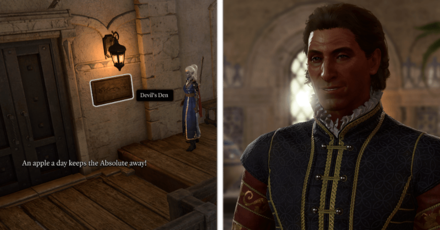
To find Raphael, make your way to the Sharess' Caress brothel in the South Span of Wyrm's Crossing. Once there, head up to the 3rd floor and look for the Devil's Den room (by reading the plaques on the walls). Inside you will find Raphael waiting for you.
How to Reach the South Span of Wyrm's Crossing
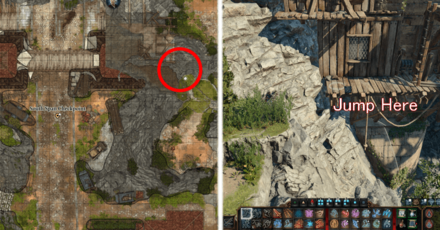
When you first arrive in Rivington, the bridge called the South Span of Wyrm's Crossing will be closed off to everyone. In order to reach Sharess' Caress (which is on the bridge) you will need to head to a small ledge to the east of the Crossing entrance. From there, use jump to reach the platform that leads you to the bridge.
Make a Deal for the Orphic Hammer (Optional)
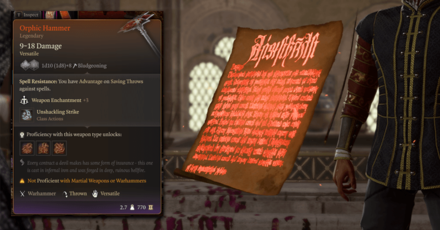
Players who want to make a deal for the hammer can do so by simply speaking to Raphael and accepting his terms (surrender the Crown of Karsus to him). However, this gives a very powerful magical artifact to a demon looking to become the Archdevil Supreme of the 9 Hells.
That aside, making the deal does as advertised. Raphael immediately hands over the Orphic Hammer with payment to be collected once you kill the dead three and defeat the Absolute. Players looking for an alternative option, skip to the next step to complete the Deal with the Devil side quest.
Obtain a Pass or Invitation to Enter Baldur's Gate
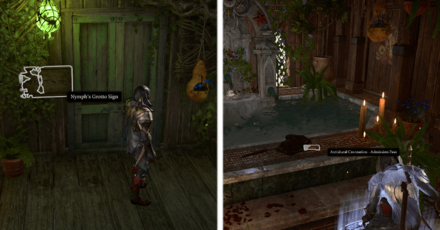
If you decide on going the alternate route, brace yourself for a lengthy quest. The first step to finding the Orphic Hammer without the help of Raphael is to find a diabolist named Helsik in Baldur's Gate. However, to enter the city, you will need a pass or an invitation to Gortash's coronation. Players will be able to find a pass or invitation at the following locations:
- Investigate the murders at the Open Hand temple. Report your findings to the investigator to receive a Lower City Pass.
- A Flaming Fist named Jara is in the middle of session at Sharess' Caress. Break into the Nymph Grotto Room (DC10 Sleight of Hand) at the 3rd Floor of the brothel and steal the Coronation Pass next to her clothes.
- Arfur the Toymaker is making a ruckus in front of his mansion. Investigate his basement and find the planted explosives before confronting him at the 1st Floor of Sharess' Caress. He will give you a Coronation Pass after you rattle him.
Find Diabolist Helsik in the Lower City
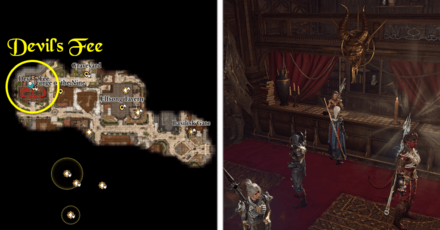
Once you have access to the Lower City, make your way east of the Basilisk Gate. Diabolist Helsik can be found in the Devil's Fee - a large building next to the Forge of the Nine where you find the blacksmith, Dammon.
Before you can ask Helsik to open a portal to hell for you, you will need to pass a Perception Check (WIS, DC5) and an Arcana Check (INT, DC15) on any two items on display. Once you identify two successfully, you can speak to Helsik and tell her to show you her real inventory.
After she shows you her true colors, you can then ask her to open a portal for you to the House of Hope. The price will be 20000 Gold. If you do not have that much, you can intimidate her to lower the price to half, or persuade her to waive the fee. The last method will have you retrieve the Gauntlets of Hill Giant Strength for her.
How to Get to the House of Hope for Free
Helsik Dialogue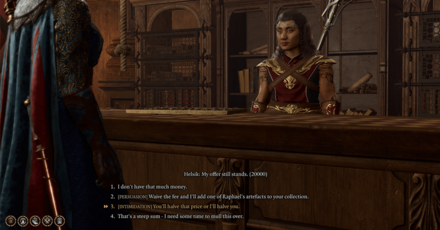 |
|
|---|---|
| Helsik: Of course, such a task will require quite the substantial donation to Lord Mammon's coffers. (20000) | |
| Dialogue Options | Dialogue Results |
| [Persuasion (DC20)] Waive the fee and I'll add one of Raphael's artefacts to your collection. |
Success Helsik accepts but you have to retrieve the Gauntlets of Hill Giant Strength for her in the House of Hope. Failure Helsik gets mad and tells you it isn't worth the risk. Price stays at 20,000 Gold. |
| [Intimidation (DC25)] You'll halve that price or I'll halve you. |
Success Helsik agrees. Price is discounted to 10,000 Gold. Failure Helsik gets mad and tells you it isn't worth the risk. Price stays at 20,000 Gold. |
Go to the House of Hope
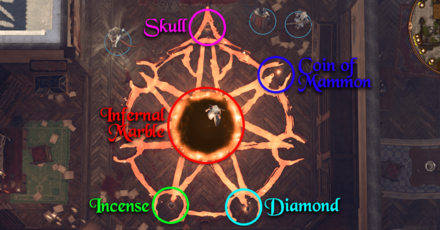
With the materials secure to open a portal, make your way to the House of Hope by setting up the materials on the blood circle inside Helsik's room. Follow the set-up above to open the portal.
- Place the Skull on the star point near Helsik's desk.
- Next, place, the Coin of Mammon on the point to the right of the Skull.
- Continuing clockwise, skip a point and place the Diamond on the next one.
- Next, place the Incense on the point after the Diamond.
- Finally, place the Infernal Marble in the center of the star.
Warning: The game isn't lying when it tells you that there are many challenges in Hell. If you pursue this part of the quest to obtain the Orphic Hammer make sure you're at least a Level 10 party since, at the end of this quest, a Level 12, 666 HP Raphael along with a handful of 96 HP Cambions will be waiting to gank you.
Gain Access to the Boudoir

Once you've set foot in the House of Hope, speak to the specter of Hope to gain a disguise that allows you to explore its halls freely. With access secured, you can look around the area but, ultimately, our destination is the Boudoir. There are two ways to access the Bourdoir.
Take the Platforming Route Outside the House of Hope

The easiest way to get to the Boudoir is to use the platforming route outside the House of Hope. The first few jumps will be easy, but the final one can only be cleared by characters with a high enough Strength ability. To get your non-STR characters up, make sure to bring along two crates to stack. This will be the easiest way to reach the Boudoir.
Convince the Archivist to Give You an Invitation
Hope Dialogue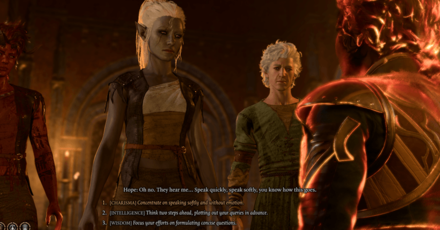 |
|
|---|---|
| Hope: Oh no. They hear me... Speak quickly, speak softly, you know how this goes. | |
| Dialogue Options | Dialogue Results |
| [Charisma (DC15)] Concentrate on speaking softly and without emotion. [Intelligence (DC15)] Think two steps ahead, plotting out your queries in advance. [Persuasion (DC18)] Who does the Archivist fear, Hope? I need a name. |
Success Allows you to ask the question, How should I deal with the Archivist? Failure Hope vanishes. Gives no clue how to trick the Archivist. |
Hope Dialogue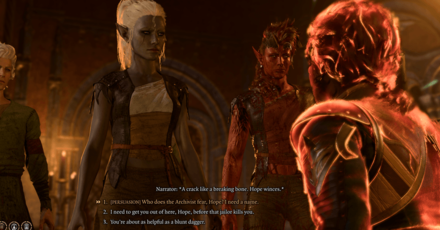 |
|
| Narrator: A crack like a breaking bone. Hope winces (after asking How should I deal with the Archivist?). | |
| Dialogue Options | Dialogue Results |
| [Persuasion (DC18)] Who does the Archivist fear, Hope? I need a name. |
Success Find out that the Archivist fears Verillius Receptor. You can use the info to trick him. Failure Hope vanishes. Gives no clue how to trick the Archivist. |
Archivist Dialogue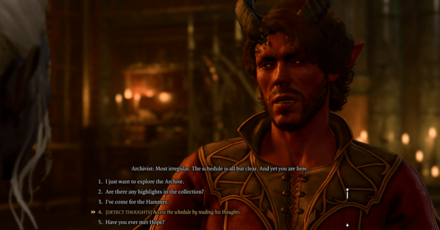 |
|
| Archivist: Most irregular. The schedule is all but clear. And yet you are here. | |
| Dialogue Options | Dialogue Results |
| [Deception (DC15)] I am Verillius Receptor, Zariel's High Inquisitor. |
Success The Archivist believes you. Gives you a Boudoir Invitation after exhausting the dialogue choices. Failure The Archivist catches on and spots the deception. Can no longer get a Boudoir Invitation. |
| [Detect Thoughts (DC10)] Access the schedule by reading his thoughts. |
Success Unlocks the option to masquerade as Verillius Receptor. Failure The Archivist catches on and blocks you. Can no longer get a Boudoir Invitation. |
Obtain the Pass Phrase for the Hammer
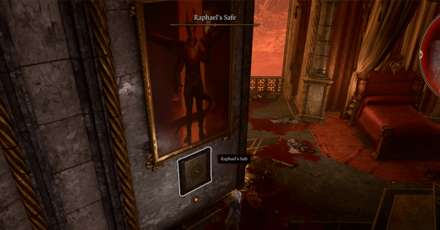
Once you gain access to the Boudoir, head over to the bed and speak to Haarlep the incubus. For this section, you can either Sleep with Haarlep or Attack Haarlep to get the key. Either option works, but the former will need some careful navigating.
With the key secure, press the button underneath Raphael's painting (left side of the bed) to reveal the safe. Open it and read Raphael's Notes to learn the pass phrase: Give me my heart's desire.
Sleep with Haarlep the Incubus
Ultimately, none of the Skill Check dialogue choices here matter. Players will only need to keep an eye out for the following exchange and answer accordingly in order to avoid the chosen character's permanent death. The safest answer is to say Haarlep can have your body but not your mind.
Note: Choosing this route will have you miss out on a unique pair of gloves called the Helldusk Gloves. They can only be obtained if you decide to kill Haarlep.
Haarlep Dialogue |
|
|---|---|
| Haarlep: Devote yourself to pleasure eternal. Stay here with me - this can be forever. | |
| Dialogue Options | Dialogue Results |
| [Dialogue Option 1] You can have my body, but not my mind. |
Haarlep lets you go free. Gives you the key and reveals the location of the safe. In exchange, he can shape change into your body for his future trysts. |
| [Dialogue Option 2] My heart and soul are yours. |
Haarlep goes to town on you. Your character dies from pleasure. This is a permanent death and you cannot be revived. The key to the safe will be on the bed though. |
| [Dialogue Option 3] I already lived an eternity devoted to pleasure, and it was rather dull. |
Push Haarlep off triggering combat. The character who slept with Haarlep will have no weapons and armor. |
| [Constitution (DC25)] Try to cool your desires, push the creature away. |
Success Push Haarlep off triggering combat. The character who slept with Haarlep will have no weapons and armor. Failure No effect. You must pick from the remaining 3 choices. |
Kill Haarlep to Get the Key

Alternatively, you can just kill Haarlep and take the key from them. You will have to fight Haarlep as well as the 6 imps he summons. Deal with the imps first since Haarlep will be easy to kill when they are by themselves.
Once killed, loot the key from Haarlep's body. Pass a Perception Check (DC18, WIS) to spot the trap guarding the painting. Disarm it by passing a Sleight of Hand Check (DC20, DEX) before pressing the button that reveals the safe.
Obtain the Orphic Hammer
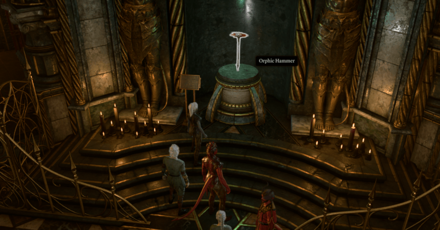
After obtaining the pass phrase, head to the Archive and approach the hammer. Interact with it and use the pass phrase Give me my heart's desire to remove the barrier blocking it. Before picking it up, make sure you have healed and prepared your party. When ready, pick up the hammer; this makes everyone at the House of Hope hostile to you.
How to Get to the House of Hope
Free Hope from Her Prison (Optional)
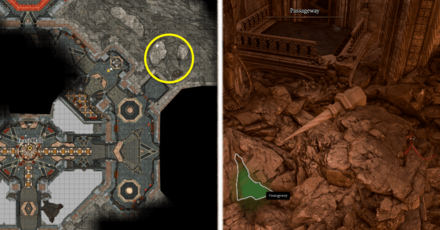
Optionally, you can free Hope from her prison underneath the House of Hope. You can use your newly acquired Orphic Hammer to break the gems locking her in place. However, do note that there will be 2 Spectators and a bunch of Imps guarding her prison.
If your party is only Level 10, it is highly recommended that you rescue Hope. She will be instrumental in beating Raphael if you don't have a good healer in your party. Plus, rescuing her and beating Raphael will reward you with another legendary item called the Gloves of Soul Catching.
Defeat Raphael
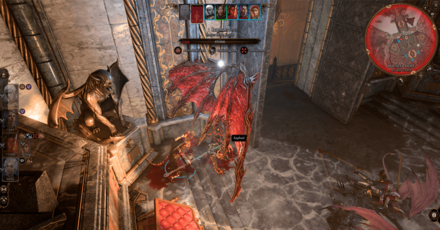
Finally, make your way back to where you first entered the House of Hope and prepare for the fight of your life. Before entering the room, Quick Save because this is going to be a long fight. When ready, head inside the room to find Raphael and his goon squad waiting to ambush you.
Defeat Raphael (Level 12, 666 Hit Points) and his entourage to escape the House of Hope. On death, he will drop a legendary armor piece called the Helldusk Armor. Additionally, if you managed to rescue and keep Hope alive through the entire fight, she will reward you with the legendary gloves.
Baldur's Gate 3 Related Guides

All Legendary Weapons and Armor
All Legendary Weapons
All Legendary Armor
| All Legendary Armor | |
|---|---|
| Gloves of Soul Catching | Helldusk Armor |
| Helm of Balduran | Mask of the Shapeshifter |
| Scarab of Protection | Viconia's Walking Fortress |
All Legendary Books
| All Legendary Books | |
|---|---|
| Caution Before the Seelie | The Annals of Karsus |
| The Red Knight's Final Strategem | The Tharchiate Codex |
All Warhammers
| Warhammer | Faithbreaker | Intransigent Warhammer |
| Orphic Hammer | Ceremonial Warhammer | Ketheric's Warhammer |
| Rusty Warhammer | Charge-Bound Warhammer | Clown Hammer |
| Dwarven Thrower | Hammer of the Just | Infernal Warhammer |
| Azer Warhammer |
Comment
Author
How to Get the Orphic Hammer
improvement survey
03/2026
improving Game8's site?

Your answers will help us to improve our website.
Note: Please be sure not to enter any kind of personal information into your response.

We hope you continue to make use of Game8.
Rankings
- We could not find the message board you were looking for.
Gaming News
Popular Games

Genshin Impact Walkthrough & Guides Wiki

Honkai: Star Rail Walkthrough & Guides Wiki

Umamusume: Pretty Derby Walkthrough & Guides Wiki

Pokemon Pokopia Walkthrough & Guides Wiki

Resident Evil Requiem (RE9) Walkthrough & Guides Wiki

Monster Hunter Wilds Walkthrough & Guides Wiki

Wuthering Waves Walkthrough & Guides Wiki

Arknights: Endfield Walkthrough & Guides Wiki

Pokemon FireRed and LeafGreen (FRLG) Walkthrough & Guides Wiki

Pokemon TCG Pocket (PTCGP) Strategies & Guides Wiki
Recommended Games

Diablo 4: Vessel of Hatred Walkthrough & Guides Wiki

Fire Emblem Heroes (FEH) Walkthrough & Guides Wiki

Yu-Gi-Oh! Master Duel Walkthrough & Guides Wiki

Super Smash Bros. Ultimate Walkthrough & Guides Wiki

Pokemon Brilliant Diamond and Shining Pearl (BDSP) Walkthrough & Guides Wiki

Elden Ring Shadow of the Erdtree Walkthrough & Guides Wiki

Monster Hunter World Walkthrough & Guides Wiki

The Legend of Zelda: Tears of the Kingdom Walkthrough & Guides Wiki

Persona 3 Reload Walkthrough & Guides Wiki

Cyberpunk 2077: Ultimate Edition Walkthrough & Guides Wiki
All rights reserved
© 2023 Larian Studios. All rights reserved. Larian Studios is a registered trademark of arrakis nv, affiliate of Larian Studios Games ltd. All company names, brand names, trademarks and logos are the property of their respective owners. © 2020 Wizards of the coast. All rights reserved. Wizards of the coast, Baldur’s Gate, Dungeons & Dragons, D&D, and their respective logos. Are registered trademarks of wizards of the coast LLC
The copyrights of videos of games used in our content and other intellectual property rights belong to the provider of the game.
The contents we provide on this site were created personally by members of the Game8 editorial department.
We refuse the right to reuse or repost content taken without our permission such as data or images to other sites.


![Everwind Review [Early Access] | The Shaky First Step to A Very Long Journey](https://img.game8.co/4440226/ab079b1153298a042633dd1ef51e878e.png/thumb)

![Monster Hunter Stories 3 Review [First Impressions] | Simply Rejuvenating](https://img.game8.co/4438641/2a31b7702bd70e78ec8efd24661dacda.jpeg/thumb)


