This survey will take about 1 minute.
Your answers will help us to improve our website.
Baldur's Gate 3 (BG3)
How to Get the Moonlight Glaive
★ All Updates for Patch 5
☆ Beginner Guides for All Starter Players
★ Simple Character Creation Guide for beginners
☆ A Full Guide to Multiclassing
★ All Side Quests and Event Points
☆ All Races and Subraces
The Moonlight Glaive is a Glaive you can get in Baldur's Gate 3 (BG3). Read on to learn more about the Moonlight Glaive, including its stats, effects, as well as how to get it, and more!
| Related Weapon Guides | |
|---|---|
| Shar's Spear of Evening | Selune's Spear of Night |
| Spear of Night | Moonlight Glaive |
 Heads up! Heads up! |
You are entering spoiler territory for a very lore-related weapon. Proceed at your own risk, adventurer. You have been warned! |
|---|
List of Contents
Moonlight Glaive Overview
| Moonlight Glaive Info | ||
|---|---|---|
| Damage |
1d10 |
+1d4 |
| Weapon Type | ||
| Effect |
Moonlight Glaive: Glowing: Thsi object shines with a glowing light in a radius of 6m. Weapon Enchantment +2 Light (Permanent) |
|
| Unlockable Skills/Spells | ||
| Weapon Traits | ||
|
|
||
| Rarity | Weight | Price |
| Rare | 2.7
|
380
|
How to Get Moonlight Glaive
Free and Spare the Nightsong
| Moonlight Glaive Location | |
|---|---|
| Moonlight Glaive can be obtained at the very end of the “Find the Nightsong” questline as part of Shadowheart's side campaigns. This requires you to spare Nightsong at the end of the quest, prompting progress in romancing Shadowheart in Act 3 . | |
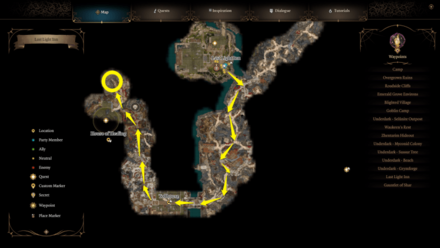
| World View | |
 |
How to Get the Moonlight Glaive Summary
- Gain Information on the Nightsong
- Reach the Grymforge in the Underdark
- Go Through the Shadow-Cursed Lands
- Get Selune's Blessing
- Head to the Thorm Mausoleum
- Complete the Shar Trials
- Obtain the Spear of Night
- Reach the Shadowfell Entrance
- Decide the fate of the Nightsong
Find the Nightsong: Full Quest Guide
Gain information on the Nightsong

You can gain information on the Nightsong either after rescuing Halsin from the Goblin camp, or getting information from Liam in the Shattered Sanctum.
Reach the Grymforge in the Underdark
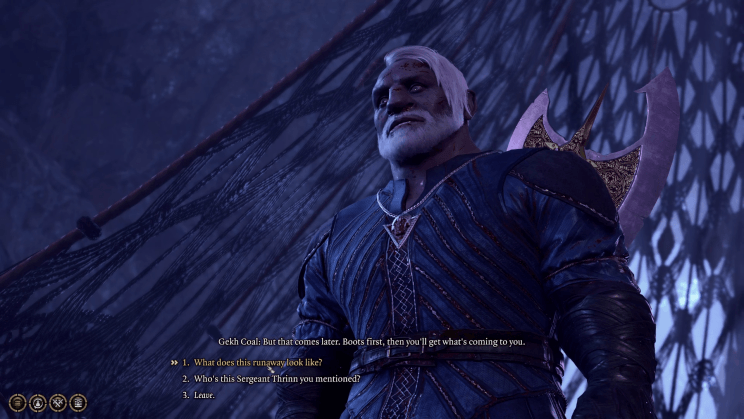
To reach the Grymforge in the Underdark, you must first clear the Goblin Camp. From the room where you talk to Priestess Gut in private find the door that leads to the Defiled Temple. Solve the tile floor puzzle, or lockpick the door to reach the stairs that lead to the Selunite Outpost. From there continue north to the Myconid Colony, then down south to the Underdark - Beach. After dealing with Gekh Coal and the other duergar, ride the boat to the Grymforge.
Go Through the Shadow-Cursed Lands
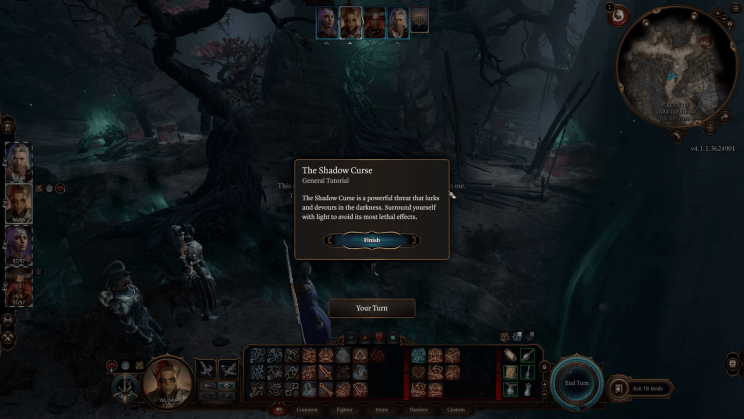
Use the elevator in the Grymforge to reach the Shadow-Cursed Lands, a land where everything is enveloped by shadows that will constantly sap your life force unless you have a source of light like a Torch or can cast Dancing Lights Cantrip. Having Shadowheart in your party is beneficial as she is immune to this place's environmental effects.
Get Selune's Blessing
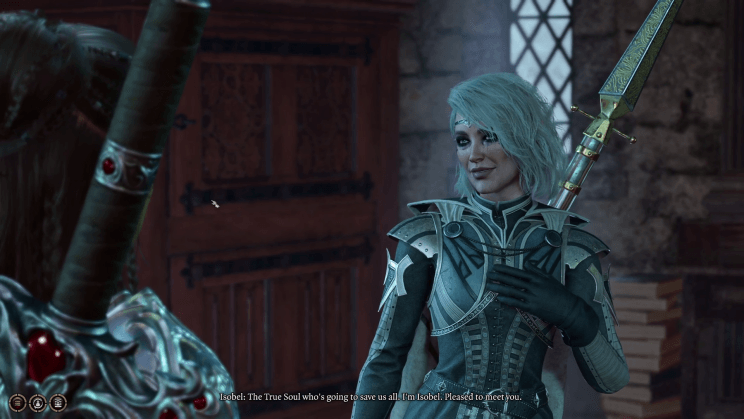
Head to the Last Light Inn located in the north eastern corner of the map and you'll be confronted by Jaheira. After convincing her that you're not a threat, she'll direct you to head upstairs in the inn to talk to Isobel, a priestess of Selûne. She can provide a blessing that can protect you from most of the curse's effects.
Take note that after receiving the blessing, you will immediately get attacked by True Soul Marcus. Defeat him and his Winged Horrors and Jaheira will ask you to help the Harpers ambush a convoy who have something that can protect you from the deeper shadows. Progressing further will put you on the path to encounter Kar'niss and obtain a moonlantern.
Head to the Thorm Mausoleum
Once inside, head to the back of the mausoleum to find an open tomb and three murals. You need to press the buttons at the base of each painting in the right order to open the hidden doorway.
Press the following murals in the correct order:
・Splendor, the southwestern mural which depicts the Moonrise Towers
・ Tragedy, the southeastern mural which depicts General Thorm
・Infamy, the central mural which depicts General Thorn sitting on a throne.
Complete the Shar Trials
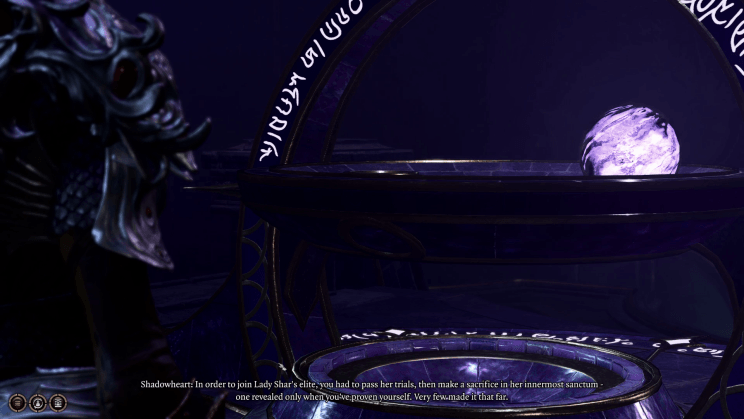
After making it through the Gauntlet of Shar, find your way to the Inner Sanctum where you pass to reach the area where you must complete the Shar Trials. It is imperative that you have Shadowheart in your party, as she is integral to activating the trials.
Soft-Step Trial
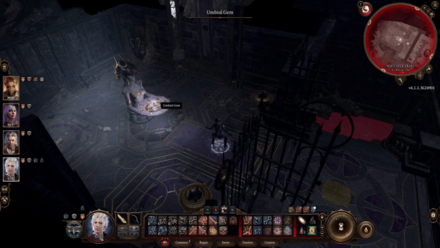
Head to the corridor north of the waypoint and open the first set of bulky doors to enter the Soft-Step Trial room. Use Shadowheart and interact with the sacrificial altar to start the trial.
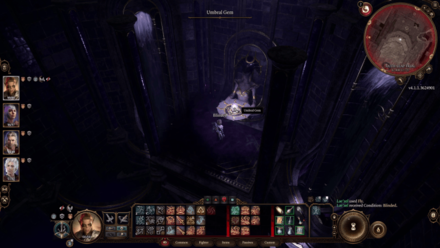
This requires you to sneak through a maze, avoiding traps and patrolling shadows to reach the statue at the end holding an Umbral Gem.
Characters with high sneak such as Astarion or can cast Invisibility can easily sneak through the entire maze without being seen by the patrolling shadows.
Self-Same Trial
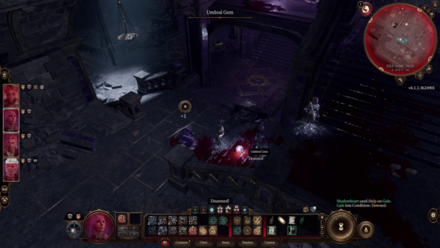
Head to the next set of bulky doors north of the Soft-Step Trial room to enter the Self-Same Trial room and use Shadowheart to activate the sacrificial altar.
Once inside, head to the upper area to confront duplicates of your current. Each character should attack their duplicates as attacking another character's duplicate will inflict a debuff that lowers their ability scores.
Alternatively, you can simply have your strongest character help defeat the duplicates and just take a Long Rest after the battle to remove the debuff. Once you defeat the last duplicate, it will drop an Umbral Gem.
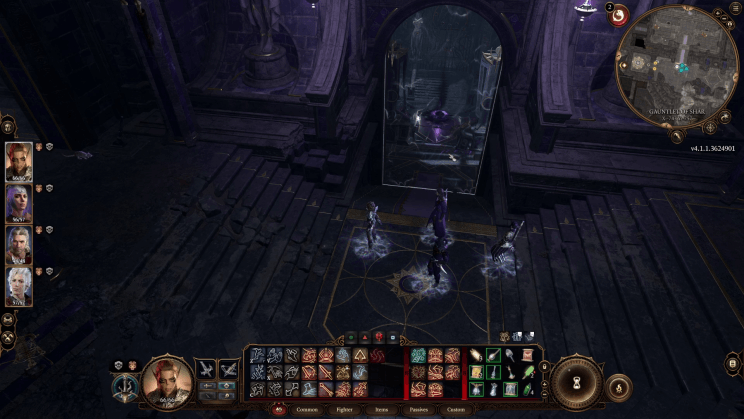
Faith-Leap Trial
Head down the stairs past the doors to the Self-Same Trial and open the first set of bulky doors to enter the Faith-Leap Trial, and have Shadowheart activate the sacrificial altar.
This trial requires you to jump across platforms to reach the end where the Umbral Gem is located. These platforms are obscured by darkness, so it's a good idea to have a Wizard like Gale infuse a character with light so that you can better see the outlines of each platform.
Lae'zel is one of the best characters for this trial since can use Misty Step as a cantrip at Level 5 to just teleport to the platforms. Alternatively, you can use a Scroll of Flight to traverse the chasm though keep in mind this will run out eventually.
Obtain the Spear of Night and Defeat the Orthon
After completing the trials, head to the end of the corridor and into the Silent Library. Here you must defeat the Umbral Tremor, loot the book Teachings of Loss: The Nightsinger. Once looted, unlock the large iron doors and place the book in the central plinth to unlock the doors and loot the Spear of Night from the table.
The last Umbral Gem is located in the northeastern part of the central area. Follow the path and you'll see a Displacer that you'll need to follow. Jump across the gap and follow the beast into a room full of bones.
Once inside, a cutscene starts where you'll be confonted by the Orthon who is the demon that Raphael wants you to deal with. There are several ways to deal with him, with the non-violent one requiring an Insight check during the dialogue. Trick the Orthon into killing itself, or kill it yourself, eitherway the Orthon must die for you to continue on.
Reach the Shadowfell Entrance
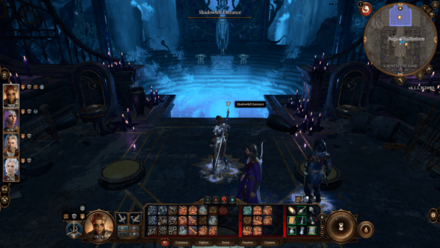
With alll Umbral Gems in hand, head into the central chamber and place the first Umbral Gem in the pedestal. This will summon a floating platform that will take you down by clicking the right Traversel Gem.
Place the remaining three Umbral Gems on the Ancient Altar to unlock the chamber into the Shadowfell Entrance. Take note that this is a point of no return and you won't be able to complete the missions in Act II anymore if you proceed. This includes rescuing the Tieflings in Moonrise Towers and meeting the Githyanki Creche.
Decide the fate of the Nightsong
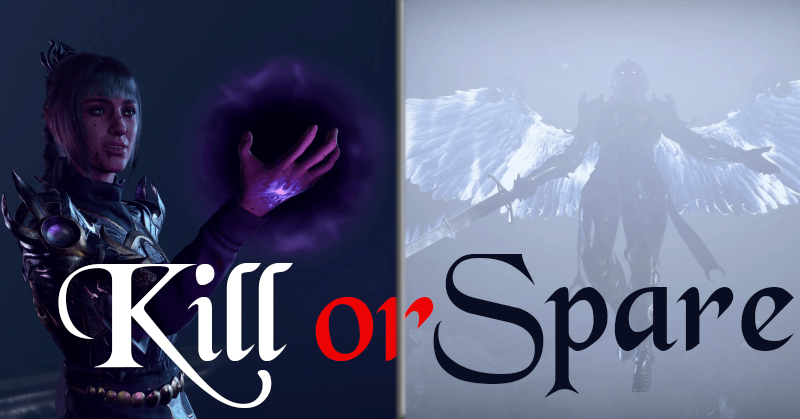
Ultimately you must decide the fate of the Nightsong. Sparing the Nightsong will result in Shadowheart discarding the Spear of Night, but doing so will reward you with the Moonlight Glaive.
Baldur's Gate 3 Related Guides
All Simple Weapons
| All Simple Weapons | |||
|---|---|---|---|
All Martial Weapons
All Glaives
| Glaive | Sorrow | Moonlight Glaive |
| Rusty Glaive | Drakethroat Glaive | Monster Slayer Glaive |
| The Dancing Breeze | Scythe of Myrkul |
Comment
Author
How to Get the Moonlight Glaive
Please participate in our site
improvement survey
03/2026
improvement survey
03/2026
Would you assist in
improving Game8's site?
improving Game8's site?

×
We are listening to our users' valuable opinions and discussing how to act on them.
The information collected through this survey will be used for the purpose of improving our services. In addition, the information will only be disclosed a part of a statistic in a format that will not allow identification of personal information.
Begin Survey
Not Now
×
Please rate each item regarding Game8.co's Advertisements.
Amount of Ads
Very Dissatisfied
Somewhat Dissatisfied
Fine
Somewhat Satisfied
Highly Satisfied
Placement of Ads
Timing of Ad Display
Ad Loading Speed
Safeness of Ads
Content of Ads
×
Please rate each item regarding Game8.co's Quality of Articles.
Amount of information
Very Dissatisfied
Somewhat Dissatisfied
Fine
Somewhat Satisfied
Highly Satisfied
Frequency of updates
Speed of new information
Accuracy of articles
Understandibility of articles
Readability of sentences
×
Please rate each item regarding Game8.co's Usability of the Site.
Ease of finding information
Very Dissatisfied
Somewhat Dissatisfied
Fine
Somewhat Satisfied
Highly Satisfied
Loading Speed
Use of Color
Font Size
Visibility of Images
Easy to Understand Layout
×
Please rate each item regarding Game8.co's Message Boards, Comments.
Ease of Writing
Very Dissatisfied
Somewhat Dissatisfied
Fine
Somewhat Satisfied
Highly Satisfied
Readability
Ease in Finding Information
Comment Quality
Comment Quantity
Admin Response
×
Please rate each item regarding Game8.co's Site's new design.
Please rate our site's new design
Very Dissatisfied
Somewhat Dissatisfied
Fine
Somewhat Satisfied
Highly Satisfied
Do you think that the website's design change makes the site easier to use?
Has the new design made it easier for you to find information on the site?
Has the new design improved the overall visual appeal of the site?
How would you rate your overall satisfaction with the new design of the site?
×
How likely are you to recommend Game8 to someone you know?
Very Unlikely
0
1
2
3
4
5
6
7
8
9
10
Very Likely
If you have other opinions regarding potential improvement to the website, please share them with us. We would appreciate your honest opinion.
Note: This is a free response section, so you can proceed without entering anything.
Note: Please be sure not to enter any kind of personal information into your response.
Note: Please be sure not to enter any kind of personal information into your response.
×
Thank You
×
Thank you for participating in our survey! Your answers will help us to improve the quality of our website and services.
We hope you continue to make use of Game8.
We hope you continue to make use of Game8.
Close
Rankings
- We could not find the message board you were looking for.
Gaming News


![Monster Hunter Stories 3 Review [First Impressions] | Simply Rejuvenating](https://img.game8.co/4438641/2a31b7702bd70e78ec8efd24661dacda.jpeg/thumb)
Popular Games

Genshin Impact Walkthrough & Guides Wiki
Honkai: Star Rail Walkthrough & Guides Wiki
Umamusume: Pretty Derby Walkthrough & Guides Wiki
Pokemon Pokopia Walkthrough & Guides Wiki
Resident Evil Requiem (RE9) Walkthrough & Guides Wiki
Monster Hunter Wilds Walkthrough & Guides Wiki
Wuthering Waves Walkthrough & Guides Wiki
Arknights: Endfield Walkthrough & Guides Wiki
Pokemon FireRed and LeafGreen (FRLG) Walkthrough & Guides Wiki
Pokemon TCG Pocket (PTCGP) Strategies & Guides Wiki


Recommended Games
Diablo 4: Vessel of Hatred Walkthrough & Guides Wiki
Cyberpunk 2077: Ultimate Edition Walkthrough & Guides Wiki
Fire Emblem Heroes (FEH) Walkthrough & Guides Wiki
Yu-Gi-Oh! Master Duel Walkthrough & Guides Wiki
Super Smash Bros. Ultimate Walkthrough & Guides Wiki
Pokemon Brilliant Diamond and Shining Pearl (BDSP) Walkthrough & Guides Wiki
Elden Ring Shadow of the Erdtree Walkthrough & Guides Wiki
Monster Hunter World Walkthrough & Guides Wiki
The Legend of Zelda: Tears of the Kingdom Walkthrough & Guides Wiki
Persona 3 Reload Walkthrough & Guides Wiki


All rights reserved
© 2023 Larian Studios. All rights reserved. Larian Studios is a registered trademark of arrakis nv, affiliate of Larian Studios Games ltd. All company names, brand names, trademarks and logos are the property of their respective owners. © 2020 Wizards of the coast. All rights reserved. Wizards of the coast, Baldur’s Gate, Dungeons & Dragons, D&D, and their respective logos. Are registered trademarks of wizards of the coast LLC
The copyrights of videos of games used in our content and other intellectual property rights belong to the provider of the game.
The contents we provide on this site were created personally by members of the Game8 editorial department.
We refuse the right to reuse or repost content taken without our permission such as data or images to other sites.