Wilderness Map and Points of Interest
★ All Updates for Patch 5
☆ Beginner Guides for All Starter Players
★ Simple Character Creation Guide for beginners
☆ A Full Guide to Multiclassing
★ All Side Quests and Event Points
☆ All Races and Subraces
In Baldur's Gate (BG3), the Wilderness is where you get dropped in from the Nautiloid ship, and is where the Act 1 of the game takes place. Read on to view the maps of the Wilderness, and to find out all the locations, dungeons, warp points, and other points of interest in the Wilderness area.
Wilderness Maps
| Nautiloid Crash Area | Emerald Grove Environs |
Nautiloid Crash Area Map
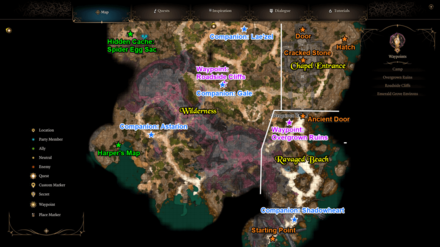
The player starts at the southwest part of the Wilderness area. This part of the Wilderness contains the Nautiloid wreckage and the Chapel Ruins. A lot of companions can be recruited here.
Emerald Grove Environs Map
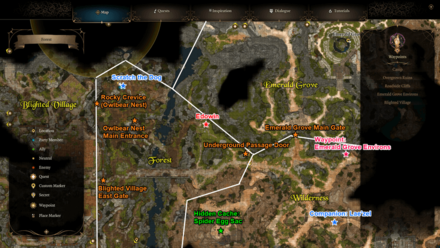
North of the Nautiloid crash area, you'll find the Emerald Grove. When you first approach this area, you'll find a bunch of soldiers getting attacked by goblins in their gate.
In this outer area surrounding the Emerald Grove, you'll find a couple of entrances to the Emerald Grove, a couple of entrances to the Owlbear Nest dungeon, and the east side of the Forest area.
Emerald Grove Maps and Points of Interest
Wilderness Locations
| Ravaged Beach | Chapel Entrance |
| Forest | |
Ravaged Beach
| Ravaged Beach |
|---|
 |
| Coordinates: (262, 208) |
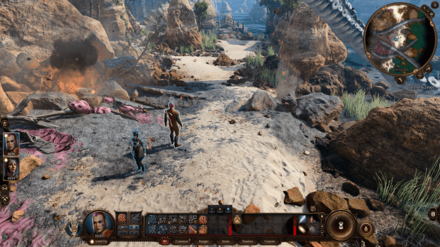
The Ravaged Beach is at the southwestmost part of the Wilderness map, and is the location where you first end up in after the Nautiloid crashes.
Chapel Entrance
| Chapel Entrance |
|---|
 |
| Coordinates: (285, 326) |
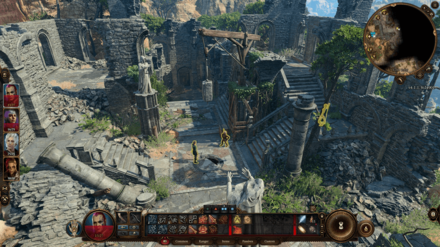
North of the Ravaged Beach is the Chapel Entrance area. When you first approach it, you'll encounter Gimblebock's group of bandits. Approach them and pass the checks to avoid a fight; otherwise, you'll have to battle them.
There are a few entrances to get into the chapel ruins, but it's recommended to simply go through the front door and pass the checks to get inside.
How to Unlock Withers: Dank Crypt Guide
Forest
| Forest |
|---|
 |
| Coordinates: (170, 417) |
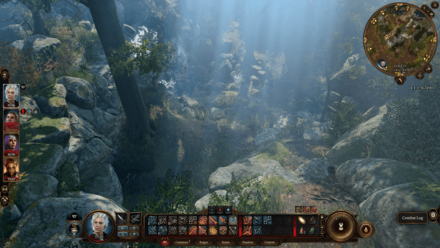
A huge subregion of the Wilderness area, the Forest region surrounds the Emerald Grove, the Blighted Village, and other locations. You'll find a lot of mushrooms and other alchemy ingredients while wandering the forest.
Wilderness Points of Interest
| Wilderness Points of Interest |
|---|
|
・Gale
|
Waypoints
Overgrown Ruins
| Overgrown Ruins Waypoint |
|---|
 |
| Coordinates: (278, 294) |
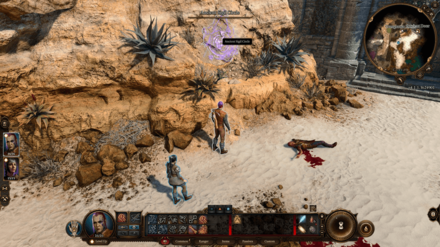
You'll encounter this waypoint early on in Ravaged Beach. Beside this waypoint is the Ancient Door to the Chapel.
Roadside Cliffs
| Roadside Cliffs Waypoint |
|---|
 |
| Coordinates: (225, 326) |
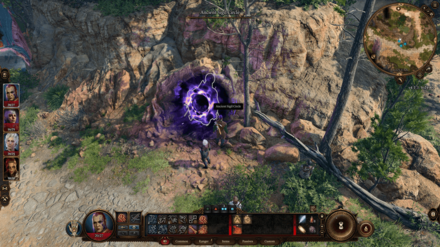
At the north of the Nautiloid wreckage, you'll encounter an Ancient Sigil embedded on a wall. Interact with it and you'll find a hand emerging from it, asking for help.
Whether you rescue the hand's owner or leave it, the Ancient Sigil becomes a regular waypoint after the encounter.
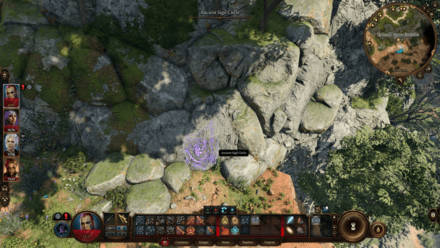
Emerald Grove Environs
| Emerald Grove Environs Waypoint |
|---|
 |
| Coordinates: (248, 423) |
The Emerald Grove Environs waypoint is located east of the Emerald Grove main gate, and is the nearest waypoint to the grove.
Companions
Shadowheart
| Shadowheart |
|---|
 |
| Coordinates: (273, 221) |
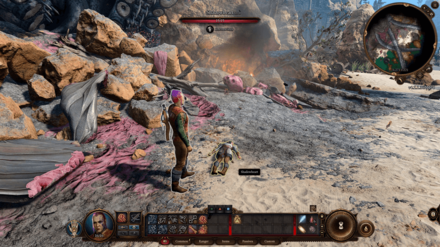
If you rescued Shadowheart in the Nautiloid and she survived, you'll find her unconscious in the Ravaged Beach, not far from where your initial position when you wake up. Interact with her to make her join your party.
Shadowheart Companion Guide
Lae'zel
| Lae'zel |
|---|
 |
| Coordinates: (240, 367) |
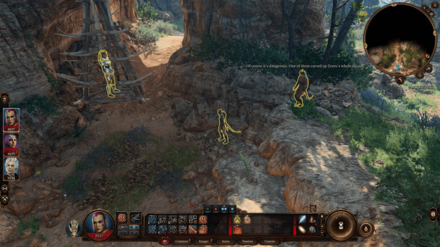
If Lae'zel survived in the Nautiloid, you'll encounter her again in the southwest part of the Wilderness, north of the Nautiloid wreckage, imprisoned by some Tieflings. You have the choice of attacking the Tieflings or doing checks to save Lae'zel.
If you chose an option that doesn't free her in the cage, you can shoot a Fire Bolt on the cage to release her. You'll then be able to recruit her to your party.
Lae'zel Companion Guide
Gale
| Gale |
|---|
 |
| Coordinates: (225, 326) |
In the southwest part of the Wilderness, north of the Nautiloid wreckage, you'll encounter an Ancient Sigil embedded on a wall. Interact with it and you'll find a hand emerging from it, asking for help.
Pass the Strength check to rescue the human wizard, Gale, who will be willing to join your party.
Gale Companion Guide
Astarion
| Astarion |
|---|
 |
| Coordinates: (168, 284) |
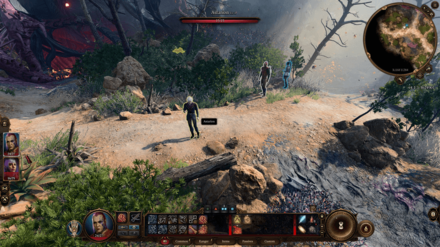
In the southwest part of the Wilderness, west of the Nautiloid wreckage, you'll encounter a man asking for help. Talk to him and he'll surprise attack you.
Even if you fail any of the checks, he won't end up killing you, and will be willing to join your party.
Astarion Companion Guide
Valuables
Harper's Map (Scuffed Rock)
| Harper's Map Under Scuffed Rock |
|---|
 |
| Coordinates: (143, 281) |
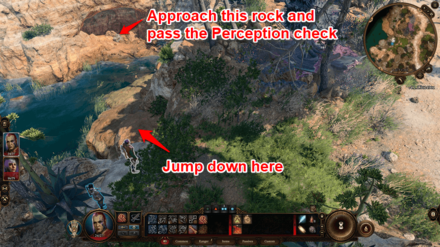
West of the Nautiloid wreckage, near the water, you'll see a tiny cove at the side of the rock wall. You can get to it by doing the Jump action down from around (167, 263).
As you approach the inside of the cove, you'll get a Perception check. If any of your party members pass, you'll be able to lift the Scuffed Rock. Drag it to reveal an Ornate Chest underneath; one of the items is Harper's Map, which will mark a Hidden Cache in the map after you read it in your inventory.
Hidden Cache
| Hidden Cache |
|---|
 |
| Coordinates: (154, 373) |
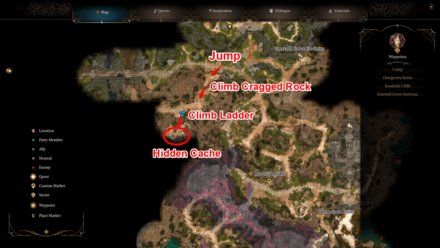
If you obtained and read Harper's Map, this Hidden Cache will be marked in the game map (though you can still find this area even if you didn't do so).
To get to the Hidden Cache, go west of the Emerald Grove Environs. Along the path, you'll find some elevated ground; use the Jump action to get up there. Proceed through the path, climbing up the Cragged Rock, then the Ladder to reach the Hidden Cache area.
Spider Egg Sac
| Spider Egg Sac |
|---|
 |
| Coordinates: (145, 364) |
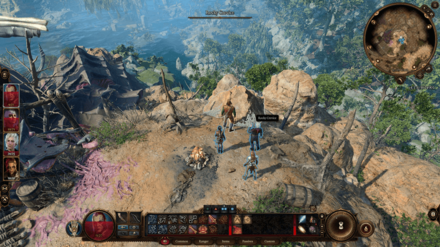
In the Hidden Cache, you'll find some loot in the chest, a locket in the skeleton, but the most valuable is the Spider Egg Sac. Approach the cracked rock near the campfire and pass the Perception check to be able to interact with the Rocky Crevice.
Examine the Spiderling Nest inside and pass the checks to get the pouch, which contains the Spider Egg Sac. This is an item that allows you to summon Spiders.
Scratch the Dog
| Scratch the Dog |
|---|
 |
| Coordinates: (72, 478) |
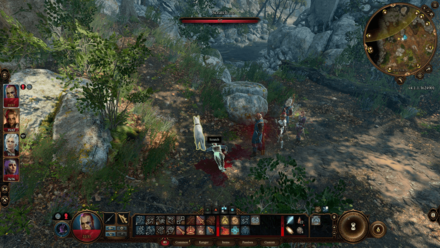
Go north of the Owlbear Nest to find Scratch the white dog, who's hanging around his dead master. Choose the correct dialogue options and pass the checks to be able to recruit this dog to your camp.
How to Get Scratch the White Dog
Dungeon Entrances
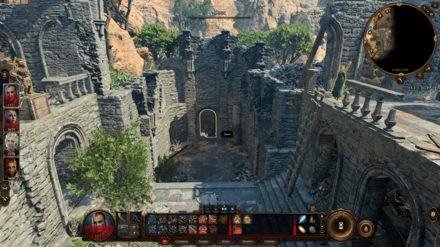
Chapel Door
| Chapel Door |
|---|
 |
| Coordinates: (285, 364) |
This front door is the main entrance to the Chapel. It's recommended to enter the Chapel through here as opposed to the other entrances.
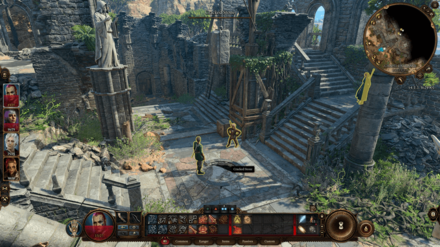
Chapel: Cracked Stone
| Cracked Stone Outside Chapel |
|---|
 |
| Coordinates: (286, 347) |
South of the main entrance, you'll see this crack on the floor. If you walk over here, the stone will crack and you can enter the chapel through it. It's not recommended though, as you'll be instantly thrust into a difficult battle upon entering.
Another thing to note: above this crack, you'll see a Foundation Block hanging by the rope. Instead of approaching the bandit group and fighting normally, you can attack this rope with a ranged attack to instantly kill Gimblebock and his companion!
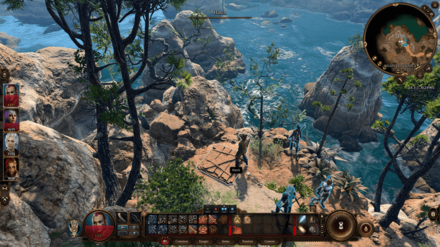
Chapel Hatch
| Chapel Hatch |
|---|
 |
| Coordinates: (319, 364) |
East of the chapel ruins, you'll find a narrow path. Go to the end of the path to find a hatch on the ground.
To go through this entrance, you'll need Thieves' Tools and to pass the lockpick check. This is not recommended though, as the required roll for this is 20, and it's simply easier to get through the other entrances.
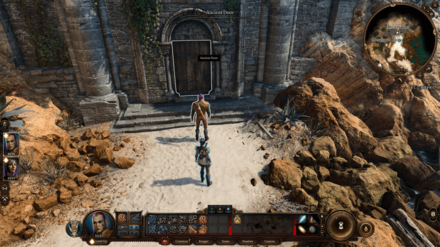
Chapel Ancient Door
| Chapel Ancient Door |
|---|
 |
| Coordinates: (285, 301) |
Unlike the other entrances located at the Chapel Entrance area, this entrance is located south at Ravaged Beach, just beside the Overgrown Ruins waypoint.
To go through this entrance, you'll need Thieves' Tools and to pass the lockpick check. This is not recommended though, as the required roll for this is 20, and it's simply easier to get through the other entrances.
Emerald Grove Main Gate
| Emerald Grove Main Gate |
|---|
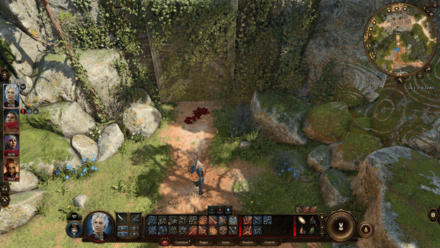 |
| Coordinates: (205, 441) |
The front gate of Emerald Grove, this is initially blocked by some soldiers being attacked by goblins. After you help the soldiers, you can now access this gate; just approach it and wait for it to be opened.
Underground Passage Door
| Underground Passage Door |
|---|
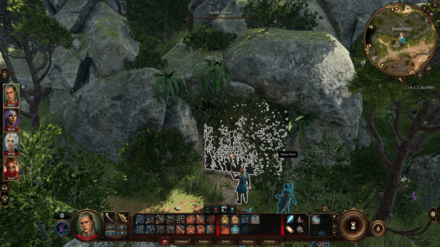 |
| Coordinates: (171, 425) |
This Stone Door leads to the Underground Passage, which is a secret path that leads to the Makeshift Prison at the other end of the Emerald Grove. You can enter the Emerald Grove through here and you can actually spot the entrance with a perception check; but if you failed, you can still open this door from the inside by going through the normal way in the Emerald Grove.
Underground Passage Guide
Owlbear Nest Cave Mouth
| Owlbear Nest Cave Mouth |
|---|
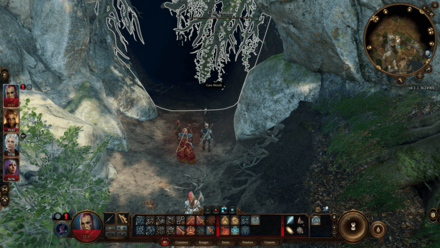 |
| Coordinates: (87, 449) |
The Owlbear Nest is a dungeon with an entrance that can be found in the Forest area. Look for the Cave Mouth, located north of the river bridge to enter this dungeon.
Owlbear Nest Map and Points of Interest
Owlbear Nest Rocky Crevice
| Owlbear Nest Rocky Crevice |
|---|
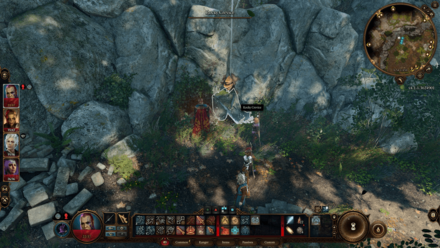 |
| Coordinates: (54, 458) |
The Owlbear Nest has a secret entrance, which you'll find as the Rocky Crevice with a perception check. It is located east of the main entrance of the Owlbear Nest.
Note that this is a tiny entrance that only small races like gnomes can enter. You likely won't be enter through here as a party, so it isn't recommended if you want to fight the Owlbear.
Baldur's Gate 3 Related Guides
Faerûn All Locations
| Prologue Locations | |
|---|---|
| Nautiloid | |
| Act 1 Locations | |
| Wilderness | Chapel Ruins |
| Emerald Grove | Owlbear Nest |
| Blighted Village | Whispering Depths |
| Putrid Bog (Sunlit Wetlands) | Overgrown Tunnel |
| The Risen Road | Zhentarim Basement |
| Goblin Camp | Mountain Pass: Rosymorn Monastery |
| Creche Y'llek | Underdark |
| Arcane Tower | Grymforge |
| Act 2 Locations | |
| Shadow-Cursed Lands | Reithwin Town |
Comment
Author
Wilderness Map and Points of Interest
Rankings
Gaming News
Popular Games

Genshin Impact Walkthrough & Guides Wiki

Umamusume: Pretty Derby Walkthrough & Guides Wiki

Crimson Desert Walkthrough & Guides Wiki

Monster Hunter Stories 3: Twisted Reflection Walkthrough & Guides Wiki

Honkai: Star Rail Walkthrough & Guides Wiki

Pokemon Pokopia Walkthrough & Guides Wiki

The Seven Deadly Sins: Origin Walkthrough & Guides Wiki

Wuthering Waves Walkthrough & Guides Wiki

Zenless Zone Zero Walkthrough & Guides Wiki

Arknights: Endfield Walkthrough & Guides Wiki
Recommended Games

Fire Emblem Heroes (FEH) Walkthrough & Guides Wiki

Diablo 4: Vessel of Hatred Walkthrough & Guides Wiki

Cyberpunk 2077: Ultimate Edition Walkthrough & Guides Wiki

Yu-Gi-Oh! Master Duel Walkthrough & Guides Wiki

Super Smash Bros. Ultimate Walkthrough & Guides Wiki

Pokemon Brilliant Diamond and Shining Pearl (BDSP) Walkthrough & Guides Wiki

Elden Ring Shadow of the Erdtree Walkthrough & Guides Wiki

Monster Hunter World Walkthrough & Guides Wiki

The Legend of Zelda: Tears of the Kingdom Walkthrough & Guides Wiki

Persona 3 Reload Walkthrough & Guides Wiki
All rights reserved
© 2023 Larian Studios. All rights reserved. Larian Studios is a registered trademark of arrakis nv, affiliate of Larian Studios Games ltd. All company names, brand names, trademarks and logos are the property of their respective owners. © 2020 Wizards of the coast. All rights reserved. Wizards of the coast, Baldur’s Gate, Dungeons & Dragons, D&D, and their respective logos. Are registered trademarks of wizards of the coast LLC
The copyrights of videos of games used in our content and other intellectual property rights belong to the provider of the game.
The contents we provide on this site were created personally by members of the Game8 editorial department.
We refuse the right to reuse or repost content taken without our permission such as data or images to other sites.


![Death Stranding 2: On The Beach [PC] Review | A Port That Delivers](https://img.game8.co/4447392/15310a0c9aa1b6843bb713b2ea216930.jpeg/show)


