This survey will take about 1 minute.
Your answers will help us to improve our website.
Clair Obscur: Expedition 33
How to Beat Simon
★ Builds: Gustave | Lune | Maelle
┗ Sciel | Verso | Monoco
★ Popular: Missables | Puzzles | White Nevrons
┗ Best Characters | Skills | Teams | Attributes
★ Patch 1.5.0: Verso's Drafts | Root of All Evil
┗ Endless Tower Guide | All New Bosses
This is a boss guide on how to beat Simon in Clair Obscur: Expedition 33. See how to beat Simon, his attack patterns, how to dodge, counter and how to rematch him in this guide!
| Simon Guides | |
|---|---|
| Normal | Divergent Star |
How to Beat Simon
Maelle One-Shot Strategy

Luckily, there's a cheese strategy that can defeat Simon before he can even act, with the stars of the show being Maelle and her Stendhal. The other two party members to include in the main party are Sciel and Monoco.
Maelle Best Setup for Simon
| Rec. Stats | Level: 94 Attack Power: 10,000+ Critical Rate: 100% |
|
|---|---|---|
| Weapon | Barrier Breaker Lv. 33 | |
| Pictos / Luminas |
・ At Death's Door
At Death's Door Deal 50% more damage if Health is below 10%. ・ Augmented First Strike
Augmented First Strike 50% increased damage on the first hit. Once per battle. ・ Burn Affinity
Burn Affinity 25% increased damage on Burning Targets. ・ Cheater
Cheater Always play twice in a row. ・ Confident Fighter
Confident Fighter 30% increased damage, but can't be Healed. ・ Energising Start I
Energising Start I +1 AP on battle start. ・ Energising Turn
Energising Turn +1 AP on turn start. ・ First Offensive
First Offensive First hit dealt and taken deals 50% more damage. ・ First Strike
First Strike Play first. ・ Immaculate
Immaculate 30% increased damage until a hit is received. |
・ In Medias Res
In Medias Res +3 Shields on Battle Start, but max Health is halved. ・ Inverted Affinity
Inverted Affinity Apply Inverted on self for 3 turns on battle start. 50% increased damage while Inverted. ・ Painted Power
Painted Power Damage can exceed 9,999. ・ Powered Attack
Powered Attack On every damage dealt, try to consume 1 AP. If successful, increase damage by 20%. ・ Powerful Shield
Powerful Shield 10% increased damage per Shield Point on self. ・ Shield Affinity
Shield Affinity 30% increased damage while having Shields, but receiving any damage always removes all Shields. ・ Solidifying
Solidifying +2 Shields when the character's Health falls below 50%. Once per battle. ・ Tainted
Tainted 15% increased damage for each Status Effect on self. ・ Teamwork
Teamwork 10% increased damage while all allies are alive. ・ Warming Up
Warming Up 5% increased damage per turn. Can stack up to 5 times. |
| Skills | ・Guard Down ・Last Chance ・Stendhal |
|
Following Medallum's recent bug fix, equipping weapons with good scaling such as Barrier Breaker or Lithum will help deal large amounts of damage to Simon.
Use Maelle's first turn to use Guard Down on Simon, then use the second turn from Cheater to use Last Chance. After Sciel swaps back to Sciel using Intervention, use Stendhal to deal large amounts of damage on Simon, even after the Stendhal nerf.
Maelle Best Builds and Attributes
Sciel Best Setup for Simon
| Rec. Stats | Level: 94 | |
|---|---|---|
| Weapon | Charnon Lv. 33 | |
| Pictos / Luminas |
・ Auto Death
Auto Death Kill self on battle start ・ Breaking Death
Breaking Death Fully charge enemy's Break Bar on death. ・ Burning Death
Burning Death Apply 3 Burn to all enemies on Death. ・ Clea's Death
Clea's Death On death, allies gain 25% increased damage until they die. ・ Energising Death
Energising Death On death, +4 AP to allies. ・ Second Chance
Second Chance Revive with 100% Health. Once per battle. ・ Shielding Death
Shielding Death On death, allies gain 3 Shield points. |
・ Energising Start I
Energising Start I +1 AP on battle start. ・ Energising Start II
Energising Start II +1 AP on battle start. ・ Energising Start III
Energising Start III +1 AP on battle start. ・ Energising Start IV
Energising Start IV +1 AP on battle start. ・ Energising Turn
Energising Turn +1 AP on turn start. ・ Faster Than Strong
Faster Than Strong Always play twice in a row, but deal 50% less damage. ・ First Strike
First Strike Play first. |
| Skills | ・Fortune's Fury ・Intervention |
|
Sciel will be your sacrificial lamb (that only dies for a moment) who equips the Auto Death Lumina and trigger the effects of the Death Luminas. Upon resurrection, she will cast Fortune's Fury on Maelle followed by Intervention to give Maelle a second turn.
As of Patch 1.5.0, Breaking Death only triggers when the character gets killed by the enemy. It's still good to bring into the Simon fight since it breaks him if he kills the wearer.
Sciel Best Builds and Attributes
Monoco Best Setup for Simon
| Rec. Stats | Level: 94 | |
|---|---|---|
| Weapon | Joyaro Lv. 33 | |
| Pictos / Luminas |
・ Auto Death
Auto Death Kill self on battle start ・ Energising Start I
Energising Start I +1 AP on battle start. ・ Energising Start II
Energising Start II +1 AP on battle start. ・ Energising Turn
Energising Turn +1 AP on turn start. ・ Energy Master
Energy Master Every AP gain is increased by 1. |
・ Clea's Death
Clea's Death On death, allies gain 25% increased damage until they die. ・ Faster Than Strong
Faster Than Strong Always play twice in a row, but deal 50% less damage. ・ First Strike
First Strike Play first. ・ Greater Powerful
Greater Powerful +15% to Powerful damage increase. ・ Shielding Death
Shielding Death On death, allies gain 3 Shield points. |
| Skills | ・Chapelier Slash ・Orphelin Cheers |
|
Monoco's main role here is to apply Mark on Simon using Chapelier Slash and buff Maelle with Orphelin Cheers enhanced by Greater Powerful, Clea's Death, and Shielding Death.
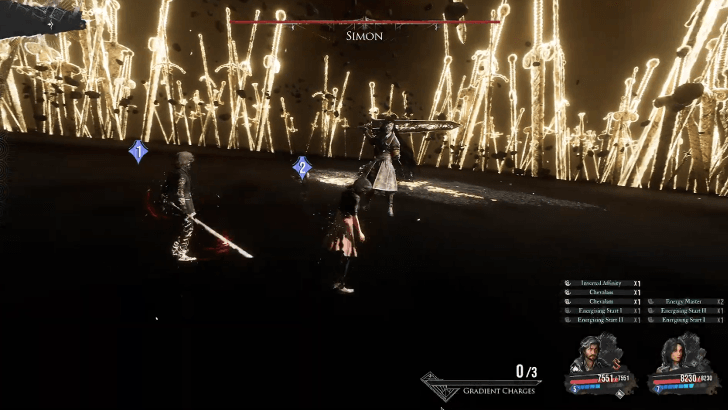
Simon Cheese Strategy
- Maelle uses Guard Down
- Maelle uses Last Chance
- Monoco uses Chapelier Slash (applies Mark on Simon)
- Monoco uses Orphelin Cheers on Maelle (applies Greater Powerful)
- Sciel uses Fortune's Fury and Intervention on Maelle
- Maelle uses Stendhal
- Repeat in Phase 2.
The idea of this cheese strategy is to stack as much buffs on Maelle and debuffs on Simon as possible using different triggers. Maelle will get a lot of damage boosts by having shield points. Since Powerful Shield gives 10% damage boost per shield, Luminas and skills that provide shields should also be included in the setup.
Before the fight, make sure that your First Strike turn order is fixed. To do this, remove all party members except Maelle, then add Monoco, and finally Sciel. This will make Maelle take her turn first, followed by Monoco, and finally Sciel. This also prevents Simon from having a turn before you can kill him.
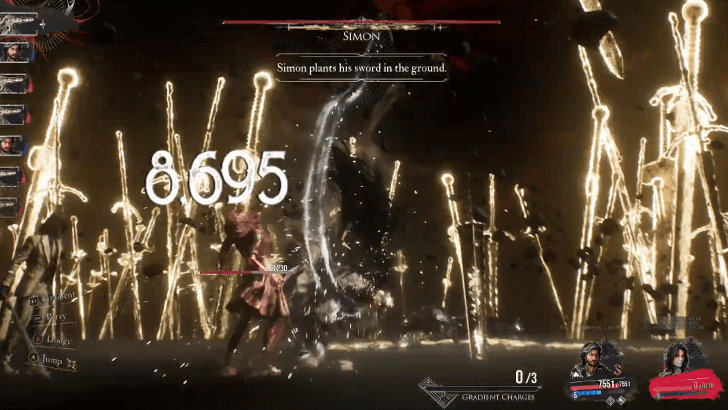
Apply Guard Down on Simon with Maelle, then use Last Chance with her second turn from Cheater to switch to Virtuose Stance. Maelle's Last Chance reduces her health to 1, triggering Solidifying and At Death's Door. Combined with Monoco and Sciel's buffs, the damage of the next Stendhal should be enough to obliterate Simon before he even gets the chance to do anything.
The steps listed above are still usable in Phase 2 as the game treats Phase 2 as a separate fight. Because of this, Sciel's Auto Death will trigger again, allowing you to perform the Stendhal combo on Simon again.
Fighting Simon Head-On Would Be Difficult
Simon is arguably one of the hardest bosses in Clair Obscur: Expedition 33 due to his ridiculous moveset that includes, but not limited to, attacks that can reduce your HP to 1, steal shields, and long, powerful combos with follow-up attacks. Simon can also remove a fallen ally from the battlefield so they can't be revived.
If you want to duke it out with Simon in both phases without using a cheese strategy, you'll need to memorize all of his attacks and master the parry timing as he can take out a party member in only one to three hits.
Second Phase Enhances His Phase One Attacks
Simon will still use most of his phase one sword attacks in the second phase, but now with a phantom following up each slash with another attack. Remember the parry timings of these sword combos and prepare to parry a second time for each hit to execute a counter.
The number of follow up attacks increases to two once Simon reaches critical health, so you'll need to parry (or dodge) thrice per slash when he uses his sword combos.
Simon Attack Patterns
- Chroma Shift
- Shield Steal
- Melee Combo
- Short Combo
- Long Combo
- Powerful Combo
- Enraged Short Combo
- Enraged Long Combo
- Enraged Powerful Combo
- Lightspeed Combo
- Sword of Lumiere
Chroma Shift
| Gathers chroma around a target and reduces their HP to 1. | |
| How to Dodge | This attack cannot be dodged. |
|---|---|
| How to Counter | This attack cannot be parried and countered. |
Shield Steal
| Steal the team's shields. Simon gain shields based on the number removed. | |
| How to Dodge | This attack cannot be dodged. |
|---|---|
| How to Counter | This attack cannot be parried and countered. |
Melee Combo
| Plants his sword on the ground, leaps, and punches down on its target. This is followed by three slow punches and ends with another jumping attack. | |
| How to Dodge | Dodge the jump punch after he plants his sword. Dodge as soon as he moves his arm during the next three punches. In the last jump punch, press dodge a split second after Simon jumps. |
|---|---|
| How to Counter | Parry all five punches to perform a counter. |
Short Combo
| Does two overhead slashes, a horizontal slash, then another overhead slash. | |
| How to Dodge | Dodge when he starts landing every time he does an overhead slash. The third hit should be jumped over to avoid. |
|---|---|
| How to Counter | Jump immediately when the jump flare on the third hit disappears and perform a counter before landing. Make sure to parry the first two hits and the fourth to execute another counter. |
Long Combo
| Performs six slow slashes. The fifth hit is a spin attack followed by an overhead slash. | |
| How to Dodge | Dodge whenever you see his arm move during each hit. The fourth and fifth slash has a shorter interval than the rest. |
|---|---|
| How to Counter | Parry all six slashes to counter. Be sure to parry again almost immediately after the fourth slash when Simon spins. |
Powerful Combo
| Swings his sword at its target thrice. All three hits have the same length of intervals. | |
| How to Dodge | Dodge as soon as he moves his sword arm during each attack. |
|---|---|
| How to Counter | Parry all three hits to perform a counter. |
Enraged Short Combo
| An enhanced version of his short combo. Each sword swing now has a follow-up attack. | |
| How to Dodge | The dodge timing should be the same, as the dodge i-frame also covers the follow-up attack. |
|---|---|
| How to Counter | Parry a second time after each swing and jump counter after the horizontal slash to perform a counter. |
Enraged Long Combo
| An enhanced version of the long combo from the first phase that adds follow-up attacks on each slash. | |
| How to Dodge | Dodge as soon as Simon's arm moves for each swing. The interval between slashes are now different from the first phase due to the follow-up attacks. |
|---|---|
| How to Counter | Be sure to parry a second time after each slash. Parry all twelve slashes in total to perform a counter. |
Enraged Powerful Combo
| An enhanced version of the powerful combo. Each of the three slashes now has a follow-up attack. | |
| How to Dodge | Dodge immediately when his arm moves for a swing. The interval between each of Simon's swings will be filled in by the follow-up attacks. |
|---|---|
| How to Counter | Parry all six slashes to perform a counter. You'd be following a rhythm while pressing the parry button as each slash will have the same interval. |
Lightspeed Combo
| Simon performs nine swift slashes before calling upon a giant sword on the target. | |
| How to Dodge | The first seven hits have almost the same dodge timing. After the seventh slash, pause for a brief moment then dodge the last two with the same timing as the first ones. When the light pillar appears, dodge after about 1.5 seconds. |
|---|---|
| How to Counter | Parry all nine slashes and the giant sword successfully to perform a counter. |
Sword of Lumiere
| Performs six slashes before calling upon a sword strike. | |
| How to Dodge | Simon will spin once before launching the first and second slashes, so press the dodge button twice after the spin. The next four slashes are slower and can be telegraphed by his arm movement. Dodge the giant sword about 0.75 seconds after the light pillar appears. |
|---|---|
| How to Counter | Parry all the slashes and the giant sword strike to counter. |
How to Rematch Simon
Added in Patch 1.3.0

Simon can now be rematched after defeating him once thanks to the developers 1.3.0 patch. Simon's Chroma will be left in the center of The Abyss as an interactable allowing him to be fought once more.
Note that Simon immediately begins his second phase in this rematch, without the environment changing as it did before. Simon will have all his moves from the start, and with Challenge Modifiers can be twice as hard of an experience if you choose to fight him this way.
How to Enable Challenge Modifiers
Simon Stats and Overview
Weaknesses and Stats
| Simon | |||
|---|---|---|---|
|
|||
| Weak | Resist | Immune | Absorb |
| None | None | None | None |
| Weakpoint | None | ||
| Quest | Optional | ||
| Location | |||
Rewards
| All Simon Rewards | |
|---|---|
| EXP | 1,237,500 |
| Items | • Simoso |
Simon Location
The Abyss
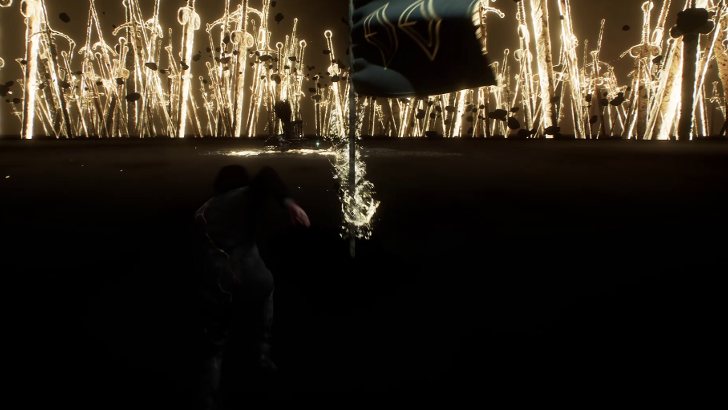
Simon is a secret boss hidden in The Abyss, a sub-area that can only be accessed through Renoir's Drafts. Entering Renoir's Drafts requires Esquie's ability to dive underwater.
Upon entering The Abyss, follow the path leading to what seems like a dead end and drop down the pit to land on an area with giant illuminating swords. Past the Expedition Flag is Simon. Approach him to start the boss fight.
Interactive Map: All Locations and Areas
Clair Obscur: Expedition 33 Related Guides

All Main Bosses
| List of All Bosses | ||
|---|---|---|
|
|
|
|
|
|
|
|
|
|
|
|
|
|
|
|
|
|
|
|
All Optional Bosses
Comment
22  Anonymous 3 months
I just beat base game Simon with this build. I had to do it a few times to get luck on my side. The Monoco part seems like outdated advice as it is impossible to break in one go with breaking death nerfed. Despite this it eventually worked. I played on story mode, not sure if that affected his HP. I just wanted the dang trophy.
Author

Please participate in our site
improvement survey
03/2026
improvement survey
03/2026
Would you assist in
improving Game8's site?
improving Game8's site?

×
We are listening to our users' valuable opinions and discussing how to act on them.
The information collected through this survey will be used for the purpose of improving our services. In addition, the information will only be disclosed a part of a statistic in a format that will not allow identification of personal information.
Begin Survey
Not Now
×
Please rate each item regarding Game8.co's Advertisements.
Amount of Ads
Very Dissatisfied
Somewhat Dissatisfied
Fine
Somewhat Satisfied
Highly Satisfied
Placement of Ads
Timing of Ad Display
Ad Loading Speed
Safeness of Ads
Content of Ads
×
Please rate each item regarding Game8.co's Quality of Articles.
Amount of information
Very Dissatisfied
Somewhat Dissatisfied
Fine
Somewhat Satisfied
Highly Satisfied
Frequency of updates
Speed of new information
Accuracy of articles
Understandibility of articles
Readability of sentences
×
Please rate each item regarding Game8.co's Usability of the Site.
Ease of finding information
Very Dissatisfied
Somewhat Dissatisfied
Fine
Somewhat Satisfied
Highly Satisfied
Loading Speed
Use of Color
Font Size
Visibility of Images
Easy to Understand Layout
×
Please rate each item regarding Game8.co's Message Boards, Comments.
Ease of Writing
Very Dissatisfied
Somewhat Dissatisfied
Fine
Somewhat Satisfied
Highly Satisfied
Readability
Ease in Finding Information
Comment Quality
Comment Quantity
Admin Response
×
Please rate each item regarding Game8.co's Site's new design.
Please rate our site's new design
Very Dissatisfied
Somewhat Dissatisfied
Fine
Somewhat Satisfied
Highly Satisfied
Do you think that the website's design change makes the site easier to use?
Has the new design made it easier for you to find information on the site?
Has the new design improved the overall visual appeal of the site?
How would you rate your overall satisfaction with the new design of the site?
×
How likely are you to recommend Game8 to someone you know?
Very Unlikely
0
1
2
3
4
5
6
7
8
9
10
Very Likely
If you have other opinions regarding potential improvement to the website, please share them with us. We would appreciate your honest opinion.
Note: This is a free response section, so you can proceed without entering anything.
Note: Please be sure not to enter any kind of personal information into your response.
Note: Please be sure not to enter any kind of personal information into your response.
×
Thank You
×
Thank you for participating in our survey! Your answers will help us to improve the quality of our website and services.
We hope you continue to make use of Game8.
We hope you continue to make use of Game8.
Close
Rankings
- We could not find the message board you were looking for.
Gaming News


![Monster Hunter Stories 3 Review [First Impressions] | Simply Rejuvenating](https://img.game8.co/4438641/2a31b7702bd70e78ec8efd24661dacda.jpeg/thumb)
Popular Games

Genshin Impact Walkthrough & Guides Wiki
Honkai: Star Rail Walkthrough & Guides Wiki
Umamusume: Pretty Derby Walkthrough & Guides Wiki
Pokemon Pokopia Walkthrough & Guides Wiki
Resident Evil Requiem (RE9) Walkthrough & Guides Wiki
Monster Hunter Wilds Walkthrough & Guides Wiki
Wuthering Waves Walkthrough & Guides Wiki
Arknights: Endfield Walkthrough & Guides Wiki
Pokemon FireRed and LeafGreen (FRLG) Walkthrough & Guides Wiki
Pokemon TCG Pocket (PTCGP) Strategies & Guides Wiki


Recommended Games
Diablo 4: Vessel of Hatred Walkthrough & Guides Wiki
Cyberpunk 2077: Ultimate Edition Walkthrough & Guides Wiki
Fire Emblem Heroes (FEH) Walkthrough & Guides Wiki
Yu-Gi-Oh! Master Duel Walkthrough & Guides Wiki
Super Smash Bros. Ultimate Walkthrough & Guides Wiki
Pokemon Brilliant Diamond and Shining Pearl (BDSP) Walkthrough & Guides Wiki
Elden Ring Shadow of the Erdtree Walkthrough & Guides Wiki
Monster Hunter World Walkthrough & Guides Wiki
The Legend of Zelda: Tears of the Kingdom Walkthrough & Guides Wiki
Persona 3 Reload Walkthrough & Guides Wiki


All rights reserved
©2025 Sandfall Interactive SAS - Published by Kepler Interactive Limited. All rights reserved.
The copyrights of videos of games used in our content and other intellectual property rights belong to the provider of the game.
The contents we provide on this site were created personally by members of the Game8 editorial department.
We refuse the right to reuse or repost content taken without our permission such as data or images to other sites.
This still works with some tweaks. Put Cheater on Monoco to have him play twice, his first turn uses Cruler Barrier to add shields to Maelle, his second turn uses Chapelier Slash to do damage to Simon, but more importantly add a Mark. Load Monoco up with loads of lumina that buff damage and AP generation, and Marking Shots as a last resort in case you can't get Chapelier Slash off. I got 66,202,981 damage from Maelle/Stendhal using this strategy, after buffing with Sciel as mentioned originally.