This survey will take about 1 minute.
Your answers will help us to improve our website.
Clair Obscur: Expedition 33
Maelle Best Builds and Attributes
★ Builds: Gustave | Lune | Maelle
┗ Sciel | Verso | Monoco
★ Popular: Missables | Puzzles | White Nevrons
┗ Best Characters | Skills | Teams | Attributes
★ Patch 1.5.0: Verso's Drafts | Root of All Evil
┗ Endless Tower Guide | All New Bosses
Maelle is a playable character who uses the Rapiere - Fleuret in Clair Obscur: Expedition 33. See Maelle's best builds, weapon, attributes, playstyle, skills, and character profile here!
List of Contents
Best Maelle Build
Maelle Best Attribute Priority
| Act 1 | Act 2 | Act 3 | |
|---|---|---|---|
| Vitality | 5 | 5 | 0 |
| Might | 15 | 0 | 0 |
| Agility | 0 | 45 | 99 |
| Defence | 0 | 35 | 81 |
| Luck | 25 | 5 | 0 |
The values in red are the ones to be prioritized.
Act 1 is calculated with 45 points at level 15.
Act 2 is calculated with 90 points at level 30.
Act 3 is calculated with 180 points at level 60.
The primary stat you want early game is Luck, as this will increase your critical strike chance and will increase your overall DPS with the Brulerum since the weapon has a B scaling on Luck. Your next priority should be investing in Might, as this will flat out increase your DPS.
In Act 2, you can use the Medalum since it allows you to enter the Virtuose stance immediately. It scales with Agility and Defence, so you'll want to prioritize investing into those stats. Increasing Agility also increases Maelle's other stats thanks to the Medalum's attribute scaling.
For Act 3, the Medalum is still a great choice since because of the instant Virtuose stance. It lets you deal immense damage on your first turn right away which is almost enough to one-shot most enemies.
Maelle Best Weapon
| Act 1 |
 Brulerum Brulerum
|
Max Power: 2744
Element: Fire Attribute Scaling: Agility - A Luck - S |
|---|---|---|
| Act 2 |
 Medalum Medalum
|
Max Power: 2906
Element: Physical Attribute Scaling: Agility - A Defense - S |
| Act 3 |
Medalum
|
Max Power: 2906
Element: Physical Attribute Scaling: Agility - A Defense - S |
The Brulerum is the best early-game weapon for Maelle, primarily due to the high Luck scaling, in which you would want to invest to get consistent critical hits. Furthermore, this weapon allows you to apply Burn on critical hits, which is extremely potent during the early sections of the game.
In Act 2, the Medalum excels since you have more attribute points to work with. You can dump your points into Defense which increases Maelle's Crit rate and Attack also due to the scaling. Combine this with high Agility and you'll get a lot of turns. This works really well with a Burn build.
For Act 3, the Medalum is still the best choice since it lets you start in the Virtuose stance. In the late game, the damage boosts you get is more than enough to synergize with this and can let you one-shot most enemies with ease.
| Weapon | Details |
|---|---|
| Licorum | A weapon added in Patch 1.5.0, Licorum is a great alternative to Medalum during Act 3 because of its innate Skill damage increase. It also allows you to apply Mark consistently and not consume it with your Skills, giving you a huge damage increase for Skills with multiple hits. |
| Clierum | A great alternative to Medalum during Act 3 since it has the same scaling and allows you to restore AP when your Skills crit. Also, it gives a damage boost to Lightning which can be used by her abilities that use the weapon's element. |
Maelle Best Skills
| Skills | ||
|---|---|---|
| Act 1 | ||
|
Offensive Switch Deals low single target damage and applies Defenceless for 3 turns. 1 hit. Uses weapon's element. Percee Deals medium single target Physical damage. 1 hit. Increased damage to Marked targets. Virtuose Stance: Costs 2 AP Spark Deals low single target Fire damage. 1 hit. Applies 3 Burn. Offensive Stance: Applies 2 more Burn. Swift Stride Deals low single target Physical damage. 1 hit. Switches to Virtuose Stance if target is burning. Regain 0 to 2 AP. Breaking Rules Deals low single target Physical damage. 2 hits. Destroys all target's Shields. Gain 1 AP per Shield destroyed. If target is Defenseless, play a second turn. Fleuret Fury Deals high single target Physical damage. 3 hits. If in Virtuose Stance, stay in Virtuose Stance. Can Break. |
||
| Act 2 | ||
|
Rain of Fire Deals medium single target Fire damage. 2 hits. Applies 3 Burn per hit. Defensive Stance: Applies 2 more Burn per hit. Combustion Deals medium single target Physical damage. 2 hits. Consumes up to 10 Burn for increased damage. Degagement Deals low single target Fire damage. 1 hit. Target becomes weak to Fire damage for 2 turns. Percee Deals medium single target Physical damage. 1 hit. Increased damage to Marked targets. Virtuose Stance: Costs 2 AP Swift Stride Deals low single target Physical damage. 1 hit. Switches to Virtuose Stance if target is burning. Regain 0 to 2 AP. Fleuret Fury Deals high single target Physical damage. 3 hits. If in Virtuose Stance, stay in Virtuose Stance. Can Break. |
||
| Act 3 | ||
|
Last Chance Change stance to Virtuose Stance. Reduces self-Health to 1 but refills all AP. Payback Deals very high single target Physical damage. 1 hit. Reduced AP cost for each attack parried since last turn. Can Break. Phantom Strike Deals very high Void damage to all enemies. 4 hits. Also gives 35% of a Gradient Charge. Stendhal Deals extreme single target Void damage. 1 hit. Removes self-Shields and self applies Defenceless. Breaking Rules Deals low single target Physical damage. 2 hits. Destroys all target's Shields. Gain 1 AP per Shield destroyed. If target is Defenseless, play a second turn. Sword Ballet Deal extreme single target damage. 5 hits. Uses weapon's element. Critical hits deal double damage. |
||
For skills, keep Swift Stride and Percee. These two skills can net you the early max critical damage of 9999 with a proper setup. You would also want to get Fleuret Fury for breaking enemies and Breaking Rules to destroy enemy shields.
For Act 2, you'll keep Percee and Fleuret Fury since they're really powerful damaging skills, especially when you're starting in the Virtuose stance. Since the Medalum's passives also gives bonuses to Burn, take Rain of Fire to inflict a lot of Burns and pop it with Combustion.
In Act 3, you gain access to better Skills like Stendhal, Payback, and Sword Ballet. The Virtuose stance with Stendhal alone can be enough to defeat enemies with ease in Maelle's first turn. If you need to switch to Virtuose again, use Last Chance to do it and then finish off the enemy.
Maelle Best Lumina and Pictos
Early Game
| Pictos |
Critical Burn 25% increased Critical Chance on Burning enemies. Dead Energy II +3 AP on killing an enemy. Attack Lifesteal Recover 15% Health on Base Attack. |
||||||||||
|---|---|---|---|---|---|---|---|---|---|---|---|
| Luminas | |||||||||||
|
Augmented Attack Augmented Attack 50% increased Base Attack damage. Dead Energy II Dead Energy II +3 AP on killing an enemy. Energising Break Energising Break +3 AP on Breaking a target. Rewarding Mark Rewarding Mark +2 AP on dealing damage to a Marked target. Once per turn. Marking Shots Marking Shots 20% chance to apply Mark on Free Aim shot. |
Burning Shots Burning Shots 20% chance to Burn on Free Aim shot. Staggering Attack Staggering Attack 50% increased Break damage on Base Attack. Energising Start II Energising Start II +1 AP on battle start. Dodger Dodger Gain 1 AP on Perfect Dodge. Once per turn. |
||||||||||
| Total Lumina Point Cost | 35 | ||||||||||
The best Pictos to equip early game are Critical Burn, Breaker, and Attack Lifesteal. These Pictos will give you a lot of critical strike chance, allowing you to consistently hit those big yellow numbers.
For Luminas, it's recommended to go for those that will increase your Break damage, since this will help stagger enemies more with Fleuret Fury. You would also want to get Marking and Burning Shots so that you can apply Burn or Mark yourself if you need to trigger conditional effects from Swift Stride or Percee.
The rest will be for obtaining as much AP as you can, as there are cases where 1 AP can be the difference between winning or losing the battle.
Mid Game
| Pictos |
Augmented First Strike 50% increased damage on the first hit. Once per battle. Energising Start IV +1 AP on battle start. SOS Power Apply Powerful when falling below 50% Health. |
||||||||||
|---|---|---|---|---|---|---|---|---|---|---|---|
| Luminas | |||||||||||
|
Burning Shots Burning Shots 20% chance to Burn on Free Aim shot. Empowering Attack Empowering Attack Gain Powerful for 1 turn on Base Attack. Energising Start II Energising Start II +1 AP on battle start. Rewarding Mark Rewarding Mark +2 AP on dealing damage to a Marked target. Once per turn. Critical Burn Critical Burn 25% increased Critical Chance on Burning enemies. |
Marking Shots Marking Shots 20% chance to apply Mark on Free Aim shot. Dodger Dodger Gain 1 AP on Perfect Dodge. Once per turn. Energising Start III Energising Start III +1 AP on battle start. Burning Mark Burning Mark Apply Burn on hitting a Marked enemy. |
||||||||||
| Total Lumina Point Cost | 67 | ||||||||||
In Act 2, the best Pictos to equip in the mid game are Augmented First Strike, Energising Start IV, and SOS Power. These Pictos give you some health, crit chance, and speed which can help you land that massive Percee on Maelle's first turn.
For Luminas, you'll want to increase your synergy with Burn since it'll be your main source of damage after the first turn Percee. Having Burning Shots and Critical Burn is a must for this build. The rest can be for AP economy.
Late Game
| Pictos |
Immaculate 30% increased damage until a hit is received. Glass Canon Deal 25% more damage, but take 25% more damage. Inverted Affinity Apply Inverted on self for 3 turns on battle start. 50% increased damage while Inverted. |
||||||||||
|---|---|---|---|---|---|---|---|---|---|---|---|
| Luminas | |||||||||||
|
Feint Feint Start each turn with 4 Barbapapa stacks. Every 5th hit with a Skill deals 600% more damage. Auto Powerful Auto Powerful Apply Powerful for 3 turns on battle start. In Medias Res In Medias Res +3 Shields on Battle Start, but max Health is halved. Rewarding Mark Rewarding Mark +2 AP on dealing damage to a Marked target. Once per turn. Critical Burn Critical Burn 25% increased Critical Chance on Burning enemies. Painted Power Painted Power Damage can exceed 9,999. Weakness Gain Weakness Gain +1 AP on hitting an enemy's Weakness. Once per turn. Tainted Tainted 15% increased damage for each Status Effect on self. Full Strength Full Strength 25% increased damage on full Health. Greater Powerful Greater Powerful +15% to Powerful damage increase. Shortcut Shortcut Immediately play when falling below 30% Health. Once per battle. First Strike First Strike Play first. Confident Fighter Confident Fighter 30% increased damage, but can't be Healed. First Life First Life 25% increased damage until death. 20% decreased damage on death. (Once) AP Discount AP Discount Skills cost 1 less AP. Double Third Double Third Every third hit of a Skill deals double damage. |
Frenzy Frenzy Each successive Skill hit deals 10% more damage. Powerful Shield Powerful Shield 10% increased damage per Shield Point on self. Shield Affinity Shield Affinity 30% increased damage while having Shields, but receiving any damage always removes all Shields. Teamwork Teamwork 10% increased damage while all allies are alive. Augmented Counter III Augmented Counter III 75% increased Counterattack damage. Energising Parry Energising Parry +1 AP on successful Parry. Roulette Roulette Every hit has a 50% chance to deal either 50% or 200% of its damage. Warming Up Warming Up 5% increased damage per turn. Can stack up to 5 times. Burn Affinity Burn Affinity 25% increased damage on Burning Targets. Energising Turn Energising Turn +1 AP on turn start. Energy Master Energy Master Every AP gain is increased by 1. Cheater Cheater Always play twice in a row. At Death's Door At Death's Door Deal 50% more damage if Health is below 10%. Clea's Death Clea's Death On death, allies gain 25% increased damage until they die. |
||||||||||
| Total Lumina Point Cost | 393 | ||||||||||
In Act 3, the best Pictos to equip in the late game are Immaculate, Glass Canon, and Inverted Affinity. These Pictos give Maelle some health, crit chance, and more speed. The damage boost from this is massive as long as you don't get hit. Dodge or parry to keep yourself alive while dealing tons of damage.
For Luminas, take ones that increase your damage even further. You can also strengthen your parries by taking ones that synergize with it like Augmented Counter. An important one is Painted Power since it removes the damage cap. The rest can be for more damage to guarantee that you kill with Stendhal or AP economy.
With Patch 1.5.0, you can also use most of the damage increasing Luminas that scale well with multiple Skill hits like Frenzy and pair it with Licorum to deal a lot of damage.
Maelle Best Team
| Support | Sub DPS | Main DPS |
|---|---|---|
 Gustave Gustave
|
 Lune Lune
|
 Maelle Maelle
|
| Character | Details |
|---|---|
 Verso Verso | A great alternative to Gustave during Act 2 and Act 3 since he pretty much does what Gustave does but better. He has more utility and supportive capabilities which can help Maelle's setup. |
 Monoco Monoco | A great alternative to Lune during Act 3 since at that point, Monoco has a lot of supportive skills from the enemies he encountered. His skills can help Maelle deal more damage and increase her survivability. |
For Gustave, you would want him to be focused on applying debuffs such as Mark and Defenseless through his Marking Shot and Exposing Attack Pictos, respectively. You also want to take advantage of his Powerful skill, which raises the attack power for all your team if you time the QTE perfectly.
For Lune, you would want her to act as your secondary DPS, primarily applying Burn on enemies to activate your Swift Stride's Virtouse swap. She can also act as your secondary support through her Healing Light skill or apply debuffs through Luminas, such as Marking Shot or Exposing Attack.
How to Play Maelle
| How to Play Maelle |
|---|
|
|
Master Cycling Through Her Stances
| Stance | Description |
|---|---|
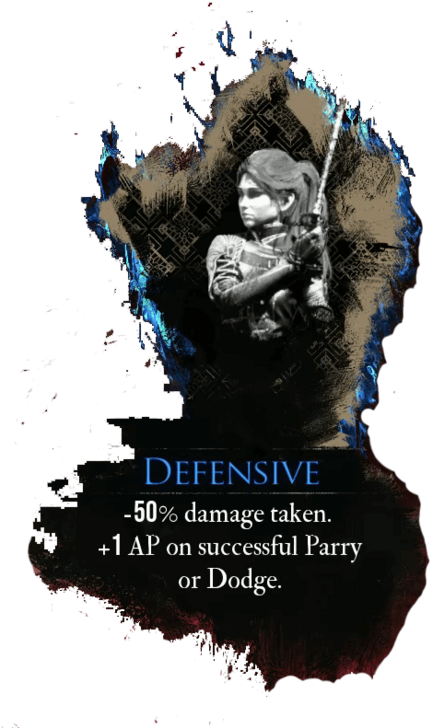 Defensive |
The defensive stance allows you to take less damage and gain 1 AP per Parry or Dodge. This is best used when the enemy will be attacking consecutively as this can help you help you survive or gain tons of AP for your next turn. |
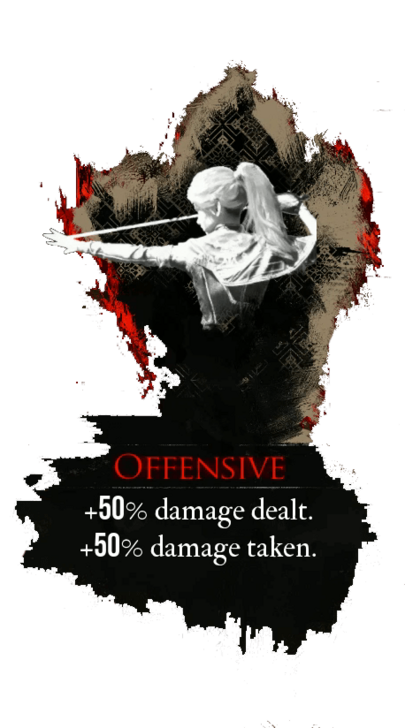 Offensive |
The offensive stance increases your damage by 50% but also increases the damage you take also by 50%. This stance, as good as it might sound, isn't as good since you have the option to immediately just jump to Virtouse, which will let you deal more damage without any draw backs. The only use of the offensive stance is its synergy with skills like Spark, which can apply more Burn to the enemies. |
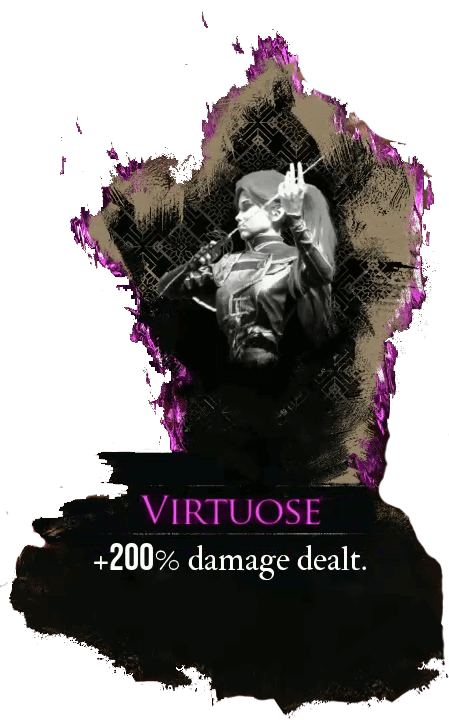 Virtouse |
The Virtouse stance let's you deal an additional 200% damage for your attacks. This is arguably Maelle's best stance since it has the highest amount of damage multiplier without any draws back, aside from the fact that most of the skills related to this move requires a good amount of AP to cast. |
Stance swapping is the core of Maelle's kit. You must understand what they do, when best to use them, and how to swap through them. In summary, your skills will have certain special mechanics that will allow you to swap through her stances.
Defensive stance is best used when ending a turn and an enemy is next to attack, while Offensive and Virtouse stances are used offensively as they provide extra damage. In most cases, you would want to skip immediately to Virtouse Stance to apply the highest amount of damage in the shortest amount of time.
Use Your Teammates to For Stance Swapping
To take full advantage of Maelle's kit you must learn to incorporate your teammates' offensive and support capabilities. A great example is using Lune to cast Immolation to apply Burn to enemies. This will allow you to immediately swap to Virtouse upon hitting the burning enemy using your Swift Stride skill.
Early Virtouse Mark Combo
A strong combo you can use at the beginning of the game is to cast a fully buffed Percee during your Virtouse Stance. You can perform this as early as two turns by following this steps:
- On the first round, use Gustav to cast Poweful on your team.
- Cast Immolation using Lune to burn enemies. This will allow you to switch to Virtouse Stance as early as the first round upon using Swift Stride.
- On the second round, use Gustav's Marking Shot skill to apply Mark, or you may opt for a Basic Attack if you have Exposing Attack Lumina equipped. It is still possible to apply Mark using a Marking Shot Lumina on either Lune or Maelle herself.
- Lastly, use Maelle's Percee skill on the marked enemy and watch the devastating damage unfold!
Practice Playing Offensively
One of the tricks to playing Maelle is to commit to playing offensively, as her kits are mostly focused on dealing tons of damage. This means that to fully utilize her abilities, you must practice parrying or dodging attacks so you can continue investing in her offensive stats.
However, this is not to mean that Maelle does not have any support capabilities or survival options. Looking at her kit, it is possible to build around the Defensive Stance combined with Burn, letting you survive for a long while watching your enemies burn over time. The only downside is this requires more investment in her as compared with sticking to pure damage.
All Maelle Skills
※ Select the search criteria below and press the Search button to filter the data.
| Skill | Details |
|---|---|
| Offensive Switch | Skill Effect: Deals low single target damage and applies Defenceless for 3 turns. 1 hit. Uses weapon's element. Special Mechanic: Switch to Offensive Cost: 0SP | 1AP |
| Percee | Skill Effect: Deals medium single target Physical damage. 1 hit. Increased damage to Marked targets. Virtuose Stance: Costs 2 AP Special Mechanic: Switch to Defensive Cost: 0SP | 5AP |
| Spark | Skill Effect: Deals low single target Fire damage. 1 hit. Applies 3 Burn. Offensive Stance: Applies 2 more Burn. Special Mechanic: Switch to Defensive Cost: 0SP | 3AP |
| Degagement | Skill Effect: Deals low single target Fire damage. 1 hit. Target becomes weak to Fire damage for 2 turns. Special Mechanic: Switch to Offensive Cost: 2SP | 2AP |
| Guard Down | Skill Effect: Applies Defenceless to all enemies for 3 turns. Special Mechanic: Switch to Offensive Cost: 4SP | 3AP |
| Guard Up | Skill Effect: Applies Shell, reducing damage taken, to up to 3 allies for 3 turns. Special Mechanic: Switch to Offensive Cost: 2SP | 3AP |
| Swift Stride | Skill Effect: Deals low single target Physical damage. 1 hit. Switches to Virtuose Stance if target is burning. Regain 0 to 2 AP. Special Mechanic: Switch to Virtuose Cost: 1SP | 3AP |
| Mezzo Forte | Skill Effect: Reapplies current stance and increases AP Special Mechanic: None Cost: 4SP | 1AP |
| Fleuret Fury | Skill Effect: Deals high single target Physical damage. 3 hits. If in Virtuose Stance, stay in Virtuose Stance. Can Break. Special Mechanic: Switch to Stanceless Cost: 2SP | 6AP |
| Breaking Rules | Skill Effect: Deals low single target Physical damage. 2 hits. Destroys all target's Shields. Gain 1 AP per Shield destroyed. If target is Defenseless, play a second turn. Special Mechanic: None Cost: 4SP | 3AP |
| Rain of Fire | Skill Effect: Deals medium single target Fire damage. 2 hits. Applies 3 Burn per hit. Defensive Stance: Applies 2 more Burn per hit. Special Mechanic: Switch to Offensive Cost: 4SP | 5AP |
| Combustion | Skill Effect: Deals medium single target Physical damage. 2 hits. Consumes up to 10 Burn for increased damage. Special Mechanic: Switch to Offensive Cost: 6SP | 4AP |
| Virtuose Strike | Skill Effect: Deals high single target Physical damage. 5 hits. Special Mechanic: Switch to Virtuose Cost: 1GC |
| Phoenix Flame | Skill Effect: Applies 10 Burn to all enemies and revives all allies with 50 to 70% Health Special Mechanic: Switch to Offensive Cost: 2GC |
| Payback | Skill Effect: Deals very high single target Physical damage. 1 hit. Reduced AP cost for each attack parried since last turn. Can Break. Special Mechanic: Switch to Defensive Cost: 8SP | 9AP |
| Momentum Strike | Skill Effect: Deals high single target damage. 1 hit. Uses weapon's element. Increased damage to Marked targets. Virtuose Stance: Costs 4 AP Special Mechanic: Switch to Defensive Cost: 6SP | 7AP |
| Fencer's Flurry | Skill Effect: Deals medium damage to all enemies. 1 hit. Uses weapon's element. Applies Defenceless for 1 turn. Special Mechanic: Switch to Offensive Cost: 4SP | 3AP |
| Sword Ballet | Skill Effect: Deal extreme single target damage. 5 hits. Uses weapon's element. Critical hits deal double damage. Special Mechanic: Switch to Defensive Cost: 8SP | 9AP |
| Revenge | Skill Effect: Deals high single target Fire damage. 1 hit. Damage increased for each hit received since the previous turn. Can Break. Special Mechanic: Switch to Defensive. Cost: 6SP | 5AP |
| Pyrolyse | Skill Effect: Deals extreme single target Fire daamge. 3 hits. Applies 5 Burn per hit. Offensive Stance: Applies 2 more Burn per hit. Special Mechanic: Switch to Defensive. Cost: 8SP | 9AP |
| Phantom Strike | Skill Effect: Deals very high Void damage to all enemies. 4 hits. Also gives 35% of a Gradient Charge. Special Mechanic: Switch to Defensive Cost: 4SP | 7AP |
| Burning Canvas | Skill Effect: Deals high single target Void damage. 5 hits. Applies 1 burn per hit. Damage increased for each Burn on the target. Special Mechanic: Switch to Offensive Cost: 6SP | 5AP |
| Stendhal | Skill Effect: Deals extreme single target Void damage. 1 hit. Removes self-Shields and self applies Defenceless. Special Mechanic: Switch to Stanceless Cost: 4SP | 8AP |
| Gustave's Homage | Skill Effect: Deals high single target Lightning damage. 8 hits. Increased damage to Marked targets. Doesn't remove Mark. Special Mechanic: Switch to Virtuose Cost: 8AP |
| Gommage | Skill Effect: Kills weak targets. Otherwise deal extreme Void damage. 1 hit. Special Mechanic: Switch to Virtuose Cost: 3GC |
| Last Chance | Skill Effect: Change stance to Virtuose Stance. Reduces self-Health to 1 but refills all AP. Special Mechanic: Switch to Virtuose Cost: 6SP | 1AP |
Maelle Gradient Attacks
| Gradient Attack | Details |
|---|---|
| Virtuose Strike | Skill Effect: Deals high single target Physical damage. 5 hits. Cost: 1GC |
| Phoenix Flame | Skill Effect: Applies 10 Burn to all enemies and revives all allies with 50 to 70% Health Cost: 2GC |
| Gommage | Skill Effect: Kills weak targets. Otherwise deal extreme Void damage. 1 hit. Cost: 3GC |
Maelle Character Information
Maelle Basic Profile
|
|
| Weapon | Rapiere - Fleuret |
|---|---|
| Background | A shy loner, eager to fly. Maelle sees the expedition as her chance to escape Lumière and explore the world beyond. |
Maelle's Voice Actors
| Voice Actors | EN: Jennifer English French: Adeline Chetail |
|---|
Clair Obscur: Expedition 33 Related Guides

All Playable Characters
| All Playable Clair Obscur Characters | ||
|---|---|---|
| Gustave
|
Maelle
|
Lune
|
 Sciel Sciel |
Monoco
|
Verso
|
All Special Characters
| All Special Clair Obscur Characters | |
|---|---|
 Esquie Esquie
|
- |
Comment
23  Anonymous 2 months
By adding "Feint" into the recommended luminas, you made Stendhal, Payback (at least it can still break), Phantom Strike (unless if it's against a group of enemies), and Breaking Rules (at least this skill still can remove shields) filler now. I suggest you guys revise what skills should be recommended now that we have the "Feint" luminas.
Author

Maelle Best Builds and Attributes
Please participate in our site
improvement survey
03/2026
improvement survey
03/2026
Would you assist in
improving Game8's site?
improving Game8's site?

×
We are listening to our users' valuable opinions and discussing how to act on them.
The information collected through this survey will be used for the purpose of improving our services. In addition, the information will only be disclosed a part of a statistic in a format that will not allow identification of personal information.
Begin Survey
Not Now
×
Please rate each item regarding Game8.co's Advertisements.
Amount of Ads
Very Dissatisfied
Somewhat Dissatisfied
Fine
Somewhat Satisfied
Highly Satisfied
Placement of Ads
Timing of Ad Display
Ad Loading Speed
Safeness of Ads
Content of Ads
×
Please rate each item regarding Game8.co's Quality of Articles.
Amount of information
Very Dissatisfied
Somewhat Dissatisfied
Fine
Somewhat Satisfied
Highly Satisfied
Frequency of updates
Speed of new information
Accuracy of articles
Understandibility of articles
Readability of sentences
×
Please rate each item regarding Game8.co's Usability of the Site.
Ease of finding information
Very Dissatisfied
Somewhat Dissatisfied
Fine
Somewhat Satisfied
Highly Satisfied
Loading Speed
Use of Color
Font Size
Visibility of Images
Easy to Understand Layout
×
Please rate each item regarding Game8.co's Message Boards, Comments.
Ease of Writing
Very Dissatisfied
Somewhat Dissatisfied
Fine
Somewhat Satisfied
Highly Satisfied
Readability
Ease in Finding Information
Comment Quality
Comment Quantity
Admin Response
×
Please rate each item regarding Game8.co's Site's new design.
Please rate our site's new design
Very Dissatisfied
Somewhat Dissatisfied
Fine
Somewhat Satisfied
Highly Satisfied
Do you think that the website's design change makes the site easier to use?
Has the new design made it easier for you to find information on the site?
Has the new design improved the overall visual appeal of the site?
How would you rate your overall satisfaction with the new design of the site?
×
How likely are you to recommend Game8 to someone you know?
Very Unlikely
0
1
2
3
4
5
6
7
8
9
10
Very Likely
If you have other opinions regarding potential improvement to the website, please share them with us. We would appreciate your honest opinion.
Note: This is a free response section, so you can proceed without entering anything.
Note: Please be sure not to enter any kind of personal information into your response.
Note: Please be sure not to enter any kind of personal information into your response.
×
Thank You
×
Thank you for participating in our survey! Your answers will help us to improve the quality of our website and services.
We hope you continue to make use of Game8.
We hope you continue to make use of Game8.
Close
Rankings
- We could not find the message board you were looking for.
Gaming News


![Everwind Review [Early Access] | The Shaky First Step to A Very Long Journey](https://img.game8.co/4440226/ab079b1153298a042633dd1ef51e878e.png/thumb)

![Monster Hunter Stories 3 Review [First Impressions] | Simply Rejuvenating](https://img.game8.co/4438641/2a31b7702bd70e78ec8efd24661dacda.jpeg/thumb)
Popular Games

Genshin Impact Walkthrough & Guides Wiki
Honkai: Star Rail Walkthrough & Guides Wiki
Umamusume: Pretty Derby Walkthrough & Guides Wiki
Pokemon Pokopia Walkthrough & Guides Wiki
Resident Evil Requiem (RE9) Walkthrough & Guides Wiki
Monster Hunter Wilds Walkthrough & Guides Wiki
Wuthering Waves Walkthrough & Guides Wiki
Arknights: Endfield Walkthrough & Guides Wiki
Pokemon FireRed and LeafGreen (FRLG) Walkthrough & Guides Wiki
Pokemon TCG Pocket (PTCGP) Strategies & Guides Wiki


Recommended Games
Diablo 4: Vessel of Hatred Walkthrough & Guides Wiki
Fire Emblem Heroes (FEH) Walkthrough & Guides Wiki
Yu-Gi-Oh! Master Duel Walkthrough & Guides Wiki
Super Smash Bros. Ultimate Walkthrough & Guides Wiki
Pokemon Brilliant Diamond and Shining Pearl (BDSP) Walkthrough & Guides Wiki
Elden Ring Shadow of the Erdtree Walkthrough & Guides Wiki
Monster Hunter World Walkthrough & Guides Wiki
The Legend of Zelda: Tears of the Kingdom Walkthrough & Guides Wiki
Persona 3 Reload Walkthrough & Guides Wiki
Cyberpunk 2077: Ultimate Edition Walkthrough & Guides Wiki


All rights reserved
©2025 Sandfall Interactive SAS - Published by Kepler Interactive Limited. All rights reserved.
The copyrights of videos of games used in our content and other intellectual property rights belong to the provider of the game.
The contents we provide on this site were created personally by members of the Game8 editorial department.
We refuse the right to reuse or repost content taken without our permission such as data or images to other sites.
Why use Energising Start II and not Energising Start I in Lumina, since both give 1 AP?