This survey will take about 1 minute.
Your answers will help us to improve our website.
Clair Obscur: Expedition 33
Best Pictos for Each Character
★ Builds: Gustave | Lune | Maelle
┗ Sciel | Verso | Monoco
★ Popular: Missables | Puzzles | White Nevrons
┗ Best Characters | Skills | Teams | Attributes
★ Patch 1.5.0: Verso's Drafts | Root of All Evil
┗ Endless Tower Guide | All New Bosses
Here are all the Best Pictos you can get in Clair Obscur: Expedition 33. Check out the best Pictos and Luminas for every character and their explanation, here!
| All Best Guides | ||
|---|---|---|
| Best Characters | Best Party | Best Builds |
| Best Skills | Best Attributes | Best Weapons |
| Best Pictos | ||
List of Contents
List of Best Pictos and Explanations
All the Best and Essential Pictos
- Painted Power - Remove the 9999 Damage Cap
- Cheater - Act Twice in a Row
- Shortcut - Emergency Turn at Low HP
- Warming Up - Damage Ramp Up
- Survivor - Survive a Fatal Hit
- Empowering Dodge - Increase DMG from Dodging
- Empowering Parry - Increase DMG from Parrying
- Energising Parry - Get AP From Parrying
- Augmented Counter III - Increases Parry Damage
- Energy Master - Increase Your AP Gain
- Second Chance - Revive on Death
- Teamwork - DMG Boost at Full Party
- Energising Turn - Get AP on Every Turn
- First Strike - Be Able to Act First
- Roulette - Double Your Damage
- Breaker - Break Your Enemies Faster
- First Life - Damage Increased As Long As You Live
- Frenzy - Successive Skill Hits Deal More Damage
- AP Discount - Skills Cost 1 AP Less
Listed above is a list of all the Best Pictos that we recommend you get as the majority of the Pictos in the list can help improve your gameplay quality, such as being able to act twice in a row or be able to survive a fatal hit.
Painted Power - Remove the 9999 Damage Cap
Painted Power is a Picto that you can get after defeating a certain boss in Act 2. It's a very essential Picto with one of the best Lumina effects in the game as it can remove the 9999 damage cap.
Most builds will require this Picto once you hit Act 3, so It's recommended that you unlock its Lumina as soon as you get it to apply it to your party members.
Painted Power and Best Characters
Cheater - Act Twice in a Row
Cheater is another essential Picto where it allows any of your party members to act twice in a row. With a full party equipping this Lumina, you can essentially get 6 actions in one turn before your enemy can even act, allowing you to set up buffs, heal members, or even revive them.
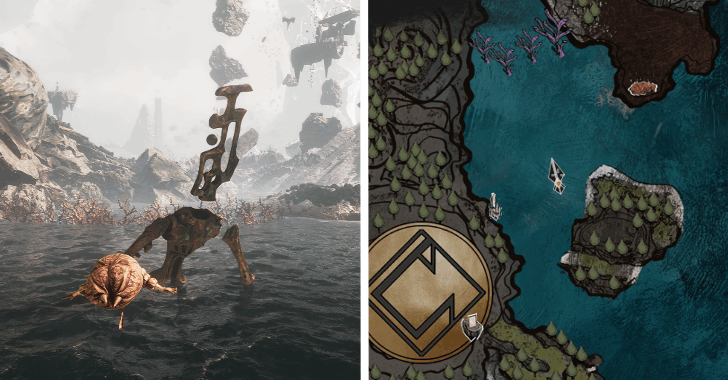
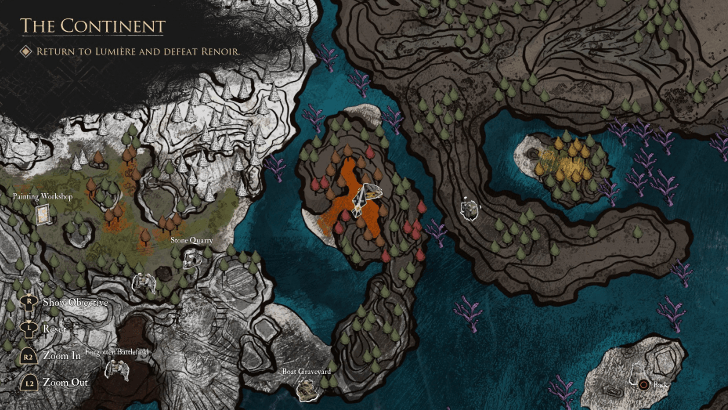
You can get Cheater Picto as soon as you unlock Esquie's swim ability. You must defeat the optional boss, Sprong, which you can find in the water, southwest of the Blades' Graveyard in The Continent.
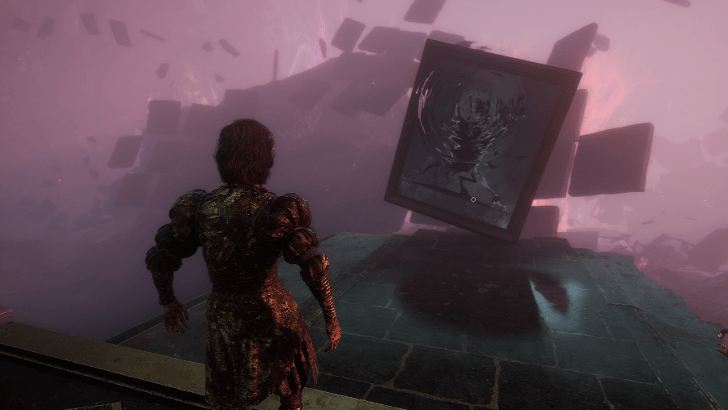
Shortcut - Emergency Turn at Low HP
Shortcut is a great Picto to have in your Lumina as this will allow you to get an immediate turn if you ever get your HP below what you're comfortable with. It's an essential Picto for emergency healing especially if your opponent has high speed that they get so much turn.
You can get this Picto by defeating the Aberration found at Renoir's Drafts.
Warming Up - Damage Ramp Up
If your fights are taking too long, you can get the Warming Up picto, as one of its main Lumina effects is to give you increased damage the longer the fight goes on. You get a total of 25% damage increase once you reach the stack cap.
This Picto can be obtained by defeating the Grosse Tete found right in front of the entrance to the Coastal Cave area at The Continent. You'll need to unlock Esquie's ability to swim to reach this part of the Continent.
Survivor - Survive a Fatal Hit
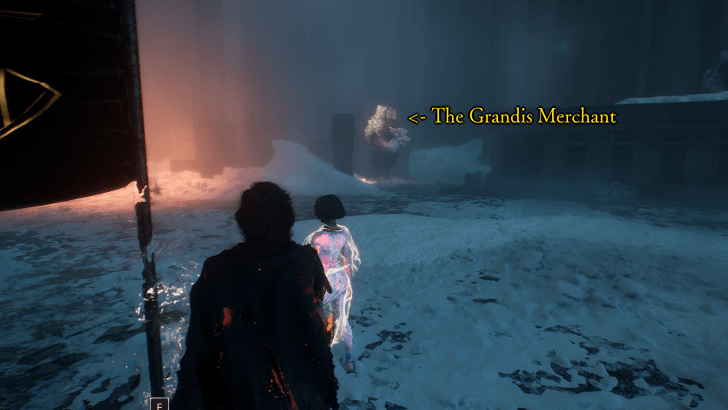
Survivor is an essential Picto because it allows your characters to survive a fatal hit once per battle. You can get this Picto by exchanging 98,000 Chromas from Grandis at Monoco's Station.
Empowering Dodge - Increase DMG by Dodging
This can be an essential Picto depending on your playstyle. If you're the type of player that prefers dodging attacks, then the Empowering Dodge picto is for you as it increases your character's damage by 5% that stacks up to 50% whenever you dodge.
You can get the Empowering Dodge Picto at The Continent, north of the Endless Night Sanctuary. Note that this area is only accessible after unlocking Esquie's flying ability at the start of Act 3.
How to Get Empowering Dodge Picto
Empowering Parry - Increases DMG by Parrying
If you're focused on a Counterattack heavy playstyle, then equipping the Empowering Parry picto for your character will be very essential. This is one of the best Picto you can have if you're going for this playstyle.
To get Empowering Parry, you'll need to fight the Gestral Merchant, Fusoka at the Flying Manor. After winning the battle, you can get the Picto for 97,800 Chromas.
How to Get Empowering Parry Picto
Energising Parry - Get AP From Parrying
Energising Parry is another essential Picto best for playstyles that focuses on dealing with Counterattack DMG. This goes well with the other Parry Pictos in this list. You can get Energising Parry by exchanging 170,975 Chromas from Grour at Renoir's Drafts.
How to Get Energising Parry Picto
Augmented Counter III - Increases Parry Damage
If your playstyle is focused on Counterattacking, then the Augmented Counter III Picto will be an essential part of your kit since this Picto allows you to deal 75% more Counterattack damage.
Augmented Counter III can be obtained as a drop by defeating Chromatic Echassier found at Lumiere.
How to Get Augmented Counter III Picto
Energy Master - Increase Your AP Gain
A very essential Picto that generates all AP gain by 1. Energy Master is a Picto that will help you a lot in getting more AP for your characters.
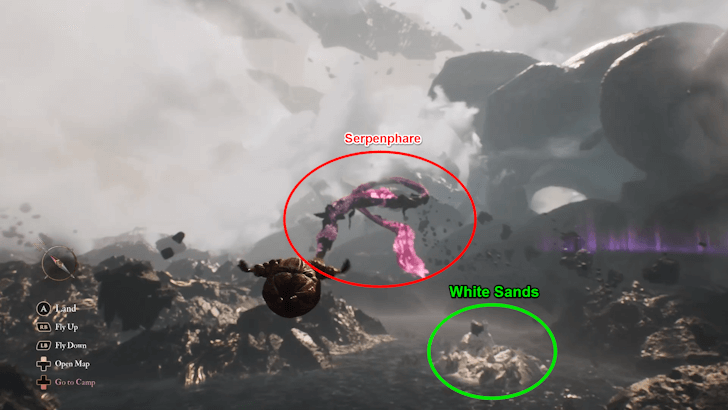
Energy Master is obtained as a drop by defeating Serpenphare, found flying above the White Sands at the east side of The Continent. Serpenphare is only accessible after unlocking Esquie's flying ability at the start of Act 3.
How to Get Energy Master Picto
Second Chance - Revive on Death
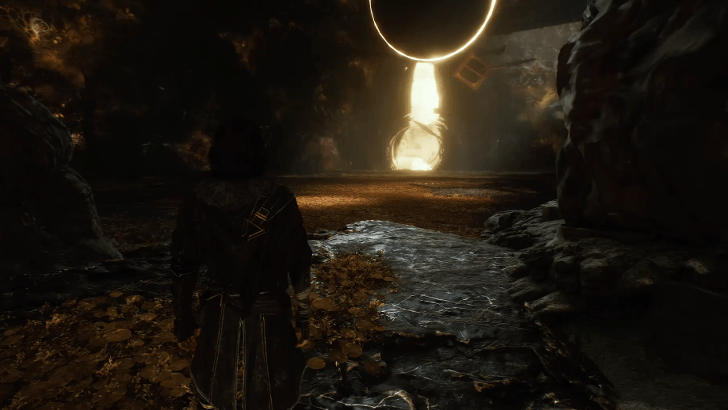
Second Chance is another essential Picto that can help your party by reviving them from the dead once per battle. You can get Second Chance as a drop by defeating Renoir which you can find in The Monolith.
How to Get Second Chance Picto
Teamwork - DMG Boost at Full Party
Teamwork is a good Picto to have as it boosts your DMG by a lot as long as your entire party is alive. To get Teamwork, you have to fight the Gestral Merchant, Pinabby at Yellow Harvest and purchase Teamwork for 9,120 Chromas.
Energising Turn - Get AP on Every Turn
A good way to ease your AP management is by getting the Energising Turn. This Picto allows you to give your characters AP on every turn they make. You can get by exchanging 195,400 Chromas from Grour at Renoir's Drafts.
How to Get Energising Turn Picto
First Strike - Be Able to Act First
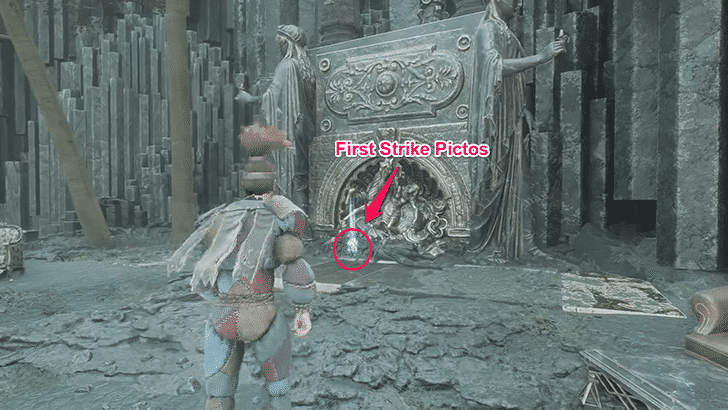
First Strike is one of the best Pictos you can have as you will be able to act first at the start of a battle, letting you set up your buffs, defenses, and more before your enemy can even make a turn.
You can get the First Trike picto as early as Act I, found near a shrine-like structure in the Stone Wave Cliffs.
Roulette - Double Your Damage
While not as essential as some of the Pictos in this list, Roulette can give your party member a huge boost in your damage if you get lucky. Its effects allow the equipping character to either deal double the damage or half the damage of the attack.
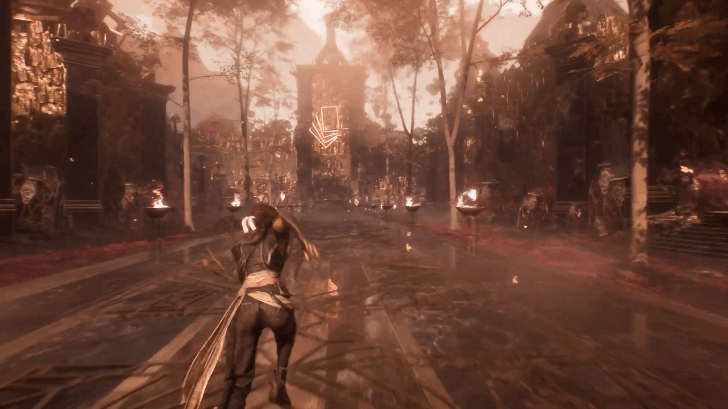
You can get this Picto as soon as you get to the Gestral Village in Act I. Just talk to the Gestral Gambler at the Casino and answer his questions correctly.
Breaker - Break Your Enemies Faster
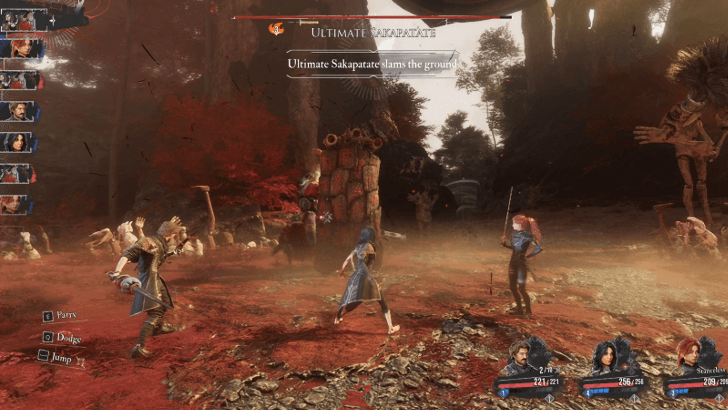
Breaker is an essential Picto because it gives an unconditional Break DMG boost for the character and is relatively easy to get as you'll only have to defeat the Ultimate Sakapatate found at the Ancient Sanctuary.
Equipping this Picto as a Lumina is recommended because it offers 25% increased Break damage, allowing you to fill the break gauge easily.
First Life - Damage Increased As Long As You Don't Die
First Life is a great Picto to get since it offers a 25% damage boost as long as you don't die. This can be used by the character who deals the most damage in the team and is supported by your other characters. Since they won't die or use any of the Death Luminas and Pictos, they'll be able to take advantage of the damage boost First Life provides.
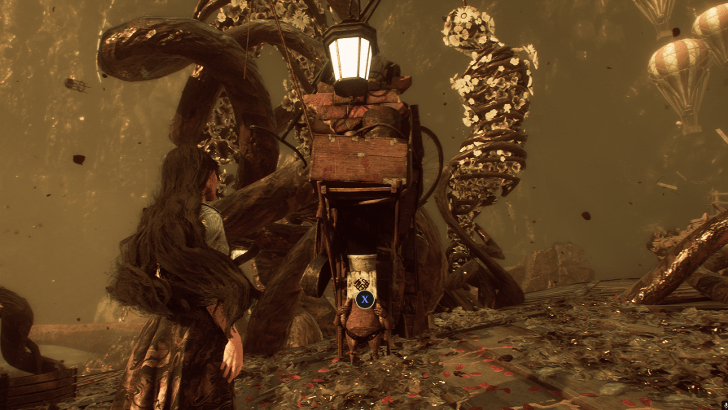
You can get First Life by defeating the Chromatic Lampmaster in the Endless Tower.
Frenzy - Successive Skill Hits Deal More Damage
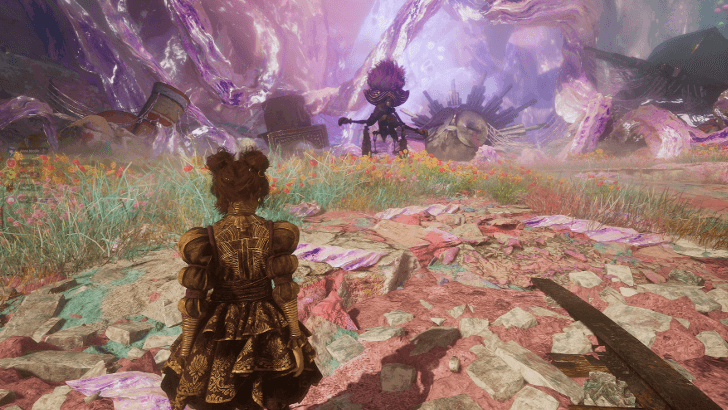
Frenzy is another great Picto to have since its an unconditional Skill damage boost for Skills with multiple hits. This can be used by any character to boost their overall Skill damage, provided that the Skill has a hit count of two or more. You can get Frenzy by defeating the Licornapieds boss in Verso's Drafts.
AP Discount - Skills Cost 1 AP Less
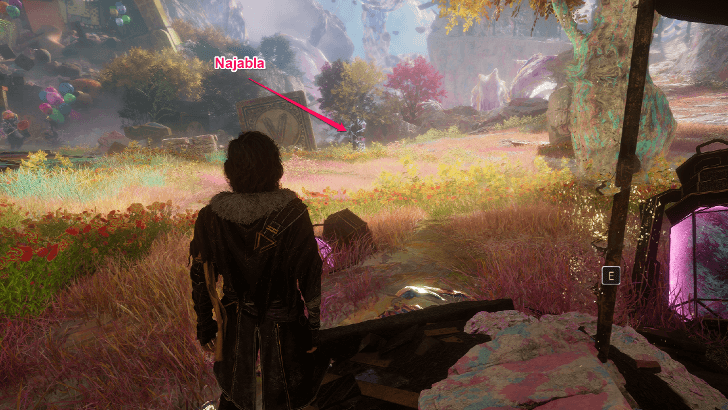
AP Discount is great for all of the characters to have since its an unconditional AP reduction for all of their Skills. This allows them to get an extra Skill or two off in situations they wouldn't be able to do so without the AP reduction. It also offers a lot of Speed when equipped as a Picto.
You can get AP Discount by purchasing it from Najabla in the Verso's Drafts area.
Best Pictos for Each Character
- Gustave Recommended Pictos
- Lune Recommended Pictos
- Maelle Recommended Pictos
- Sciel Recommended Pictos
- Verso Recommended Pictos
- Monoco Recommended Pictos
Recommended Pictos for Gustave
| Pictos |
Exposing Attack Base Attack applies Defenceless for 1 turn. SOS Shell Apply Shell when falling below 50% Health. Rewarding Mark +2 AP on dealing damage to a Marked target. Once per turn. |
||||||||||
|---|---|---|---|---|---|---|---|---|---|---|---|
| Luminas | |||||||||||
|
Burning Shots Burning Shots 20% chance to Burn on Free Aim shot. Critical Burn Critical Burn 25% increased Critical Chance on Burning enemies. Dodger Dodger Gain 1 AP on Perfect Dodge. Once per turn. |
Dead Energy II Dead Energy II +3 AP on killing an enemy. Marking Shots Marking Shots 20% chance to apply Mark on Free Aim shot. |
||||||||||
| Total Lumina Point Cost: | 14 | ||||||||||
For the early game, Gustave will want supportive Pictos and Lumina like Marking Shots and Burning Shots. This allows him to inflict debuffs on the enemies before his other allies take a turn so they can utilize it.
Gustave Best Builds and Attributes
Recommended Pictos for Lune
| Pictos |
Empowering Parry Each successful Parry increases damage by 5% until end of the following turn. Taking any damage removes this buff. Shortcut Immediately play when falling below 30% Health. Once per battle. Charging Critical +20% of a Gradient Charge on Critical Hit. Once per turn. |
||||||||||
|---|---|---|---|---|---|---|---|---|---|---|---|
| Luminas | |||||||||||
|
Burn Affinity Burn Affinity 25% increased damage on Burning Targets. Cheater Cheater Always play twice in a row. Confident Fighter Confident Fighter 30% increased damage, but can't be Healed. Dead Energy II Dead Energy II +3 AP on killing an enemy. Double Burn Double Burn On applying a Burn stack, apply a second one. Energising Burn Energising Burn +1 AP on applying Burn. Once per turn. Energising Start I Energising Start I +1 AP on battle start. Energising Start II Energising Start II +1 AP on battle start. Energy Master Energy Master Every AP gain is increased by 1. Frenzy Frenzy Each successive Skill hit deals 10% more damage. First Life First Life 25% increased damage until death. 20% decreased damage on death. (Once) Clea's Death Clea's Death On death, allies gain 25% increased damage until they die. |
Energising Turn Energising Turn +1 AP on turn start. First Strike First Strike Play first. Full Strength Full Strength 25% increased damage on full Health. Glass Canon Glass Canon Deal 25% more damage, but take 25% more damage. Immaculate Immaculate 30% increased damage until a hit is received. Inverted Affinity Inverted Affinity Apply Inverted on self for 3 turns on battle start. 50% increased damage while Inverted. Painted Power Painted Power Damage can exceed 9,999. Warming Up Warming Up 5% increased damage per turn. Can stack up to 5 times. Tainted Tainted 15% increased damage for each Status Effect on self. Sweet Kill Sweet Kill Recover 50% Health on killing an enemy. AP Discount AP Discount Skills cost 1 less AP. Double Third Double Third Every third hit of a Skill deals double damage. Feint Feint Start each turn with 4 Barbapapa stacks. Every 5th hit with a Skill deals 600% more damage. |
||||||||||
| Total Lumina Point Cost: | 425 | ||||||||||
Lune's Pictos prioritize giving her Critical Rate so that Elemental Trick can provide Stains, while also synergizing well with Choralim's Level 20 Passive. The Burns that her Skills apply, combined with Burn Affinity and the other damage increasing Luminas will allow Lune to output huge amounts of damage.
Lune Best Builds and Attributes
Recommended Pictos for Maelle
| Pictos |
Immaculate 30% increased damage until a hit is received. Glass Canon Deal 25% more damage, but take 25% more damage. Inverted Affinity Apply Inverted on self for 3 turns on battle start. 50% increased damage while Inverted. |
||||||||||
|---|---|---|---|---|---|---|---|---|---|---|---|
| Luminas | |||||||||||
|
Feint Feint Start each turn with 4 Barbapapa stacks. Every 5th hit with a Skill deals 600% more damage. Auto Powerful Auto Powerful Apply Powerful for 3 turns on battle start. In Medias Res In Medias Res +3 Shields on Battle Start, but max Health is halved. Rewarding Mark Rewarding Mark +2 AP on dealing damage to a Marked target. Once per turn. Critical Burn Critical Burn 25% increased Critical Chance on Burning enemies. Painted Power Painted Power Damage can exceed 9,999. Weakness Gain Weakness Gain +1 AP on hitting an enemy's Weakness. Once per turn. Tainted Tainted 15% increased damage for each Status Effect on self. Full Strength Full Strength 25% increased damage on full Health. Greater Powerful Greater Powerful +15% to Powerful damage increase. Shortcut Shortcut Immediately play when falling below 30% Health. Once per battle. First Strike First Strike Play first. Confident Fighter Confident Fighter 30% increased damage, but can't be Healed. First Life First Life 25% increased damage until death. 20% decreased damage on death. (Once) AP Discount AP Discount Skills cost 1 less AP. Double Third Double Third Every third hit of a Skill deals double damage. |
Frenzy Frenzy Each successive Skill hit deals 10% more damage. Powerful Shield Powerful Shield 10% increased damage per Shield Point on self. Shield Affinity Shield Affinity 30% increased damage while having Shields, but receiving any damage always removes all Shields. Teamwork Teamwork 10% increased damage while all allies are alive. Augmented Counter III Augmented Counter III 75% increased Counterattack damage. Energising Parry Energising Parry +1 AP on successful Parry. Roulette Roulette Every hit has a 50% chance to deal either 50% or 200% of its damage. Warming Up Warming Up 5% increased damage per turn. Can stack up to 5 times. Burn Affinity Burn Affinity 25% increased damage on Burning Targets. Energising Turn Energising Turn +1 AP on turn start. Energy Master Energy Master Every AP gain is increased by 1. Cheater Cheater Always play twice in a row. At Death's Door At Death's Door Deal 50% more damage if Health is below 10%. Clea's Death Clea's Death On death, allies gain 25% increased damage until they die. |
||||||||||
| Total Lumina Point Cost | 393 | ||||||||||
In Act 3, the best Pictos to equip in the late game are Immaculate, Glass Canon, and Inverted Affinity. These Pictos give Maelle some health, crit chance, and more speed. The damage boost from this is massive as long as you don't get hit. Dodge or parry to keep yourself alive while dealing tons of damage.
To strengthen your parries, take Luminas that synergize with them such as Healing Counter and Energising Parry. These give you more survivability while also giving you more AP. An important one is Painted Power since it removes the damage cap. The rest can be for more damage to guarantee that you kill with Stendhal or AP economy.
Maelle Best Builds and Attributes
Recommended Pictos for Sciel
| Pictos |
Immaculate 30% increased damage until a hit is received. Glass Canon Deal 25% more damage, but take 25% more damage. Inverted Affinity Apply Inverted on self for 3 turns on battle start. 50% increased damage while Inverted. |
||||||||||
|---|---|---|---|---|---|---|---|---|---|---|---|
| Luminas | |||||||||||
|
Augmented Counter III Augmented Counter III 75% increased Counterattack damage. Auto Rush Auto Rush Apply Rush for 3 turns on battle start. Critical Burn Critical Burn 25% increased Critical Chance on Burning enemies. Teamwork Teamwork 10% increased damage while all allies are alive. Roulette Roulette Every hit has a 50% chance to deal either 50% or 200% of its damage. Empowering Parry Empowering Parry Each successful Parry increases damage by 5% until end of the following turn. Taking any damage removes this buff. Energy Master Energy Master Every AP gain is increased by 1. Energising Parry Energising Parry +1 AP on successful Parry. Energising Turn Energising Turn +1 AP on turn start. Burn Affinity Burn Affinity 25% increased damage on Burning Targets. Frenzy Frenzy Each successive Skill hit deals 10% more damage. First Life First Life 25% increased damage until death. 20% decreased damage on death. (Once) Clea's Death Clea's Death On death, allies gain 25% increased damage until they die. |
First Strike First Strike Play first. Tainted Tainted 15% increased damage for each Status Effect on self. Full Strength Full Strength 25% increased damage on full Health. Painted Power Painted Power Damage can exceed 9,999. Recovery Recovery Recovers 10% Health on turn start. Cheater Cheater Always play twice in a row. Solidifying Solidifying +2 Shields when the character's Health falls below 50%. Once per battle. Sweet Kill Sweet Kill Recover 50% Health on killing an enemy. Warming Up Warming Up 5% increased damage per turn. Can stack up to 5 times. Second Chance Second Chance Revive with 100% Health. Once per battle. AP Discount AP Discount Skills cost 1 less AP. Double Third Double Third Every third hit of a Skill deals double damage. Feint Feint Start each turn with 4 Barbapapa stacks. Every 5th hit with a Skill deals 600% more damage. |
||||||||||
| Total Lumina Point Cost: | 387 | ||||||||||
In the late game, giving Sciel as much damage and offensive stats along with speed is important especially when you want to apply Fortune's Fury. Cheater also helps as it gives her an extra turn to buff herself or her allies. The rest of her Luminas can be centered around increasing her survivability and AP recovery.
Sciel Best Builds and Attributes
Recommended Pictos for Verso
| Pictos |
Augmented Counter I 25% increased Counterattack damage. Perilous Parry +1 AP on Parry, but damage received is doubled. Confident Fighter 30% increased damage, but can't be Healed. |
||||||||||
|---|---|---|---|---|---|---|---|---|---|---|---|
| Luminas | |||||||||||
|
Augmented First Strike Augmented First Strike 50% increased damage on the first hit. Once per battle. Auto Rush Auto Rush Apply Rush for 3 turns on battle start. Breaking Counter Breaking Counter 50% increased Break damage on Counterattack. Charging Tint Charging Tint +5% of a Gradient Charge on using an item. Confident Confident Take 50% less damage, but can't be Healed. Critical Burn Critical Burn 25% increased Critical Chance on Burning enemies. Dead Energy II Dead Energy II +3 AP on killing an enemy. Marking Shots Marking Shots 20% chance to apply Mark on Free Aim shot. Double Mark Double Mark Mark requires 1 more hit to be removed. Powerful on Shell Powerful on Shell Apply Powerful on applying Shell. Burning Shots Burning Shots 20% chance to Burn on Free Aim shot. Cheater Cheater Always play twice in a row. Full Strength Full Strength 25% increased damage on full Health. First Strike First Strike Play first. Warming Up Warming Up 5% increased damage per turn. Can stack up to 5 times. Frenzy Frenzy Each successive Skill hit deals 10% more damage. First Life First Life 25% increased damage until death. 20% decreased damage on death. (Once) Clea's Death Clea's Death On death, allies gain 25% increased damage until they die. |
Empowering Parry Empowering Parry Each successful Parry increases damage by 5% until end of the following turn. Taking any damage removes this buff. Energising Jump Energising Jump +1 AP on Jump Counterattack. Energising Parry Energising Parry +1 AP on successful Parry. Energising Start II Energising Start II +1 AP on battle start. Glass Canon Glass Canon Deal 25% more damage, but take 25% more damage. Inverted Affinity Inverted Affinity Apply Inverted on self for 3 turns on battle start. 50% increased damage while Inverted. Painted Power Painted Power Damage can exceed 9,999. Solidifying Solidifying +2 Shields when the character's Health falls below 50%. Once per battle. Shell On Rush Shell On Rush Apply Shell on applying Rush. Energising Shots Energising Shots 20% chance to gain 1 AP on Free Aim shot. Rewarding Mark Rewarding Mark +2 AP on dealing damage to a Marked target. Once per turn. Energising Burn Energising Burn +1 AP on applying Burn. Once per turn. Burn Affinity Burn Affinity 25% increased damage on Burning Targets. Immaculate Immaculate 30% increased damage until a hit is received. AP Discount AP Discount Skills cost 1 less AP. Double Third Double Third Every third hit of a Skill deals double damage. Feint Feint Start each turn with 4 Barbapapa stacks. Every 5th hit with a Skill deals 600% more damage. |
||||||||||
| Total Lumina Point Cost: | 388 | ||||||||||
The equipped Pictos give Verso strong passives, while also giving him Critical Rate, Health, and Speed. The Lumina themselves revolve around strengthening Verso's parries as much as possible, as well as increasing his damage output even with the downsides.
As your gameplay with Verso involves parrying and not getting hit, Luminas like Confident Fighter and Glass Canon will be your main source of damage amplification. As long as you parry well, you will be able to output large amounts of damage. You can also equip Luminas that are related to Free Aim to further maximize your Follow Up skill.
Verso Best Builds and Attributes
Recommended Pictos for Monoco
| Pictos |
Immaculate 30% increased damage until a hit is received. Energising Parry +1 AP on successful Parry. Empowering Parry Each successful Parry increases damage by 5% until end of the following turn. Taking any damage removes this buff. |
||||||||||
|---|---|---|---|---|---|---|---|---|---|---|---|
| Luminas | |||||||||||
|
First Strike First Strike Play first. First Offensive First Offensive First hit dealt and taken deals 50% more damage. Rewarding Mark Rewarding Mark +2 AP on dealing damage to a Marked target. Once per turn. Marking Shots Marking Shots 20% chance to apply Mark on Free Aim shot. Auto Rush Auto Rush Apply Rush for 3 turns on battle start. Breaking Counter Breaking Counter 50% increased Break damage on Counterattack. Breaker Breaker 25% increased Break damage. Full Strength Full Strength 25% increased damage on full Health. Inverted Affinity Inverted Affinity Apply Inverted on self for 3 turns on battle start. 50% increased damage while Inverted. Augmented First Strike Augmented First Strike 50% increased damage on the first hit. Once per battle. Cheater Cheater Always play twice in a row. Second Chance Second Chance Revive with 100% Health. Once per battle. Frenzy Frenzy Each successive Skill hit deals 10% more damage. First Life First Life 25% increased damage until death. 20% decreased damage on death. (Once) Clea's Death Clea's Death On death, allies gain 25% increased damage until they die. |
Augmented Counter III Augmented Counter III 75% increased Counterattack damage. Sweet Kill Sweet Kill Recover 50% Health on killing an enemy. Painted Power Painted Power Damage can exceed 9,999. Greater Powerful Greater Powerful +15% to Powerful damage increase. Longer Powerful Longer Powerful On applying Powerful, its duration is increased by 2. Auto Powerful Auto Powerful Apply Powerful for 3 turns on battle start. Glass Canon Glass Canon Deal 25% more damage, but take 25% more damage. Teamwork Teamwork 10% increased damage while all allies are alive. Tainted Tainted 15% increased damage for each Status Effect on self. Warming Up Warming Up 5% increased damage per turn. Can stack up to 5 times. Energy Master Energy Master Every AP gain is increased by 1. Energising Turn Energising Turn +1 AP on turn start. AP Discount AP Discount Skills cost 1 less AP. Double Third Double Third Every third hit of a Skill deals double damage. Feint Feint Start each turn with 4 Barbapapa stacks. Every 5th hit with a Skill deals 600% more damage. |
||||||||||
| Total Lumina Point Cost: | 403 | ||||||||||
The best Pictos for Monoco in Act 3 are Immaculate, Energising Parry, and Empowering Parry. This gives him a mix of health and offensive stats, along with a stacking damage boost as long as you don't get damaged.
For Luminas, focus on the ones that give more AP, parry effects, Break, and more damage. This lets you strengthen Monoco's parries more while also having consistent AP generation and lets him use his damaging or supportive abilities every turn.
Monoco Best Builds and Attributes
Clair Obscur: Expedition 33 Related Guides
Clair Obscur: Expedition 33 Wiki
Guides by Category
| All Clair Obscur: Expedition 33 Categories | |
|---|---|
 Characters Characters |
 Walkthrough Walkthrough |
 Tips and Tricks Tips and Tricks |
 Bosses Bosses |
 Enemies Enemies |
 Pictos and Luminas Pictos and Luminas |
 Items Items |
 Weapons Weapons
|
 NPCs NPCs |
 Map and Areas Map and Areas
|
 Romance Romance |
 Latest News Latest News |
 Cosmetics Cosmetics |
 Journals Journals |
 Skills Skills |
- |
All Recommended Guides
Comment
1  Anonymous 10 months
How come you are giving Lune Confident Fighter and Sweet Kill at the same time?
Author

Best Pictos for Each Character
Please participate in our site
improvement survey
03/2026
improvement survey
03/2026
Would you assist in
improving Game8's site?
improving Game8's site?

×
We are listening to our users' valuable opinions and discussing how to act on them.
The information collected through this survey will be used for the purpose of improving our services. In addition, the information will only be disclosed a part of a statistic in a format that will not allow identification of personal information.
Begin Survey
Not Now
×
Please rate each item regarding Game8.co's Advertisements.
Amount of Ads
Very Dissatisfied
Somewhat Dissatisfied
Fine
Somewhat Satisfied
Highly Satisfied
Placement of Ads
Timing of Ad Display
Ad Loading Speed
Safeness of Ads
Content of Ads
×
Please rate each item regarding Game8.co's Quality of Articles.
Amount of information
Very Dissatisfied
Somewhat Dissatisfied
Fine
Somewhat Satisfied
Highly Satisfied
Frequency of updates
Speed of new information
Accuracy of articles
Understandibility of articles
Readability of sentences
×
Please rate each item regarding Game8.co's Usability of the Site.
Ease of finding information
Very Dissatisfied
Somewhat Dissatisfied
Fine
Somewhat Satisfied
Highly Satisfied
Loading Speed
Use of Color
Font Size
Visibility of Images
Easy to Understand Layout
×
Please rate each item regarding Game8.co's Message Boards, Comments.
Ease of Writing
Very Dissatisfied
Somewhat Dissatisfied
Fine
Somewhat Satisfied
Highly Satisfied
Readability
Ease in Finding Information
Comment Quality
Comment Quantity
Admin Response
×
Please rate each item regarding Game8.co's Site's new design.
Please rate our site's new design
Very Dissatisfied
Somewhat Dissatisfied
Fine
Somewhat Satisfied
Highly Satisfied
Do you think that the website's design change makes the site easier to use?
Has the new design made it easier for you to find information on the site?
Has the new design improved the overall visual appeal of the site?
How would you rate your overall satisfaction with the new design of the site?
×
How likely are you to recommend Game8 to someone you know?
Very Unlikely
0
1
2
3
4
5
6
7
8
9
10
Very Likely
If you have other opinions regarding potential improvement to the website, please share them with us. We would appreciate your honest opinion.
Note: This is a free response section, so you can proceed without entering anything.
Note: Please be sure not to enter any kind of personal information into your response.
Note: Please be sure not to enter any kind of personal information into your response.
×
Thank You
×
Thank you for participating in our survey! Your answers will help us to improve the quality of our website and services.
We hope you continue to make use of Game8.
We hope you continue to make use of Game8.
Close
Rankings
- We could not find the message board you were looking for.
Gaming News


![Everwind Review [Early Access] | The Shaky First Step to A Very Long Journey](https://img.game8.co/4440226/ab079b1153298a042633dd1ef51e878e.png/thumb)

![Monster Hunter Stories 3 Review [First Impressions] | Simply Rejuvenating](https://img.game8.co/4438641/2a31b7702bd70e78ec8efd24661dacda.jpeg/thumb)
Popular Games

Genshin Impact Walkthrough & Guides Wiki
Honkai: Star Rail Walkthrough & Guides Wiki
Umamusume: Pretty Derby Walkthrough & Guides Wiki
Pokemon Pokopia Walkthrough & Guides Wiki
Resident Evil Requiem (RE9) Walkthrough & Guides Wiki
Monster Hunter Wilds Walkthrough & Guides Wiki
Wuthering Waves Walkthrough & Guides Wiki
Arknights: Endfield Walkthrough & Guides Wiki
Pokemon FireRed and LeafGreen (FRLG) Walkthrough & Guides Wiki
Pokemon TCG Pocket (PTCGP) Strategies & Guides Wiki


Recommended Games
Diablo 4: Vessel of Hatred Walkthrough & Guides Wiki
Fire Emblem Heroes (FEH) Walkthrough & Guides Wiki
Yu-Gi-Oh! Master Duel Walkthrough & Guides Wiki
Super Smash Bros. Ultimate Walkthrough & Guides Wiki
Pokemon Brilliant Diamond and Shining Pearl (BDSP) Walkthrough & Guides Wiki
Elden Ring Shadow of the Erdtree Walkthrough & Guides Wiki
Monster Hunter World Walkthrough & Guides Wiki
The Legend of Zelda: Tears of the Kingdom Walkthrough & Guides Wiki
Persona 3 Reload Walkthrough & Guides Wiki
Cyberpunk 2077: Ultimate Edition Walkthrough & Guides Wiki


All rights reserved
©2025 Sandfall Interactive SAS - Published by Kepler Interactive Limited. All rights reserved.
The copyrights of videos of games used in our content and other intellectual property rights belong to the provider of the game.
The contents we provide on this site were created personally by members of the Game8 editorial department.
We refuse the right to reuse or repost content taken without our permission such as data or images to other sites.
It provides you with an additional 10% bonus damage