This survey will take about 1 minute.
Your answers will help us to improve our website.
Borderlands 4
His Vile Sanctum Walkthrough
★ 17 active SHiFT Codes as of March 14, 2026
☆ Black Market Location
★ Elemental Weakness Chart
☆ Legendary Weapons
★ Builds: Vex | Amon | Rafa | Harlowe
This is a walkthrough for the His Vile Sanctum mission in Borderlands 4. Read on to follow the objectives and clear the mission, as well as how to re-enter Vile Lictor's fortress if you're stuck.
| ◀ Previous Mission | Next Mission ▶ |
|---|---|
| Dark Subject | Rising Action |
His Vile Sanctum Walkthrough
| List of Objectives | ||
|---|---|---|
| 1 | Reach Vile Lictor's Fortress | |
| 2 | Reach Power Substation | |
| 3 | Breach Vile Lictor’s Fortress | |
| 4 | Kill Vile Lictor | |
Reach Vile Lictor's Fortress
| # | Walkthrough |
|---|---|
| 1 | 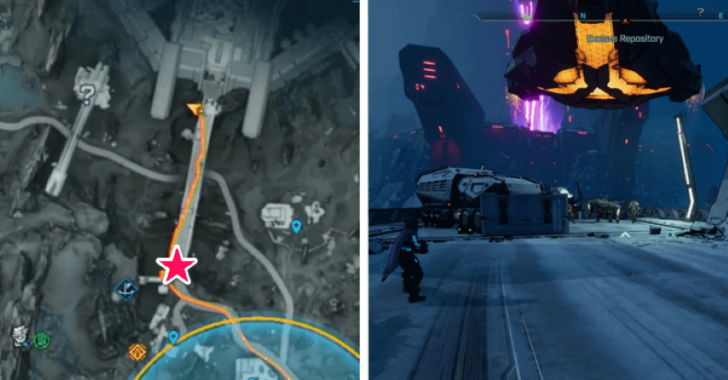 Follow Amara to the bridge leading to Vile Lictor's fortress, located southwest of Windspear. |
| 2 | 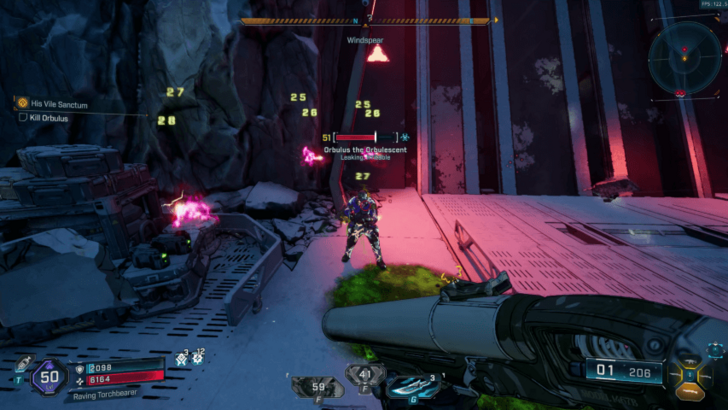 Fight your way across the bridge. At the entrance, kill Orbulus! |
| 3 | Return to Belton's Bore to trigger a cutscene. Afterward, follow Defiant Calder for your next objective. |
Reach Power Substation
| # | Walkthrough |
|---|---|
| 1 | 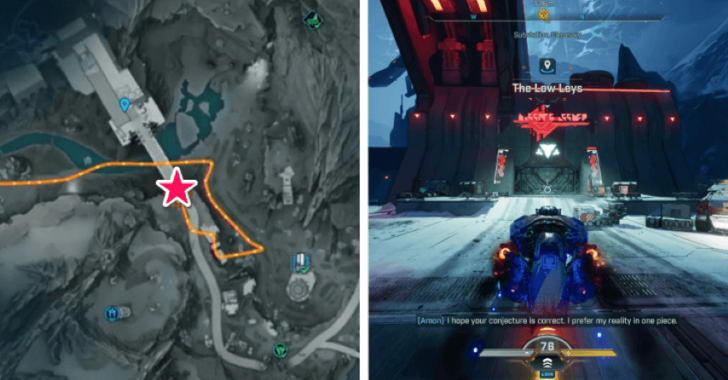 Head north to Substation Canonary, east of Stoneblood Forest. Kill Order forces inside the power substation. |
| 2 | 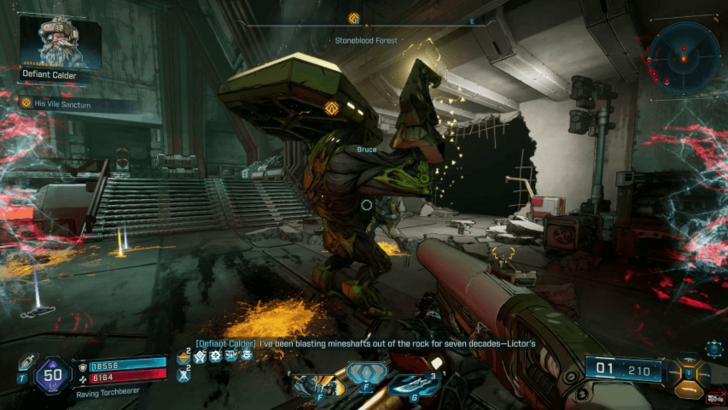 Follow the marked location to an open area in the power substation. Approach the white wall on the right to find Defiant Calder and have Bruce barge inside. Kill more Order forces with Bruce! |
| 3 | Follow Bruce to the doorway with the purple barrier. Once he takes the force field down, proceed through the corridor and to the next open area. Kill Order forces there as well. |
| 4 | 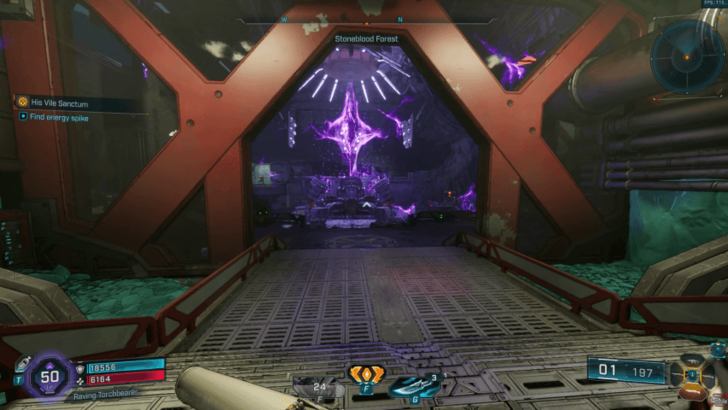 Keep following Bruce into the power substation as he tears down the barriers blocking your path. This willl eventually lead you to the chamber where the energy spike is. |
| 5 | 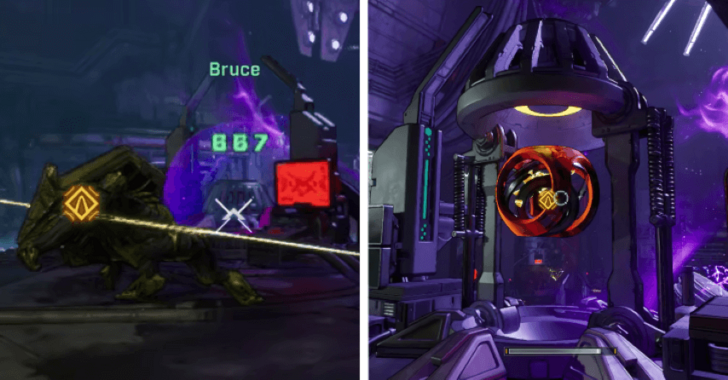 Escort Bruce to limiter A by killing enemies in his path. Once he takes down the shield bubble, destroy limiter A. Repeat this process for limiters B and C. |
| 6 | After destroying all limiters, huddle with Bruce. You will then be teleported in a cave in The Low Leys. |
Breach Vile Lictor’s Fortress
| # | Walkthrough |
|---|---|
| 1 | 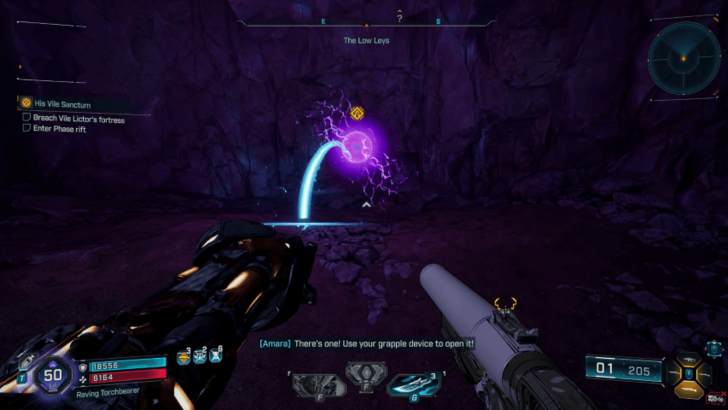 Proceed through the cave and use your grappling hook to enter the Phase rift nearby. This will teleport you to another cave, but this time in Windspear. |
| 2 | Follow the marked location and enter another Phase rift at the top of the ledge, taking you to an Order facility. |
| 3 | Enter the Phase rift once more in the Order facility to finally reach the gates of Vile Lictor's fortress. |
| 4 |  Head north to the large gate and take Bruce's control core from his corpse. Be ready, as there will be more enemies in the area! |
| 5 | 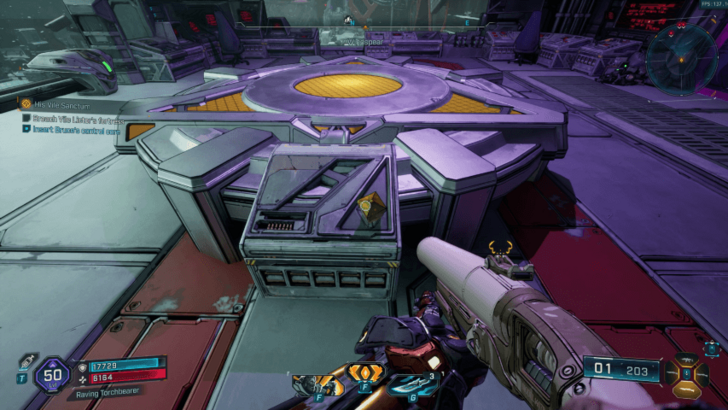 Enter the doorway on the right and follow the marked location to the engineering bay. Insert Bruce's control core into the console. |
| 6 |  Grab the Bruce Bomb from the console and throw it at the barrier to destroy it. |
| 7 | 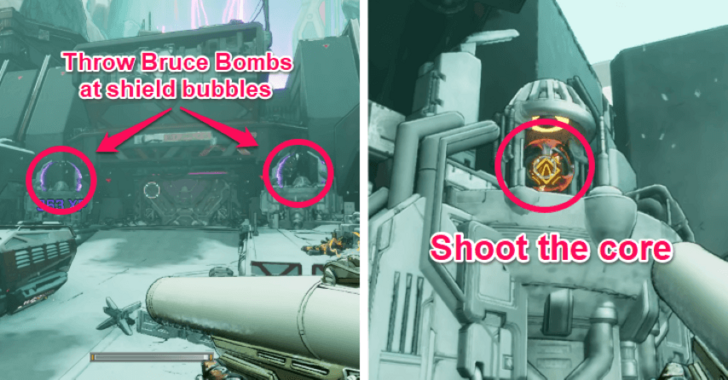 Use the Bruce Bombs to tear down the shield bubbles on either side of the large gate. Once both shield bubbles are down, shoot the cores to destroy the large gate's barrier. |
| 8 | Enter through the newly opened gate and you will be teleported to the Umbral Foundry. |
Kill Vile Lictor
| # | Walkthrough |
|---|---|
| 1 | Grab a Bruce Bomb nearby and throw it at the barrier to the south. |
| 2 | 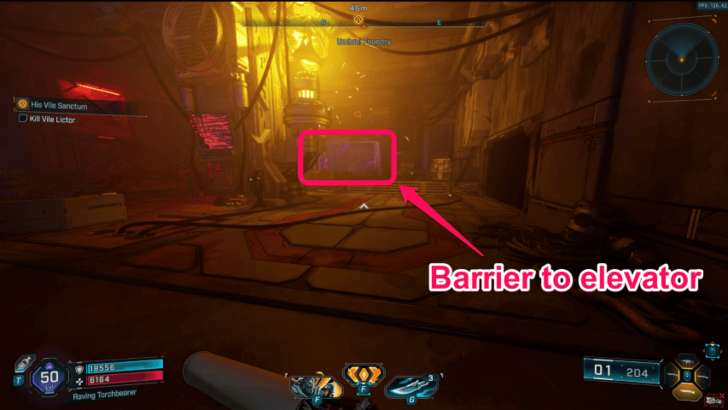 Follow the marked location to a yellow-lit reactor with another barrier blocking an elevator. |
| 3 | 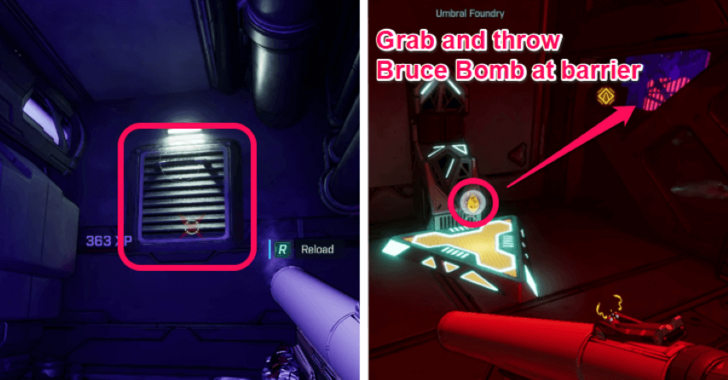 To the left of the reactor, enter the vent and grab a Bruce Bomb on the other side. Press the button to open the door, then throw the bomb at the barrier to destroy it. |
| 4 | 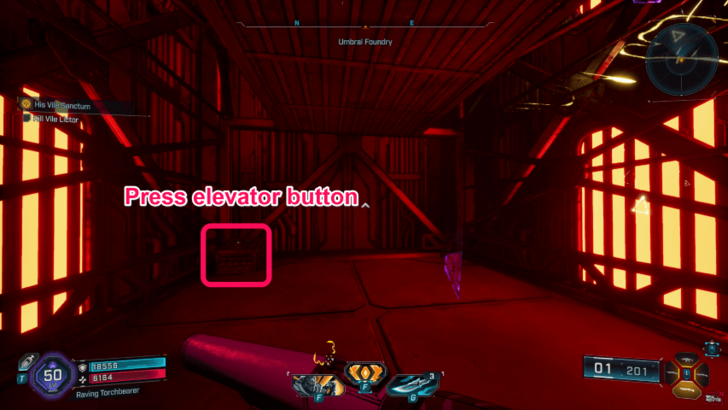 Enter the elevator and press the button to ascend to the upper level. |
| 5 | 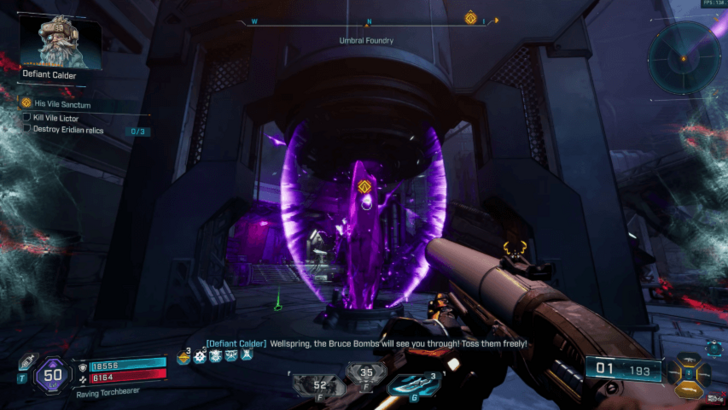 This will take you to a large, open vertical area with three Eridium relics protected by shield bubbles. Grab a Bruce Bomb on the left and throw it at the shield bubbles, then shoot the Eridium relics to destroy them. Be careful, as falling will result to your death. Make sure to use gliding and grapple points to traverse the area safely. |
| 6 | 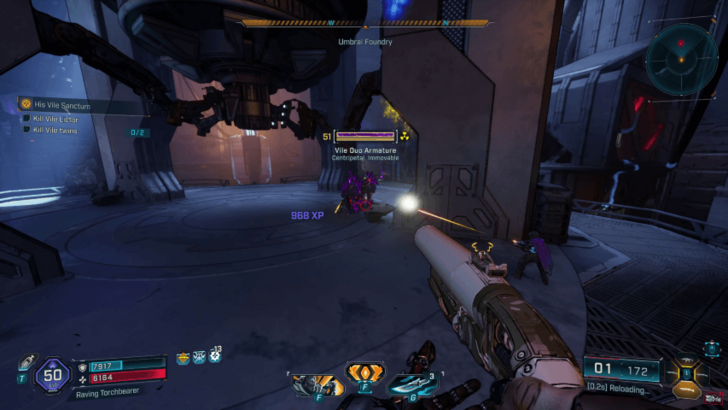 After destroying the Eridium relics, the Vile twins will appear. Kill both to proceed! Amara will also come in to help you fight them. |
| 7 | Follow Amara to the elevator and press the button to activate it. A cutscene will trigger at your destination. |
| 8 | 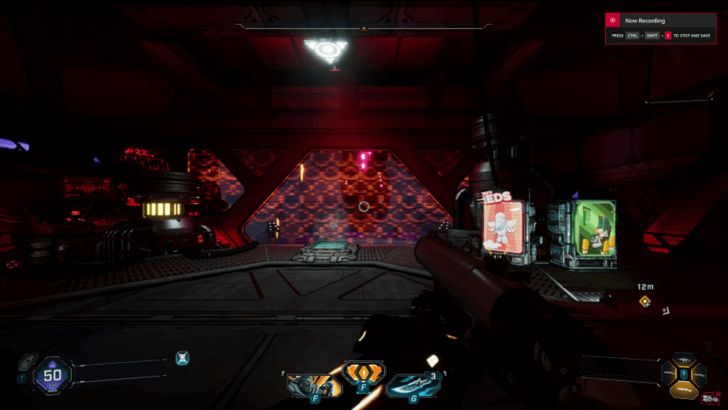 There are vending machines in the area. Make your preparations before facing Vile Lictor. When you're ready, approach the jump pad to enter the boss arena. |
| 9 | 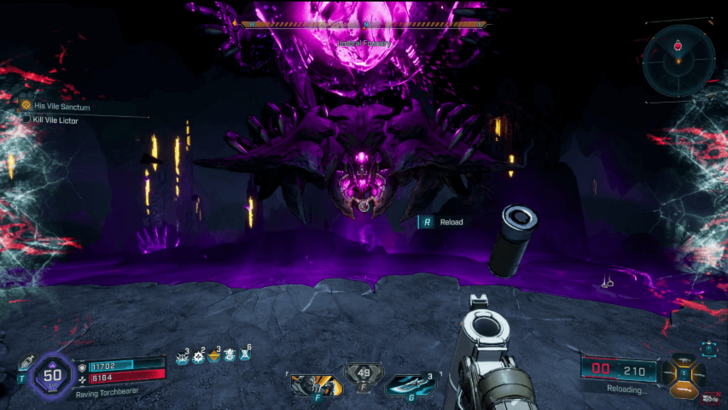 Defeat Vile Lictor! It's important to stay on the move during the boss fight. Vile Lictor fires multiple projectiles and conjures deadly walls. For horizontal walls on the ground, jump and glide to avoid getting hit. During the second phase, Vile Lictor will charge a bomb that hits the entire arena. Quickly grapple to one of the stone platforms outside the arena to avoid the blast. |
| 10 | 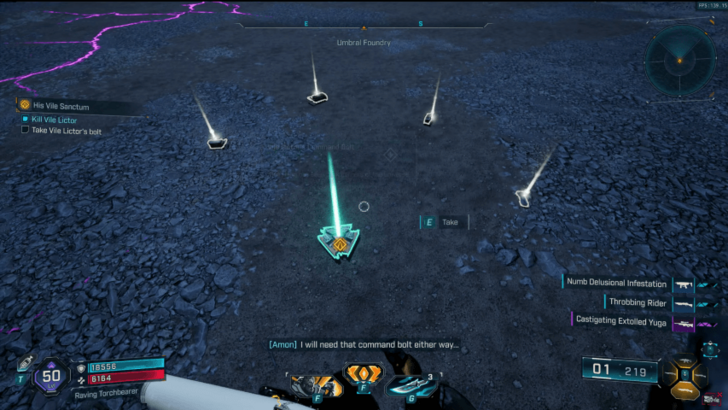 After defeating Vile Lictor, take his bolt to trigger another cutscene. |
| 11 | Return to Belton's Bore and talk to Defiant Calder to complete the mission. |
How to Re-Enter Vile Lictor's Fortress
Return to the Power Substation
If you Fast Travel out of Vile Lictor's fortress during the mission, you may be wondering how to get back inside.
To re-enter Vile Lictor's fortress, return to Substation Canonary or the power substation and reach the chamber where the energy spike was. Stand where you huddled with Bruce to be teleported back to the cave in The Low Leys. Enter the Phase rifts again, and you'll find yourself back at the gates of Vile Lictor's fortress.
His Vile Sanctum Rewards
| Main Mission Rewards | |
|---|---|
| Base Reward |
・EXP ・Cash ・Eridium |
| Weapon Reward | ・Sniper Rifle (Blue to Purple Rarity) |
| Cosmetic Reward |
・Vault Hunter Head (Armed Collection) ・Vehicle Selection (Carapacer) |
Armed Collection and Carapacer Skins
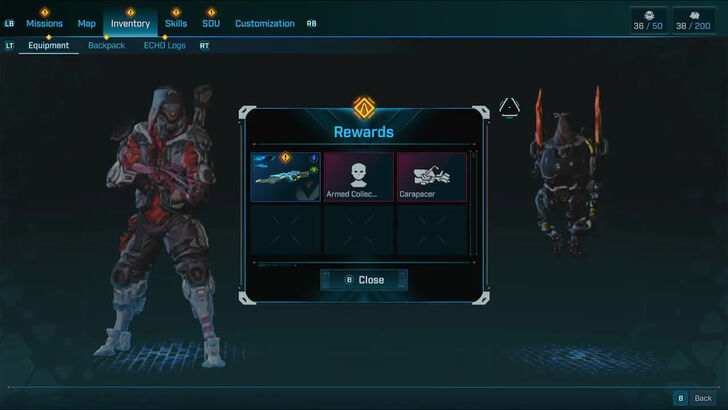
Completing His Vile Sanctum will also reward you with the Armed Collection Vault Hunter Head and Carapacer Vehicle Selection, which you can use in the Customization menu.
List of All Customization Options
Borderlands 4 Related Guides

All Main Missions
| # | Main Mission | ||
|---|---|---|---|
| 1 | Guns Blazing | ||
| 2 | Recruitment Drive | ||
| 3 | Down and Outbound | ||
| 4 | A Lot to Process | ||
| * | One Fell Swoop | Shadow of the Mountain | Wrath of the Ripper Queen |
| Rush the Gate | Crystal Brawl | Siege and Destroy | |
| ↓ | Dark Subject | Unpaid Tab | |
| His Vile Sanctum | Her Flaming Vision | ||
| 15 | Rising Action | ||
| 16 | Another Day, Another Universe | ||
| 17 | The Falling Wall | ||
| 18 | Means of Ascent | ||
| 19 | Plan Z | ||
| 20 | The Timekeeper's Order | ||
| 21 | Secrets of the Vault | ||
Comment
Author

His Vile Sanctum Walkthrough
Please participate in our site
improvement survey
03/2026
improvement survey
03/2026
Would you assist in
improving Game8's site?
improving Game8's site?

×
We are listening to our users' valuable opinions and discussing how to act on them.
The information collected through this survey will be used for the purpose of improving our services. In addition, the information will only be disclosed a part of a statistic in a format that will not allow identification of personal information.
Begin Survey
Not Now
×
Please rate each item regarding Game8.co's Advertisements.
Amount of Ads
Very Dissatisfied
Somewhat Dissatisfied
Fine
Somewhat Satisfied
Highly Satisfied
Placement of Ads
Timing of Ad Display
Ad Loading Speed
Safeness of Ads
Content of Ads
×
Please rate each item regarding Game8.co's Quality of Articles.
Amount of information
Very Dissatisfied
Somewhat Dissatisfied
Fine
Somewhat Satisfied
Highly Satisfied
Frequency of updates
Speed of new information
Accuracy of articles
Understandibility of articles
Readability of sentences
×
Please rate each item regarding Game8.co's Usability of the Site.
Ease of finding information
Very Dissatisfied
Somewhat Dissatisfied
Fine
Somewhat Satisfied
Highly Satisfied
Loading Speed
Use of Color
Font Size
Visibility of Images
Easy to Understand Layout
×
Please rate each item regarding Game8.co's Message Boards, Comments.
Ease of Writing
Very Dissatisfied
Somewhat Dissatisfied
Fine
Somewhat Satisfied
Highly Satisfied
Readability
Ease in Finding Information
Comment Quality
Comment Quantity
Admin Response
×
Please rate each item regarding Game8.co's Site's new design.
Please rate our site's new design
Very Dissatisfied
Somewhat Dissatisfied
Fine
Somewhat Satisfied
Highly Satisfied
Do you think that the website's design change makes the site easier to use?
Has the new design made it easier for you to find information on the site?
Has the new design improved the overall visual appeal of the site?
How would you rate your overall satisfaction with the new design of the site?
×
How likely are you to recommend Game8 to someone you know?
Very Unlikely
0
1
2
3
4
5
6
7
8
9
10
Very Likely
If you have other opinions regarding potential improvement to the website, please share them with us. We would appreciate your honest opinion.
Note: This is a free response section, so you can proceed without entering anything.
Note: Please be sure not to enter any kind of personal information into your response.
Note: Please be sure not to enter any kind of personal information into your response.
×
Thank You
×
Thank you for participating in our survey! Your answers will help us to improve the quality of our website and services.
We hope you continue to make use of Game8.
We hope you continue to make use of Game8.
Close
Rankings
- We could not find the message board you were looking for.
Gaming News


![Everwind Review [Early Access] | The Shaky First Step to A Very Long Journey](https://img.game8.co/4440226/ab079b1153298a042633dd1ef51e878e.png/thumb)

![Monster Hunter Stories 3 Review [First Impressions] | Simply Rejuvenating](https://img.game8.co/4438641/2a31b7702bd70e78ec8efd24661dacda.jpeg/thumb)
Popular Games

Genshin Impact Walkthrough & Guides Wiki
Honkai: Star Rail Walkthrough & Guides Wiki
Umamusume: Pretty Derby Walkthrough & Guides Wiki
Pokemon Pokopia Walkthrough & Guides Wiki
Resident Evil Requiem (RE9) Walkthrough & Guides Wiki
Monster Hunter Wilds Walkthrough & Guides Wiki
Wuthering Waves Walkthrough & Guides Wiki
Arknights: Endfield Walkthrough & Guides Wiki
Pokemon FireRed and LeafGreen (FRLG) Walkthrough & Guides Wiki
Pokemon TCG Pocket (PTCGP) Strategies & Guides Wiki


Recommended Games
Diablo 4: Vessel of Hatred Walkthrough & Guides Wiki
Cyberpunk 2077: Ultimate Edition Walkthrough & Guides Wiki
Fire Emblem Heroes (FEH) Walkthrough & Guides Wiki
Yu-Gi-Oh! Master Duel Walkthrough & Guides Wiki
Super Smash Bros. Ultimate Walkthrough & Guides Wiki
Pokemon Brilliant Diamond and Shining Pearl (BDSP) Walkthrough & Guides Wiki
Elden Ring Shadow of the Erdtree Walkthrough & Guides Wiki
Monster Hunter World Walkthrough & Guides Wiki
The Legend of Zelda: Tears of the Kingdom Walkthrough & Guides Wiki
Persona 3 Reload Walkthrough & Guides Wiki


All rights reserved
©2025 Gearbox Software. Published by 2K Games. Developed by Gearbox. Gearbox, Borderlands, and related logos are all trademarks of Gearbox Software, LLC. 2K and the 2K logo are trademarks of Take-Two Interactive Software, Inc. All other marks and trademarks are the property of their respective owners. All rights reserved.
The copyrights of videos of games used in our content and other intellectual property rights belong to the provider of the game.
The contents we provide on this site were created personally by members of the Game8 editorial department.
We refuse the right to reuse or repost content taken without our permission such as data or images to other sites.