Recruitment Drive Walkthrough: How to Get Clearance for Elevator
★ 17 active SHiFT Codes as of March 14, 2026
☆ Black Market Location
★ Elemental Weakness Chart
☆ Legendary Weapons
★ Builds: Vex | Amon | Rafa | Harlowe

This is a walkthrough for the Recruitment Drive mission in Borderlands 4. Read on to learn how to get clearance to access the broadcast tower elevator and finish the mission.
| ◀ Previous Mission | Next Mission ▶ |
|---|---|
| Guns Blazing | Down and Outbound |
List of Contents
Recruitment Drive Walkthrough
Objective 1: Take Claptrap's Tour
| # | Walkthrough |
|---|---|
| 1 | 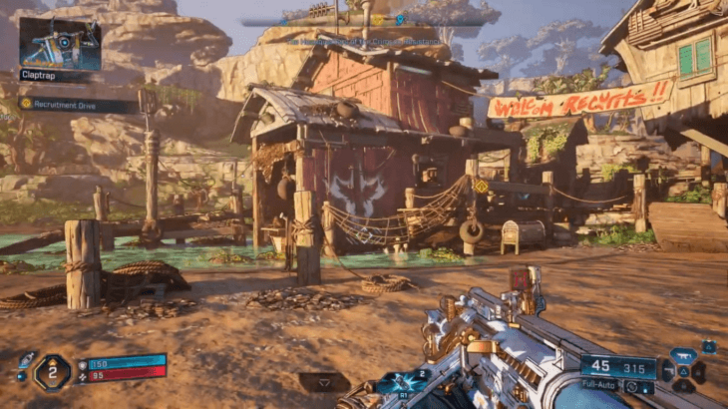 Go up the steps and approach the grill beside Claptrap. After his dialogue is exhausted, open it to retrieve batteries. |
| 2 | Follow Claptrap until you see an enclosure with new ripper enemies that may be tougher to kill. |
| 3 | After eliminating all enemies, proceed with Claptrap to the elevator of a broadcast tower where you will reunite with Arjay's ECHO-4 robot. The elevator, however, cannot be called from the bottom. |
| 4 | Using ECHO-4's ECHO Location, you may trace your path to the next objective with a yellow line. Follow the trail until you see climbable wall on a cliffside. |
| 5 | Inside a cave, there should be Mangrel enemies guarding the way to another Ripper camp. |
Objective 2: Find Splashzone
| # | Walkthrough |
|---|---|
| 1 |  Kill all rippers in the camp before advancing further to find a passageway leading to Riptide Grotto. |
| 2 | Be cautious in Riptide Grotto as the battle becomes very hectic with several enemies. Take cover to avoid losing health and having to respawn. Remember to loot for better weapons to clear the area more efficiently. |
| 3 | 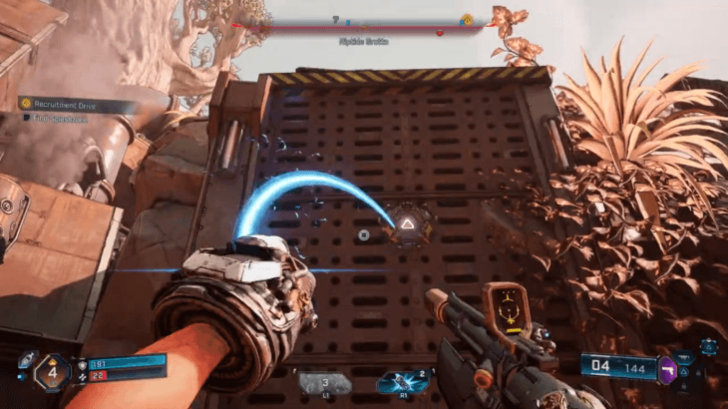 Upon entering Riptide Grotto, run left and follow the raised terrain to eventually reach a climbable wall. Eliminate the rippers once you climb up. |
| 4 | 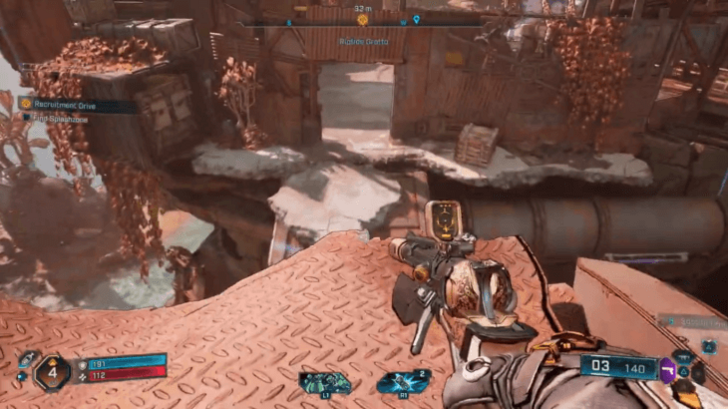 If you turn to the right facing a gap, there is a ledge leading to a jutting platform you have to jump onto. Upon entering, you will fight the miniboss Splashzone. |
| 5 | Kill Splashzone. As he moves quickly and hits hard, use the environment to your advantage while also being careful of rippers outnumbering you. |
| 6 | After killing Splashzone, get his key and use it to open the nearby chest to receive the Glide Pack. Use the Glide Pack on the edge of his boss platform to reach the other side. From there, run up the grassy dirt path until you reach the starting area again. |
Objective 3: Return to the Broadcast Tower
| # | Walkthrough |
|---|---|
| 1 | 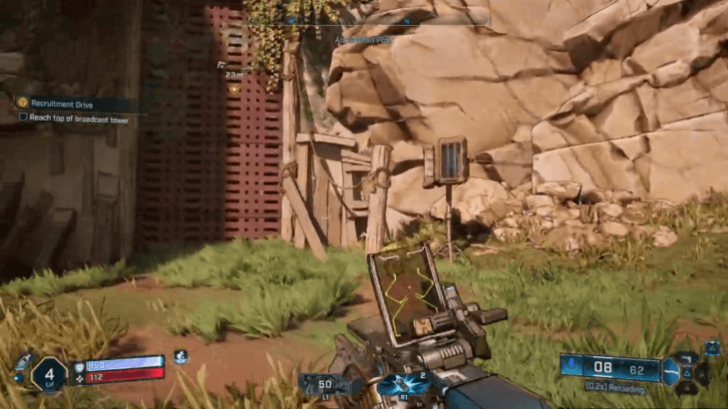 With Splashzone's key, return to the area with the broadcast tower. Find a climbable wall to reach the side of the tower. |
| 2 | Head to the top of the tower by using the grappling hook. There, you will realize that the elevator is still inaccesible. |
Objective 4: Get Clearance for Elevator
| # | Walkthrough |
|---|---|
| 1 | 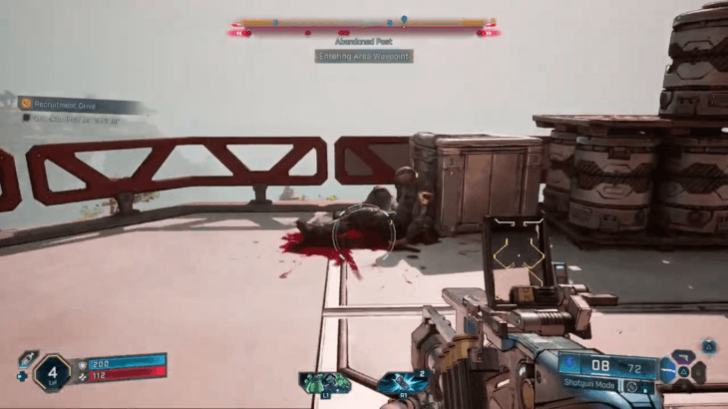 Turn back from the elevator to see a corpse slumped by a crate. Looking at the back of its head, there should be a green chip. A prompt should then allow you to get the clearance from it. Go back to the elevator to finally activate it. |
| 2 | After Claptrap reaches the top, he will ask you to break a door. After breaking the door, enter Claptrap's Safehouse. |
| 3 | To successfully capture the Safehouse, find the command console's datapad and use it to access the console. This unlocks the Vending Machine, which allows you to buy and sell resources. Moreover, this unlocks the Safehouse as a point for fast travel. |
| 4 | After capturing the Safehouse, start a broadcast with Claptrap by accessing the console near him. |
Recruitment Drive Rewards
| Main Mission Rewards | |
|---|---|
| Base Reward | • Cash • XP |
| Equipment Reward | • Shield (Purple Rarity) |
Borderlands 4 Related Guides

All Main Missions
| # | Main Mission | ||
|---|---|---|---|
| 1 | Guns Blazing | ||
| 2 | Recruitment Drive | ||
| 3 | Down and Outbound | ||
| 4 | A Lot to Process | ||
| * | One Fell Swoop | Shadow of the Mountain | Wrath of the Ripper Queen |
| Rush the Gate | Crystal Brawl | Siege and Destroy | |
| ↓ | Dark Subject | Unpaid Tab | |
| His Vile Sanctum | Her Flaming Vision | ||
| 15 | Rising Action | ||
| 16 | Another Day, Another Universe | ||
| 17 | The Falling Wall | ||
| 18 | Means of Ascent | ||
| 19 | Plan Z | ||
| 20 | The Timekeeper's Order | ||
| 21 | Secrets of the Vault | ||
Comment
Author

Recruitment Drive Walkthrough: How to Get Clearance for Elevator
Rankings
- We could not find the message board you were looking for.
Gaming News

![Monster Hunter Stories 3 Review [First Impressions] | Simply Rejuvenating](https://img.game8.co/4438641/2a31b7702bd70e78ec8efd24661dacda.jpeg/show)

![Slay the Spire 2 Review [Early Access] | Still the Deckbuilder to Beat](https://img.game8.co/4433115/44e19e1fb0b4755466b9e516ec7ffb1e.png/thumb)
![Resident Evil Village Review [Switch 2] | Almost Flawless Port](https://img.game8.co/4432790/e1859f64830960ce4248d898f8cd38d9.jpeg/thumb)
Popular Games

Genshin Impact Walkthrough & Guides Wiki
Umamusume: Pretty Derby Walkthrough & Guides Wiki
Pokemon Pokopia Walkthrough & Guides Wiki
Honkai: Star Rail Walkthrough & Guides Wiki
Monster Hunter Stories 3: Twisted Reflection Walkthrough & Guides Wiki
Arknights: Endfield Walkthrough & Guides Wiki
Wuthering Waves Walkthrough & Guides Wiki
Zenless Zone Zero Walkthrough & Guides Wiki
Pokemon TCG Pocket (PTCGP) Strategies & Guides Wiki
Monster Hunter Wilds Walkthrough & Guides Wiki


Recommended Games
Diablo 4: Vessel of Hatred Walkthrough & Guides Wiki
Cyberpunk 2077: Ultimate Edition Walkthrough & Guides Wiki
Fire Emblem Heroes (FEH) Walkthrough & Guides Wiki
Yu-Gi-Oh! Master Duel Walkthrough & Guides Wiki
Super Smash Bros. Ultimate Walkthrough & Guides Wiki
Pokemon Brilliant Diamond and Shining Pearl (BDSP) Walkthrough & Guides Wiki
Elden Ring Shadow of the Erdtree Walkthrough & Guides Wiki
Monster Hunter World Walkthrough & Guides Wiki
The Legend of Zelda: Tears of the Kingdom Walkthrough & Guides Wiki
Persona 3 Reload Walkthrough & Guides Wiki


All rights reserved
©2025 Gearbox Software. Published by 2K Games. Developed by Gearbox. Gearbox, Borderlands, and related logos are all trademarks of Gearbox Software, LLC. 2K and the 2K logo are trademarks of Take-Two Interactive Software, Inc. All other marks and trademarks are the property of their respective owners. All rights reserved.
The copyrights of videos of games used in our content and other intellectual property rights belong to the provider of the game.
The contents we provide on this site were created personally by members of the Game8 editorial department.
We refuse the right to reuse or repost content taken without our permission such as data or images to other sites.