Shadow of the Mountain Walkthrough
★ 17 active SHiFT Codes as of March 14, 2026
☆ Black Market Location
★ Elemental Weakness Chart
☆ Legendary Weapons
★ Builds: Vex | Amon | Rafa | Harlowe
This is a walkthrough for the Shadow of the Mountain mission in Borderlands 4. Read on to follow the objectives and clear the mission.
| ◀ Previous Mission | Next Mission ▶ |
|---|---|
| A Lot to Process | Crystal Brawl |
List of Contents
Shadow of the Mountain Walkthrough
| List of Objectives | ||
|---|---|---|
| 1 | Find Defiant Calder | |
| 2 | Reach Calder's Office | |
| 3 | Return to Belton's Bore | |
Find Defiant Calder
| # | Walkthrough |
|---|---|
| 1 | 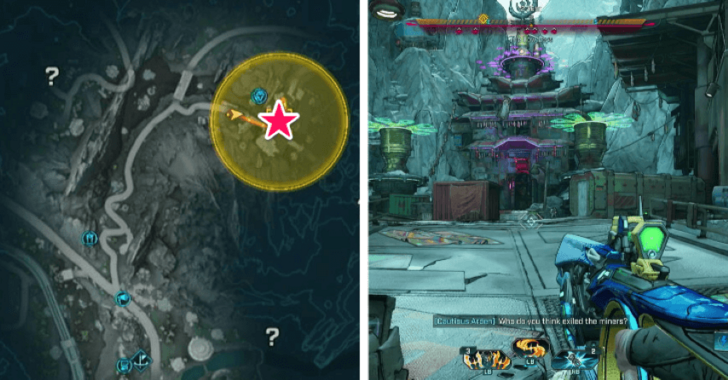 To start the mission, head to Belton's Bore, located in the southern part of The Low Leys. Upon arriving, help the Augers kill the Order forces. |
| 2 | 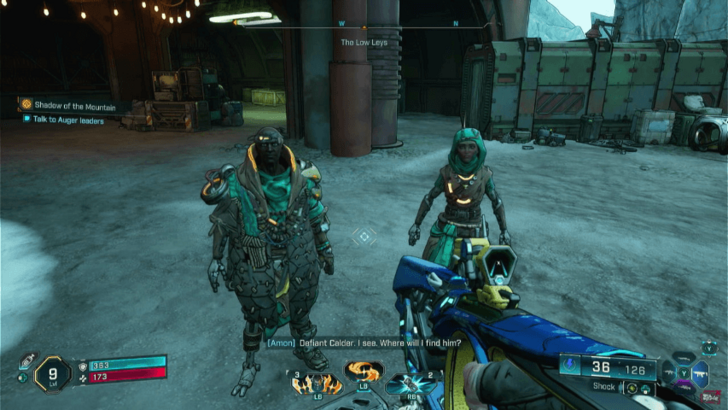 After killing the Order, speak to one of the Auger leaders, Joyless Stellan. He will then direct you to find Defiant Calder. |
| 3 | 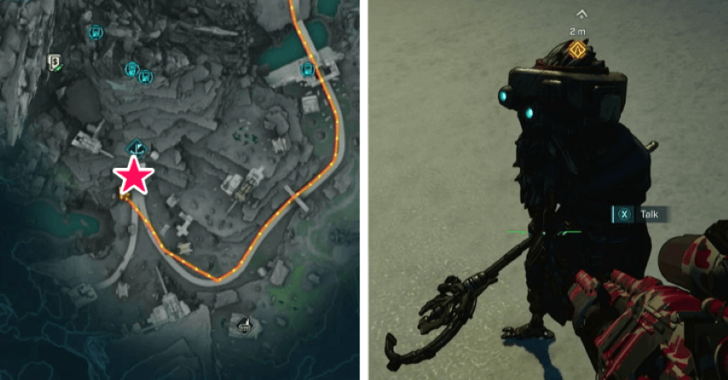 From there, head southeast to The Lambent Mines in the eastern part of Cuspid Climb. You can use the Digirunner to drive to your destination. |
| 4 | Once you're in The Lambent Mines, the Defiant Calder will be under attack by Order forces. Help him and defeat them. Talk to the Defiant Calder afterward. |
| 5 | Follow the Defiant Calder and wait for him to bring down the force field to Clavehome. Enter and make your way to Calder's office. |
Reach Calder's Office
| # | Walkthrough |
|---|---|
| 1 | 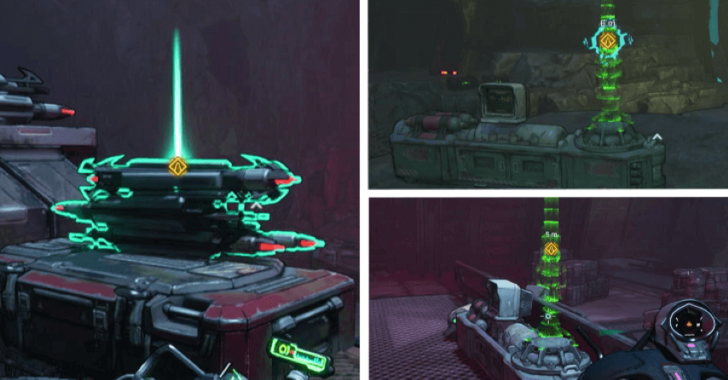 In the first area, approach the force field to the north. Calder will ask you to take the signal beacons on the right side of the area and set them up on the power sources near the force field and on the bridge in the middle. Be careful, as you will be fighting enemies along the way! |
| 2 | 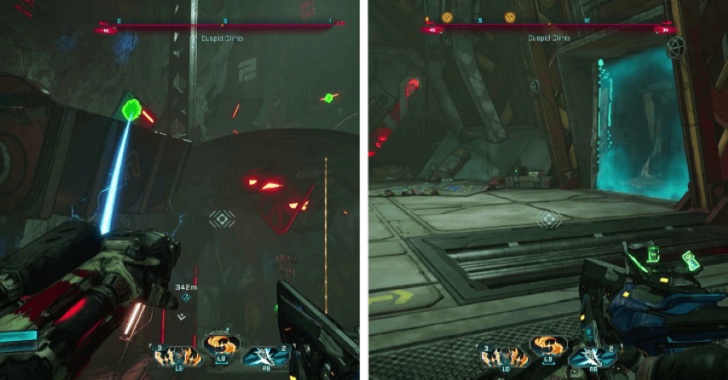 With the force field down, continue through the mines going northwest until you reach a red-lit area with a circular platform above. Use your grappling hook to climb up and reach the next force field. |
| 3 | 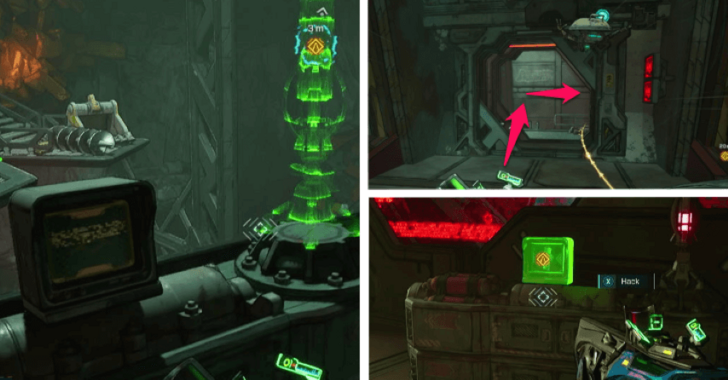 Place the first signal beacon near the stairs, then enter the door on the right to reach the room behind the red force field. A Pinhead will drop down as soon as you enter the room. |
| 4 | Go through the newly opened doorway and interact with the switch on the control panel to access the dig chamber. |
| 5 |  Enter the door on the right and cross the dig chamber heading southwest. Climb up to the platform on the right to hack the first beacon. Proceed further and hack the second beacon near the next force field. |
| 6 | This will then lead you to an area with vending machines, giving you a chance to prepare before the boss fight against Skyspanner Kratch. |
| 7 | 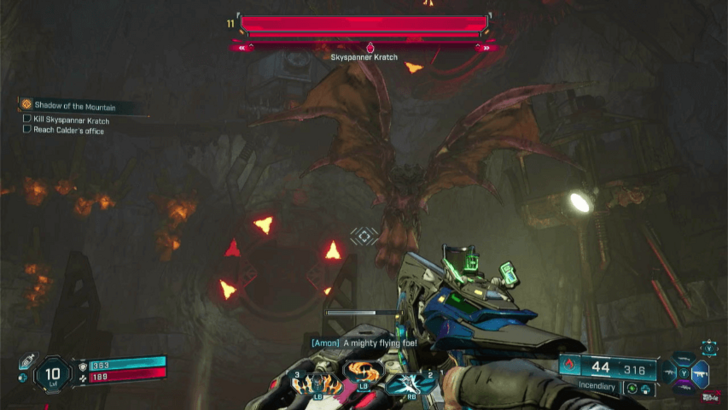 When you're ready, slide down the chute on the right and defeat Skyspanner Kratch. This flying boss summons red balloon bombs that explode on impact and smaller Kratches that chase you. Take adavantage of the open arena and stay mobile to avoid its attacks. |
| 8 | 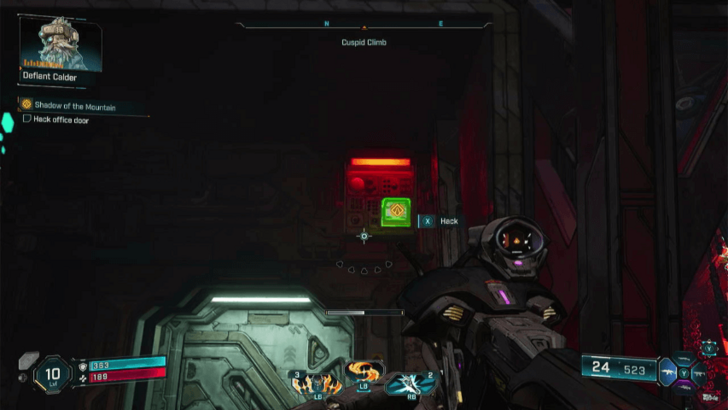 After defeating Skyspanner Kratch, head northeast to Calder’s office. Interact with the panel above the door to hack and open it. |
| 9 | 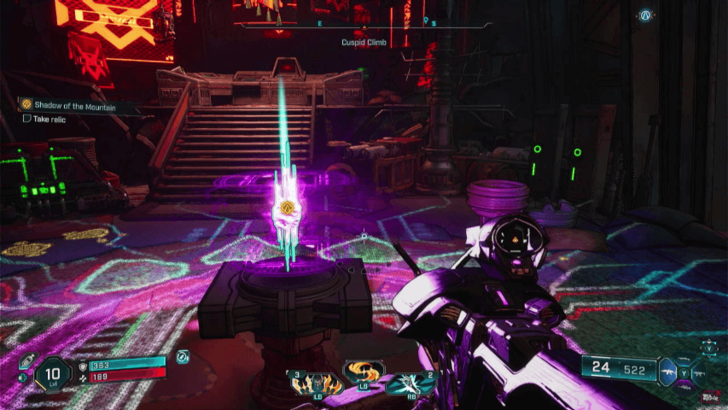 Enter the office and take the relic from the table. It glows bright purple, so it shouldn’t be hard to miss. |
Return to Belton's Bore
| # | Walkthrough |
|---|---|
| 1 | After getting the relic, return to Belton's Bore and approach the Defiant Calder at the gate entrance. |
| 2 | Wait for the gate to open, then follow the Defiant Calder through the halls of Belton's Bore. |
| 3 |  After the cutscene, place the relic on the table to complete the mission. |
Shadow of the Mountain Rewards
| Main Mission Rewards | |
|---|---|
| Base Reward |
・EXP ・Cash ・Eridium |
| Weapon Reward | ・Pistol (Blue to Purple Rarity) |
Borderlands 4 Related Guides

All Main Missions
| # | Main Mission | ||
|---|---|---|---|
| 1 | Guns Blazing | ||
| 2 | Recruitment Drive | ||
| 3 | Down and Outbound | ||
| 4 | A Lot to Process | ||
| * | One Fell Swoop | Shadow of the Mountain | Wrath of the Ripper Queen |
| Rush the Gate | Crystal Brawl | Siege and Destroy | |
| ↓ | Dark Subject | Unpaid Tab | |
| His Vile Sanctum | Her Flaming Vision | ||
| 15 | Rising Action | ||
| 16 | Another Day, Another Universe | ||
| 17 | The Falling Wall | ||
| 18 | Means of Ascent | ||
| 19 | Plan Z | ||
| 20 | The Timekeeper's Order | ||
| 21 | Secrets of the Vault | ||
Author

Shadow of the Mountain Walkthrough
Rankings
- We could not find the message board you were looking for.
Gaming News


![Marathon Cryo Archive Map Teased as [REDACTED] on Selection Screen](https://img.game8.co/4442236/6357203e58172f6de57f1991e7c39b22.png/thumb)


Popular Games

Genshin Impact Walkthrough & Guides Wiki
Umamusume: Pretty Derby Walkthrough & Guides Wiki
Pokemon Pokopia Walkthrough & Guides Wiki
Honkai: Star Rail Walkthrough & Guides Wiki
Monster Hunter Stories 3: Twisted Reflection Walkthrough & Guides Wiki
Arknights: Endfield Walkthrough & Guides Wiki
Wuthering Waves Walkthrough & Guides Wiki
Zenless Zone Zero Walkthrough & Guides Wiki
Pokemon TCG Pocket (PTCGP) Strategies & Guides Wiki
Monster Hunter Wilds Walkthrough & Guides Wiki


Recommended Games
Diablo 4: Vessel of Hatred Walkthrough & Guides Wiki
Cyberpunk 2077: Ultimate Edition Walkthrough & Guides Wiki
Fire Emblem Heroes (FEH) Walkthrough & Guides Wiki
Yu-Gi-Oh! Master Duel Walkthrough & Guides Wiki
Super Smash Bros. Ultimate Walkthrough & Guides Wiki
Pokemon Brilliant Diamond and Shining Pearl (BDSP) Walkthrough & Guides Wiki
Elden Ring Shadow of the Erdtree Walkthrough & Guides Wiki
Monster Hunter World Walkthrough & Guides Wiki
The Legend of Zelda: Tears of the Kingdom Walkthrough & Guides Wiki
Persona 3 Reload Walkthrough & Guides Wiki


All rights reserved
©2025 Gearbox Software. Published by 2K Games. Developed by Gearbox. Gearbox, Borderlands, and related logos are all trademarks of Gearbox Software, LLC. 2K and the 2K logo are trademarks of Take-Two Interactive Software, Inc. All other marks and trademarks are the property of their respective owners. All rights reserved.
The copyrights of videos of games used in our content and other intellectual property rights belong to the provider of the game.
The contents we provide on this site were created personally by members of the Game8 editorial department.
We refuse the right to reuse or repost content taken without our permission such as data or images to other sites.
Just popping in to let everyone know this quest sucks. A lot of running around doing nothing boring. But I love the game so far. Happy hunting.