This survey will take about 1 minute.
Your answers will help us to improve our website.
Outer Worlds 2
The Lab that Shouted Incoherently and Often Walkthrough
The Lab that Shouted Incoherently and Often is a Paradise Island side quest in the Outer Worlds 2. Read on for a full walkthrough of the quest, including info on how to unlock the quest and its rewards.
List of Contents
How to Unlock The Lab that Shouted Incoherently and Often
Listen to the Auntie's Choice Brand Distress Signal

The Lab that Shouted Incoherently and Often will be unlocked once you pick up Auntie's Choice Brand Distress Signal. The signal will pop up on the top right part of the screen once you pick it up with your Wireless.
Obtain the Thruster Boots to Make Sneaking Easier
Obtaining the Thruster Boots is highly recommended as this gadget allows a stealthy approach during the quest. You can unlock the Thruster Boots in the side quest A Final Death for Gravity.
The Lab that Shouted Incoherently and Often Walkthrough
Click on a step to jump to its section in the walkthrough!
Enter the Eden's Bounty Agricenter
| How to Enter Eden's Bounty Agricenter | |
|---|---|
| Sneak Into the Eden's Bounty Agricenter | Kill Everyone on the Farm |
To gain access to Eden's Bounty Agricenter, you can perform platforming actions to stealthily reach a hidden vent on the side of the building. Alternatively, you can force your way inside by killing all the Homicidal Employees stationed around the area.
Sneak Into Eden's Bounty Agricenter
| Step-by-step Walkthrough | |
|---|---|
| 1 | 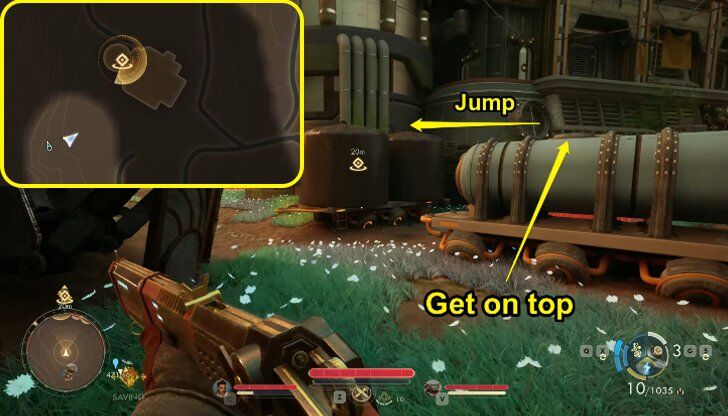 Approach from the southwest side of the building to avoid detection. Once you see the storage containers, get on top of them by using the Thruster Boots. |
| 2 | 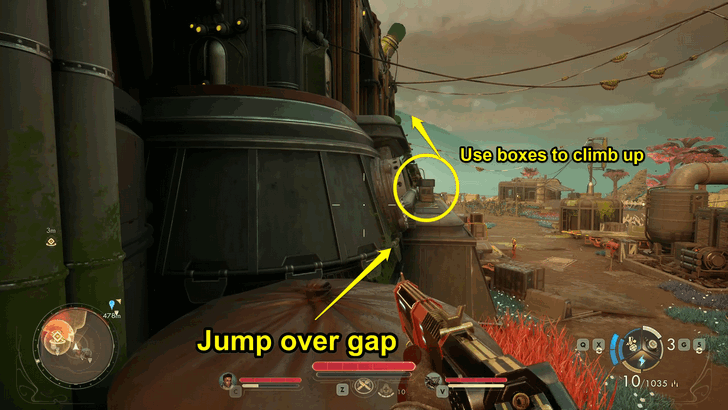 Afterward, jump over the gap and climb the boxes. |
| 3 |  Enter the vent to your left to gain access to the building. |
Kill Everyone on the Farm

While killing everyone is an option, this choice may have long-term consequences. It is recommended to stick with the stealthy approach to avoid any consequence that might come later in the game.
Find and Speak to Omid Ormsby
| Step-by-step Walkthrough | |
|---|---|
| 1 |  Once inside, you can sneak your way past the two guards to enter the door below. |
| 2 | 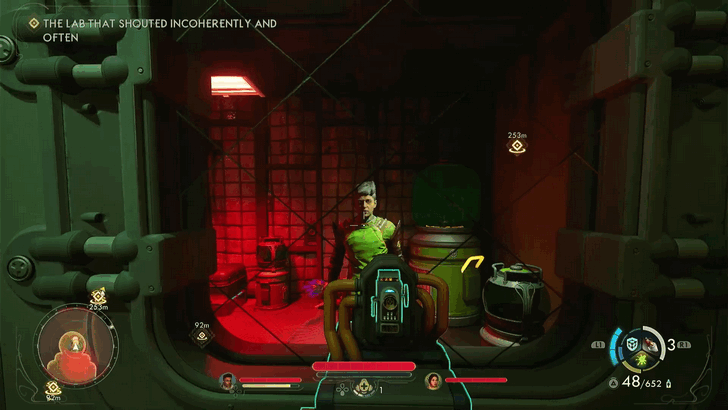
Inside the room, you'll find Omid Ormsby. Speak to him and he will give you the next set of tasks. |
Download the Data Cartridge
| Step-by-step Walkthrough | |
|---|---|
| 1 | 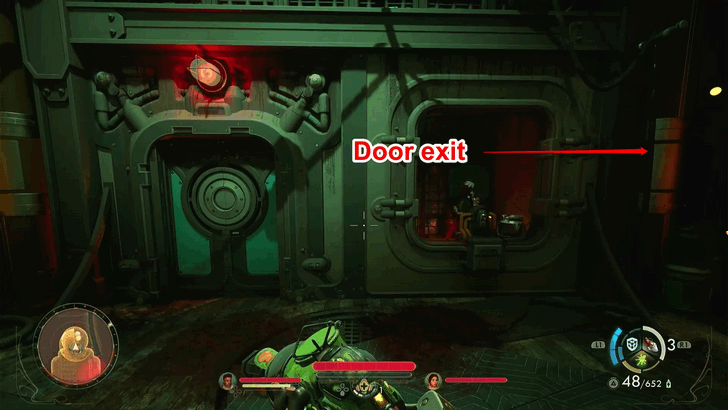
After speaking with Omid, exit the room through the door to your right to make your way towards the Data Cartridge. |
| 2 | Hug the mountainous area to the right to avoid enemy detection. Do this until you get near the hut. |
| 3 | 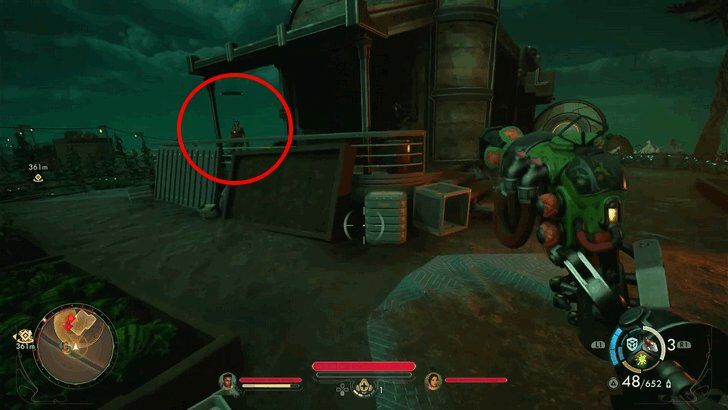
Beware of enemy patrols as you approach the hut. Make sure to crouch to avoid enemy detection! |
| 4 | 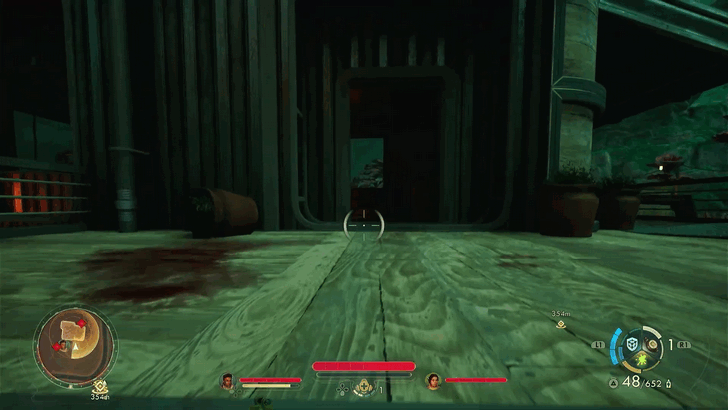
Use the entrance on the right side of the hut to get in. Once inside, you'll see a terminal that contains the needed data. |
| 5 | 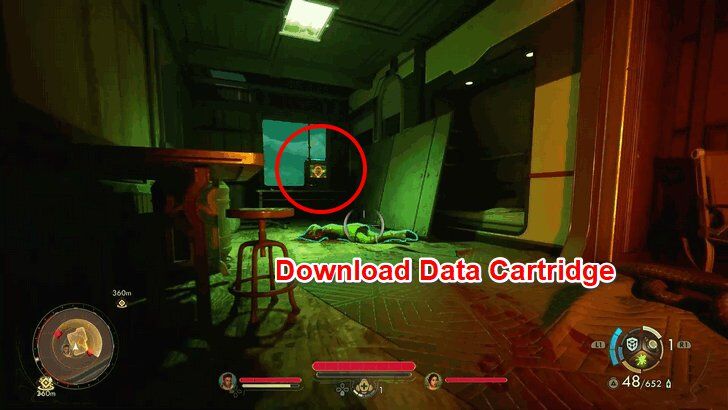
Access the terminal and select Download Data, completing the first of two objectives. |
Retrieve Two Red Spore Samples
| Step-by-step Walkthrough | |
|---|---|
| 1 | 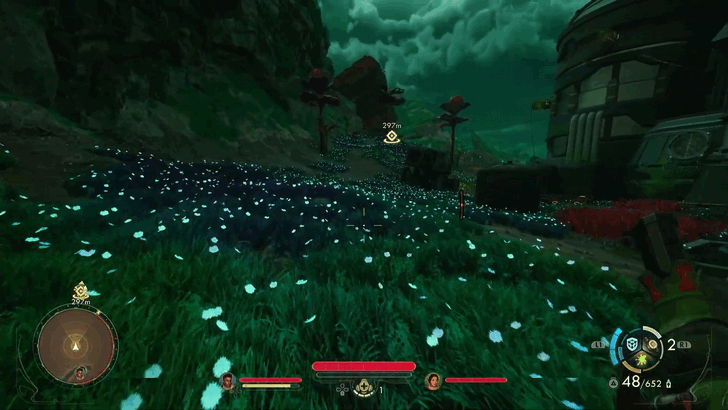 After downloading the Data Cartridge, make your way through the mountainous range to retrieve Red Spore Samples. |
| 2 | 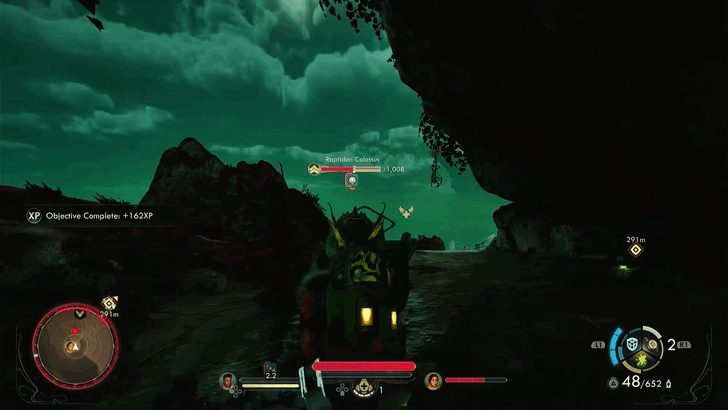
Keep your weapons ready as this long trek is made dangerous by roaming Raptidons! |
| 3 | 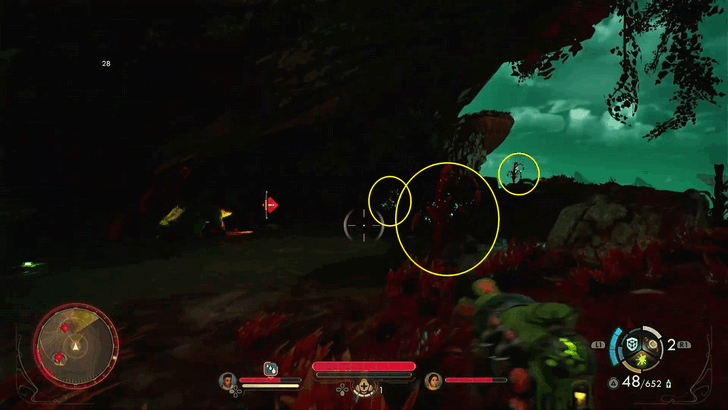
Upon reaching the location, you'll see red plants that can be highlighted. You must take at least two of these Red Samples in order to finish the quest. |
| 4 | 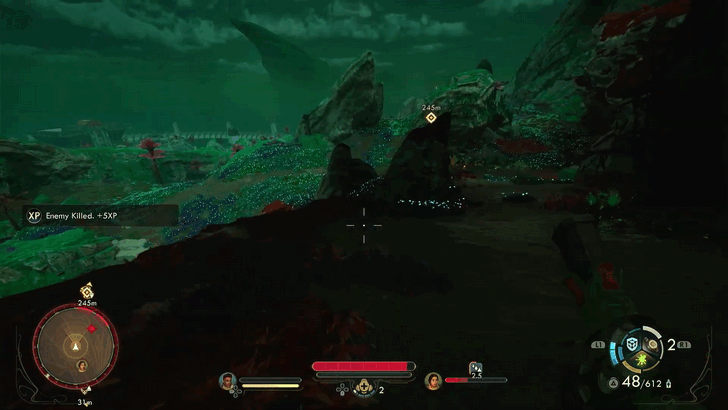
Once you have enough Red Samples, you can now return to Omid's location. |
Synthesize the Antidote
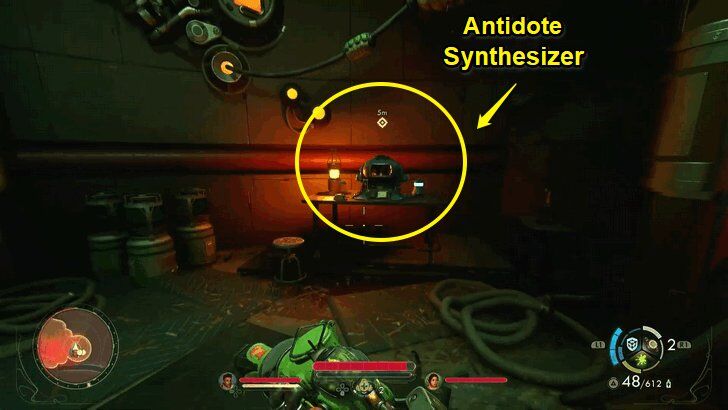
Upon returning to Omid's location, both of you will exchange items to synthesize an antidote. Take all items and use the Chemical Synthesizer to your left.
Enhance the Antidote With a Medical Skill Check
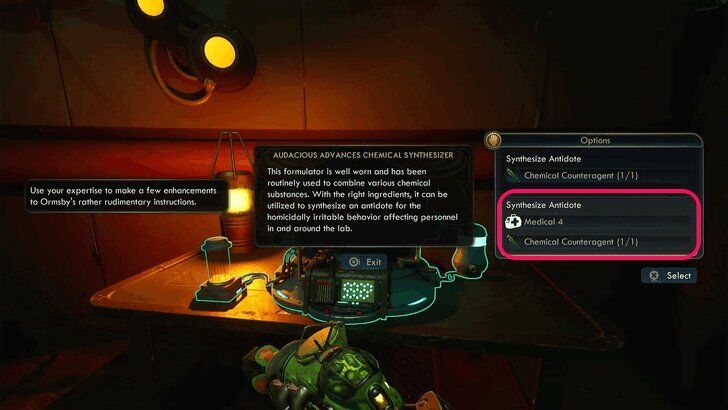
When using the Chemical Synthesizer, you have an option to enhance the antidote with a Medical (4) skill check.
If you pass the check and enhance the antidote, you'll be rewarded with Blight Fortifications.
The Lab that Shouted Incoherently and Often Choices
Should You Kill or Sneak Past the Homicidal Employees?
Since it is still uncertain if there would be long-term consequences, it is recommended to choose stealth all the way through quest completion.
Omid mentions that the player's actions will be reported to their supervisor, with Omid's goodbye mentioning that they'll be seeing you again. This can imply that the player's action in this quest will impact a future meeting.
The Lab that Shouted Incoherently and Often Rewards
| Quest Completion Rewards | |
|---|---|
|
・540 XP ・Escape Suit ・Blight Fortifications ・Adreno Spume Boom Starter Plus ・Heartless Laphoria |
|
| Faction Reputation | +3 Rep for Auntie's Choice |
The item rewards can be found inside the room where Omid Ormsby is located. Aside from the consumables and crafting items that the quest rewards, you'll also receive a unique armor called Escape Suit.
Omid Ormsby's room can only be accessed after completing the quest, and the items can be claimed by opening a chest.
The Lab that Shouted Incoherently and Often Info
| The Lab that Shouted Incoherently and Often Info | |||||
|---|---|---|---|---|---|
| Type | Side Quest | ||||
| Location | Paradise Island | ||||
| Quest Giver | Omid Ormsby | ||||
| How to Start | |||||
| Tune in to the Auntie's Choice Brand Distress Signal using your Wireless to trigger the quest. | |||||
Outer Worlds 2 Related Guides
All Quests by Location
| Quest Guides by Location | ||
|---|---|---|
| Paradise Island | Golden Ridge | Free Market Station |
| Praetor | Cloister | Undisputed Claim |
All Side Quest Guides
Comment
2  Anonymous 5 months
Specifically the end of step 2 that jumps to step 3
Author

The Lab that Shouted Incoherently and Often Walkthrough
Please participate in our site
improvement survey
04/2026
improvement survey
04/2026
Would you assist in
improving Game8's site?
improving Game8's site?

×
We are listening to our users' valuable opinions and discussing how to act on them.
The information collected through this survey will be used for the purpose of improving our services. In addition, the information will only be disclosed a part of a statistic in a format that will not allow identification of personal information.
Begin Survey
Not Now
×
Please rate each item regarding Game8.co's Advertisements.
Amount of Ads
Very Dissatisfied
Somewhat Dissatisfied
Fine
Somewhat Satisfied
Highly Satisfied
Placement of Ads
Timing of Ad Display
Ad Loading Speed
Safeness of Ads
Content of Ads
×
Please rate each item regarding Game8.co's Quality of Articles.
Amount of information
Very Dissatisfied
Somewhat Dissatisfied
Fine
Somewhat Satisfied
Highly Satisfied
Frequency of updates
Speed of new information
Accuracy of articles
Understandibility of articles
Readability of sentences
×
Please rate each item regarding Game8.co's Usability of the Site.
Ease of finding information
Very Dissatisfied
Somewhat Dissatisfied
Fine
Somewhat Satisfied
Highly Satisfied
Loading Speed
Use of Color
Font Size
Visibility of Images
Easy to Understand Layout
×
Please rate each item regarding Game8.co's Message Boards, Comments.
Ease of Writing
Very Dissatisfied
Somewhat Dissatisfied
Fine
Somewhat Satisfied
Highly Satisfied
Readability
Ease in Finding Information
Comment Quality
Comment Quantity
Admin Response
×
Please rate each item regarding Game8.co's Site's new design.
Please rate our site's new design
Very Dissatisfied
Somewhat Dissatisfied
Fine
Somewhat Satisfied
Highly Satisfied
Do you think that the website's design change makes the site easier to use?
Has the new design made it easier for you to find information on the site?
Has the new design improved the overall visual appeal of the site?
How would you rate your overall satisfaction with the new design of the site?
×
How likely are you to recommend Game8 to someone you know?
Very Unlikely
0
1
2
3
4
5
6
7
8
9
10
Very Likely
If you have other opinions regarding potential improvement to the website, please share them with us. We would appreciate your honest opinion.
Note: This is a free response section, so you can proceed without entering anything.
Note: Please be sure not to enter any kind of personal information into your response.
Note: Please be sure not to enter any kind of personal information into your response.
×
Thank You
×
Thank you for participating in our survey! Your answers will help us to improve the quality of our website and services.
We hope you continue to make use of Game8.
We hope you continue to make use of Game8.
Close
Rankings
- We could not find the message board you were looking for.
Gaming News


![Forza Horizon 6 Review [Preview] | Beautiful Roads With a Whole Lot of Oversteer](https://img.game8.co/4460981/a7254c24945c43fbdf6ad9bea52b5ce9.png/thumb)
![Borderlands Mobile Review [Playtest] | The Same Borderlands Made Easy](https://img.game8.co/4465500/aac0c880a39ec5cd46073e49d18f3ed5.png/thumb)
Popular Games

Genshin Impact Walkthrough & Guides Wiki
Crimson Desert Walkthrough & Guides Wiki
Umamusume: Pretty Derby Walkthrough & Guides Wiki
Honkai: Star Rail Walkthrough & Guides Wiki
Monster Hunter Stories 3: Twisted Reflection Walkthrough & Guides Wiki
Wuthering Waves Walkthrough & Guides Wiki
The Seven Deadly Sins: Origin Walkthrough & Guides Wiki
Pokemon TCG Pocket (PTCGP) Strategies & Guides Wiki
Pokemon Pokopia Walkthrough & Guides Wiki
Zenless Zone Zero Walkthrough & Guides Wiki


Recommended Games
Fire Emblem Heroes (FEH) Walkthrough & Guides Wiki
Pokemon Brilliant Diamond and Shining Pearl (BDSP) Walkthrough & Guides Wiki
Super Smash Bros. Ultimate Walkthrough & Guides Wiki
Diablo 4: Vessel of Hatred Walkthrough & Guides Wiki
Cyberpunk 2077: Ultimate Edition Walkthrough & Guides Wiki
Yu-Gi-Oh! Master Duel Walkthrough & Guides Wiki
Elden Ring Shadow of the Erdtree Walkthrough & Guides Wiki
Monster Hunter World Walkthrough & Guides Wiki
The Legend of Zelda: Tears of the Kingdom Walkthrough & Guides Wiki
Persona 3 Reload Walkthrough & Guides Wiki


All rights reserved
© 2025 Obsidian Entertainment, Inc. Obsidian Entertainment, the Obsidian Entertainment logo, The Outer Worlds 2, and The Outer Worlds 2 logos are trademarks or registered trademarks of Obsidian Entertainment, Inc. All rights reserved.
The copyrights of videos of games used in our content and other intellectual property rights belong to the provider of the game.
The contents we provide on this site were created personally by members of the Game8 editorial department.
We refuse the right to reuse or repost content taken without our permission such as data or images to other sites.
I was able to just walk through the open door in the front