An Instrument to Unfold Space & Time Walkthrough

This is a walkthrough for the An Instrument to Unfold Space & Time main quest in Outer Worlds 2. Read on for a complete An Instrument to Unfold Space & Time walkthrough, including the choices you can make and the rewards for completing the quest.
| ◀ Previous Mission | Next Mission ▶ |
|---|---|
| Fiends in High Places | A Complication with the Computronic Cerebrum |
List of Contents
An Instrument to Unfold Space & Time Walkthrough
| Objectives | ||
|---|---|---|
| 1 | Travel to Praetor | |
| 2 | Reach the Western Half of Praetor | |
| Method 1 | Method 2 | |
| Automech Production Facility | Auntie's Choice Tunnel | |
| 3 | Enter the Interstitial Reconfiguration Center | |
| 4 | Speak with Dr. Hurley | |
| Choices | ||
| Help Dr. Hurley | Ignore Dr. Hurley | |
| 5 | Acquire the Rift Device | |
| 6 | Go Through the Maintenance Vents | |
| 7 | Make Your Way Back to the Hangar | |
| 8 | Investigate the Restricted Wing (Optional Objective for Helping Dr. Hurley) |
|
| 9 | Defeat Security Chief Vaillancourt | |
Click on a step to jump to its section in the walkthrough!
Travel to Praetor
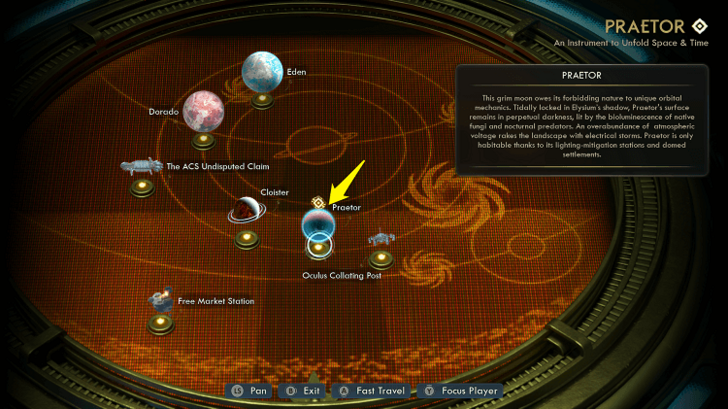
After Fiends in High Places, you'll find yourself aboard the Incognito once more. After VAL debriefs you on what happened, head over to the astrogator and travel to Praetor to start the main mission, An Instrument to Unfold Space & Time.
Reach the Western Half of Praetor
| Method 1 | Method 2 |
|---|---|
| Automech Production Facility | Auntie's Choice Tunnel |
Upon landing, you'll quickly learn that the way to the Interstitial Reconfiguration Center (where you get the Rift Device) is blocked by a base owned by the Protectorate. Your first order of business, then, is to find a way to reach the west side of Praetor.
You'll have two options. You can choose to either pass through the Automech Production Facility to the north or use the Auntie's Choice Tunnel to the south.
Travel Through Automech Production Facility
| Walkthrough | |
|---|---|
| 1 | 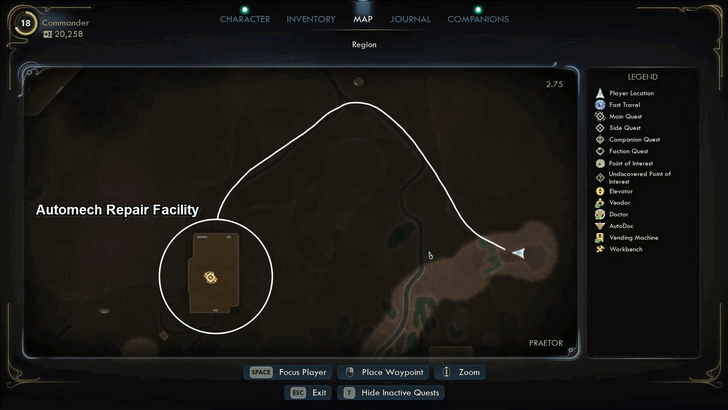 You can use the route displayed above once you're in Praetor. This route directly leads you to an Automech Production Facility. Keep your weapons prepared, as this long walk forces you to come across Gorvids. These are lethal animals and are best fought from a distance. |
| 2 | 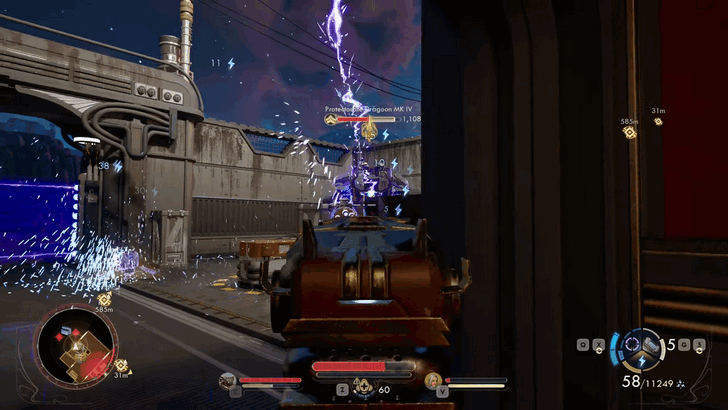 Before entering the Automech Production Facility, make sure to heal up first. This place is filled with hostile automechs and guards that will shoot you on sight. After all enemies are dealt with, flip the switch next to the energy by the western exit of the facility. You now have access to the Western side of Praetor. |
| 3 | 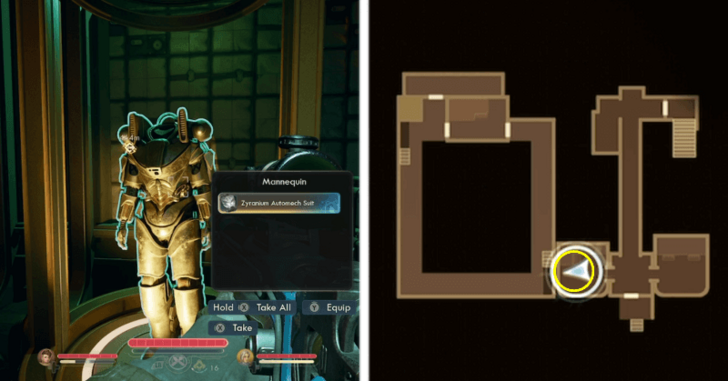 Before leaving the facility, grab the Zyranium Automech Suit on the second floor. Use the control panel in the room to unlock the display case. The facility will go on lockdown if you take it, but you can easily use the armor's thruster abilities to fly past the shock-trapped floor. With excellent defensive stats and a second chance mechanic, it is one of the best heavy armors in the game. Even if you do not use heavy armor, it can fetch a good price. |
| 4 | 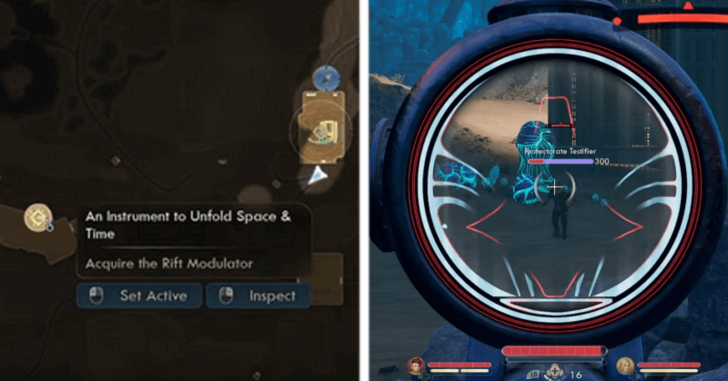 While traversing on the Western side of Praetor to reach the IRC (Interstitial Reconfiguration Center), you'll come across a mix hostile Protectorate guards, automechs, and wildlife. You can sneak past the hostiles or fight them head-on. |
Travel Through Auntie's Choice Tunnel
| Walkthrough | |
|---|---|
| 1 | 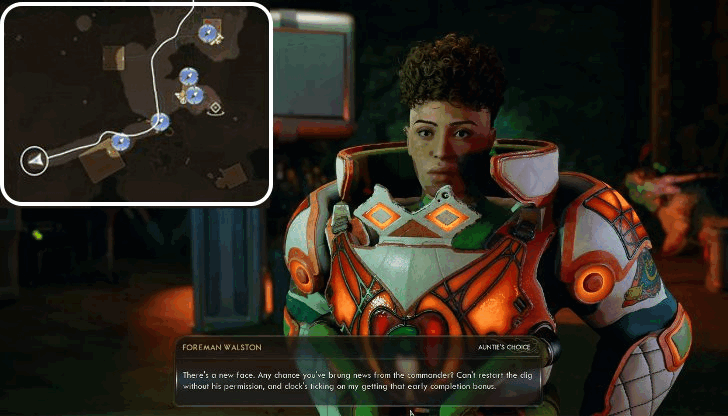 You can use the route displayed above once you're in Praetor. This route directly leads you to a tunnel managed by Auntie's Choice. Upon arriving, speak to the Foreman Walston. |
| 2 | 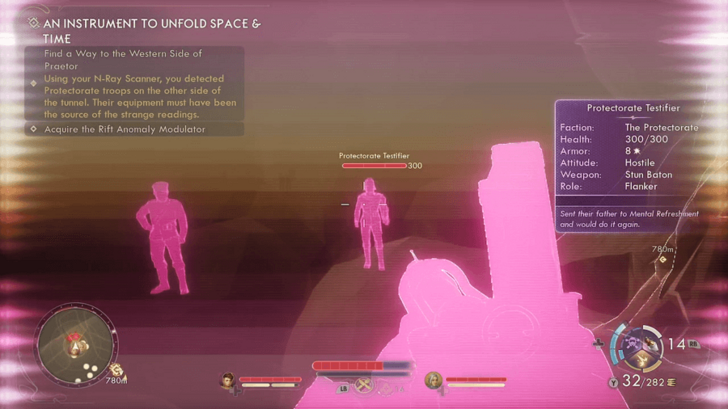 Walston will inform you that they stopped digging due to strange readings. To uncover the truth, go close to the wall of the tunnel and directly N-Ray Scan the Protectorate troops on the other end. Return to Foreman Walston afterwards. |
| 3 | 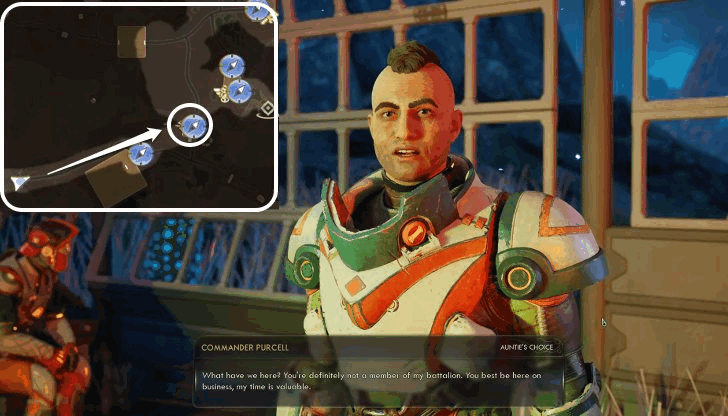 Walston will instruct you to report to Commander Purcell, located by the entrance of the Auntie's Choice outpost. He'll instruct his people to resume drilling, giving you a way to cross to Praetor's western side. |
| 4 | 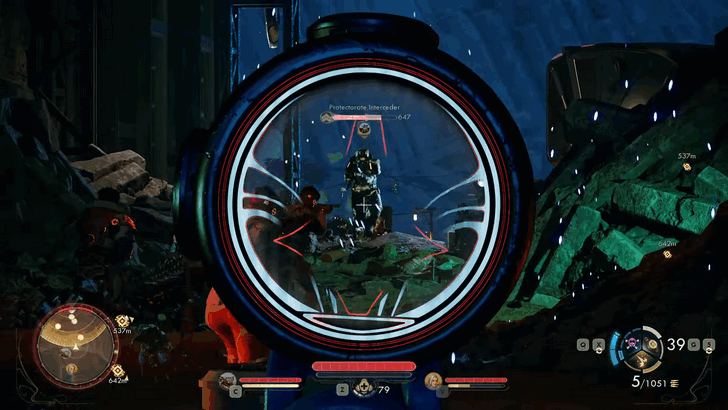
Head back to the tunnel and prepare for combat. The tunnel should already be open, and with the aid of Auntie's Choice troops, you should be able to cross the tunnel and reach Praetor's western side. There will be more hostile Protectorate troops and automechs as you approach the IRC. |
Enter the Interstitial Reconfiguration Center
| Walkthrough | |
|---|---|
| 1 | 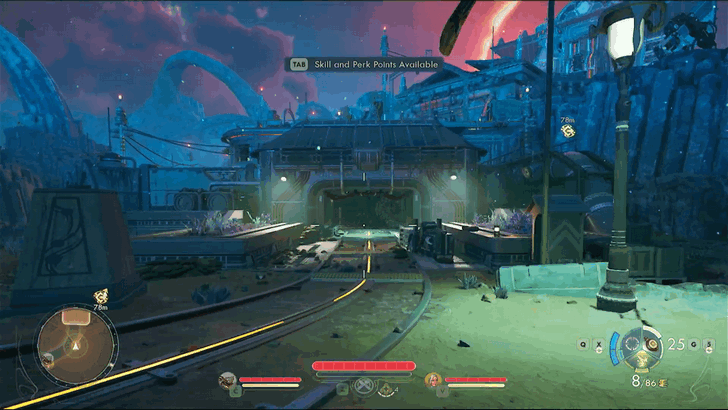 Before you enter the IRC, you'll come across roaming Protectorate Wasps that will attack you on sight. Deal with them and proceed further into the area. |
| 2 |  Turn left from the IRC entrance and use the elevator at the end. |
| 3 | 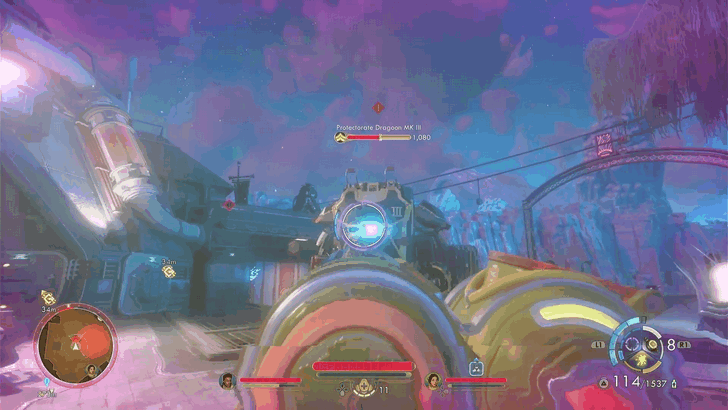 After using the elevator, prepare for more combat as a Protectorate Dragoon and Sentry Turrets are located on the upper floor. |
| 4 | To open the door, you can use your N-Ray scanner to find the hidden switch below. Alternatively, you can force it open by using Lockpick 4 and a Magpick. |
| 5 | 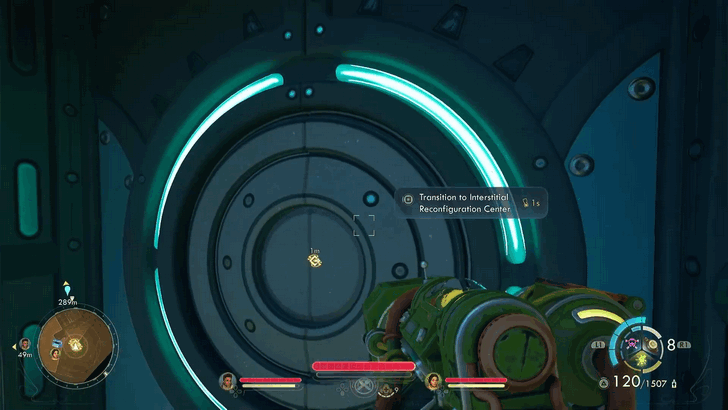 Once the door is open, enter the IRC through the main door. This place is heavily populated by enemies, so prepare for combat! |
| 6 | 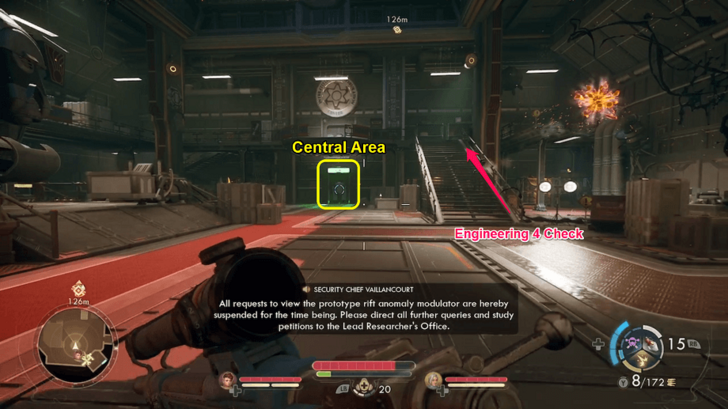 Inside the IRC, the main entrance floor (the Hangar) is clear. You can proceed through the door ahead to go further, or take the stairs up for an optional Engineering 4 check. |
| 7 | 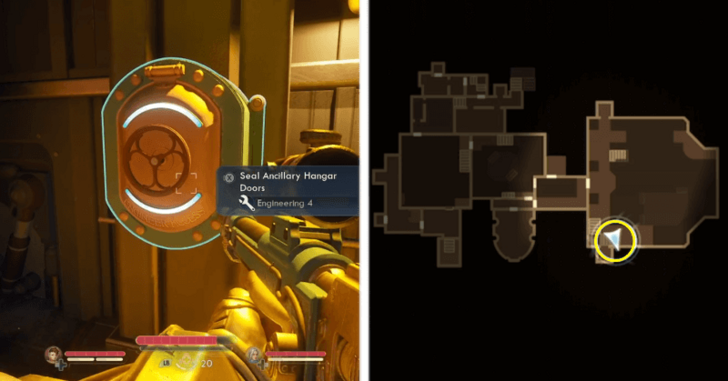 If you take the stairs for the Engineering check, head up, turn left, and locate the valve on the catwalk. Use Engineering 4 to seal the ancillary Hangar doors, making the upcoming boss fight easier. Sealing the doors prevents additional Protectorate Troops from joining the boss fight later on. |
| 8 | 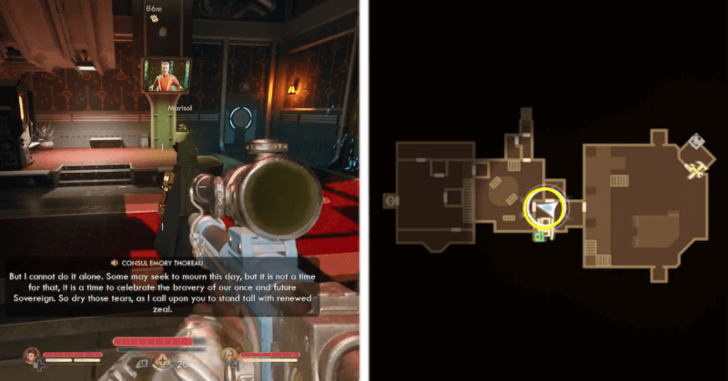 Enter the Security Room, where you will find a vending machine on the left to restock on ammo and grenades. On the right is a jammed door that can be opened with Brawny or Engineering 7, containing Bits, armor, weapons, and ammo. |
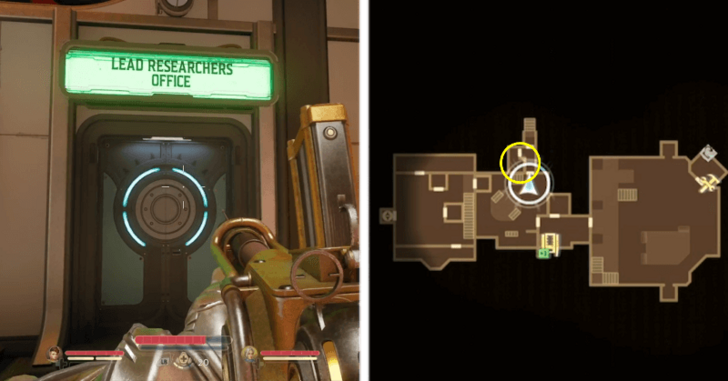
| 9 | 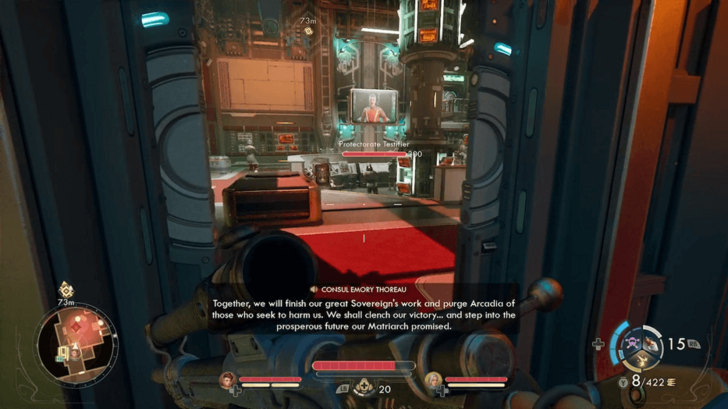 Enter the next room and either sneak past or eliminate the hostile Protectorate inside. Proceed to the Lead Researcher's Office to the right of the door you entered. |
Speak to Dr. Hurley in the Lead Researcher's Office
 |
|
| Choices for Dr. Hurley | |
|---|---|
| Help Dr. Hurley | Ignore Dr. Hurley |
You can find Dr. Hurley inside the Lead Researchers Office. Start speaking with her to gain information about the events in the facility, and to decide whether to help her or not.
Help Dr. Hurley
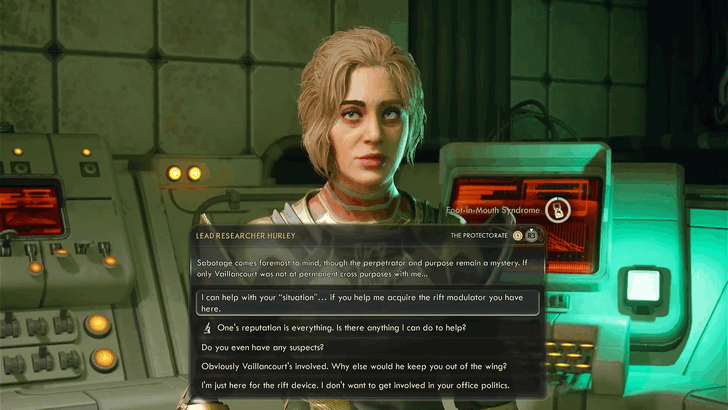
Dr. Hurley will offer to help you escape after obtaining the Rift Device if you agree to help her. This is great for stealth builds, as she will later help distract the main boss (Vaillaincourt) for a sneak attack. You can still choose to help her if you prefer to go guns blazing against the enemies inside.
To help her, you must gain access to the Restricted Wing and conduct an investigation. If you help her successfully, she rewards you with Advanced Decryption Keys and a Trauma Kit at the end of the quest.
Ignore or Kill Dr. Hurley
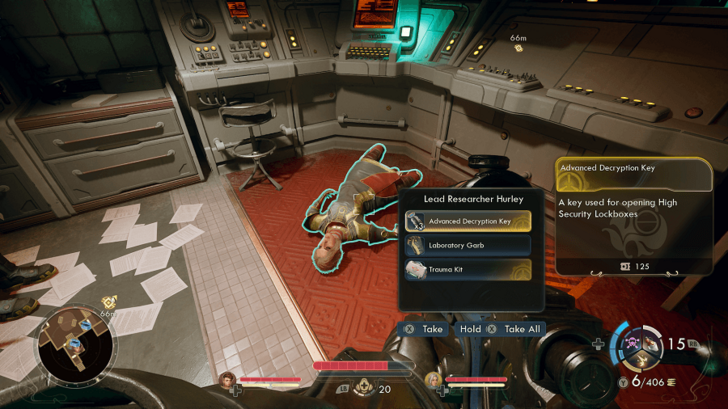
You can opt to kill Dr. Hurley to immediately loot Advanced Decryption Keys and a Trauma Kit for her body (she would give these as rewards if you help her). Ignoring her would be a waste since she would just stay in the IRC and not give you anything.
Even though ignoring or killing Dr. Hurley is an option, we highly recommend that you help her instead of killing or ignoring her. Helping her will give you more information about the Rift incident.
Acquire the Rift Device
| Walkthrough | |
|---|---|
| 1 | To find the Rift Device, exit Dr. Hurley's office and climb the stairs on your right. Before entering the Rift Containment Laboratory, ready your weapons, as there are enemies inside this room. |
| 2 | 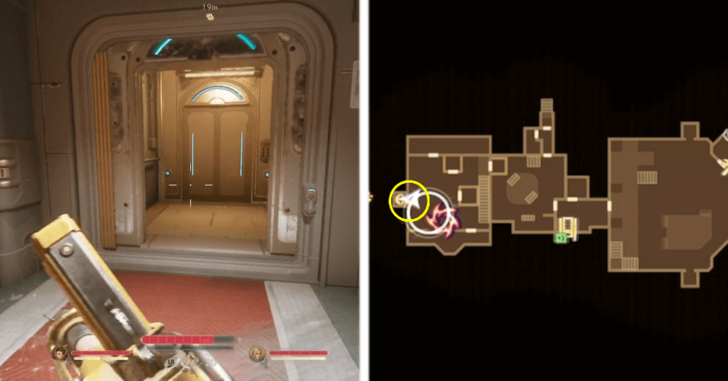 Once the enemies are taken care of, head to the Exhibition Tower by using the elevator. |
| 3 | 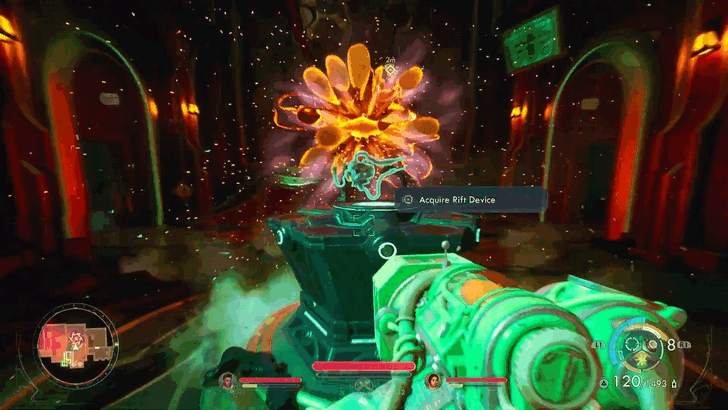 Exit the elevator and go straight ahead to the Rift Anomaly. You will find the Rift Device placed directly in front of it. |
| 4 | 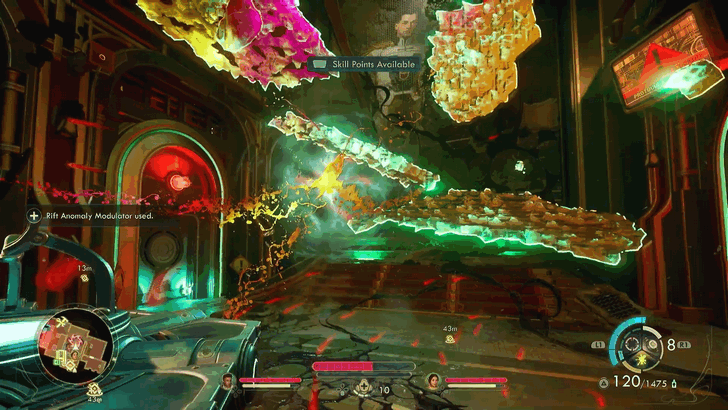 Use the Rift Device on the Rift Anomaly to create a path that will lead you to the upper floor. Here, Security Chief Vaillancourt will speak with you, demanding to know who helped you find the Rift Device. |
Go Through the Maintenance Vents
Before entering the elevator to continue to the next area, check the maintenance vents on the sides. The vents lead to Hack opportunities, a way to disable the hostile automechs ahead, and a hidden armor mod.
| Walkthrough | |
|---|---|
| 1 | 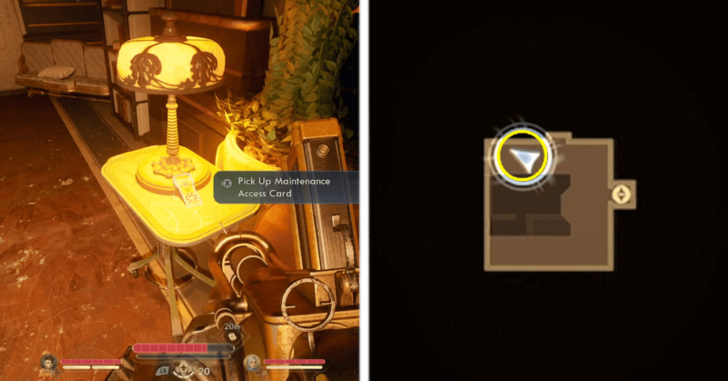 After speaking to Vaillancourt, you will be ambushed by two troops exiting the elevator. After dispatching them, grab the Maintenance Access Card from a table nearby. |
| 2 | 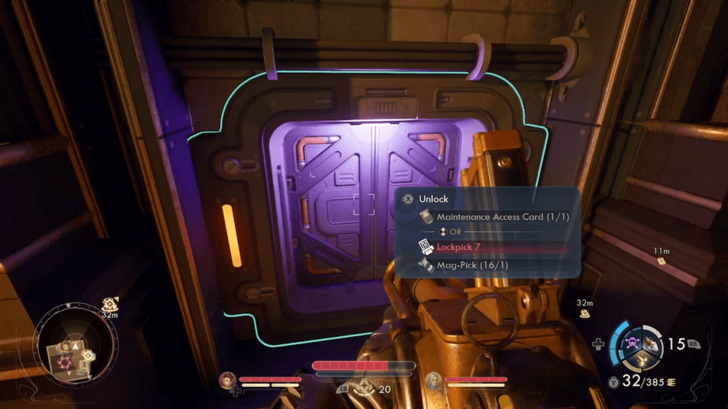 You can use the access card to open the vents to the left and right of the elevator, leading to extra Hack opportunities and potentially disable the hostile automechs ahead. You can also unlock these vents with Lockpick 7. At the end of either vent, you will be lead back to the room with the Rift Anomaly leading to the elevator (where you spoke to Vaillancourt). |
| 3 | 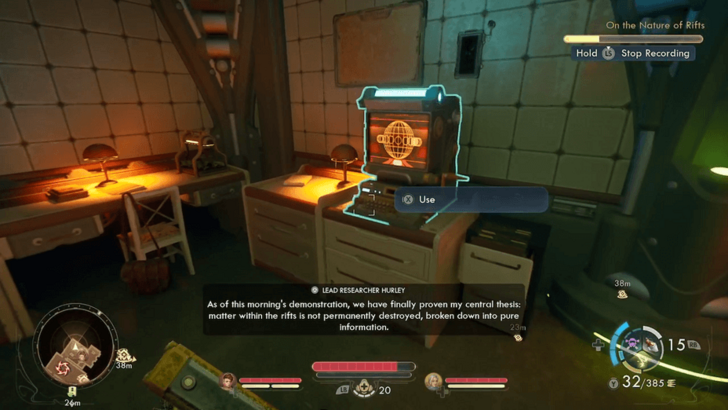 The vent to the left of the elevator will lead to a room with Dr. Hurley's terminal. You can use Hack 2 on it to gain additional information on the Rift problem. Additionally, it is recommended to read through all the entries in the terminal as it can be used later in Aza's quest Stabbing at Shadows. |
| 4 | 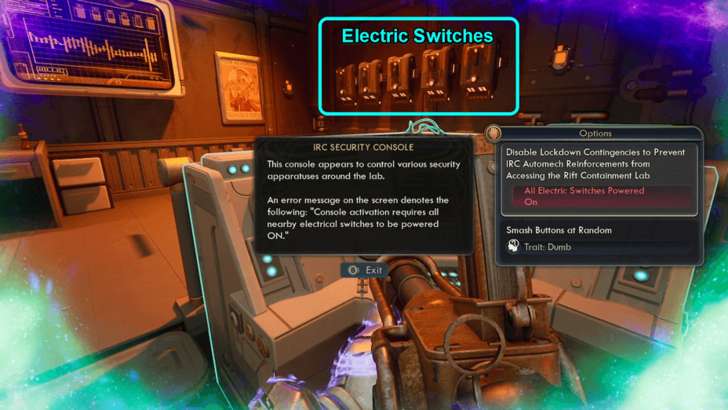 The vent to the right of the elevator leads to a room with troops and sentry turrets. After clearing them, you can use the control panel at the top of the stairs to disable the automechs guarding the path to the hangar. Flip all nearby switches on in a specific order, then use the control panel to shut down the mechs. Flipping the switches correctly also opens a hidden compartment to get a Stun Counter armor mod. If you have the Dumb Trait, you can simply choose the smash buttons option on the control panel to disable the automechs. ▶︎ How to Solve IRC Security Console Puzzle |
| 5 | Exiting either room will lead back to the initial Rift Anomaly you opened earlier. Use the Rift Gadget again to climb up the debris and get back to the elevator. |
Make Your Way Back to the Hangar
| Walkthrough | |
|---|---|
| 1 |  On the elevator, head down to the Prestige Observation Suite, which is the only level available to select. |
| 2 | 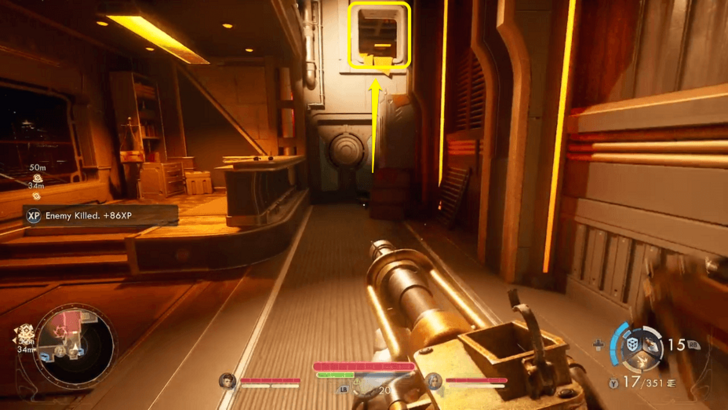 On this floor, two more troops will attempt an ambush from a different elevator. After killing them, jump up to the opening above by climbing some crates. |
| 3 | 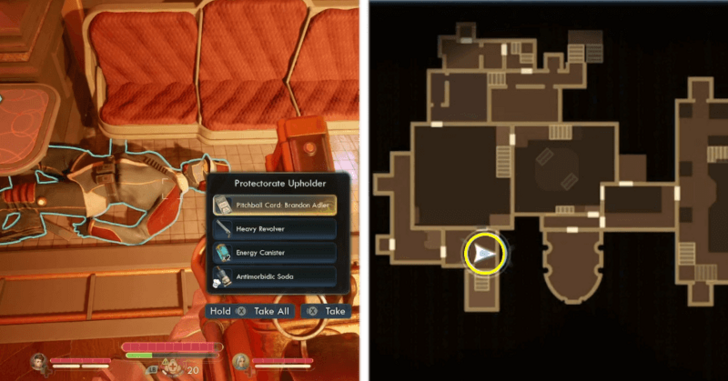 The next room will have two more guards. One of them will be holding a Pitchball Card. After dealing with the guards, use the crawlspace vent in the room to go to the next area. |
| 4 | From the other end of the vent, drop down and use the Rift Gadget on the rift there. Use the platforms to get to the next vent. A Dragoon patrols this area, but it will be gone if you disabled the automechs earlier. You can also avoid it easily by sprinting across the Rift platforms. |
| 5 | 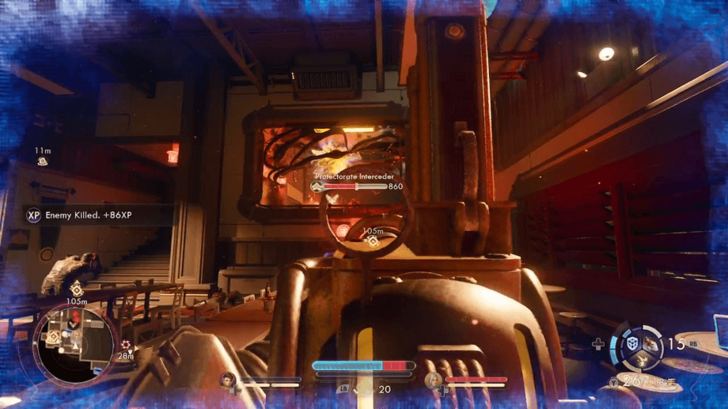 Clear out the Protectorate hostiles in the next room. Afterward, the path back to the Hangar to confront Vaillancourt is straight ahead. If you plan to assist Dr. Hurley, you must take a short detour for a few additional objectives. |
Investigate the Restricted Wing (Helping Hurley)
This section is only required if you are doing the optional task of helping Dr. Hurley clear her name, otherwise, you can jump to the next step.
| Walkthrough | |
|---|---|
| 1 | 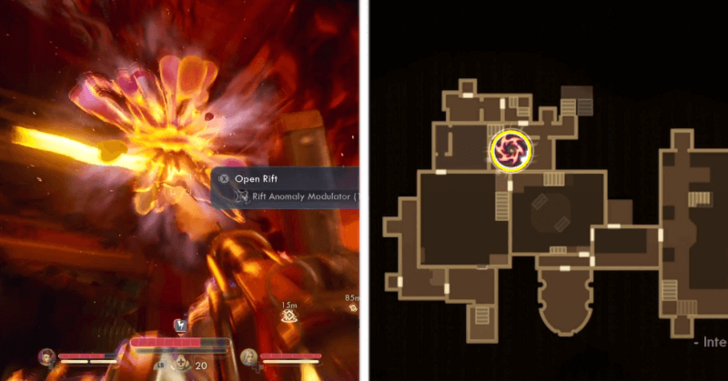 Head towards the Rift Anomaly in the room. Using the Rift Device on it will create a path to the vents leading to the room with the access card needed later. |
| 2 | After using the Rift Device, climb up to the vent system above. |
| 3 | 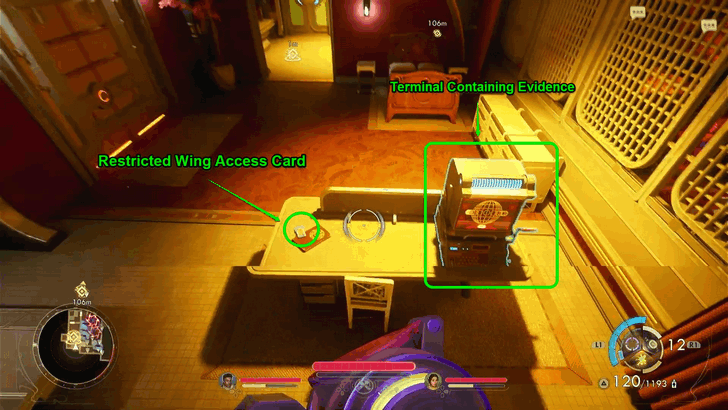 Drop down from the vent into the main security room to pick up the Restricted Wing Access Card. You can also find extra evidence against Vaillancourt by using Hack 11 on the terminal placed on the same table. |
| 4 | 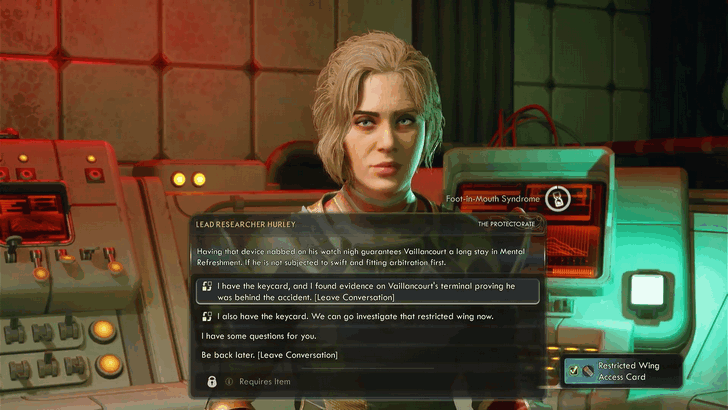 Return to Dr. Hurley in the Lead Researcher's Office and inform her about your findings. Then, follow her to the Restricted Wing. |
| 5 | 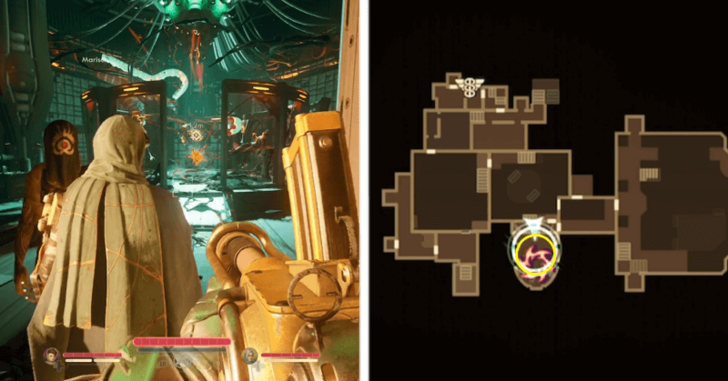 Enter the Restricted Wing by using the Restricted Wing Access Card. Once you enter the room, use your Rift Device to start the investigation. |
| 6 |  To fully (optional) conduct your investigation, you must interact with these evidence materials inside the room:
|
| 7 | 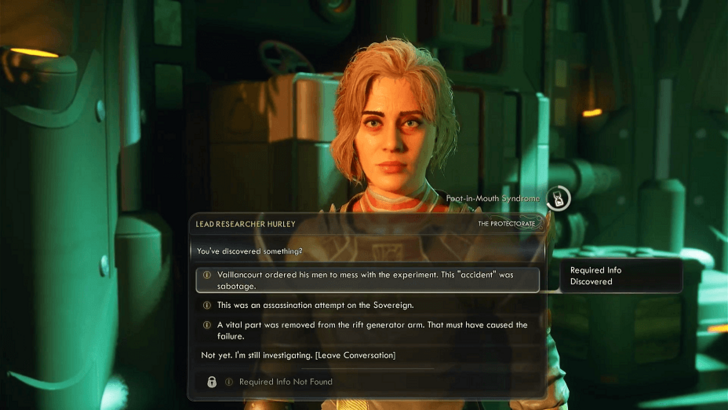 While speaking to Dr. Hurley, you can present to her any one of the Required Info you have found as evidence, via the evidence in the room or from hacking Vaillancourt's terminal (where the Restricted Wing Access Card was). After speaking to her, she will help offer to distract Vaillancourt in the hangar, giving you an opportunity for a sneak attack. |
Defeat Security Chief Vaillancourt
| Walkthrough | |
|---|---|
| 1 | 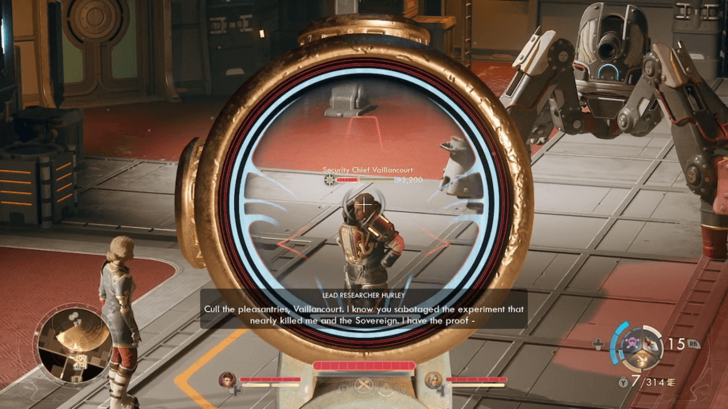 Head to the Hangar (where you first entered the IRC) to confront Vaillancourt. If you helped Dr. Hurley, you can use her distraction to land sneak attacks. Let Hurley go ahead and enter the Hangar only after she starts speaking to him, or you will be spotted too early. If Dr. Hurley is helping, be alert and listen to the conversation between Dr. Hurley and Vaillancourt's. Things will escalate, and you will have to intervene in time to prevent Dr. Hurley's death. |
| 2 | With Hurley distracting him, you can opt to drop down stealthily for a bigger melee or burst sneak attack. |
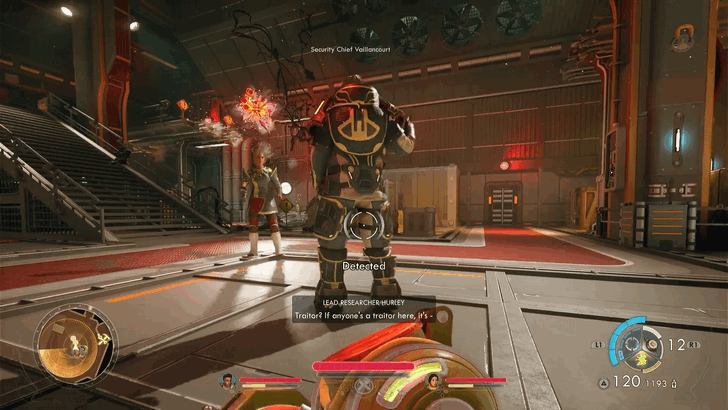
| 3 | 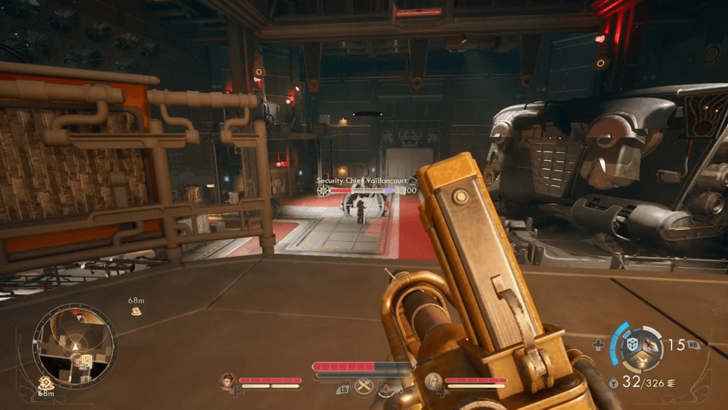 If you did not end up helping Dr. Hurley at this point, you can fight Vaillancourt and his automech head on. |
| 4 | 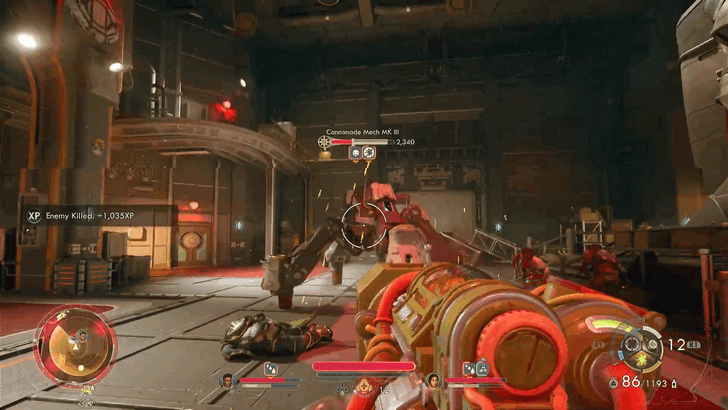 During the fight, all enemy troops will be alerted, unless you were able to do the Engineering 4 check to Seal the Ancillary Hangar doors earlier when you first entered the IRC, blocking out the reinforcements. If the troops show up, you must defeat them all as well to progress. |
| 5 | 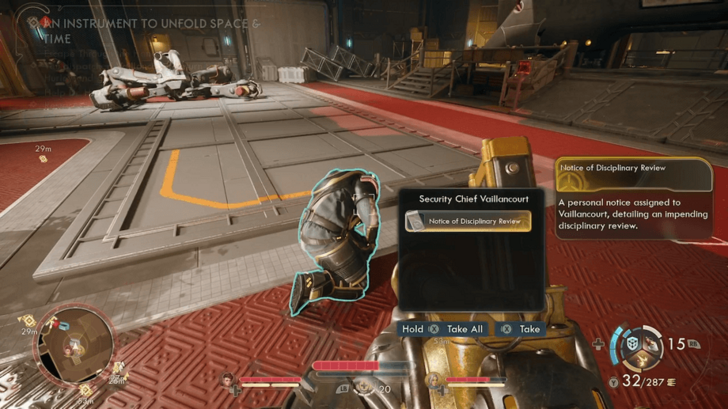 Take the Notice of Disciplinary Review from Vaillaincourt's body, another piece of evidence to help absolve Dr. Hurley's name if needed. |
| 6 | 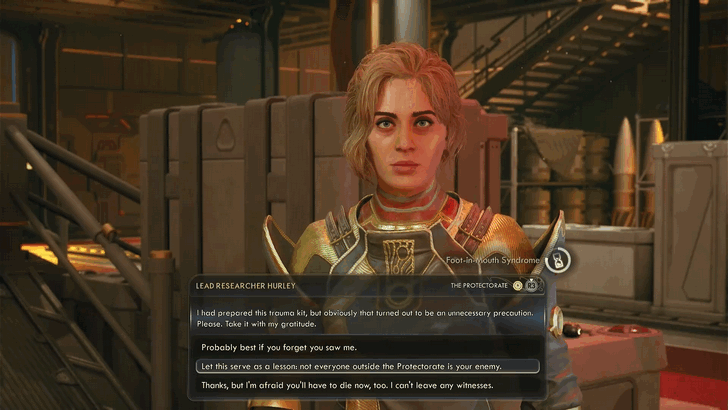 Talk to Dr. Hurley once more. She'll reward you with 3 Advanced Decryption Keys and a Trauma Kit. After talking to her, you can actually kill her at this point to loot extra Advanced Decryption Keys and an additional Trauma Kit. |
| 7 | 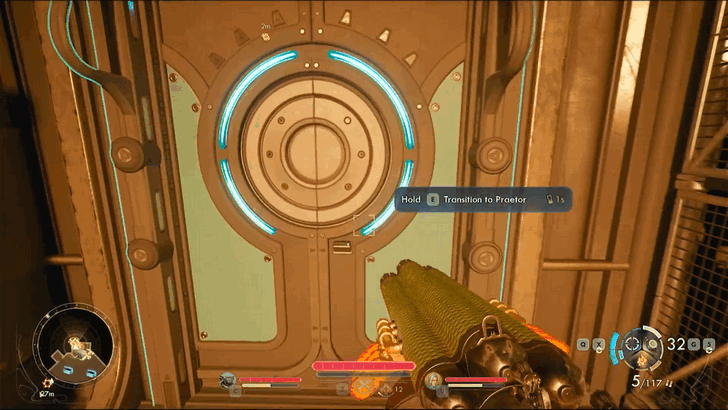 Exit the IRC to conclude the quest, earning you 9315 XP. |
An Instrument to Unfold Space & Time Missables
Armageddon Unique Weapon
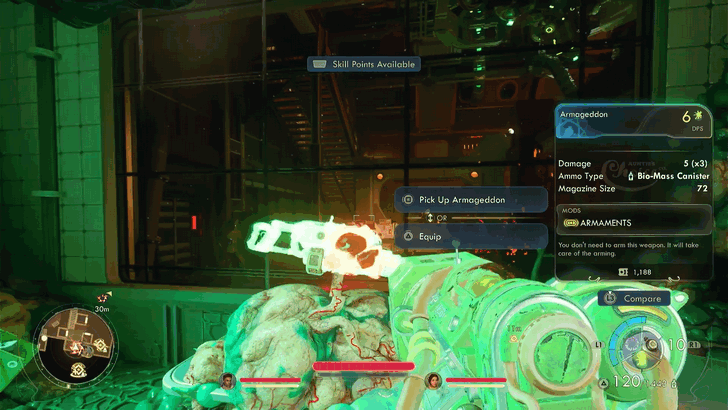
The Armageddon is a unique weapon that can be found and collected by using your Rift Device on the Rift Anomaly inside the Interstitial Weapons Development room. This room is inside the Rift Containment Laboratory.
List of All Missables and Points of No Return
Stun Counter Armor Mod
The Stun Counter armor mod, including its crafting recipe, can be obtained by completing a puzzle. You can follow our video above to guide you on the correct patterns to unlock the safe.
How to Solve IRC Security Console Puzzle
An Instrument to Unfold Space & Time Choices
Should You Help Dr. Hurley?
Upon meeting Dr. Hurley, you'll have the choice to help her or not. If you decide to help her, you'll uncover the truth behind the Rift incident to clear Hurley's name.
We recommend helping Hurley, as she'll distract Vaillancourt to give you an stealthy opportunity to assassinate him, and will give you more rewards as opposed to ignoring her.
List of Choices and Consequences
An Instrument to Unfold Space & Time Rewards
| Quest Completion Rewards | |
|---|---|
|
This section is under construction.
|
An Instrument to Unfold Space & Time Info
| An Instrument to Unfold Space & Time Info | |||||
|---|---|---|---|---|---|
| Type | Main Quest | ||||
| Location | The Incognito | ||||
| How to Start | |||||
| Obtained when speaking to VAL in the Incognito right after Fiends in High Places. | |||||
The Outer Worlds 2 Related Guides

All Main Quests
| # | Main Quests |
|---|---|
| 1 | A Cause Worth Killing For |
| 2 | Recalling the Score |
| 3 | The Saboteur of Paradise |
| 4 | On the Trail of the Traitor ┗ Discrete Mathematics |
| 5 | Fiends in High Places |
| 6 | An Instrument to Unfold Space & Time |
| 7 | A Complication with the Computronic Cerebrum |
| 8 | Sins of the Past on the Precipice of the Future |
Comment
If you do not help Hurley, you will not get access to the rift in the experimental room (no keycard in Valencourt's bedroom, at least for me), hence voiding the achievement for finding all the rifts, so this is highly missable.
Author

An Instrument to Unfold Space & Time Walkthrough
Rankings
- We could not find the message board you were looking for.
Gaming News

![The Liar Princess and the Blind Prince Review [PC] | Lovely to Look at but Tedious to Play](https://img.game8.co/4442586/8d95f5faf05780f1765ce7e0938bd825.jpeg/show)
![Monster Hunter Stories 3 Review [First Impressions] | Simply Rejuvenating](https://img.game8.co/4438641/2a31b7702bd70e78ec8efd24661dacda.jpeg/thumb)
![The Seven Deadly Sins: Origin [First Impressions] | A Promising Start](https://img.game8.co/4440581/584e0bfb87908f12c4eab6e846eb1afd.png/thumb)

Popular Games

Genshin Impact Walkthrough & Guides Wiki
Umamusume: Pretty Derby Walkthrough & Guides Wiki
Pokemon Pokopia Walkthrough & Guides Wiki
Honkai: Star Rail Walkthrough & Guides Wiki
Monster Hunter Stories 3: Twisted Reflection Walkthrough & Guides Wiki
Arknights: Endfield Walkthrough & Guides Wiki
Wuthering Waves Walkthrough & Guides Wiki
Zenless Zone Zero Walkthrough & Guides Wiki
Pokemon TCG Pocket (PTCGP) Strategies & Guides Wiki
Monster Hunter Wilds Walkthrough & Guides Wiki


Recommended Games
Diablo 4: Vessel of Hatred Walkthrough & Guides Wiki
Cyberpunk 2077: Ultimate Edition Walkthrough & Guides Wiki
Fire Emblem Heroes (FEH) Walkthrough & Guides Wiki
Yu-Gi-Oh! Master Duel Walkthrough & Guides Wiki
Super Smash Bros. Ultimate Walkthrough & Guides Wiki
Pokemon Brilliant Diamond and Shining Pearl (BDSP) Walkthrough & Guides Wiki
Elden Ring Shadow of the Erdtree Walkthrough & Guides Wiki
Monster Hunter World Walkthrough & Guides Wiki
The Legend of Zelda: Tears of the Kingdom Walkthrough & Guides Wiki
Persona 3 Reload Walkthrough & Guides Wiki


All rights reserved
© 2025 Obsidian Entertainment, Inc. Obsidian Entertainment, the Obsidian Entertainment logo, The Outer Worlds 2, and The Outer Worlds 2 logos are trademarks or registered trademarks of Obsidian Entertainment, Inc. All rights reserved.
The copyrights of videos of games used in our content and other intellectual property rights belong to the provider of the game.
The contents we provide on this site were created personally by members of the Game8 editorial department.
We refuse the right to reuse or repost content taken without our permission such as data or images to other sites.
If you do Niles quest. After helping Zebulaon there is a path that leads you right to the western side bypassing both paths