Discrete Mathematics Walkthrough
This is a walkthrough for the Discrete Mathematics main quest in Outer Worlds 2. Read on for a complete Discrete Mathematics walkthrough, including the choices you can make and the rewards for completing the quest.
List of Contents
Discrete Mathematics Walkthrough
Click on a step to jump to its section in the walkthrough!
Speak to Exemplar Foxworth Inside the N-Ray Range
| Walkthrough | |
|---|---|
| 1 | 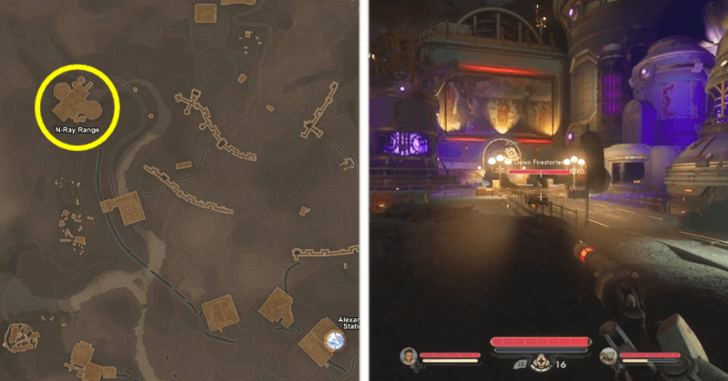 During the main quest, On the Trail of the Traitor, you'll be tasked to investigate the N-Ray Range, located on the far northwest corner of Golden Ridge. There will be a few hostile cultists by the entrance that you have to take out before you can begin. ▶︎ On the Trail of the Traitor Walkthrough |
| 2 | 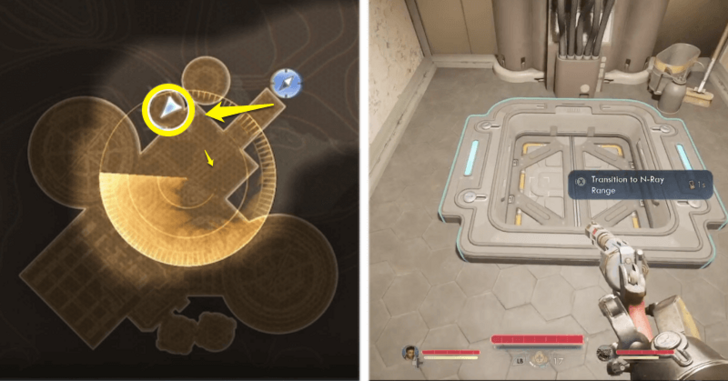 Next, you must enter through a hatch located to the right of the entrance, since the main door is sealed. |
| 3 | 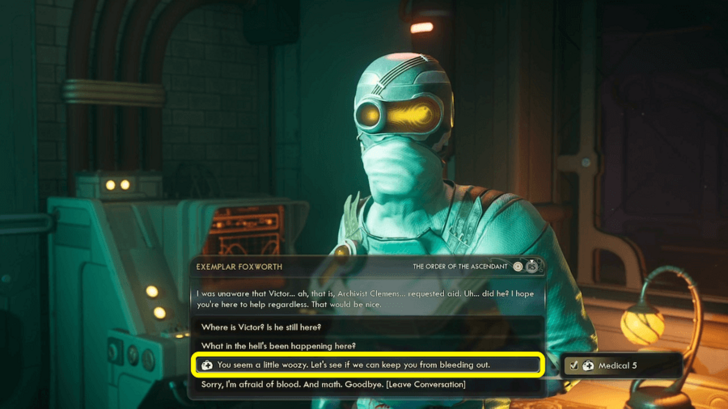 Speak to Exemplar Foxworth on the first floor inside. You can either give her a Trauma Kit or pass a Medical 5 check to treat her wounds and save her life. Saving her is required if you want to spare Victor Clemens later on (without having to pass a Speech check). Plus, you get a +1 Rep increase for the Order by helping. Afterward, she will instruct you to locate the N-Ray Scanner gadget, which is vital for the rest of the mission. Once the conversation ends, the Discrete Mathematics quest will officially begin in the journal quest log. |
Find the N-Ray Scanner
| Walkthrough | |
|---|---|
| 1 | 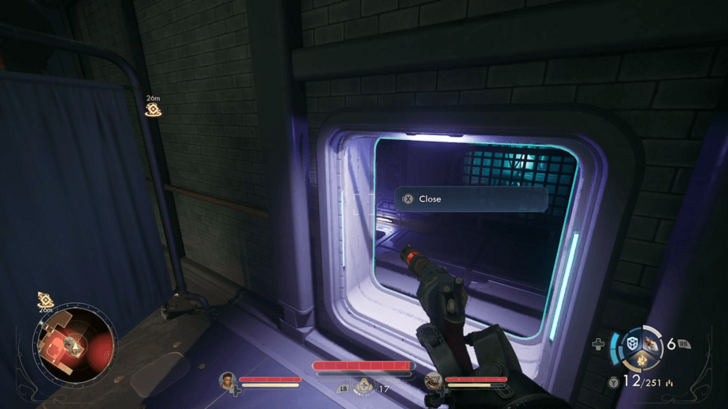 Behind Foxworth is a vent. Open and crouch through it, then follow the ramp upwards. |
| 2 | 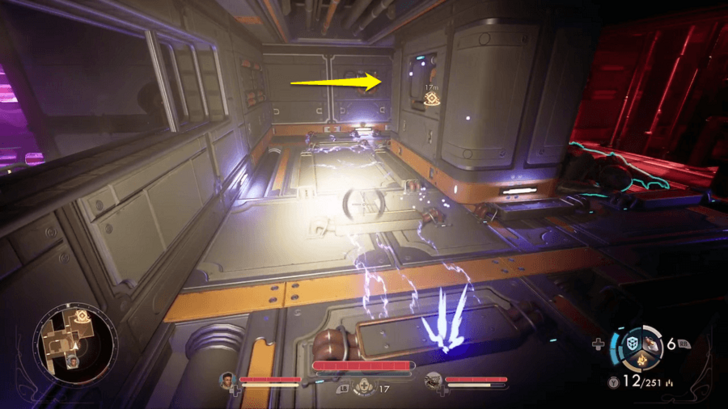 You will come across an electric circuit with a dead body nearby. The current moves in a clockwise pattern, so wait for an opening and move through when it passes you. Continue forward to reach the next vent opening. |
| 3 | 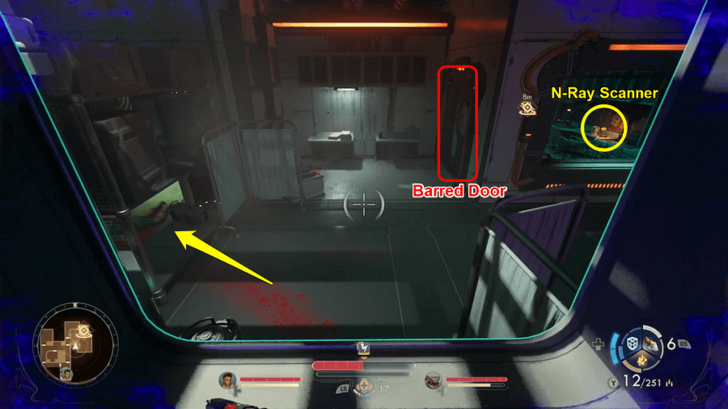 Drop down into the next room and crawl underneath the space on the left. Continue forward towards the N-Ray Scanner. |
| 4 |  Collect the N-Ray Scanner in the room. |
| 5 | 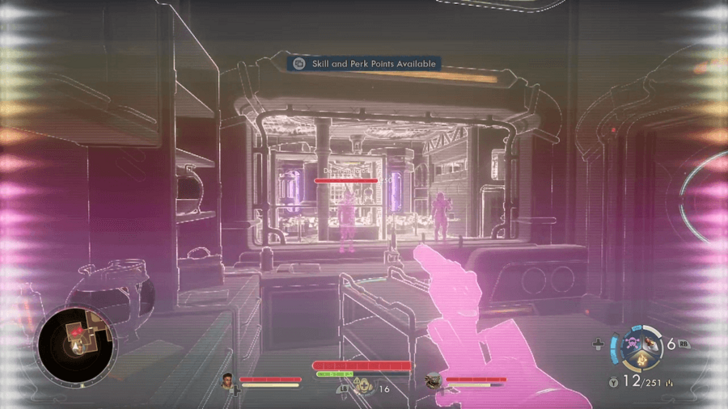 With your new Gadget, you can activate it and now see the two invisible dawn cultists in the next room. Kill them and return towards Foxworth. |
Solve the N-Ray Range Puzzle
| Puzzle Location and Solution | |
|---|---|
 |
|
| Lever Solution | 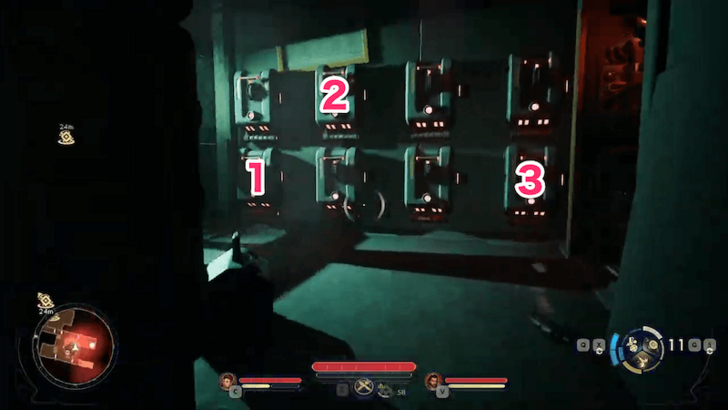 |
| N-Ray Scanner View | 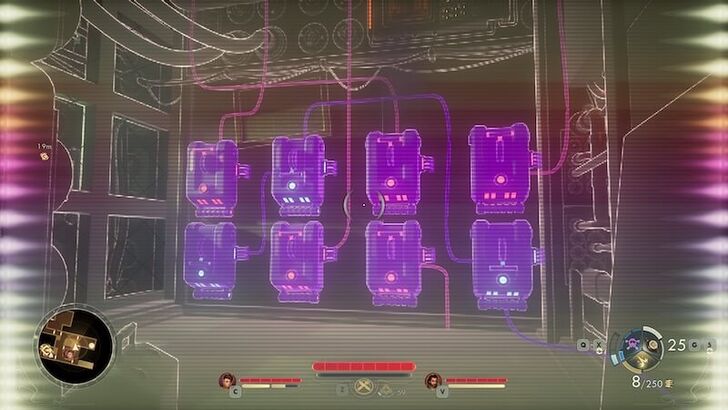 |
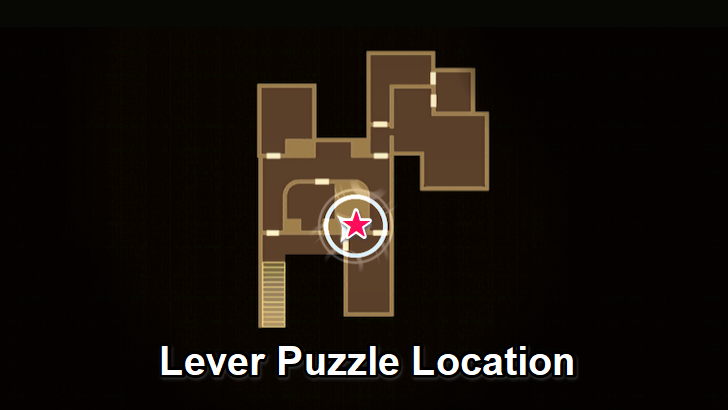
In the central room of the floor is a lever puzzle that opens the door next to Foxworth. Pull the lever on the bottom left, the second top lever, then the bottom right to power the door.
This is clued in by using the N-Ray Scanner, revealing the wiring of the levers. The three levers with wires running toward the door where Foxworth is are the ones you need to switch on.
Eliminate the Invisible Cultists Using the Scanner
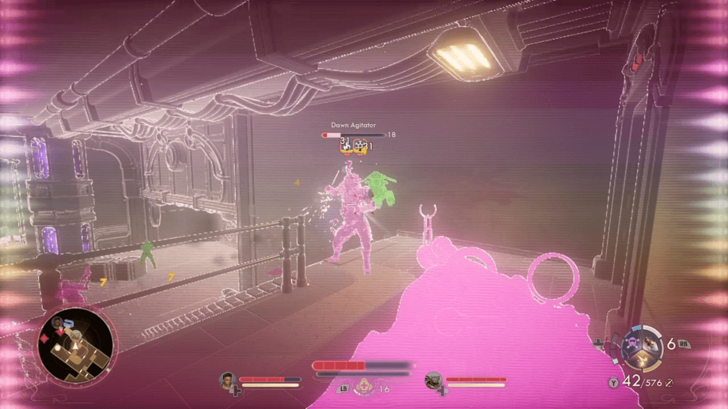
With the door open, head on deeper through the range and use the N-Ray Scanner to reveal the enemies, and clear them out.
Crawl Through the Vent to Get to the Next Area
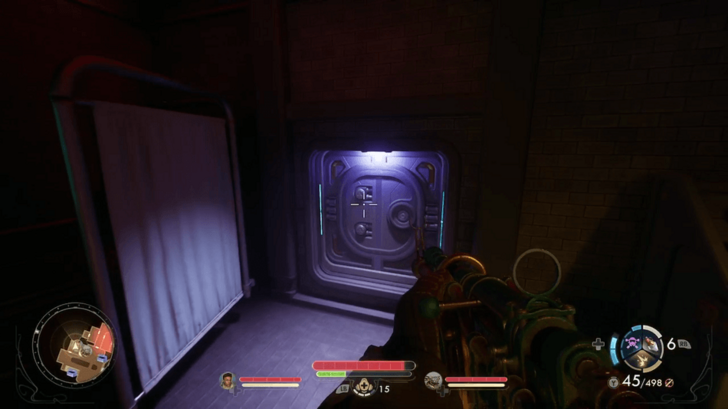
After clearing the enemies, locate the vent in the corner of the room to proceed to the next area. The path inside is straightforward.
Go Through Victor's Terminal
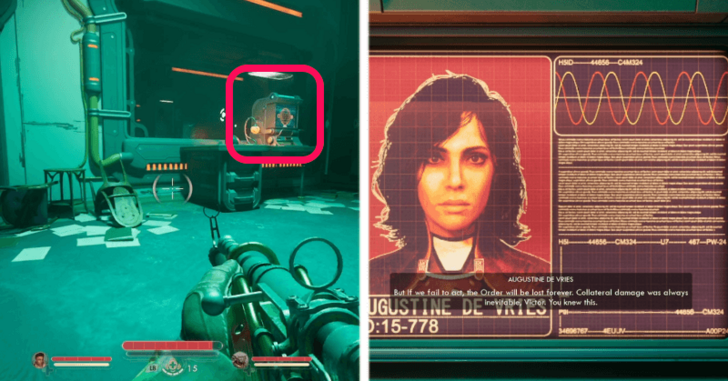
Accessing Victor’s terminal is crucial if you plan to spare him later when you meet him at the end of the quest. After exiting the crawlspace, the Terminal is on the table to your right.
Make sure to go through everything on the terminal, including De Vries' message and Victor's personal logs. This is also where you can find more info on Abbot Newell's secret for On the Trail of the Traitor.
Rescue Novice Archivist Trammell
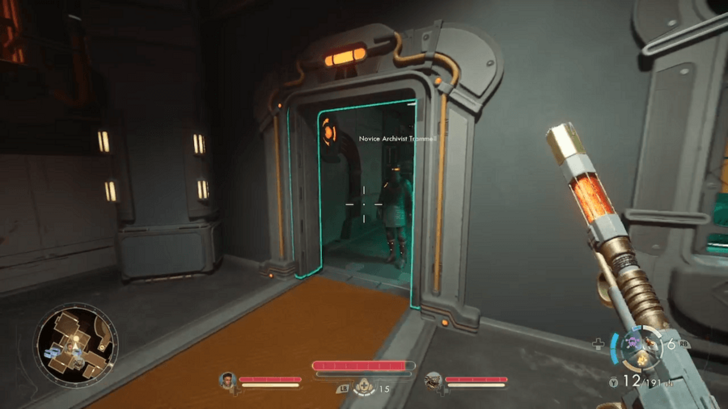
Go past the terminal and through the next rooms, fighting your way through the invisible cultists. You will find Trammell hiding in his lab. Once all nearby enemies are defeated, he will come out, and you can speak to him.
Exhaust his dialogue to get info about Victor and earn +1 Rep with the Order of the Ascension for rescuing him.
Get Past the Invisible Traps
| Walkthrough | |
|---|---|
| 1 | 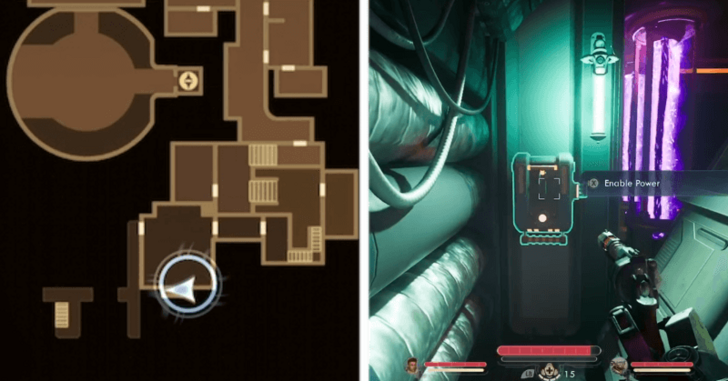 Head up the stairs towards Victor's location, and hit the power switch to open the door. Do not rush in yet, as the path ahead is littered with invisible traps that you can spot out using the N-Ray Scanner. |
| 2 | 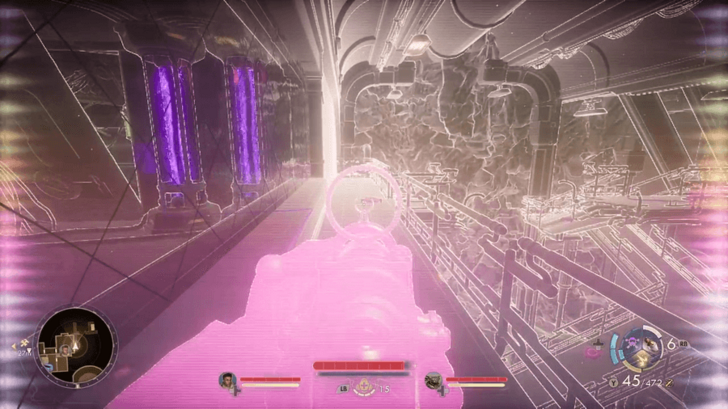 Enter the next room and shoot the invisible mine on the catwalk, next to the corpse. You could alternatively disable the mines with Explosives 3. |
| 3 | 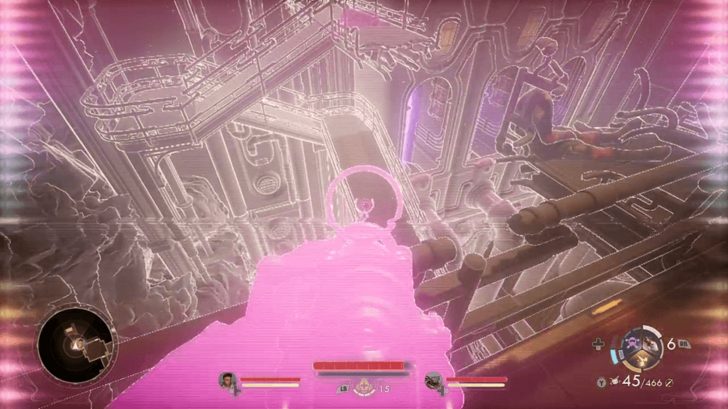 Shoot the mine below you, in between the gap of the bridge. After it's gone, drop down to the catwalk below. |
| 4 | 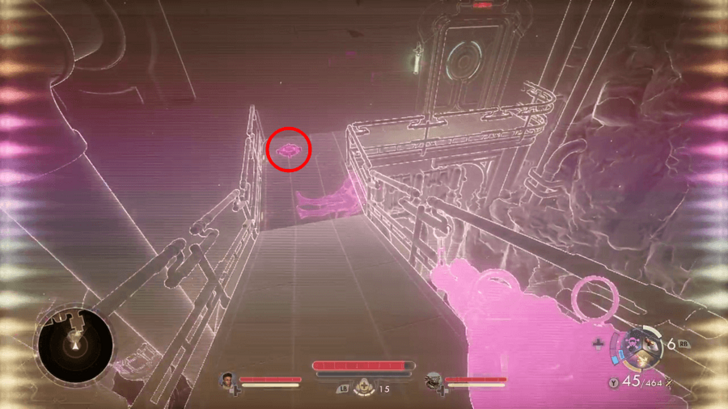 Destroy one more mine before opening the door to its right. |
| 5 | 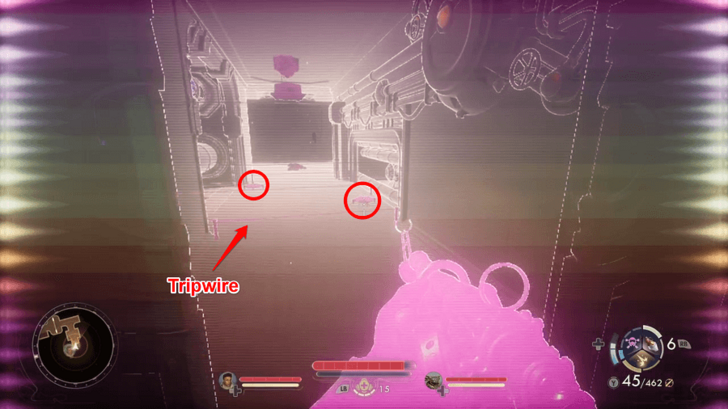 Past the door are more invisible mines and tripwires. Shoot the two mines first, and then carefully jump over each tripwire. You can also disable the tripwires with Explosives 5. |
| 6 | 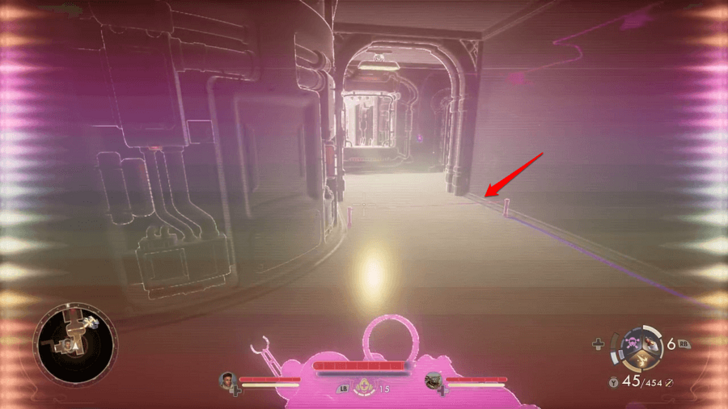 There is one more tripwire to jump over before finding the lazer room. |
| 7 | 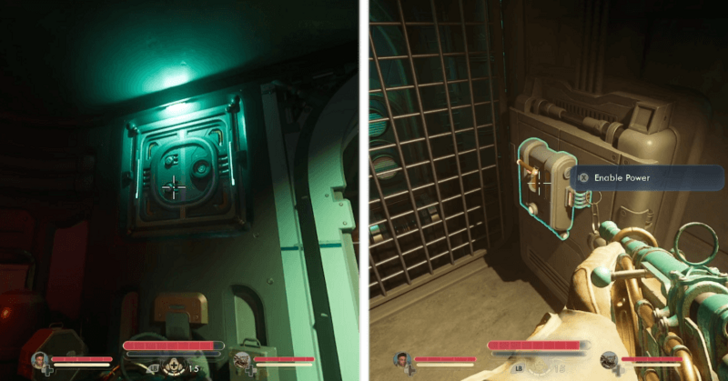 Behind the door towards the laser trap is a vent. Head inside and flip the switch there to open the door towards the lasers. |
Disable the Lazer Trap
Follow the lasers as they trace backward, then drop down to the safe space on the far right. Shoot the mines in the area, then flip the power switch to disable the lasers.
Confront Victor Clemens
| How to Deal With Victor | ||
|---|---|---|
| Kill Victor | Spare Victor | |
Take the elevator down past the laser hall to confront Victor Clemens. You can choose to kill, spare, or let Aza torture him if she is in your party.
Killing Victor Clemens
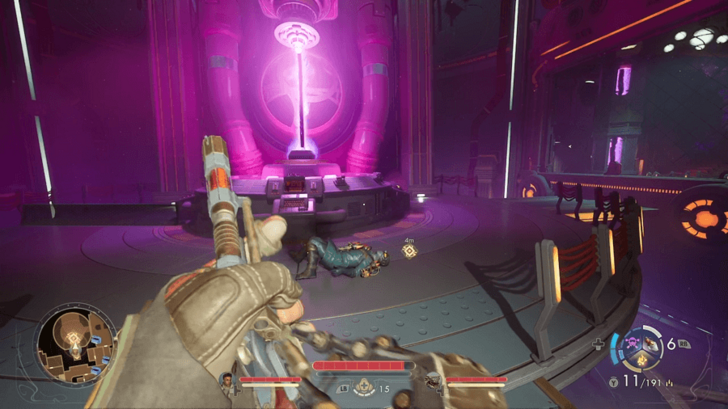
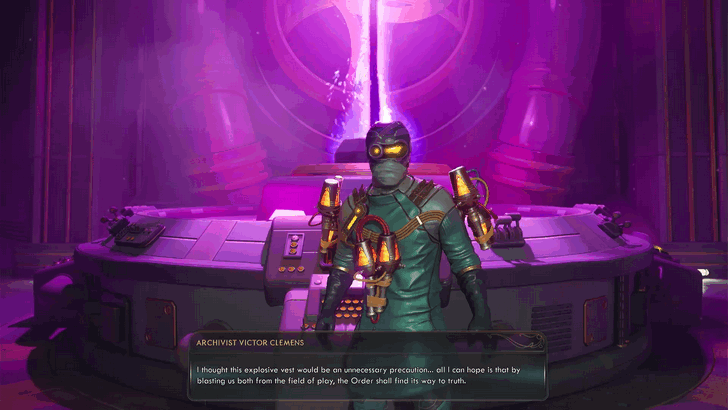
Killing Victor is straightforward. Choose any of the hostile dialogue options, and he will charge at you with his suicide bomb vest but will go down after taking minimal damage. You can loot the Maintenance Hatch Key from his body.
Sparing Victor Clemens
| Steps to Make Victor Stand Down | |
|---|---|
| 1 | To convince Victor to stand down without Speech 5, you must meet these certain conditions before the encounter: 1. Have Marisol in the party. 2. You saved Exemplar Foxworth with a Trauma Kit or Medical 5 check. 3. You have the required info from Victor's terminal. 4. Novice Archivist Trammell is alive. |
| 2 | 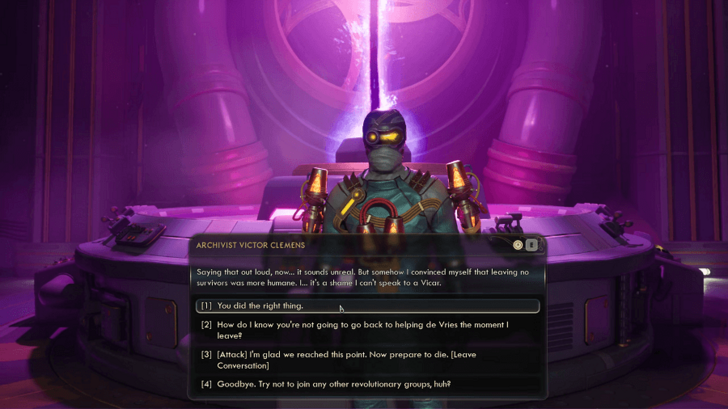 When speaking to Victor, choose the following non-hostile dialogue options during the conversation to spare him: 1. There's always a choice. Stand down and nobody needs to get hurt. 2. I thought you were a scientist, not a martyr. Is this how you want to be remembered? 3. Wait a minute... de Vries put you up to this. (Requried info from terminal) 4. Would pure scientific certainty have saved your co-worker? No. That was me. (Saved the scientists) 5. I think I finally understand you. You're afraid to live with what you've been doing here. 6. Someone afraid of living to see the consequences of his actions. After selecting the final option above, Victor will stand down and you are free to continue. |
| 3 | 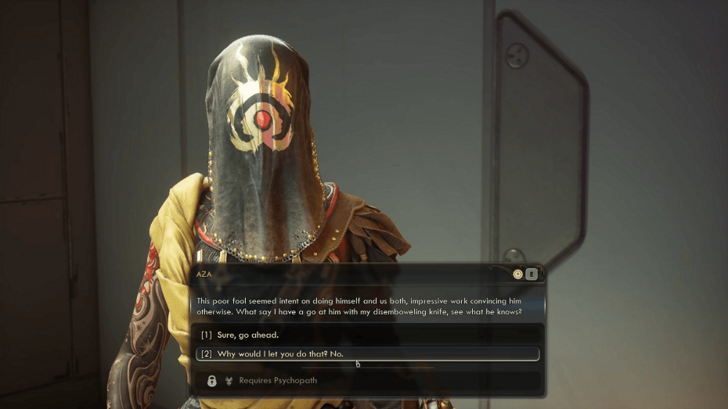 If you have Aza in your party, she will offer to torture Victor for more information. If you agree, Victor will just die. |
Discrete Mathematics Missables
Present and Future Company Excluded Side Quest
After completing both the Discrete Mathematics and Beginning at the Endpoint quests, a large rockslide will crash down on a section of the Matriarch’s Mercy area.
The Present and Future Company Excluded side quest will be missed or automatically fail if this occurs before you finish it.
List of All Missables and Points of No Return
Discrete Mathematics Choices
|
|
| Choice | Result |
|---|---|
| Kill Archivist Victor | Victor dies and none of de Vries' plans will be exposed. Loot the Maintenance Hatch Key from his body.
The ending screen where you Victor as a Janitor will not appear. |
| Spare Archivist Victor |
Victor exposes de Vries' plans and will no longer help her. He hands you the Maintenance Hatch Key.
In a future meeting, de Vries acknowledges that you spared Victor. Victor appears as a janitor in one of the ending screens. |
| Let Aza Torture Victor | Some information about de Vries' plans will be revealed but Victor ultimately dies.
Similarly, the ending screen where Victor is a Janitor will not appear. |
List of Choices and Consequences
Discrete Mathematics Rewards
| Quest Completion Rewards | |
|---|---|
|
・4860 XP ・Maintenance Hatch Key |
Discrete Mathematics Info
| Discrete Mathematics Info | |||||
|---|---|---|---|---|---|
| Type | Main Quest | ||||
| Location | N-Ray Range, Golden Ridge | ||||
| Quest Giver | Exemplar Foxworth | ||||
| How to Start | |||||
| Speak to Exemplar Foxworth inside the N-Ray Range during On the Trail of the Traitor. | |||||
The Outer Worlds 2 Related Guides

All Main Quests
Comment
Author
Discrete Mathematics Walkthrough
improvement survey
04/2026
improving Game8's site?

Your answers will help us to improve our website.
Note: Please be sure not to enter any kind of personal information into your response.

We hope you continue to make use of Game8.
Rankings
- We could not find the message board you were looking for.
Gaming News
Popular Games

Genshin Impact Walkthrough & Guides Wiki

Crimson Desert Walkthrough & Guides Wiki

Umamusume: Pretty Derby Walkthrough & Guides Wiki

Honkai: Star Rail Walkthrough & Guides Wiki

Monster Hunter Stories 3: Twisted Reflection Walkthrough & Guides Wiki

Wuthering Waves Walkthrough & Guides Wiki

The Seven Deadly Sins: Origin Walkthrough & Guides Wiki

Pokemon TCG Pocket (PTCGP) Strategies & Guides Wiki

Pokemon Pokopia Walkthrough & Guides Wiki

Zenless Zone Zero Walkthrough & Guides Wiki
Recommended Games

Fire Emblem Heroes (FEH) Walkthrough & Guides Wiki

Pokemon Brilliant Diamond and Shining Pearl (BDSP) Walkthrough & Guides Wiki

Super Smash Bros. Ultimate Walkthrough & Guides Wiki

Diablo 4: Vessel of Hatred Walkthrough & Guides Wiki

Cyberpunk 2077: Ultimate Edition Walkthrough & Guides Wiki

Yu-Gi-Oh! Master Duel Walkthrough & Guides Wiki

Elden Ring Shadow of the Erdtree Walkthrough & Guides Wiki

Monster Hunter World Walkthrough & Guides Wiki

The Legend of Zelda: Tears of the Kingdom Walkthrough & Guides Wiki

Persona 3 Reload Walkthrough & Guides Wiki
All rights reserved
© 2025 Obsidian Entertainment, Inc. Obsidian Entertainment, the Obsidian Entertainment logo, The Outer Worlds 2, and The Outer Worlds 2 logos are trademarks or registered trademarks of Obsidian Entertainment, Inc. All rights reserved.
The copyrights of videos of games used in our content and other intellectual property rights belong to the provider of the game.
The contents we provide on this site were created personally by members of the Game8 editorial department.
We refuse the right to reuse or repost content taken without our permission such as data or images to other sites.


![Forza Horizon 6 Review [Preview] | Beautiful Roads With a Whole Lot of Oversteer](https://img.game8.co/4460981/a7254c24945c43fbdf6ad9bea52b5ce9.png/thumb)
![Borderlands Mobile Review [Playtest] | The Same Borderlands Made Easy](https://img.game8.co/4465500/aac0c880a39ec5cd46073e49d18f3ed5.png/thumb)


