 Main Quests
 Side Quests
 Collectible Quests
 Tasks
Tasks Companion Quests
 Companions
 Puzzles
 Choices
 Weapons
 Mods
Mods Armor
Armor Helmets
 Builds
 Resources
 Gadgets
 Inhalers
 Skills
 Perks
Perks Traits
 Flaws
Flaws Maps
Maps Tips and Tricks
 Factions
 Faction Quests
 Items
Items Ship Pets
 Trophies
 News and Game Info
This survey will take about 1 minute.
Your answers will help us to improve our website.
Outer Worlds 2
Best Armor Tier List
✧ Best Builds: Science | Stealth | Gunslinger
✦ Best Background | Best Traits | Best Skills
✧ Missables and Points of No Return
✦ Best Weapons | Best Armor
✧ Unique Weapons | Unique Armor
✦ Best Flaws | Best Perks
The best armor and helmets in Outer Worlds 2 will vary based on your playstyle. Read on to learn more about the best armors and helmets in the game, as well as the tier list for each armor type.
| Armor / Helmet Related Pages | |||||
|---|---|---|---|---|---|
| Best Armor | All Armor | All Helmets | |||
| Unique Armor | Unique Helmets | ||||
List of Contents
Best Armor Tier List
| Jump to a Tier List! | ||
|---|---|---|
| Unique Armor | Unique Helmet | Base |
Best Unique Armor
| Tier | Unique Armor |
|---|---|
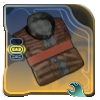
Acquiescence
 Acquiescence Acquiescence
|
|
|---|
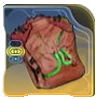
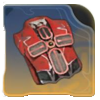
Acquiescence is a Medium Armor with good base stats, as well as a powerful mod that changes the armor bonus based on the damage you take. You get Damage Resistance upon taking light damage, and Evasion Chance when you take heavy damage. The downside is that the armor is not immediately available, and you must have a good reputation with Sub Rosa to access the merchant.
You can buy Acquiescence for 6,500 Bits from Sub Rosa Agent Kobor in Matriarch's Mercy.
Acquiescence Stats and How to Get
Native Species
 Native Species Native Species
|
|
|---|
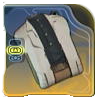
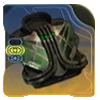
Native Species is a Light Armor that reduces your weapon's sound radius, acting like a silencer on all your weapons. Additionally, it converts Burn damage to Healing, basically making you immune to one status effect. The problem, however, is that as a Light Armor it has lower defense, making it hard to fight in frontal assaults.
You can get Native Species from the High Security Lockbox by trading in 5 Advanced Decryption Keys.
Native Species Stats and How to Get
Sentience
 Sentience Sentience
|
|
|---|
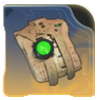
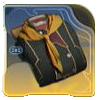
The Light Armor Sentience regenerates 30% of the damage you take over a period of time, effectively making you only take 70% damage. Outside of the health regen, however, the armor has low survivability.
This armor is a reward from the quest Hazard a Gas after turning in ten Compression Coils.
Sentience Stats and How to Get
Patient Step
 Patient Step Patient Step
|
|
|---|
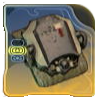
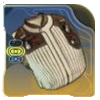
This Light Armor is great for players who rely on Tactical Time Dilation (TTD) as it allows you to move around in TTD without draining energy. Additionally, the energy drain while using TTD is reduced by up to 30% based on your Science Skill. Of course, as this helmet directly buffs TTD, it is useless if the player does not use TTD.
Patient Step can be bought from Adelia Plotnick in Matriarch's Mercy for 4,750 Bits.
Patient Step Stats and How to Get
Mathematician's Mantle
 Mathematician's Mantle Mathematician's Mantle
|
|
|---|
The Mathematician's Mantle is a Light Armor that can block a single attack every 10 seconds, which is good for both short and long fights. Additionally, you gain significant Gadget Energy Recharge while wearing the armor. This does, however, get deactivated when you take damage, and will only reactivate after not taking damage for 10 seconds.
You can get this armor as a reward from completing the Crash Course in Telemetry faction quest.
Mathematician's Mantle Stats and How to Get
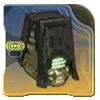
Bomb Suit
 Bomb Suit Bomb Suit
|
|
|---|
The Bomb Suit is a Heavy Armor that reduces the explosive damage you take by 90%, as well as recover parts from mines you step on, making it the perfect armor for Explosives-focused builds. You will, however, need to get through enemies and locked doors to get this armor.
The Bomb Suit armor is located inside the Bridge Armory, found in The Bridge of the Reverent in Eden.
Bomb Suit Stats and How to Get
Scoundrel's Aegis
 Scoundrel's Aegis Scoundrel's Aegis
|
|
|---|
Scoundrel's Aegis is a Light Armor that provides Temporary HP whenever a Companion Ability is used. This can give up to 650 Temporary HP based on your Leadership Skill. As there is a hard cap on the Temporary HP you can get, however, it can fall off later in the game when enemies start dealing more damage. Additionally, the armor has minimal survivability as Light Armor.
Players can find Scoundrel's Aegis in the Crabble Spawning Grounds in Paradise Island.
Scoundrel's Aegis Stats and How to Get
Escape Suit
 Escape Suit Escape Suit
|
|
|---|
The Escape Suit Light Armor is great for stealth builds as it drops a smoke bomb if you go below 30% HP. This makes it perfect for escaping tough fights after getting detected. The smoke bomb has a ten-minute cooldown, so it can't be used consecutively.
This is a reward for completing the side quest The Lab that Shouted Incoherently and Often in Paradise Island.
Escape Suit Stats and How to Get
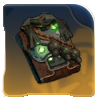
Dead Man's Jacket
 Dead Man's Jacket Dead Man's Jacket
|
|
|---|
The Dead Man's Jacket is a Unique Medium Armor that has a chance of releasing spider mines whenever you get damaged. Additionally, you also drop grenades whenever you get knocked out. The downside, however, is that both of these effects are reliant on Hack and Explosives, requiring you to invest in either skill to make the most of it.
You can get the Dead Man's Jacket from the High Security Lockbox.
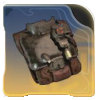
Kaur's Kuirass
 Kaur's Kuirass Kaur's Kuirass
|
|
|---|
Kaur's Kuirass is a strong Unique Heavy Armor that reduces your Toxicity whenever you get damaged, making it perfect for builds that rely on the Medical Inhaler. It also provides good protection as Heavy Armor. The Toxicity reduction's effects, however, scale off of your Medical skill. Not only that, but the armor itself is potentially missable.
Kaur's Kuirass is a reward from siding with Kaur and sabotaging the Automech Repair Center during Above and Beyond Repair quest.
Kaur's Kuirass Stats and How to Get
Merciless Master
 Merciless Master Merciless Master
|
|
|---|
Merciless Master allows you to instantly revive fights at the cost of knocking down your Companions. This means that if your companions are already knocked down, you will not revive.
You can get Merciless master from the High Security Lockbox by trading in 6 Advanced Decryption Keys.
Merciless Master Stats and How to Get
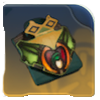
Calorie Counter
 Calorie Counter Calorie Counter
|
|
|---|
The Calorie Counter is a Heavy Armor that increases your Energy Recharge Rate whenever you use your Medical Inhaler, making it perfect for builds that rely on gadgets. The drawback is that it reduces the effectiveness of your Medical Inhaler.
You can buy the Calorie Counter from the Reclaimed Imports in the Free Market Station for 5,750 Bits.
Calorie Counter Stats and How to Get
Townie Clothing
 Townie Clothing Townie Clothing
|
|
|---|
The Townie Clothing is great in that it can ignore a single incoming hit, allowing you to survive potentially fatal attacks. The drawback is that it can only do so every 15 seconds. Additionally, there is no way to shorten the cooldown. As such, you will need to play around the cooldown if you want to take advantage of the effect.
The Townie Clothing is a reward for completing the quest Purloined Propaganda.
Townie Clothing Stats and How to Get
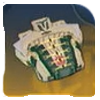
Tossball Uniform
 Tossball Uniform Tossball Uniform
|
|
|---|
The Tossball Uniform is a Light Armor that increases your slide distance and increases your Damage Resistance while sliding. As the special effects rely on you sliding around, this armor basically loses its bonuses if you are not sliding.
This Light Armor can be bought from Bonnie's Battlefield Bazaar in the Golden Ridge for 5,000 Bits.
Tossball Uniform Stats and How to Get
Golden Shroud
 Golden Shroud Golden Shroud
|
|
|---|
The Golden Shroud provides a minimum of 30% Damage Resistance, increasing even more based on your Speech Skill. Its downside, however, is that taking damage reduces your Bits based on the damage you take. If you don't have Bits, the Damage Resistance is deactivated.
You can find the Golden Shroud on display during the Do No Harm companion quest for Niles.
Golden Shroud Stats and How to Get
Best Unique Helmet
| Tier | Unique Helmet |
|---|---|
Bowlzerker
 Bowlzerker Bowlzerker
|
|
|---|
The Bowlzerker buffs your damage by 20% whenever you get hit in melee, making it strong for melee builds. The buff, however, only lasts for 3 seconds, which means you need to keep getting hit to keep the buff active.
You can get Merciless master from the High Security Lockbox by trading in Advanced Decryption Keys.
Bowlzerker Stats and How to Get
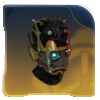
Malpractice
 Malpractice Malpractice
|
|
|---|
Malpractice is a Helmet that buffs your damage by up to +40% whenever you are Crashing (scaling off of your Medical skill). This means you cannot heal while the Damage buff is active, requiring proper Crashing management.
Malpractice can be found on a table in the Mysterious Cave in Eden.
Malpractice Stats and How to Get
Monocular Target-Finder
 Monocular Target-Finder Monocular Target-Finder
|
|
|---|
The Monocular Target-Finder is a great Helmet that increases your Weakspot damage based on distance, with the bonus maxing out at +30% at 100 meters. The downside is that your weapon is still affected by damage falloff, potentially cancelling out the bonus Weakspot damage.
You can receive this Helmet as a reward from the side quest A Final Death for Gravity in Eden.
Manager's Tasking Hat
 Manager's Tasking Hat Manager's Tasking Hat
|
|
|---|
The Manager's Tasking Hat is a Helmet that lets you mark enemies you attack. Marked enemies are priority targets for your companions, and they deal less damage to your party as well. While this is strong, you will need high Speech levels to maximize the effects.
This Helmet can be unlocked via the High Security Lockbox by trading in Advanced Decryption Keys.
Manager's Tasking Hat Stats and How to Get
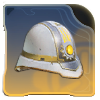
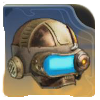
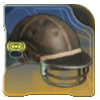
Berserker's Bucket
 Berserker's Bucket Berserker's Bucket
|
|
|---|
The Berserker's Bucket provides passive health regeneration to the player based on how much reserve ammo they have. This buff, however, is only available while in combat, and will have reduced effects in gun builds as the effect scales off of your reserve ammo.
You can purchase the Berserker's Bucket from The Bullet Sponge in the ACS Undisputed Claim for 6,750 Bits.
Berserker's Bucket Stats and How to Get
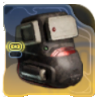
Bomb Suit Helmet
 Bomb Suit Helmet Bomb Suit Helmet
|
|
|---|
The Bomb Suit Helmet is a Helmet that not only provides Base Health, but also grants temporary health whenever you deal Explosive damage. Sadly, this means that the helmet is just a stat stick outside of Explosive builds.
The Bomb Suit Helmet can be obtained by opening Jan Dunsany’s locked safe located in Scrappers' Den on Golden Ridge. The key can be found on the body of Jan Dunsany.
Bomb Suit Helmet Stats and How to Get
Limited Production Gentleperson's Oxonian
 Limited Production Gentleperson's Oxonian Limited Production Gentleperson's Oxonian
|
|
|---|
The Limited Production Gentleperson's Oxonian is a Hat that increases the charge rate of your Companion Ability, improving it up to +30% based on your Speech Skill. This is, however, a missable helmet if you decide to side with Kaur in Fairfield.
You can get this helmet either by succeeding a Speech 2 check during A Refreshing Bit of News, or by accomplishing the quest The Brain Benders of Auntie's Choice.
Limited Production Gentleperson's Oxonian Stats and How to Get
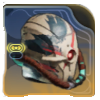
Scrutinizer's Eyepiece
 Scrutinizer's Eyepiece Scrutinizer's Eyepiece
|
|
|---|
The Scrutinizer's Eyepiece lowers the Weak threshold for Strong enemies, requiring less damage before they become Weak. Not only that, but you also receive increased critical chance when attacking Weak enemies. The threshold decrease amount will scale off of your Observation, making its effects minimal on builds that don't have Observation.
This Helmet can be unlocked via the High Security Lockbox by trading in Advanced Decryption Keys.
Scrutinizer's Eyepiece Stats and How to Get
Pillferator
 Pillferator Pillferator
|
|
|---|
The Pillferator is a Helmet that increases the healing you receive from the Medical Inhaler, making them more effective without the increased Toxicity. Not only that, but it also lets you hack AutoDocs for one extra use. The downside is that the healing bonus scales off of Hack, so the bonus is minimal if Hack is your dump skill.
The Pillferator can be purchased for 2,750 Bits from the doctor at Hal’s Fairsomely Priced Farmacy in Free Market Station.
Pillferator Stats and How to Get
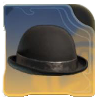
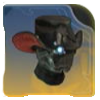
The Black Hat
 The Black Hat The Black Hat
|
|
|---|
The Black Hat increases your Critical Hit Chance against Automechs, increasing your possible damage output. Additionally, you can hack Automechs from a distance, granted that you have the Manual Reset perk unlocked. The buff and hack distance, however, scales off of your Hack skill. Additionally, the hat's second effect is useless if you don't have Manual Reset unlocked.
The Black Hat Stats and How to Get
Tossball Helmet
 Tossball Helmet Tossball Helmet
|
|
|---|
The Tossball Helmet is a Helmet that increases your slide distance and increases your Damage while sliding. As the special effects rely on you sliding around, this armor basically loses its bonuses if you are not sliding.
This Light Armor can be bought from Bonnie's Battlefield Bazaar in the Golden Ridge for 1,500 Bits.
Tossball Helmet Stats and How to Get
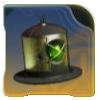
The Dose
 The Dose The Dose
|
|
|---|
The Dose is a Helmet that buffs your Crit Chance while standing in a Zyranium Cloud. While this sounds dangerous, The Dose also slows down Zyranium poisoning. Its biggest downside, however, is that you need to be standing in a Zyranium Cloud to enjoy its effects, making it useless wherever there is none.
This helmet is a reward for completing the quest Vanquishing the Vexing Vapors in Paradise Island.
Best Base Armor
| Tier | Weapon Type | |
|---|---|---|
| Medium Armor | - | |
| Light Armor | Heavy Armor | |
| Clothing | - | |
Medium Armor
| Medium Armor |
|
|---|
Medium armor gives a little bit of everything, so it can be used in any build. Although their Combat Sprint Speed, Evade Chance, and Damage Reduction are lower than those of Light and Heavy Armors, they still provide all-around protection.
Light Armor
| Medium Armor |
|
|---|
Light Armors provide both Combat Sprint Speed and Evasion Chance, making them great for high mobility builds. The Combat Sprint Speed makes it perfect for going from cover to cover, or for closing the distance and attacking enemies in melee. Evasion Chance, on the other hand, allows you to dodge hard-hitting attacks like sniper shots.
The downside is that your Armor Rating is innately low, making you more vulnerable to enemy attacks.
Heavy Armor
| Medium Armor |
|
|---|
Heavy Armors provide high damage reduction and have high Armor Ratings, making them perfect for close-range encounters where you will be taking the brunt of the damage. Damage Reduction is especially effective against weapons that fire fast, but have low per-bullet damage.
Its biggest downside, however, is that you have no Combat Sprint Speed or Evasion Chance, making it hard to move around on the battlefield.
Clothing
| Medium Armor |
|
|---|
Clothing is similar to Light Armor in that they have the same Evasion and Combat Sprint Speed, and can have Unique versions as well. The biggest downside is that most Clothing can only have 2 Armor Rating at most, making them weaker than Light Armor.
Best Armor Per Planet
Best Armor in Eden (Early Game)
| Tier | Unique Helmet | |
|---|---|---|
|
Monocular Target-Finder
|
Malpractice
|
|
|
Escape Suit
|
Kaur's Kuirass
|
|
|
Limited Production Gentleperson's Oxonian
|
The Dose
|
|
|
Bomb Suit
|
Townie Clothing
|
|
| Hibernation Helmet | Footsoldier Helmet | |
| Hibernation Suit | Agent Armor | |
These are the best armors to use while you are exploring Paradise Island in Eden. There is armor available for every playstyle, so use the ones that best complement your build.
Best Armor in Dorado (Early Game)
| Tier | Unique Helmet | |
|---|---|---|
|
Monocular Target-Finder
|
Malpractice
|
|
|
Sentience
|
Acquiescence
|
|
|
Bowlzerker
|
Manager's Tasking Hat
|
|
|
Native Species
|
Dead Man's Jacket
|
|
|
Pillferator
|
Bomb Suit Helmet
|
|
|
Sentience
|
Bomb Suit
|
|
These are the best armors to use while you are exploring Golden Ridge in Dorado. There is armor available for every playstyle, so use the ones that best complement your build.
Outer Worlds 2 Related Guides

Recommended Guides
The Outer Worlds 2 Guides
Comment
Author

Best Armor Tier List
Please participate in our site
improvement survey
04/2026
improvement survey
04/2026
Would you assist in
improving Game8's site?
improving Game8's site?

×
We are listening to our users' valuable opinions and discussing how to act on them.
The information collected through this survey will be used for the purpose of improving our services. In addition, the information will only be disclosed a part of a statistic in a format that will not allow identification of personal information.
Begin Survey
Not Now
×
Please rate each item regarding Game8.co's Advertisements.
Amount of Ads
Very Dissatisfied
Somewhat Dissatisfied
Fine
Somewhat Satisfied
Highly Satisfied
Placement of Ads
Timing of Ad Display
Ad Loading Speed
Safeness of Ads
Content of Ads
×
Please rate each item regarding Game8.co's Quality of Articles.
Amount of information
Very Dissatisfied
Somewhat Dissatisfied
Fine
Somewhat Satisfied
Highly Satisfied
Frequency of updates
Speed of new information
Accuracy of articles
Understandibility of articles
Readability of sentences
×
Please rate each item regarding Game8.co's Usability of the Site.
Ease of finding information
Very Dissatisfied
Somewhat Dissatisfied
Fine
Somewhat Satisfied
Highly Satisfied
Loading Speed
Use of Color
Font Size
Visibility of Images
Easy to Understand Layout
×
Please rate each item regarding Game8.co's Message Boards, Comments.
Ease of Writing
Very Dissatisfied
Somewhat Dissatisfied
Fine
Somewhat Satisfied
Highly Satisfied
Readability
Ease in Finding Information
Comment Quality
Comment Quantity
Admin Response
×
Please rate each item regarding Game8.co's Site's new design.
Please rate our site's new design
Very Dissatisfied
Somewhat Dissatisfied
Fine
Somewhat Satisfied
Highly Satisfied
Do you think that the website's design change makes the site easier to use?
Has the new design made it easier for you to find information on the site?
Has the new design improved the overall visual appeal of the site?
How would you rate your overall satisfaction with the new design of the site?
×
How likely are you to recommend Game8 to someone you know?
Very Unlikely
0
1
2
3
4
5
6
7
8
9
10
Very Likely
If you have other opinions regarding potential improvement to the website, please share them with us. We would appreciate your honest opinion.
Note: This is a free response section, so you can proceed without entering anything.
Note: Please be sure not to enter any kind of personal information into your response.
Note: Please be sure not to enter any kind of personal information into your response.
×
Thank You
×
Thank you for participating in our survey! Your answers will help us to improve the quality of our website and services.
We hope you continue to make use of Game8.
We hope you continue to make use of Game8.
Close
Rankings
- We could not find the message board you were looking for.
Gaming News


![Forza Horizon 6 Review [Preview] | Beautiful Roads With a Whole Lot of Oversteer](https://img.game8.co/4460981/a7254c24945c43fbdf6ad9bea52b5ce9.png/thumb)
![Borderlands Mobile Review [Playtest] | The Same Borderlands Made Easy](https://img.game8.co/4465500/aac0c880a39ec5cd46073e49d18f3ed5.png/thumb)
Popular Games

Genshin Impact Walkthrough & Guides Wiki
Crimson Desert Walkthrough & Guides Wiki
Umamusume: Pretty Derby Walkthrough & Guides Wiki
Honkai: Star Rail Walkthrough & Guides Wiki
Monster Hunter Stories 3: Twisted Reflection Walkthrough & Guides Wiki
Wuthering Waves Walkthrough & Guides Wiki
The Seven Deadly Sins: Origin Walkthrough & Guides Wiki
Pokemon TCG Pocket (PTCGP) Strategies & Guides Wiki
Pokemon Pokopia Walkthrough & Guides Wiki
Zenless Zone Zero Walkthrough & Guides Wiki


Recommended Games
Fire Emblem Heroes (FEH) Walkthrough & Guides Wiki
Pokemon Brilliant Diamond and Shining Pearl (BDSP) Walkthrough & Guides Wiki
Super Smash Bros. Ultimate Walkthrough & Guides Wiki
Diablo 4: Vessel of Hatred Walkthrough & Guides Wiki
Cyberpunk 2077: Ultimate Edition Walkthrough & Guides Wiki
Yu-Gi-Oh! Master Duel Walkthrough & Guides Wiki
Elden Ring Shadow of the Erdtree Walkthrough & Guides Wiki
Monster Hunter World Walkthrough & Guides Wiki
The Legend of Zelda: Tears of the Kingdom Walkthrough & Guides Wiki
Persona 3 Reload Walkthrough & Guides Wiki


All rights reserved
© 2025 Obsidian Entertainment, Inc. Obsidian Entertainment, the Obsidian Entertainment logo, The Outer Worlds 2, and The Outer Worlds 2 logos are trademarks or registered trademarks of Obsidian Entertainment, Inc. All rights reserved.
The copyrights of videos of games used in our content and other intellectual property rights belong to the provider of the game.
The contents we provide on this site were created personally by members of the Game8 editorial department.
We refuse the right to reuse or repost content taken without our permission such as data or images to other sites.