
This survey will take about 1 minute.
Your answers will help us to improve our website.
Outer Worlds 2
On the Trail of the Traitor Walkthrough
This is a walkthrough for the On the Trail of the Traitor main quest in Outer Worlds 2. Read on for a complete On the Trail of the Traitor walkthrough, including the choices you can make and the rewards for completing the quest.
| ◀ Previous Mission | Next Mission ▶ |
|---|---|
| The Saboteur of Paradise | Fiends in High Places |
List of Contents
On the Trail of the Traitor Walkthrough
Click on a step to jump to its section in the walkthrough!
View the Order Missibe from Ruth Basar
| Walkthrough | |
|---|---|
| 1 | 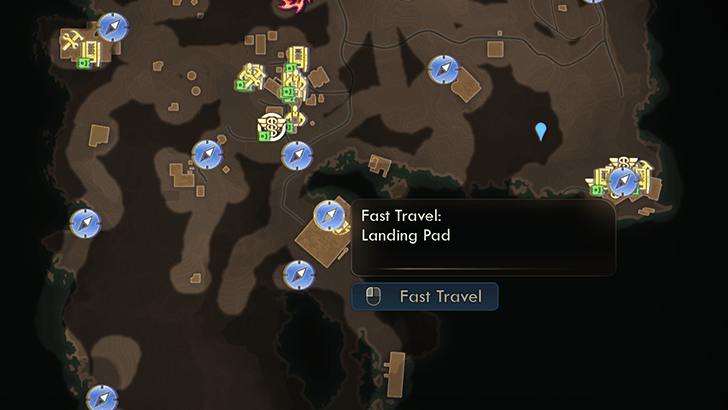 After the Vox Relay's crash in The Saboteur of Paradise, fast travel back to the Landing Pad. |
| 2 | 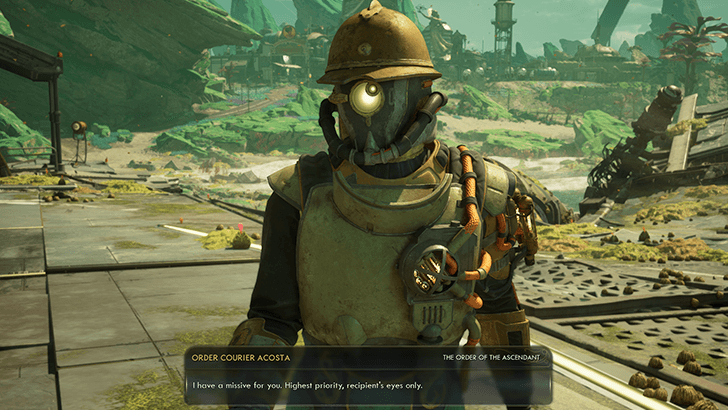 As soon as you load in and approach the ship, a courier from the Order of the Ascendant will stop you. Take the Order Missive quest item from him before hopping aboard the Incognito. |
| 3 |  Once you're aboard head over to the main deck central console (next to where Niles is standing). Insert the cartridge and listen to the message sent by Presiding Ruth Basar of the Order of the Ascendant. In the message, she'll ask you to meet with Abbot Newell in Golden Ridge and investigate radical splinter group that has infiltrated the Order. |
Go to Golden Ridge in Dorado
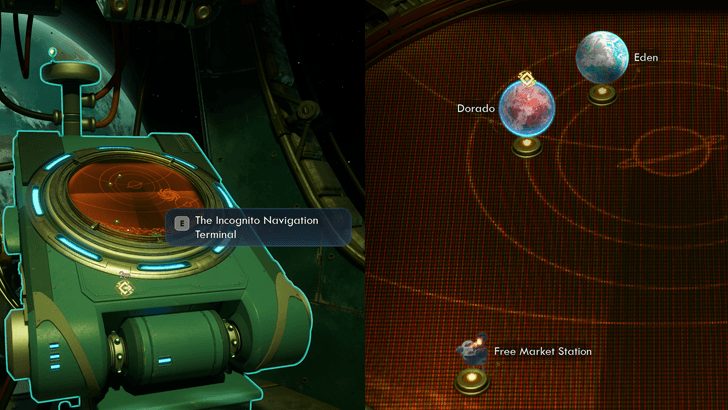
After listening to the message, head over to the bridge of the Incognito and interact with the astrogator. You'll notice that you have new locations unlocked: Dorado and Free Market Station. Since Golden Ridge is in Dorado, select that as your destination and buckle up.
Seek Out Abbot Newell in Matriarch's Mercy
| Walkthrough | |
|---|---|
| 1 | As soon as you land in Golden Ridge, head down to the Incognito hangar and select the companions that'll accompany you. Once you're ready, exit the Incognito. |
| 2 | 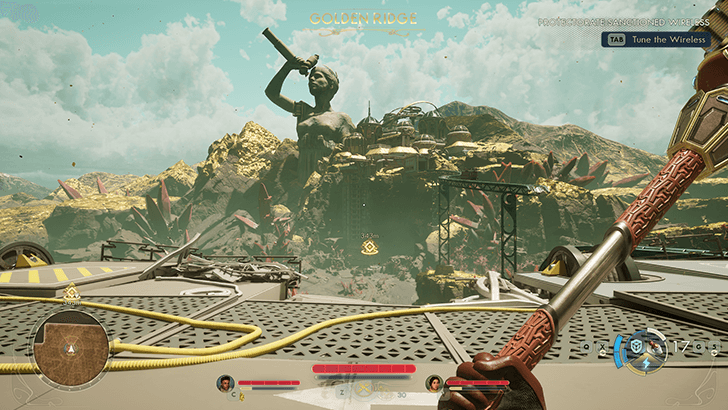 At the landing pad, you'll see Matriarch's Mercy off to the distance. Instead of going towards it, go left and follow the ruined walkway around the side of the ship to reach the back of the landing pad. Midway through, an explosion will go off in the distance. Ignore it for now since you'll quickly learn what it's about once you reach Matriarch's Mercy. |
| 3 | 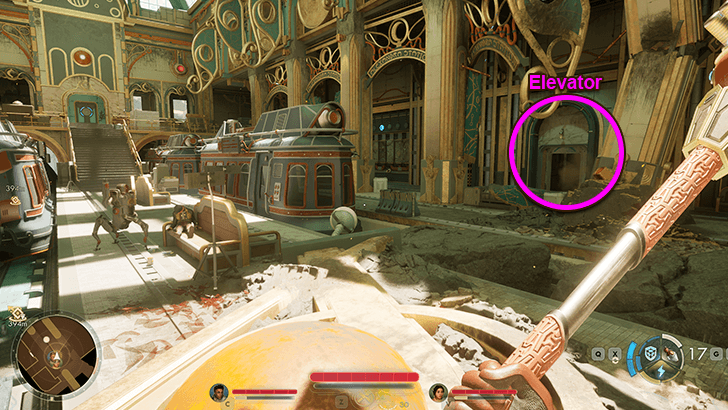 From the back of the landing pad you should see the ruins of the Alexandra Station. Head inside then cross over the train tracks to reach the elevators on the other side. Note: Before going down, you'll see a set of murals next to the elevator. If you interact with it, you'll trigger the collectible quest, The Pursuit of the Partite Pentaptych. |
| 4 | 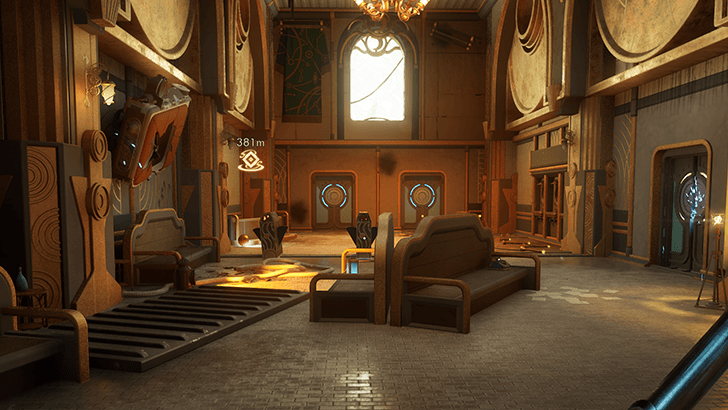 Upon reaching the ground floor, exit through the doors of the station to reach the Alexandra Station Entrance. |
| 5 | 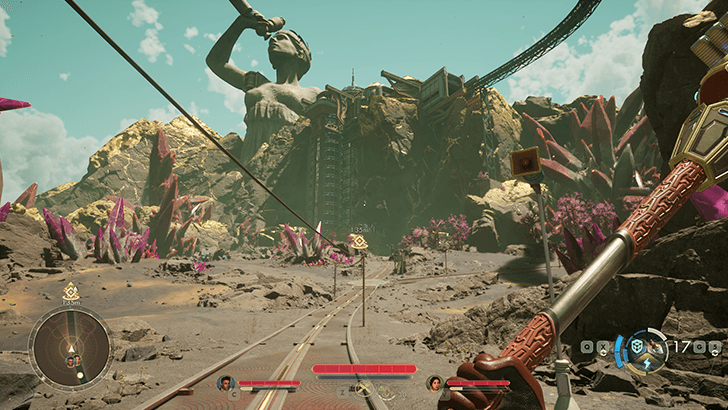 From here, simply follow the road towards the large human statue that you see off in the distance to reach Matriarch's Mercy. |
| 6 | 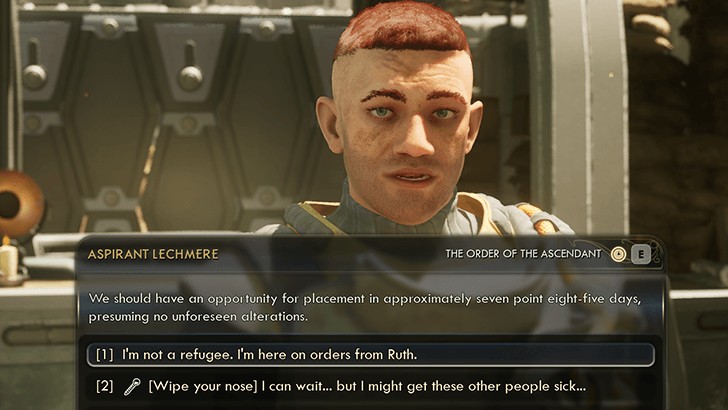 At the entrance of Matriarch's Mercy, you'll be stopped by Aspirant Lechmere. This won't require any skill checks. Choose the option I'm not a refugee. I'm here on orders from Ruth and you should be let in with minimal fuss. |
| 7 | 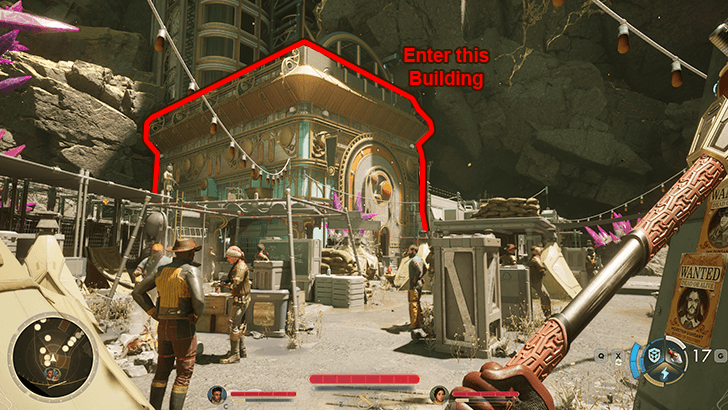 Once you're inside, you'll see a large building connected to an elevator that leads up to the a structure high above the rocks. Go here to find Abbot Newell. |
| 8 |  Speak to Abbot Josef Newell about why you were sent here and he'll ask you to investigate two locations: ① Zyranium Manufactory VII ② N-Ray Range Before you leave, he'll give you the Writ of Investigate Inquiry needed to enter Zyranium Manufactory VII. Note: During this same conversation, you'll also get the task called The Invocation of Inconclusive Evidence. |
Investigate Zyranium Manufactory VII
For the purposes of this guide, we'll start by investigating Zyranium Manufactory VII first since it's nearer. This investigation will trigger a mandatory side quest called Beginning at the Endpoint.
| Beginning at the Endpoint Objectives | |
|---|---|
| 1 | Gain Entry to Zyranium Manufactory VII |
| 2 | Speak to Initiate Ava in Operations |
| 3 | Investigate Central Processing |
| 4 | Investigate Refinement Logistics |
| 5 | Return to Initiate Ava and Confront Svoboda |
▼ Jump to Next Main Quest Step ▼
Gain Entry to Zyranium Manufactory VII
| Walkthrough | |
|---|---|
| 1 | 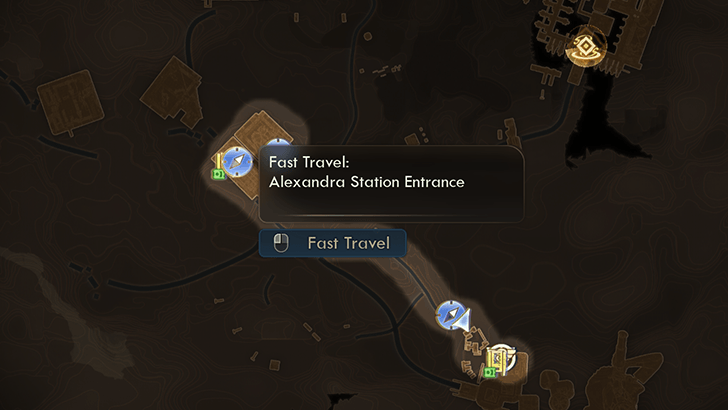 To save you time, fast travel back the Alexandra Station Entrance. |
| 2 | 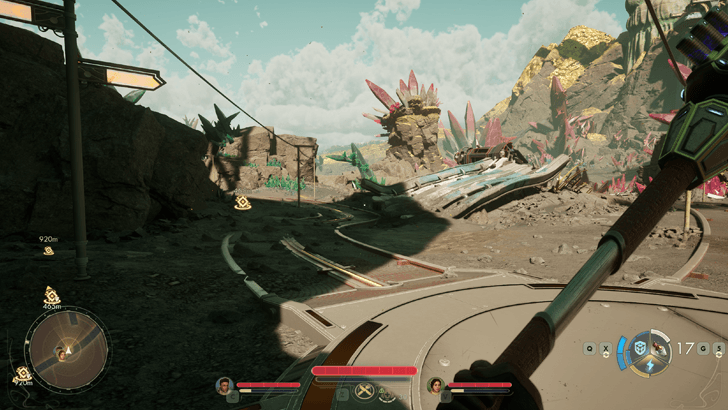 Once there, walk towards Matriarch's Mercy again by following the road. However, once you reach a fork, take the path to your left. Follow this road to reach Zyranium Manufactory VII. |
| 3 | 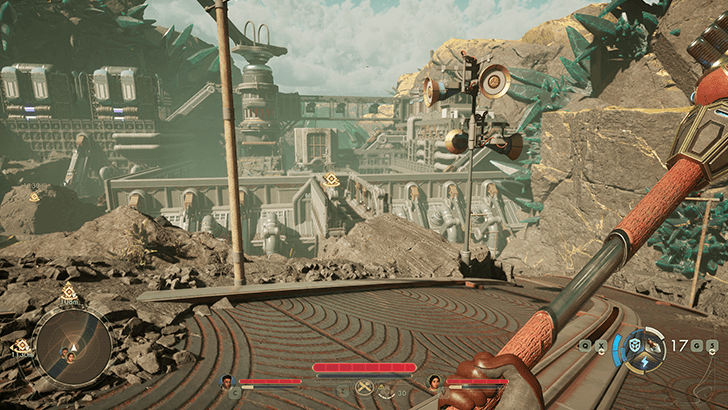 During your approach, you'll be warned away from entering. Press forward until you reach the gates of the manufactory. |
| 4 | 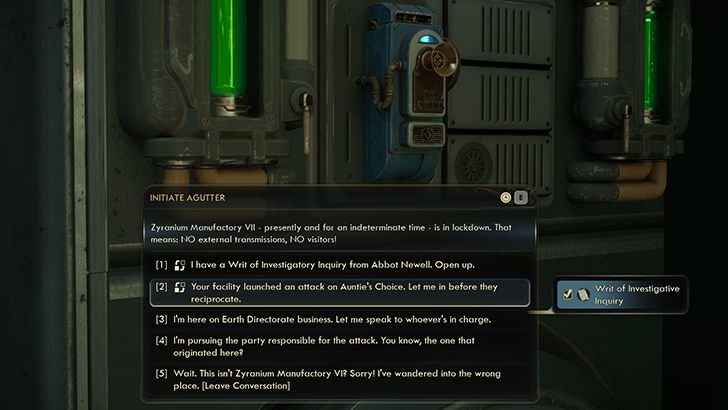 Look for the Intercom on the right side of the gate. Use it to speak to Initiate Agutter. Present your Writ of Investigate Inquiry to get them to open the door. This triggers the side quest (which you now have to do) called Beginning at the Endpoint. Complete this to fulfill the required objective of On the Trail of the Traitor. |
| 5 | 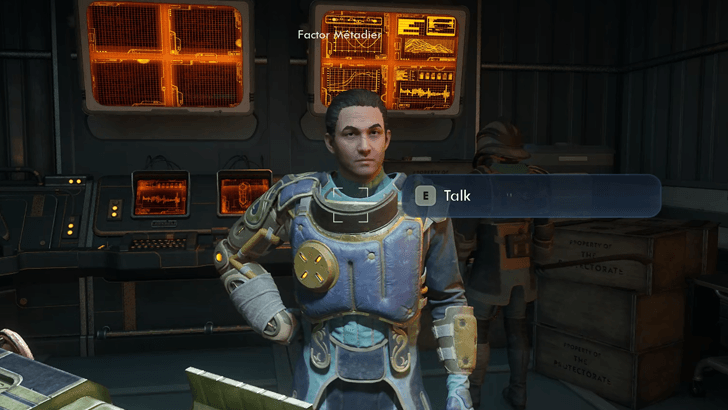 After passing through the door, head inside the small structure to your immediate left and speak to Factor Metadier. Show him the Writ of Investigate Inquiry and he'll give you the green light to head into Zyranium Manufactory VII. Exit the structure and go through the double doors leading to the manufactory elevator. Use it to go down to the manufactory floor. |
| 6 | 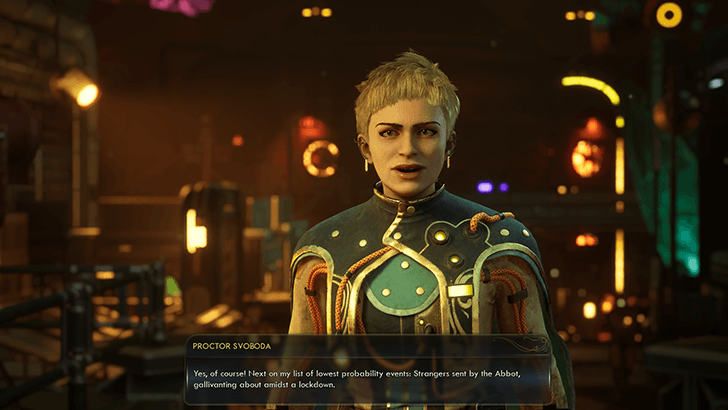 After passing through the decontamination room, head onto the main manufactory floor and speak to Proctor Svoboda. Tell her you're here to investigate what happened without committing to blaming Initiate Alva. |
Speak to Initiate Ava in Operations
| Walkthrough | |
|---|---|
| 1 | 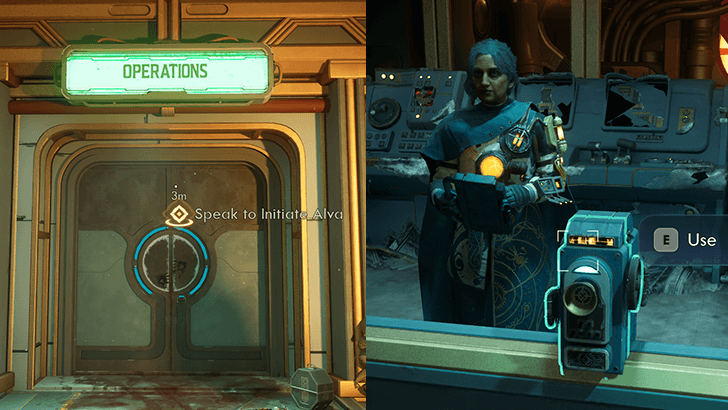 Once Svoboda lets you go, head towards the Operations building. Inside, go over to the large glass window with an intercom and speak to Initiate Alva. Tell her you're here to investigate and she'll cooperate with you by unlocking the Records Repository nearby. Note: You can examine the bodies of the dead Order troops using Observation 5 or Medical 5 but this isn't required to complete the quest. |
| 2 | 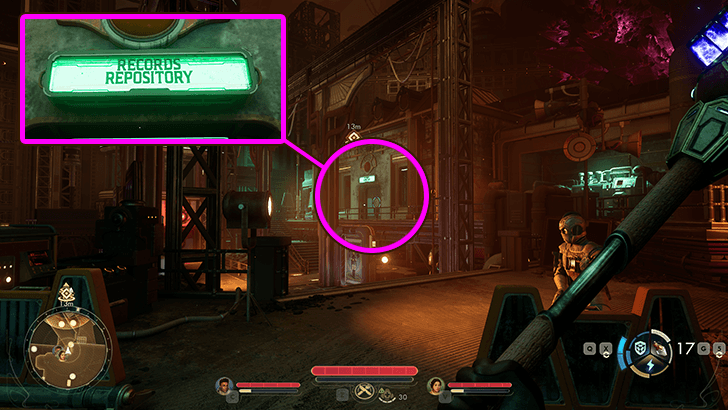 When ready, head over to the Records Repository. |
| 3 | 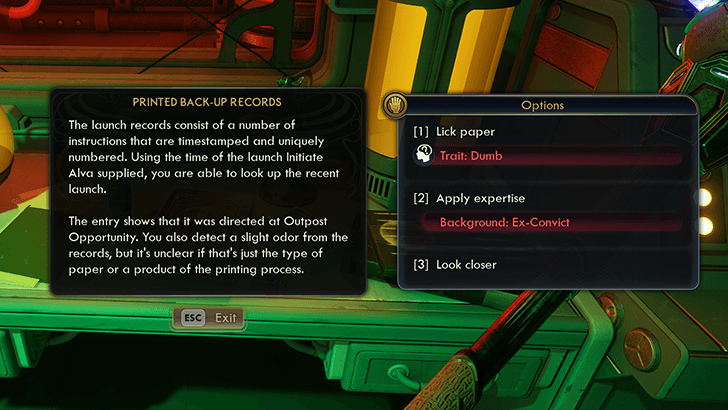 On one of the tables, you'll find the Printed Back-Up Records. Examine it to learn more about what happened. You can choose 1 of 3 options to examine it: ① Lick Paper (Trait: Dumb) ② Apply expertise (Background: Ex-Convict) ③ Look closer There will be multiple checks like this during this quest. However, you won't really lose out if you always choose the Look closer option for all of them. |
| 4 | 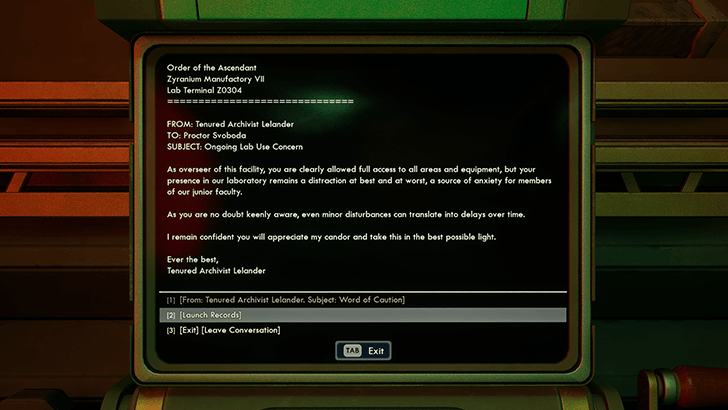 After examining the records, head over to the Terminal and read all the memos stored on it. |
| 5 | 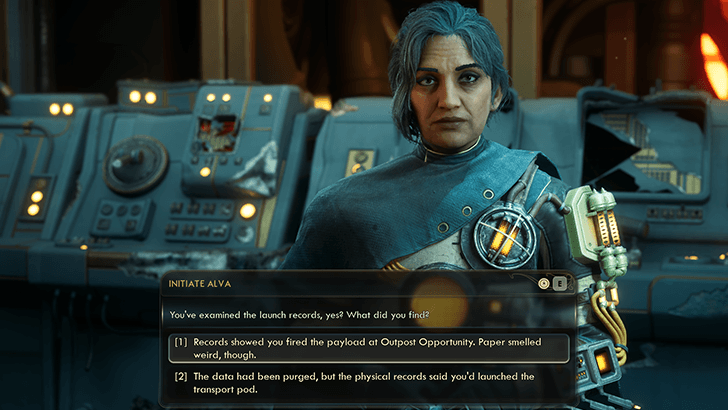 Return to Initiate Ava in Operations to find her talking to Factor Metadier. Report your findings back to both of them and they'll agree that something is fishy. This triggers your next set of objectives. Metadier will tell you to investigate Central Processing while Ava will direct you towards Refinement Logistics to investigate the zyranium leak. |
Investigate Central Processing
| Walkthrough | |
|---|---|
| 1 | 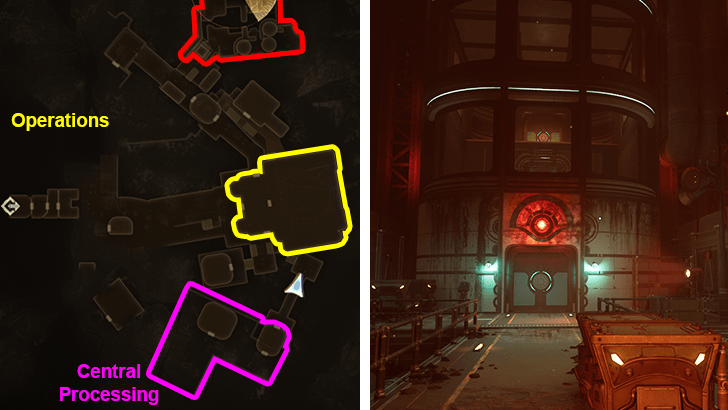 To start, head over to Central Processing first. Take the elevator up to reach it. |
| 2 |  At the top, you'll be met by multiple Webweavers. Kill all of them to clear the area. |
| 3 |  Next, head over to the structure with the jammed door. Speak to Archivist Conkling and he'll offer to answer your questions as long as you get him out. |
| 4 | 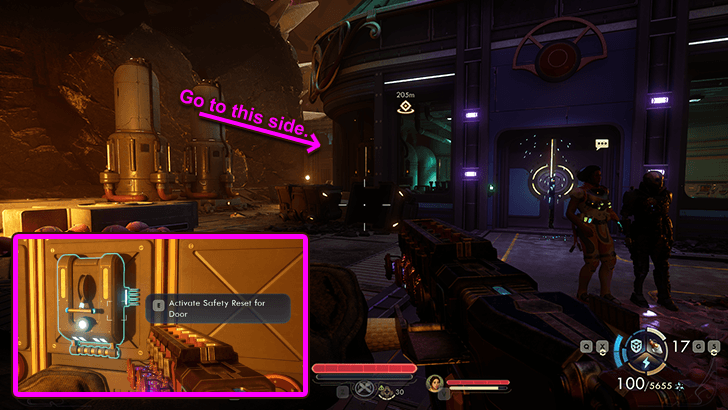 If you have Trait: Brawny or Engineering 3, you can unjam the door right then and there. If you have neither, head over to the left side of the building. Flip the switch here to override the door. |
| 5 | 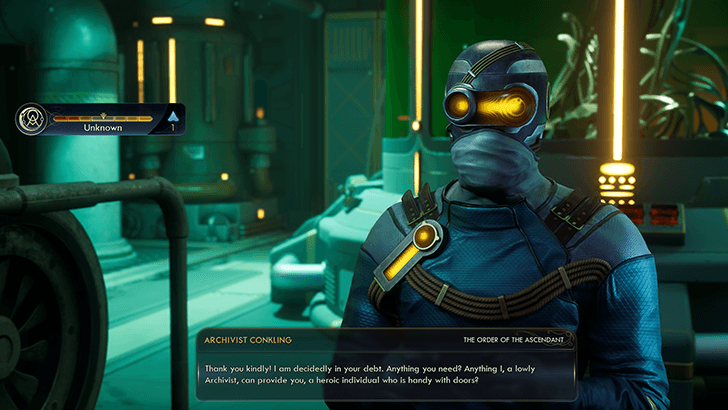 Once the door is open, speak to Archivist Conkling and ask him about the incidents leading up to the launch of the Zyranium bomb. |
| 6 | 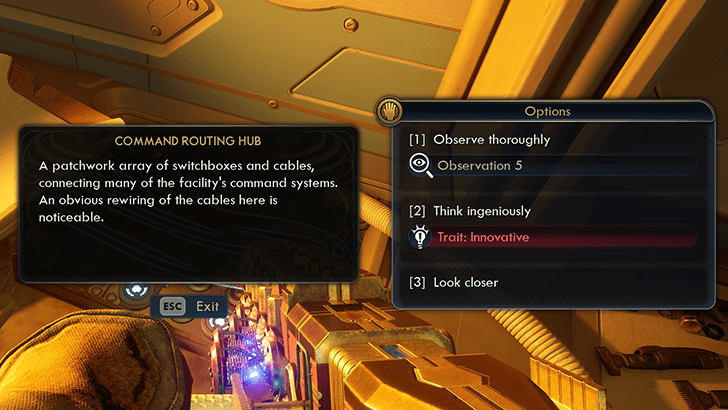 Next, head over to the back of the room and look for a broken floor panel with exposed wiring. Examine this Command Routing Hub to learn more about what happened. Again, you can use Observation 5 or Trait: Innovative to get more info, but Look closer works just as well. |
| 7 | With more info secured, head back out towards the elevator. You'll get ambushed by more Webweavers in transit, so deal with them before taking the elevator back down to the operations floor. |
Investigate Refinement Logistics
| Walkthrough | |
|---|---|
| 1 | 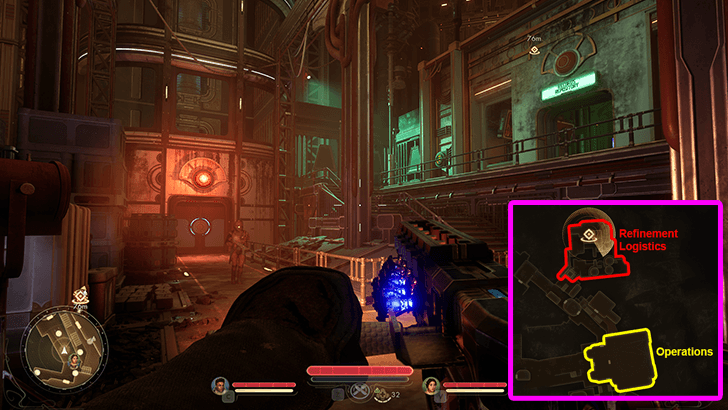 Next, head over to the opposite end of the manufactory and use the elevator there to reach Refinement Logistics. |
| 2 | 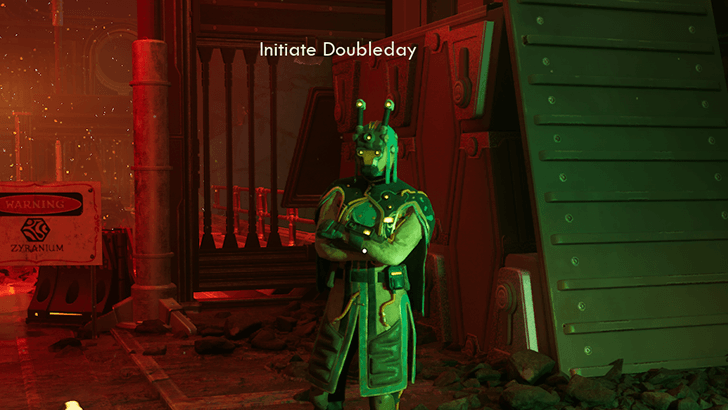 Once you arrive at the site of Zyranium gas leak, speak to Initiate Doubleday. Strike a deal so that you get the High Security Access Card as a reward for stopping the Zyranium leak. |
| 3 | When ready, head up the stairs and platform your way over to the Refinement Logistics control room. |
| 4 | 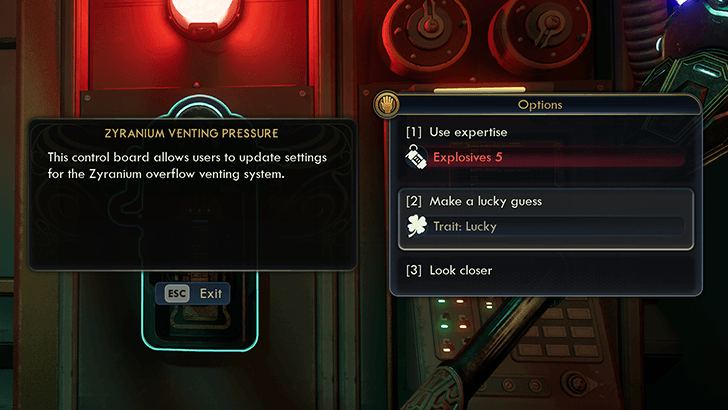 Before venting the zyranium, examine a nearby wall panel to learn what happened in the moments leading up to the disaster. Similarly, you can use Explosives 5 or Trait: Lucky to learn more about the overflow, but Look closer works just fine. |
| 5 | 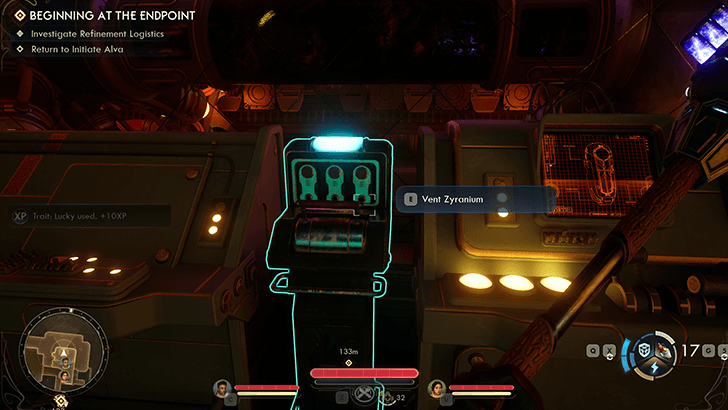 Finish up your investigation before flipping the nearby switch to vent the Zyranium. |
| 6 | 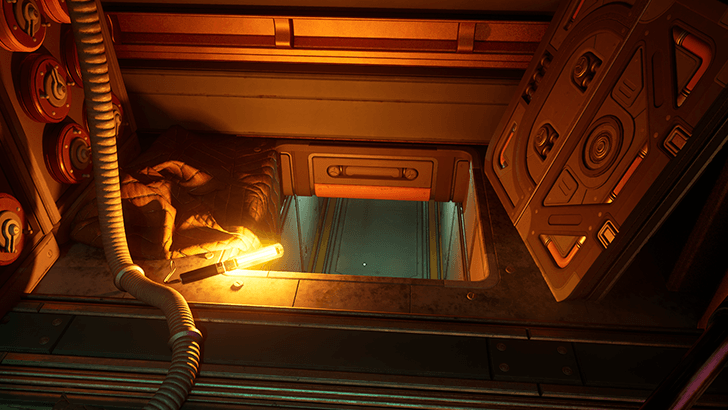 Exit through the nearby floor vent. |
| 7 | 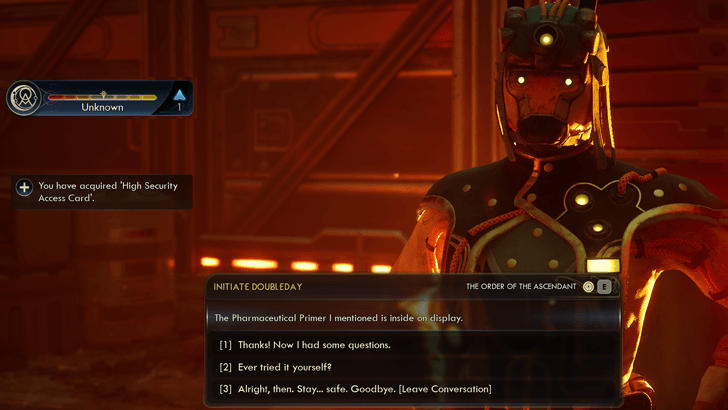 As soon as you emerge from the vents, make your way back to Initiate Doubleday to receive your reward. |
| 7 | Now, you can explore a bit more or simply return back to Operations to initiate the end of the quest. |
Return to Initiate Ava and Confront Svoboda
| Walkthrough | |
|---|---|
| 1 | 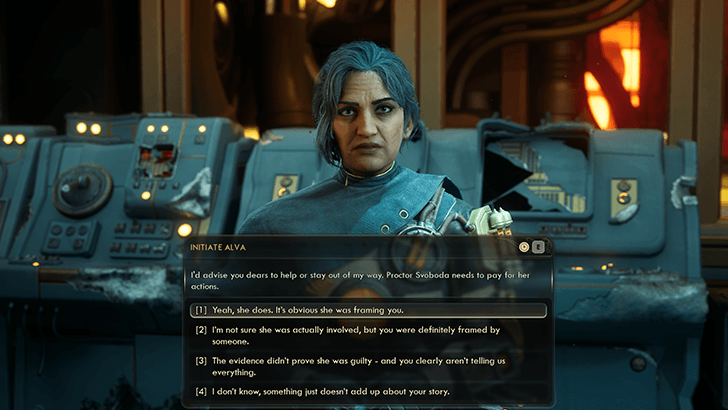 Once you present your evidence to Initiate Ava, she'll reveal that she was, in fact, Marisol all along. She concludes that Svoboda was the culprit and you can either side with her or side with Svoboda. WARNING: While valid, you do not get any benefits for siding with Svoboda. It's better for everyone that you side with Marisol. |
| 2 | 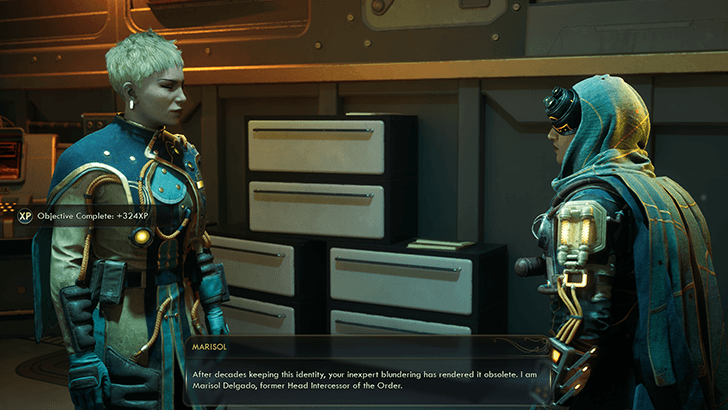 After confirming that you agree with Marisol, you'll immediately be teleported to Svoboda's Office where Marisol executes her. In doing so, you gain access to her Terminal. |
| 3 | 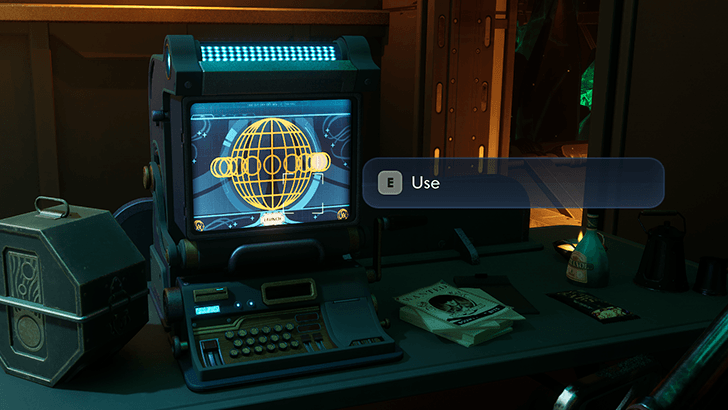 Use the deceased Svoboda's terminal to unlock the way to the Toxic Effluvium Repository. Make sure to read everything on the terminal as well to get an optional objective related to Abbot Newell and Seer Wiley. |
| 4 | 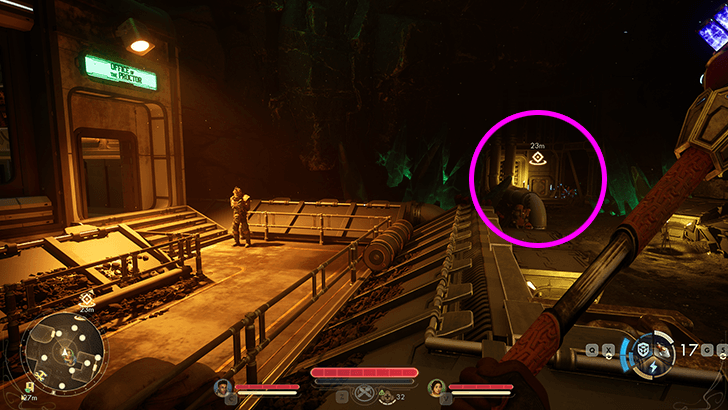 Exit the Proctor's Office then head over to the nearby vent. Go through it to reach the Toxic Effluvium Repository. |
| 5 |  From here, enter through the double doors to find the terminal detailing the correspondence between Svoboda and De Vries. Finding the terminal concludes the side quest, Beginning at the Endpoint. This room will also have a special weapon called the Zyranium Ray. Make sure to pick it up before leaving. |
| 6 |  Once you exit the terminal interface, Marisol will confront you. Let her tag along or join your crew to unlock her as a companion. |
| 7 | 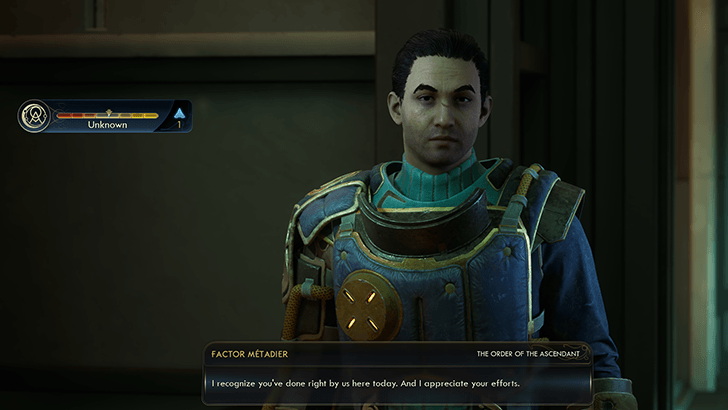 Exit the Toxic Effluvium Repository then start making your way back up to the surface. Factor Metadier will speak to you before the elevator to rewards you with +1 Order rep before you leave. This concludes your investigation. Head back up and exit the manufactory to continue. |
Investigate the N-Ray Range
After you finish investigating the Zyranium Manufactory, your next stop is the N-Ray Range. To reach this side of the map, you'll have to pass through the Decommisioned Autonomous Extractorium off to the west of Golden Ridge.
Inside the range, speak to Exemplar Foxworth to trigger the accompanying main quest Discrete Mathematics, which you must complete for this objective.
▼ Jump to Next Main Quest Step ▼
Speak to Exemplar Foxworth Inside the N-Ray Range
| Walkthrough | |
|---|---|
| 1 | 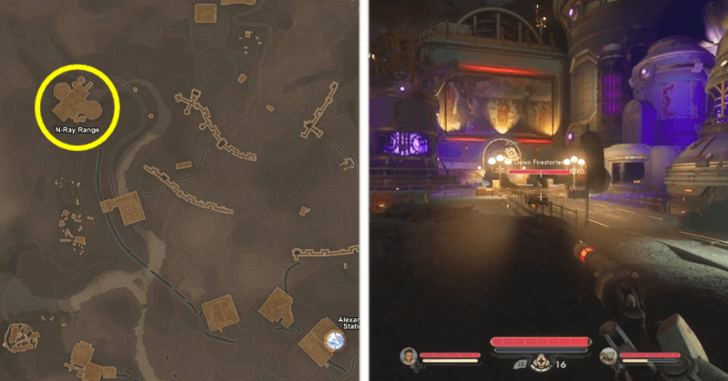 Head towards the N-Ray Range, located on the far northwest corner of Golden Ridge. From the Zyranium Manufactory, follow the path and take a sharp turn right towards a dirt road. This will lead you to the trenches of Golden Ridge. |
| 2 |  The trench nearby is manned by Foreman Trenton. Below him is a tunnel with a locked gate containing a Rejuvenation Converter helmet mod. The gate can be opened with Explosives 8 or Lockpick 8. Walk pass the trenches and cross the road to the two large post nearby. |
| 3 | From here, head northwest by following walking through the open war zone. Be warned that this area is full of Zyranium Mantisaur Drones and a Zyranium Mega Mantisaur. |
| 4 | 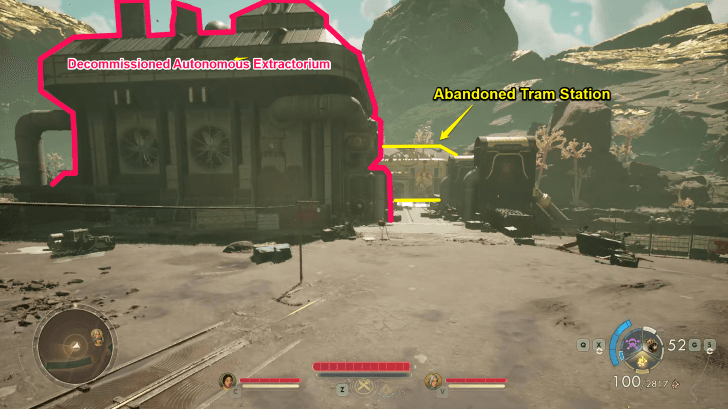 Once the wildlife is dealt with, follow dirt path until you see an outpost with a few soldiers and Scrapers locked in battle. Help them out then follow the road on the way to the N-Ray Range. Continue towards the crashed train and eliminate the Scrappers nearby. Then head left to the Decommissioned Autonomous Extractorium building. Inside the Extractorium, you'll hear Aza, a potential companion, screaming to be let out. Helping her will trigger the companion quest The Dawn of a Glorious Betrayal. Exit the Extractorium once you're finished. |
| 5 | Up ahead will be an abandoned tram station, enter the building and climb up the stairs, go right and walk along the tracks until you reach the crashed train at the end. Look right and there will be a cave nearby with the corpse of Trooper Baylor and a few Order Suppressors. One of the Order Suppressors has a Mass Distributor helmet mod you can loot. Once done, exit the cave and continue onto a dirt path that will lead you to a bridge. Cross the bridge to reach the N-Ray Range. |
| 6 | 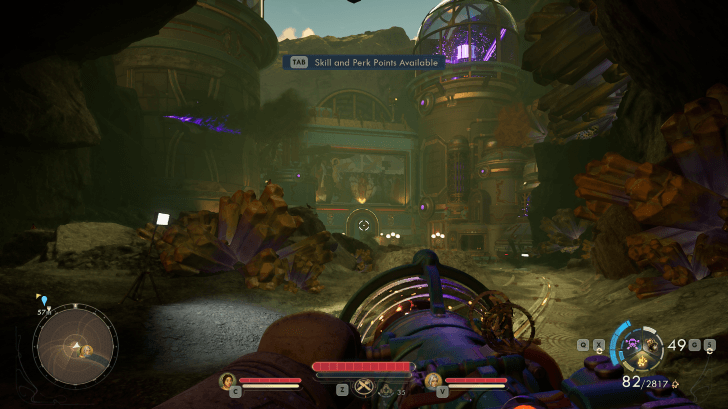 There will be a few hostile cultists by the entrance that you have to take out before you can begin. |
| 7 | 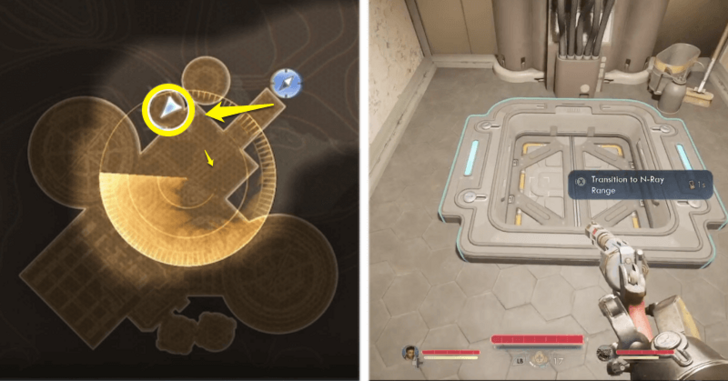 Next, you must enter through a hatch located to the right of the entrance, since the main door is sealed. |
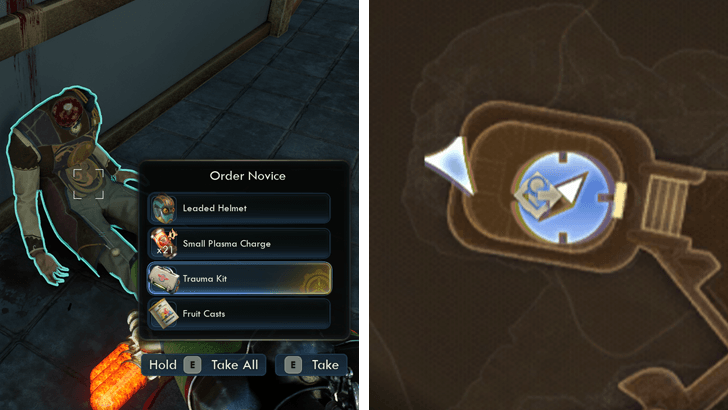
| 8 | 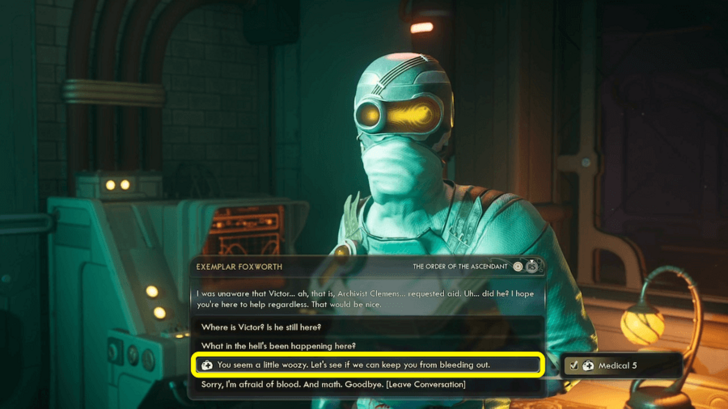 Speak to Exemplar Foxworth on the first floor inside. You can either give her a Trauma Kit or pass a Medical 5 check to treat her wounds and save her life. Saving her is required if you want to spare Victor Clemens later on (without having to pass a Speech check). Plus, you get a +1 Rep increase for the Order by helping. Afterward, she will instruct you to locate the N-Ray Scanner gadget, which is vital for the rest of the mission. Once the conversation ends, the Discrete Mathematics quest will officially begin in the journal quest log. |
Find the N-Ray Scanner
| Walkthrough | |
|---|---|
| 1 | 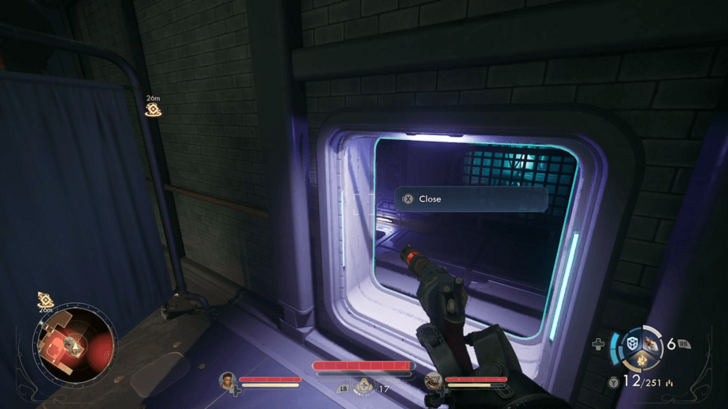 Behind Foxworth is a vent. Open and crouch through it, then follow the ramp upwards. |
| 2 | 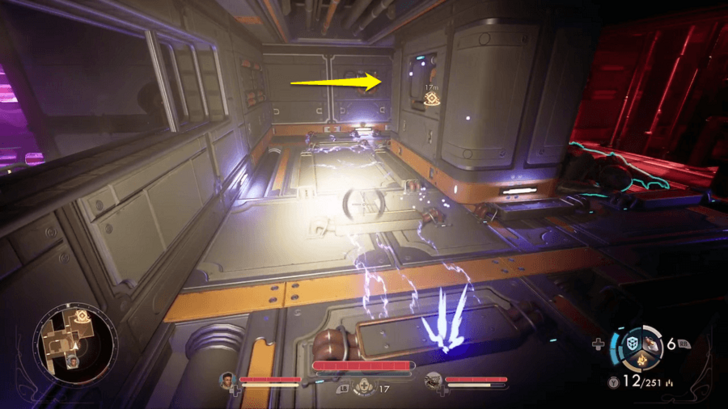 You will come across an electric circuit with a dead body nearby. The current moves in a clockwise pattern, so wait for an opening and move through when it passes you. Continue forward to reach the next vent opening. |
| 3 | 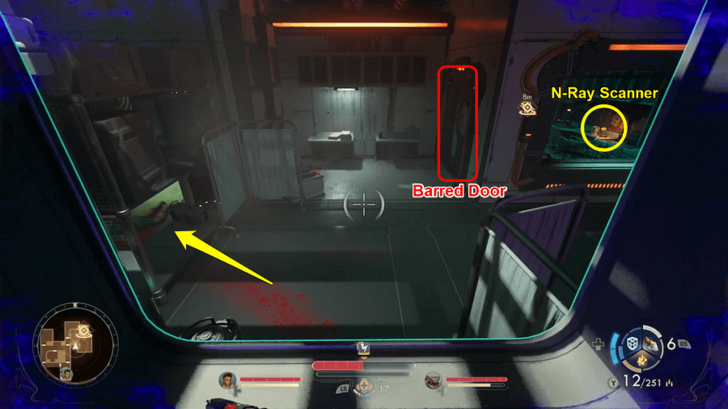 Drop down into the next room and crawl underneath the space on the left. Continue forward towards the N-Ray Scanner. |
| 4 |  Collect the N-Ray Scanner in the room. |
| 5 | 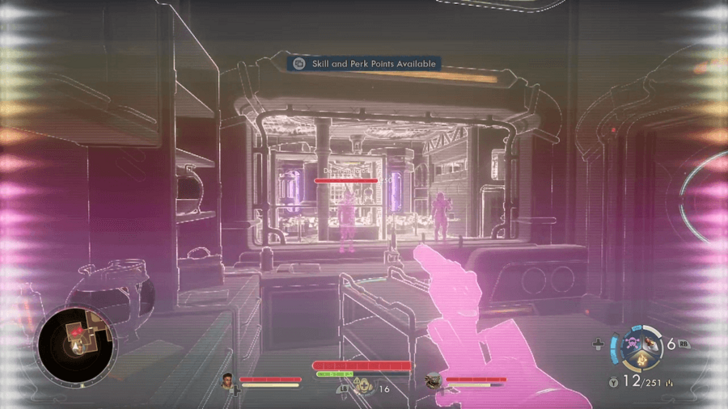 With your new Gadget, you can activate it and now see the two invisible dawn cultists in the next room. Kill them and return towards Foxworth. |
Solve the N-Ray Range Puzzle
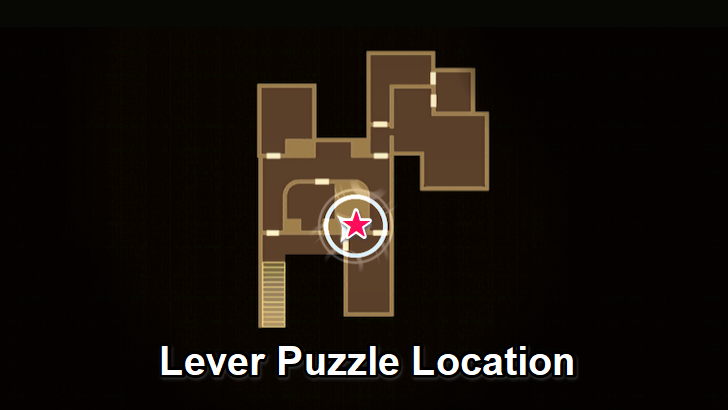
| Puzzle Location and Solution | |
|---|---|
 |
|
| Lever Solution | 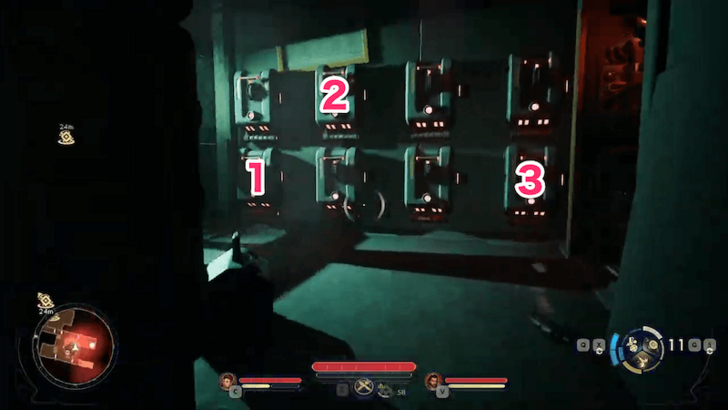 |
| N-Ray Scanner View | 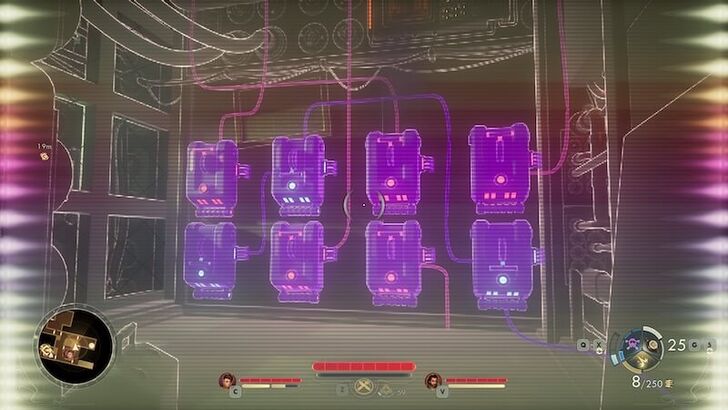 |
In the central room of the floor is a lever puzzle that opens the door next to Foxworth. Pull the lever on the bottom left, the second top lever, then the bottom right to power the door.
This is clued in by using the N-Ray Scanner, revealing the wiring of the levers. The three levers with wires running toward the door where Foxworth is are the ones you need to switch on.
Eliminate the Invisible Cultists Using the Scanner
With the door open, head on deeper through the range and use the N-Ray Scanner to reveal the enemies, and clear them out.
After clearing the enemies, locate the vent in the corner of the room to proceed to the next area. The path inside is straightforward.
Go Through Victor's Terminal
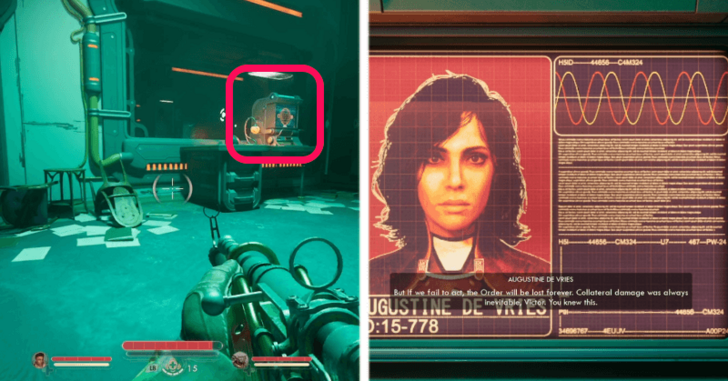
Accessing Victor’s terminal is crucial if you plan to spare him later when you meet him at the end of the quest. After exiting the crawlspace, the Terminal is on the table to your right.
Make sure to go through everything on the terminal, including De Vries' message and Victor's personal logs. This is also where you can find more info on Abbot Newell's secret for On the Trail of the Traitor.
Rescue Novice Archivist Trammell
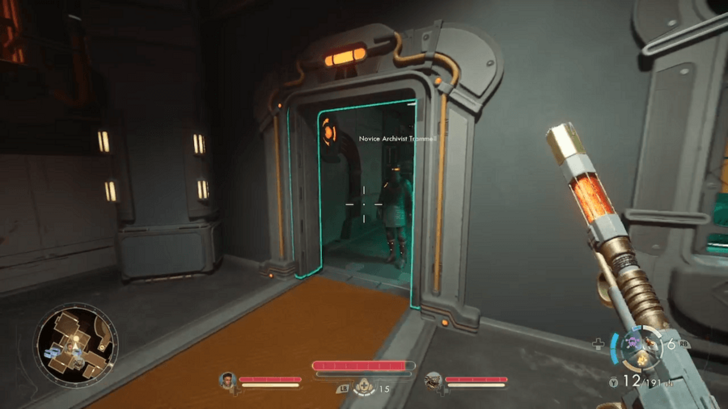
Go past the terminal and through the next rooms, fighting your way through the invisible cultists. You will find Trammell hiding in his lab. Once all nearby enemies are defeated, he will come out, and you can speak to him.
Exhaust his dialogue to get info about Victor and earn +1 Rep with the Order of the Ascension for rescuing him.
Get Past the Invisible Traps
| Walkthrough | |
|---|---|
| 1 | 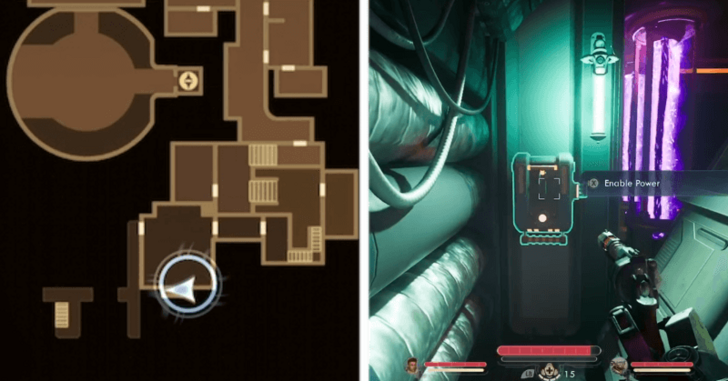 Head up the stairs towards Victor's location, and hit the power switch to open the door. Do not rush in yet, as the path ahead is littered with invisible traps that you can spot out using the N-Ray Scanner. |
| 2 | 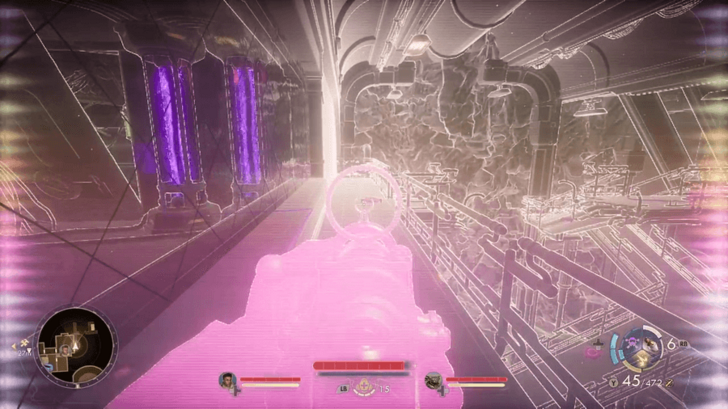 Enter the next room and shoot the invisible mine on the catwalk, next to the corpse. You could alternatively disable the mines with Explosives 3. |
| 3 | 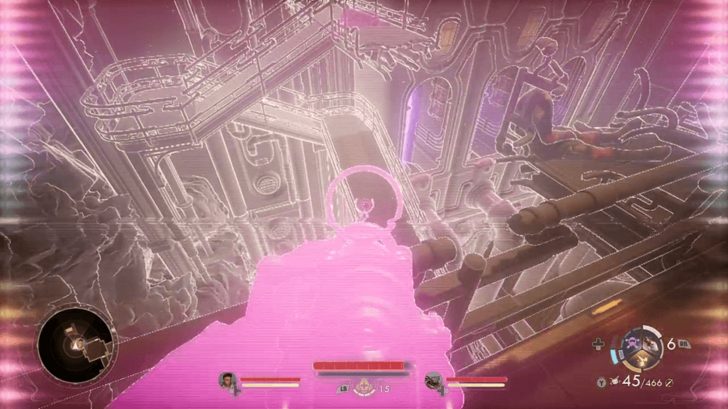 Shoot the mine below you, in between the gap of the bridge. After it's gone, drop down to the catwalk below. |
| 4 | 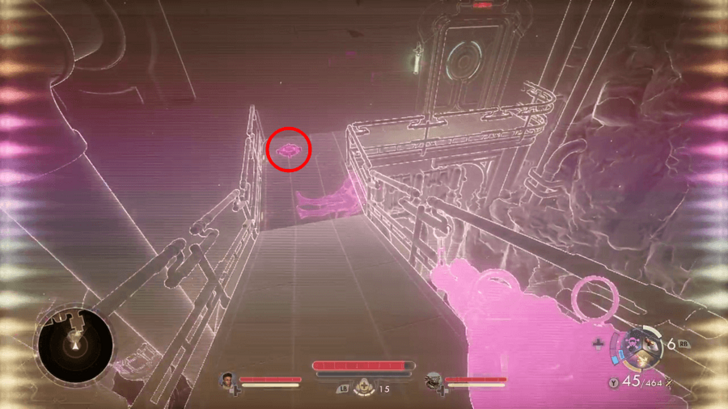 Destroy one more mine before opening the door to its right. |
| 5 |  Past the door are more invisible mines and tripwires. Shoot the two mines first, and then carefully jump over each tripwire. You can also disable the tripwires with Explosives 5. |
| 6 | 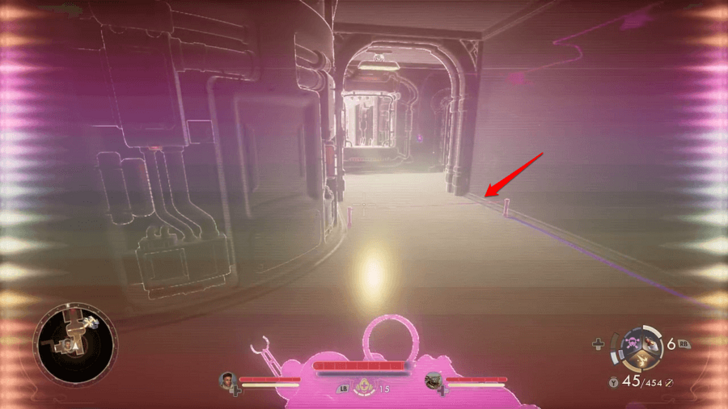 There is one more tripwire to jump over before finding the lazer room. |
| 7 | 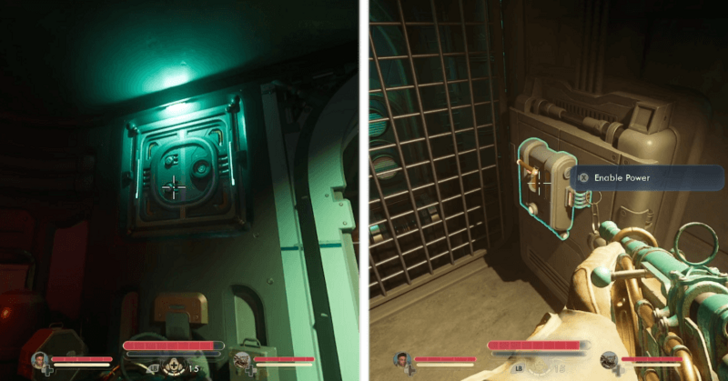 Behind the door towards the laser trap is a vent. Head inside and flip the switch there to open the door towards the lasers. |
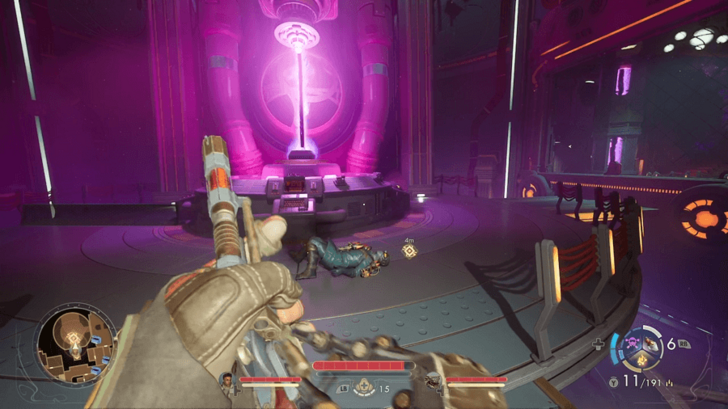
| 8 | Follow the lasers as they trace backward, then drop down to the safe space on the far right. Shoot the mines in the area, then flip the power switch to disable the lasers. Once the lasers are disabled, head down the elvator shaft past the hall to confront Victor Clemens. |
Option 1: Killing Victor Clemens
Killing Victor is straightforward. Choose any of the hostile dialogue options, and he will charge at you with his suicide bomb vest but will go down after taking minimal damage. You can loot the Maintenance Hatch Key from his body and continue the main quest.
Option 2: Sparing Victor Clemens
| Steps to Make Victor Stand Down | |
|---|---|
| 1 | To convince Victor to stand down without Speech 5, you must meet these certain conditions before the encounter: 1. Have Marisol in the party. 2. You saved Exemplar Foxworth with a Trauma Kit or Medical 5 check. 3. You have the required info from Victor's terminal. 4. Novice Archivist Trammell is alive. |
| 2 | 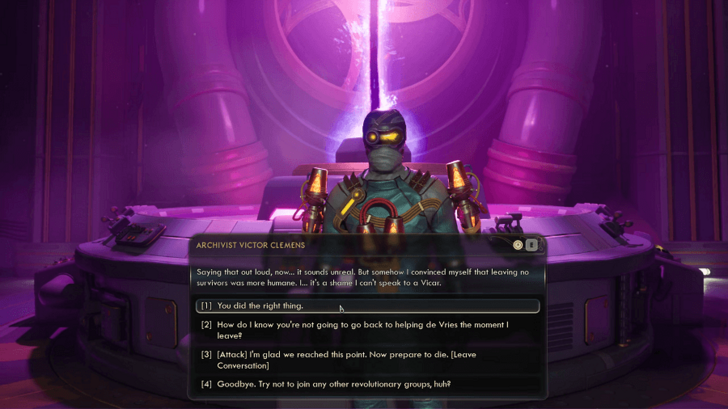 When speaking to Victor, choose the following non-hostile dialogue options during the conversation to spare him: 1. There's always a choice. Stand down and nobody needs to get hurt. 2. I thought you were a scientist, not a martyr. Is this how you want to be remembered? 3. Wait a minute... de Vries put you up to this. (Requried info from terminal) 4. Would pure scientific certainty have saved your co-worker? No. That was me. (Saved the scientists) 5. I think I finally understand you. You're afraid to live with what you've been doing here. 6. Someone afraid of living to see the consequences of his actions. After selecting the final option above, Victor will stand down and you are free to continue. He will hand you the Maintenance Hatch Key himself. |
| 3 |  If you have Aza in your party, she will offer to torture Victor for more information. If you agree, Victor will just die. |
Confront Seer Wiley at the Monastery's Observatory
As soon as you exit the N-Ray Range, fast travel back to Matriarch's Mercy. This segment will involve infiltrating the Alexandra Monastery. Stock up on supplies and ammo before you ascend.
Ask Abbot Newell About His Secret
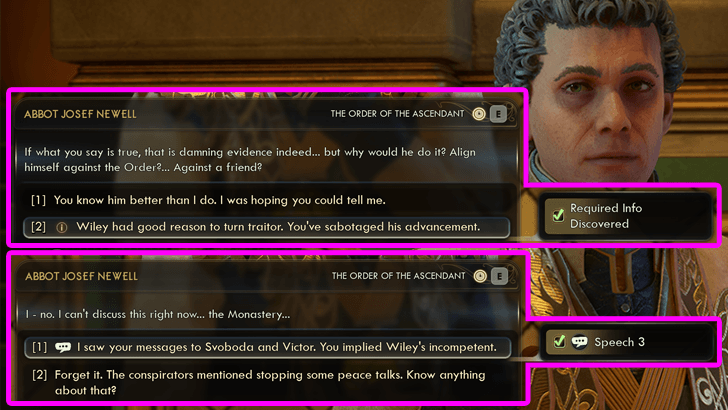
Before heading up to the Alexandra Monastery, speak to Abbot Newell and ask him about his secret using the information you gathered at the Zyranium Manufactory and N-Ray Range. You'll need to pass a Speech 3 check but this step is integral if you want to convince Seer Wiley to stand down later on.
Head Up to the Alexandra Monastery
Once you're ready, interact with the terminal and call down the elevator. Then, use it to head up to the Alexandra Monastery. Before doing anything on arrival, exit the elevator then head to the back of the structure. You'll find a corpse here with a Trauma Kit you can loot.
Get Past the Prescient Garden's Locked Door
| Walkthrough | |
|---|---|
| 1 | 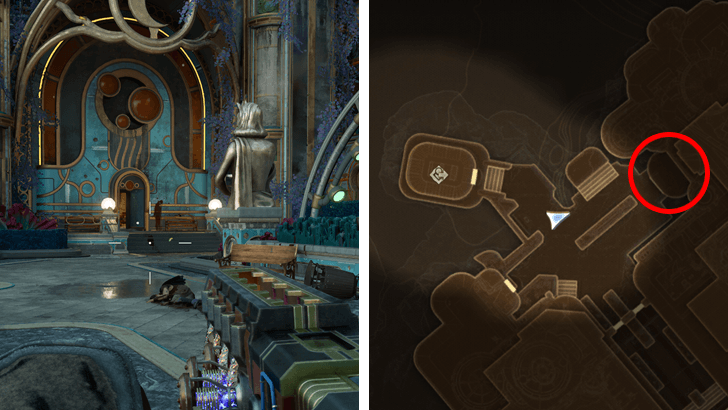 Once you're ready, head east towards the only open door in the area. This brings you into the entrance hall of the Prescient's Garden where Seer Wiley can be seen on the big screen. |
| 2 | 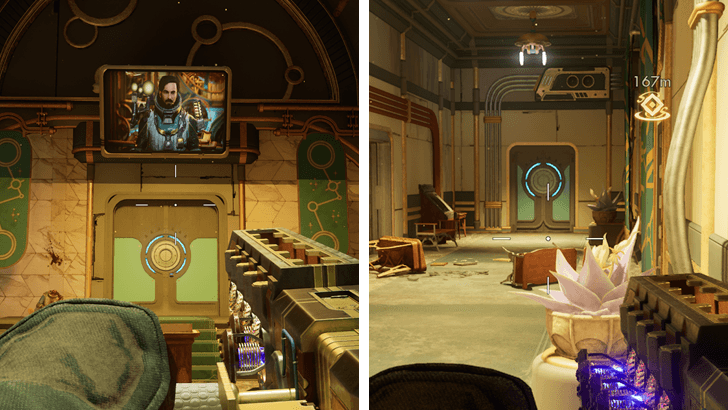 Go through the double doors here then hang a right. Exit through the door at the end of the hallway to reach the actual Prescient's Garden area. |
| 3 | 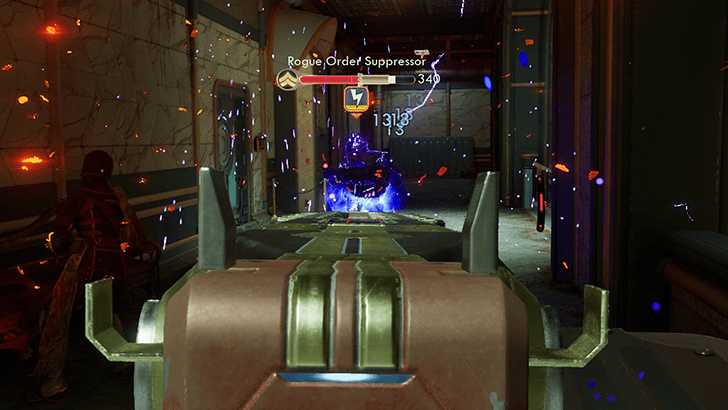 Before you can start puzzling out how to unlock the door, you'll first need to deal with the Rogue Order soldiers here. Kill them all before continuing. Tip: This level introduces the self-healing gadgets that the Order deploy. Make sure to destroy them to prevent your enemies from healing back up to full. |
| 4 | 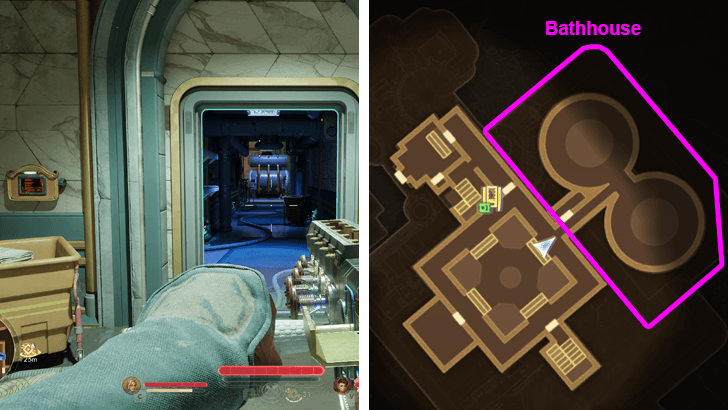 Once all enemies in the garden are dead, head over to the Bathhouse area to the northeast. There are 4 guards here you'll have to kill if they hadn't already aggro'ed earlier. |
| 5 |  When all the guards are dead, look for a circuit breaker on one of the walls along with a datapad on a stool right next to it. Read the datapad to continue. Note: If you have Hack 8 then you can interact with the circuit breaker directly to open the door. Otherwise, continue on to step 6. |
| 6 | 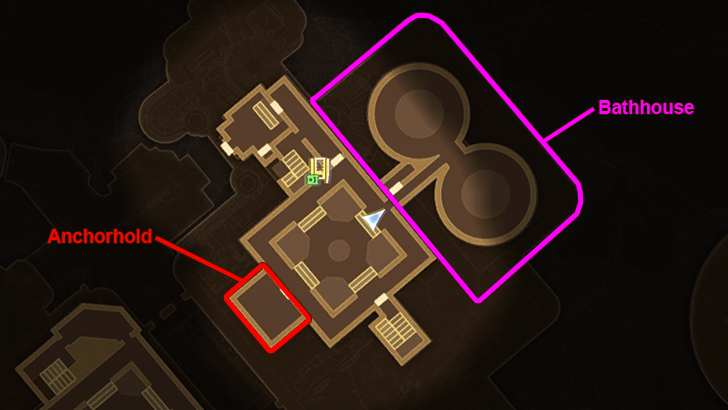 The datapad mentions a book that'll allow you to fix the breaker. Head over to the Anchorhold (southwest room from the garden courtyard) in order to get it. |
| 7 | 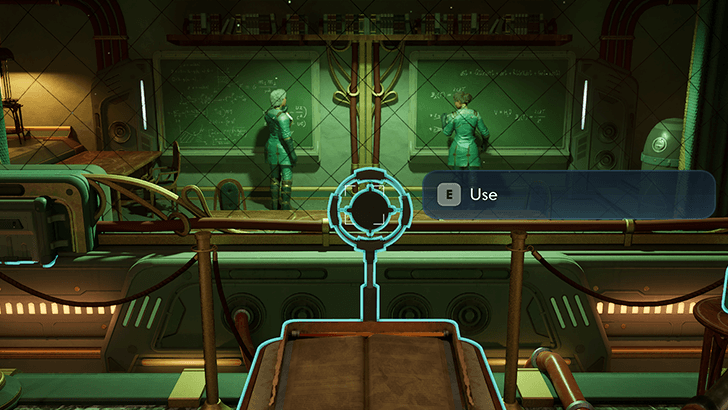 Inside the Anchorhold you'll find two anchoresses in the middle of a scholarly debate. Interrupt their conversation by interacting with the mic and ask them for the book called the Essential History of Mechanized Doors. Anchoress Brun will say that she'll give it to you after their debate so sit back and allow them to continue (chiming in when necessary). |
| 8 | 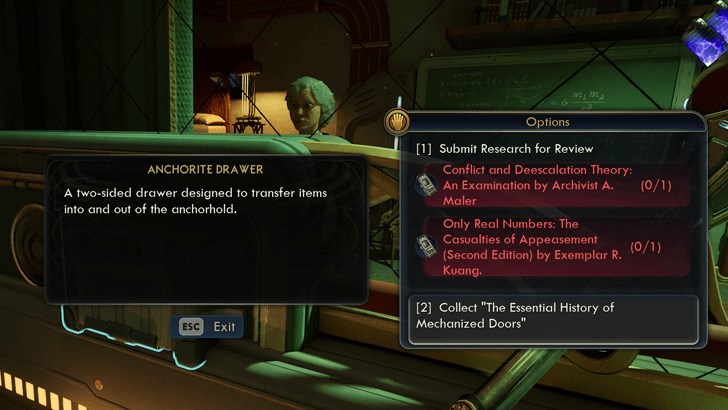 Midway through the conversation, they'll ask you for a favor. Accept it to get the book delivered quicker. Once the conversation ends, Anchoress Brun will walk over to the Anchorite Drawer and drop the book that you need inside. Collect it before heading back to the Bathhouse. |
| 9 | 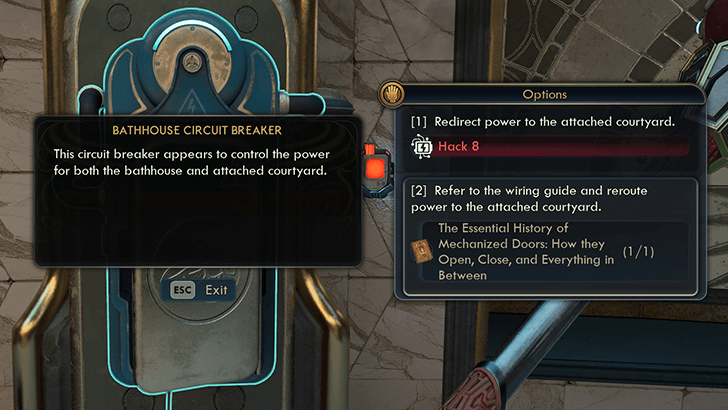 Interact with the Bathhouse Circuit Breaker and use the Essential History of Mechanized Doors to reroute the power back to the locked doors in the garden. |
Go to the Applied Sciences Quadrant
| Walkthrough | |
|---|---|
| 1 | 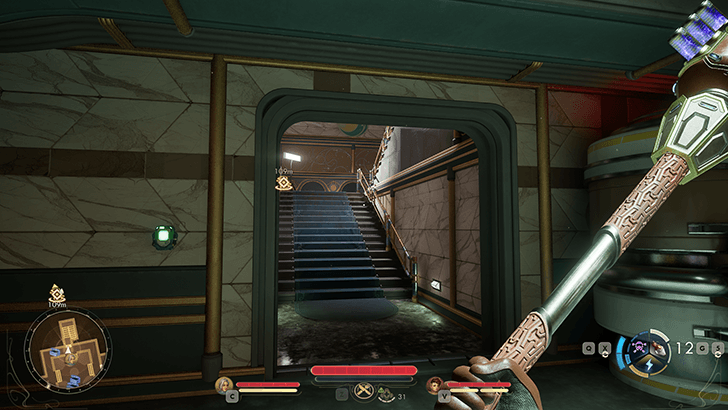 Backtrack to the now open garden doors and head up the stairs to reach the second floor. Your goal now is to reach the Applied Science Quadrant (that is, the building opposite the Prescient's Garden). |
| 2 | 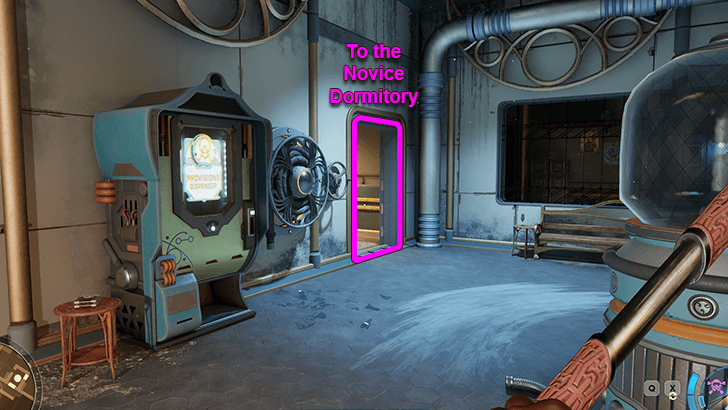 At the top of the stairs, hang a left to see a vending machine and an open doorway. Head through the doorway to reach the hallway that takes you to the Novice Dormitory. |
| 3 | 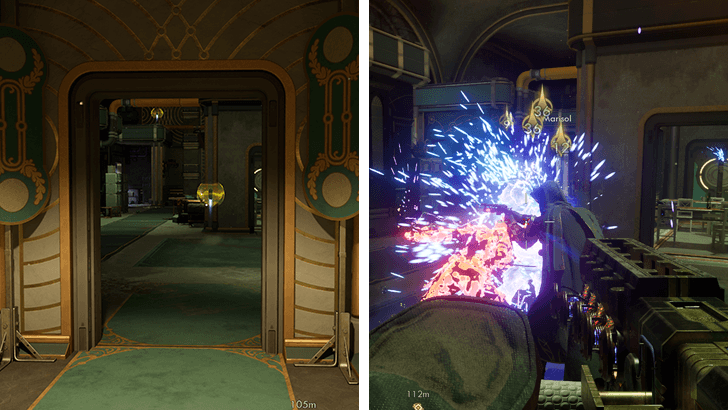 Enter the Novice Dormitory. Inside, you'll find two Order troopers. Kill them before exiting through the door at the opposite end of the dorm. Deal with the soldier that jumps you before continuing. |
| 4 | 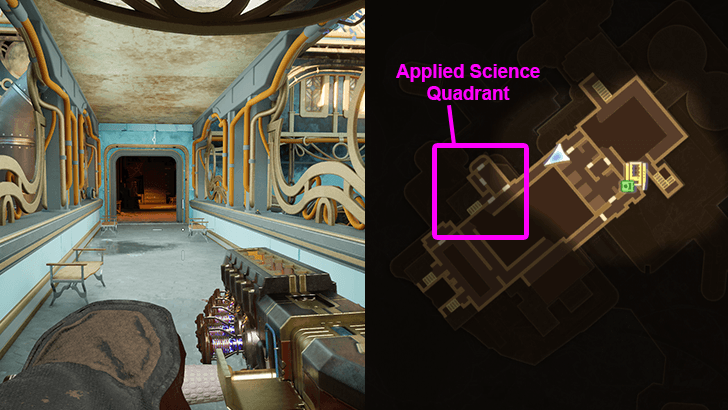 After exiting the Novice Dormitory, go right to see the walkway connecting the Prescient's Garden to the Applied Science Quadrant. Make your way over to the next building to bring yourself one step closer to the Observatory. |
| 5 | 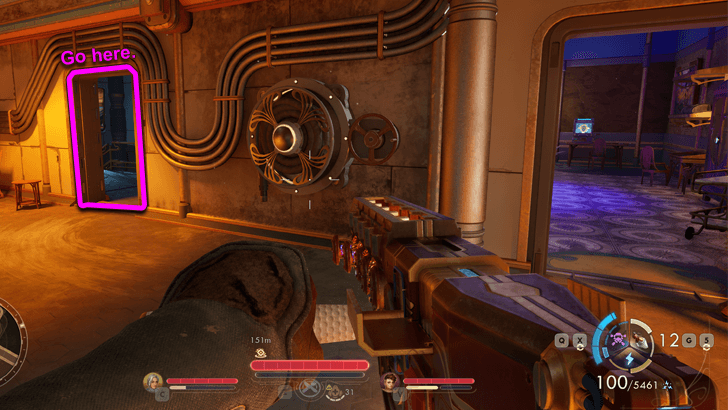 The 2nd floor of the Applied Science Quadrant will greet you with 2 doors. One leads to the room of Abbot Newell and the other leads to a set of stairs that take you down to the first floor. Take the stairs to continue. Note: Abbot Newell's room will have some loot and a terminal you can check out for more info (req. Hack 8 or Science 8). |
| 6 | 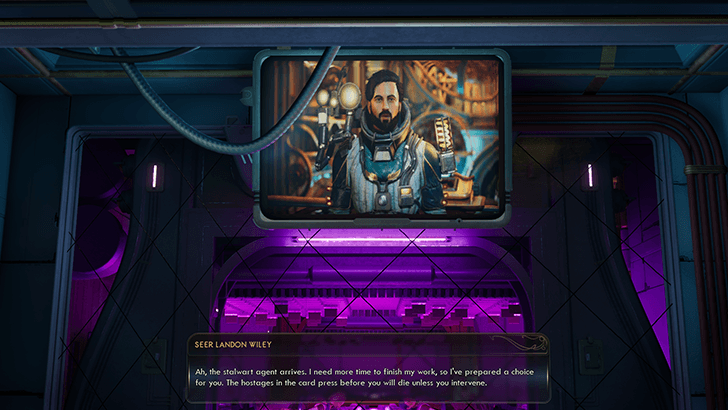 Keeping heading down, past the lobby of Applied Science until you reach the basement of the building. You'll know you're in the right room if you get interrupted by a cutscene where Seer Wiley talks to you via one of the big screens. |
Save or Leave the Hostages
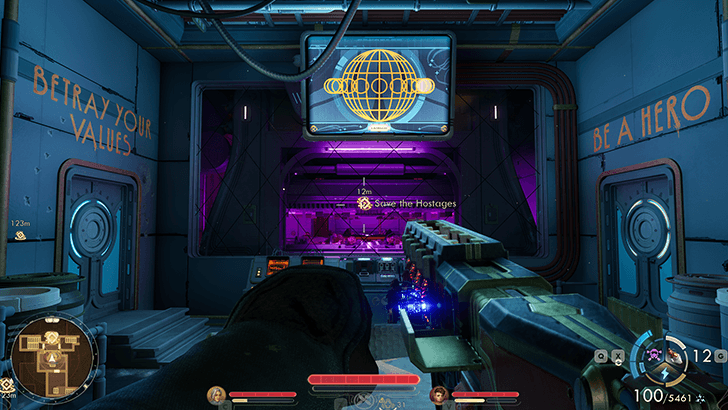
During this next segment, you'll be given a choice: save the hostages or leave them to die. We recommend saving the hostages because the negative consequences aren't that dire.
If you save the hostages, you'll get +3 Faction Rep with the Order at the cost of having to fight more automechs during the next main quest. If you leave them to die, you get -3 Faction Rep with the Order, instead.
| How to Save the Hostages | |
|---|---|
| 1 | 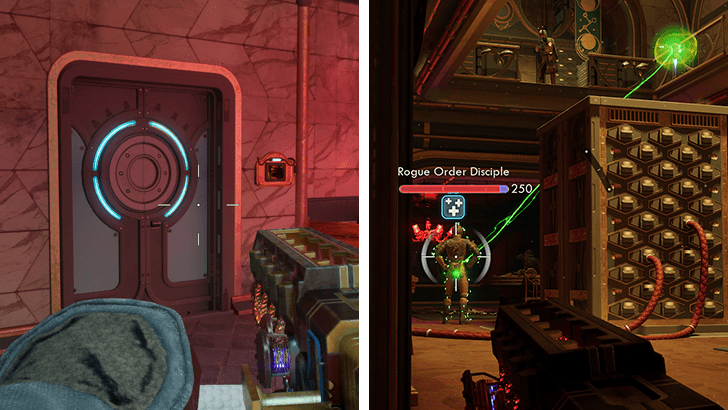 To start, head over to the Special Collections library. Kill all of the Order troops here before heading up to the 2nd floor. |
| 2 | 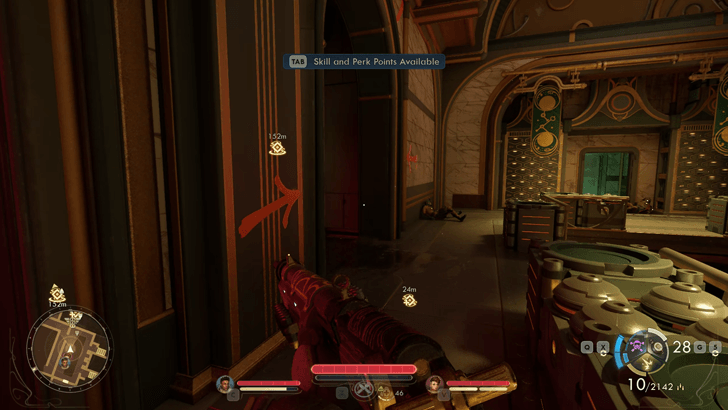 At the 2nd floor, you'll notice an open doorway with arrows pointing towards it. Exit through that to reach the start of the Rube Goldberg puzzle. |
| 3 | To start, step on the first pressure plate adjacent to the large, multi-colored ball. This raises the metal gate blocking the ball, allowing it to roll forward. Repeat until you go through all 3 pressure plates. Then, use the hole on the ground nearby to drop down to the first floor. Shoot out the boxes blocking the ball, before flipping the nearby switch twice to get the ball across. Finally, step on the last two pressure plates to get the ball to roll down onto the safe in the floor below. This unlocks the safe, allowing you to get the keycard needed to save the hostages. |
| 4 | 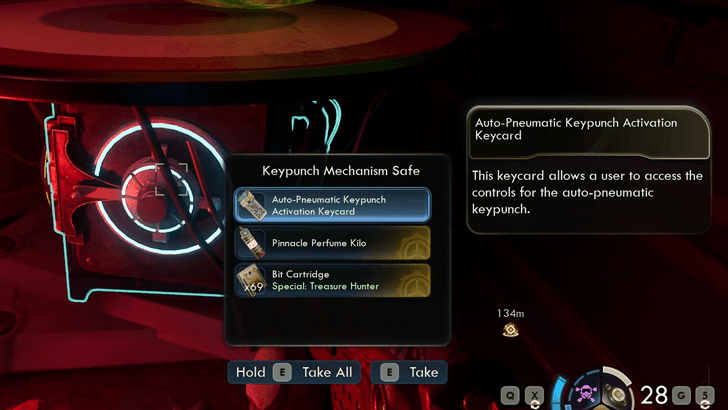 Take the keycard to the console right in front of the hostages. Slot it in then flip the switch to trigger the final decision. |
| 5 | 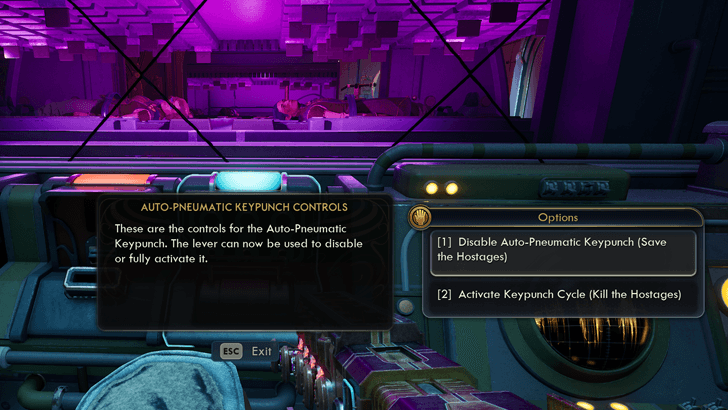 Here, you are given a final confirmation. Choose to save the hostages to get that bonus faction rep and XP. |
Should You Save the Hostages or Not?
Open the Observatory Doors by Ringing the Bells
| Walkthrough | |
|---|---|
| 1 | 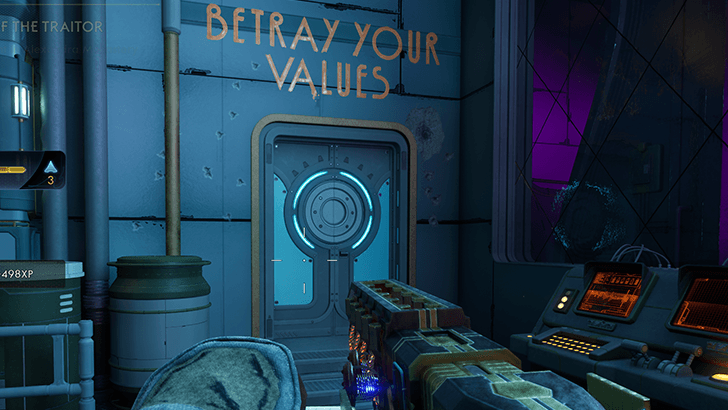 After saving (or ignoring) the hostages, head through the door marked by the Betray Your Values text. This will take you up to the Convergent Harmony Courtyard - the final area right before the Observatory. |
| 2 | 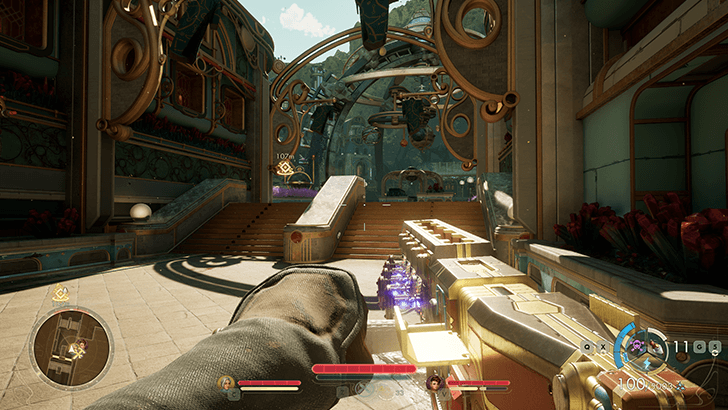 Upon arriving, you'll notice quite a few Order troops waiting for you. Kill them all before moving up to the front of the Observatory. |
| 3 | 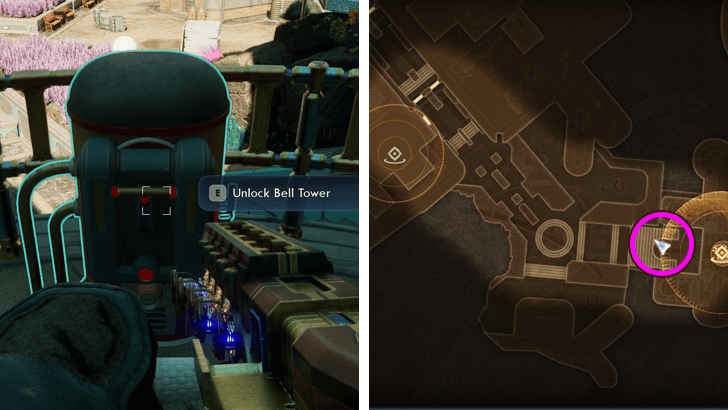 The door to the Observatory will be locked and it'll only open after you ring two of the bell towers in the courtyard. Turn around and look for a nearby switch that opens the first bell tower. |
| 4 | 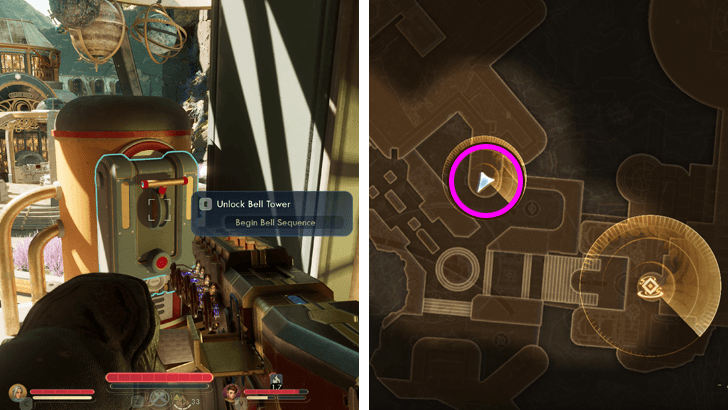 Enemies will start flooding out of the first bell tower and its adjacent building. Kill them all before going up and flipping the switch of the first bell tower. |
| 5 | 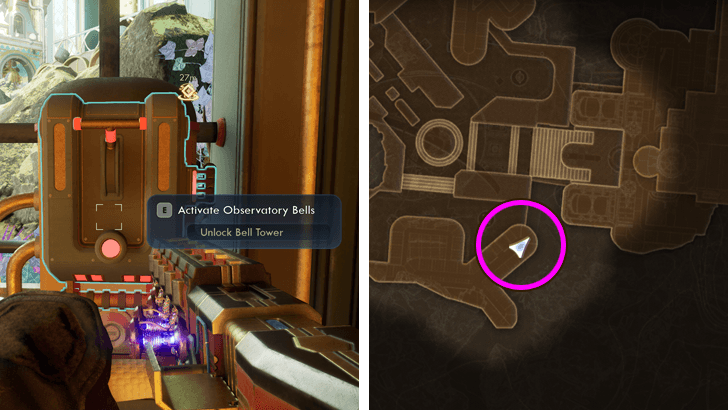 Immediately after flipping the switch, the second bell tower will open up. Similar to the first, a flood of enemies will spawn in. Kill them all before heading up and flipping the switch of the second bell tower. |
| 6 | 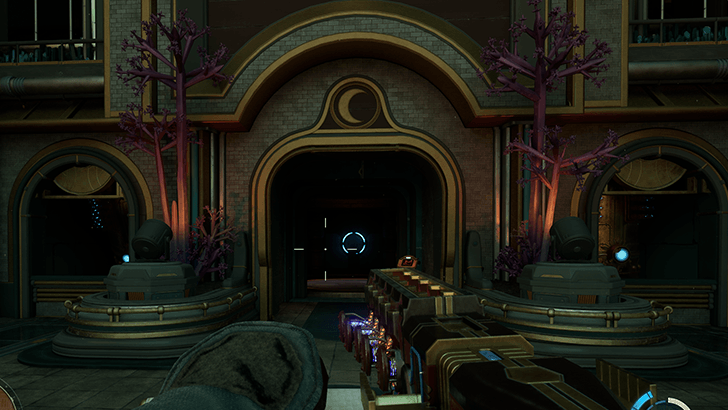 Once the second bell rings, the Observatory doors will open. Backtrack to it and enter the observatory to finally confront Seer Wiley. |
Confront Seer Wiley inside the Observatory
The Observatory's interior is pretty simple. At the entrance hall, you'll be able to resupply. Once you're ready, head through the two sets of doors to confront Seer Wiley.
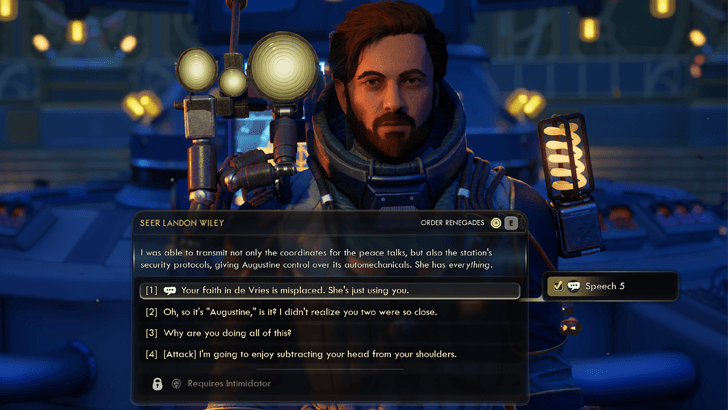
In order to convince Seer Wiley to stand down, you need to have learned and confront Abbot Newell about his secrets. Pass a subsequent Speech 5 check to get Wiley to stand down. If you fail, then you'll have to defeat him.
Once the dust settles, interact with the terminal and check out De Vries video messags. Then, make sure to Copy the Peace Talks data to a cartridge to complete this main quest.
Next Quest: Fiends in High Places
On the Trail of the Traitor Rewards
The Oracle Assault Rifle
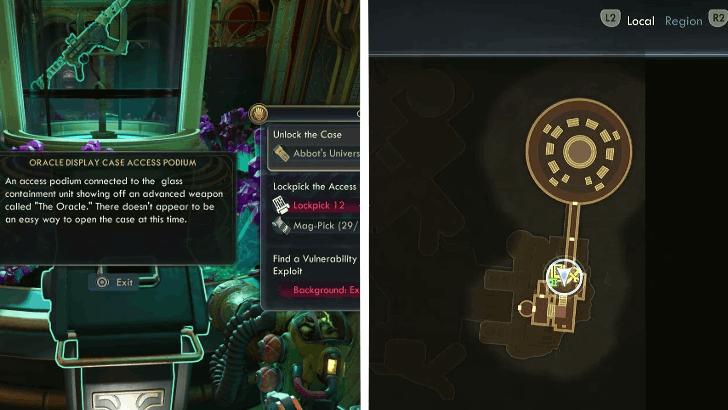
The Oracle Assault Rifle can be obtained by using Abbot's Universal Key to open its display case in the Observatory. You can get Abbot's Universal Key via three methods:
- Kill Seer Wiley and loot it from his body.
- Spare Seer Wiley then speak to Abbot Newell outside the Observatory.
- Spare Seer Wiley then pickpocket it from him inside the Observatory.
The Oracle Stats and How to Get
The Outer Worlds 2 Related Guides

All Main Quests
| # | Main Quests |
|---|---|
| 1 | A Cause Worth Killing For |
| 2 | Recalling the Score |
| 3 | The Saboteur of Paradise |
| 4 | On the Trail of the Traitor ┗ Discrete Mathematics |
| 5 | Fiends in High Places |
| 6 | An Instrument to Unfold Space & Time |
| 7 | A Complication with the Computronic Cerebrum |
| 8 | Sins of the Past on the Precipice of the Future |
Comment
3  Anonymous 5 months
There's clues all over. I didn't feel up for a scavenger hunt so I just looked up the answers and completed it that way.
Author

On the Trail of the Traitor Walkthrough
Please participate in our site
improvement survey
04/2026
improvement survey
04/2026
Would you assist in
improving Game8's site?
improving Game8's site?

×
We are listening to our users' valuable opinions and discussing how to act on them.
The information collected through this survey will be used for the purpose of improving our services. In addition, the information will only be disclosed a part of a statistic in a format that will not allow identification of personal information.
Begin Survey
Not Now
×
Please rate each item regarding Game8.co's Advertisements.
Amount of Ads
Very Dissatisfied
Somewhat Dissatisfied
Fine
Somewhat Satisfied
Highly Satisfied
Placement of Ads
Timing of Ad Display
Ad Loading Speed
Safeness of Ads
Content of Ads
×
Please rate each item regarding Game8.co's Quality of Articles.
Amount of information
Very Dissatisfied
Somewhat Dissatisfied
Fine
Somewhat Satisfied
Highly Satisfied
Frequency of updates
Speed of new information
Accuracy of articles
Understandibility of articles
Readability of sentences
×
Please rate each item regarding Game8.co's Usability of the Site.
Ease of finding information
Very Dissatisfied
Somewhat Dissatisfied
Fine
Somewhat Satisfied
Highly Satisfied
Loading Speed
Use of Color
Font Size
Visibility of Images
Easy to Understand Layout
×
Please rate each item regarding Game8.co's Message Boards, Comments.
Ease of Writing
Very Dissatisfied
Somewhat Dissatisfied
Fine
Somewhat Satisfied
Highly Satisfied
Readability
Ease in Finding Information
Comment Quality
Comment Quantity
Admin Response
×
Please rate each item regarding Game8.co's Site's new design.
Please rate our site's new design
Very Dissatisfied
Somewhat Dissatisfied
Fine
Somewhat Satisfied
Highly Satisfied
Do you think that the website's design change makes the site easier to use?
Has the new design made it easier for you to find information on the site?
Has the new design improved the overall visual appeal of the site?
How would you rate your overall satisfaction with the new design of the site?
×
How likely are you to recommend Game8 to someone you know?
Very Unlikely
0
1
2
3
4
5
6
7
8
9
10
Very Likely
If you have other opinions regarding potential improvement to the website, please share them with us. We would appreciate your honest opinion.
Note: This is a free response section, so you can proceed without entering anything.
Note: Please be sure not to enter any kind of personal information into your response.
Note: Please be sure not to enter any kind of personal information into your response.
×
Thank You
×
Thank you for participating in our survey! Your answers will help us to improve the quality of our website and services.
We hope you continue to make use of Game8.
We hope you continue to make use of Game8.
Close
Rankings
- We could not find the message board you were looking for.
Gaming News


![Forza Horizon 6 Review [Preview] | Beautiful Roads With a Whole Lot of Oversteer](https://img.game8.co/4460981/a7254c24945c43fbdf6ad9bea52b5ce9.png/thumb)
![Borderlands Mobile Review [Playtest] | The Same Borderlands Made Easy](https://img.game8.co/4465500/aac0c880a39ec5cd46073e49d18f3ed5.png/thumb)
Popular Games

Genshin Impact Walkthrough & Guides Wiki
Crimson Desert Walkthrough & Guides Wiki
Umamusume: Pretty Derby Walkthrough & Guides Wiki
Honkai: Star Rail Walkthrough & Guides Wiki
Monster Hunter Stories 3: Twisted Reflection Walkthrough & Guides Wiki
Wuthering Waves Walkthrough & Guides Wiki
The Seven Deadly Sins: Origin Walkthrough & Guides Wiki
Pokemon TCG Pocket (PTCGP) Strategies & Guides Wiki
Pokemon Pokopia Walkthrough & Guides Wiki
Zenless Zone Zero Walkthrough & Guides Wiki


Recommended Games
Fire Emblem Heroes (FEH) Walkthrough & Guides Wiki
Pokemon Brilliant Diamond and Shining Pearl (BDSP) Walkthrough & Guides Wiki
Super Smash Bros. Ultimate Walkthrough & Guides Wiki
Diablo 4: Vessel of Hatred Walkthrough & Guides Wiki
Cyberpunk 2077: Ultimate Edition Walkthrough & Guides Wiki
Yu-Gi-Oh! Master Duel Walkthrough & Guides Wiki
Elden Ring Shadow of the Erdtree Walkthrough & Guides Wiki
Monster Hunter World Walkthrough & Guides Wiki
The Legend of Zelda: Tears of the Kingdom Walkthrough & Guides Wiki
Persona 3 Reload Walkthrough & Guides Wiki


All rights reserved
© 2025 Obsidian Entertainment, Inc. Obsidian Entertainment, the Obsidian Entertainment logo, The Outer Worlds 2, and The Outer Worlds 2 logos are trademarks or registered trademarks of Obsidian Entertainment, Inc. All rights reserved.
The copyrights of videos of games used in our content and other intellectual property rights belong to the provider of the game.
The contents we provide on this site were created personally by members of the Game8 editorial department.
We refuse the right to reuse or repost content taken without our permission such as data or images to other sites.
Tristan is running me into a wall on my way out of this area after completing the mission. I'm guessing it's from the hidden wall on another floor because I couldn't find anything.