This survey will take about 1 minute.
Your answers will help us to improve our website.
Outer Worlds 2
Do More Harm Walkthrough
Do More Harm is a companion quest for Niles in the Outer Worlds 2. Read on for a full walkthrough of the companion quest, including info on how to unlock it and its rewards.
| Previous Quest | Next Quest |
|---|---|
| Pressing Cares | - |
List of Contents
How to Unlock Do More Harm
Agree to Help Zebulon Tran on Praetor
Upon landing in Praetor and making your way to The Incognito's exit, Niles will stop you and initiate a conversation. He mentions receiving a short-range transmission from Zebulon, who is asking to meet at the Tomb of the Matriarch.
Agree to his request to start the quest, and the Tomb of the Matriarch will be marked on your map.
Only Available After Pressing Cares
As this is the second Companion Quest for Niles, you must first finish the previous quest Pressing Cares, before this quest will trigger.
Do More Harm Walkthrough
Click on a step to jump to its section in the walkthrough!
Meet with Zebulon at the Tomb of the Matriarch
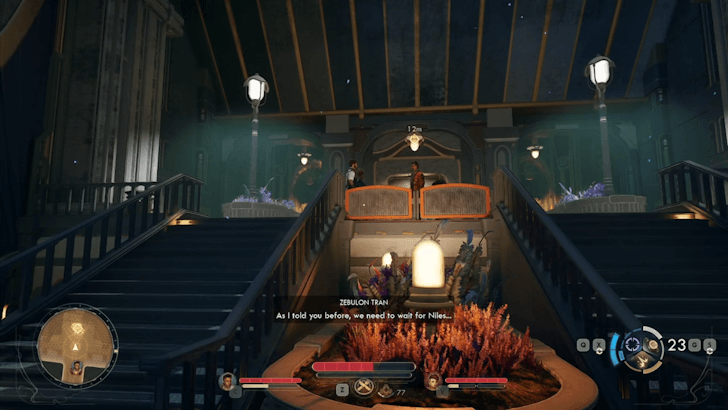
Make your way to the Tomb of the Matriarch south of the Praetor Landing Pad. Upon getting there, you will find Zebulon and his companions waiting for Niles. Zebulon informs you and Niles that he plans to locate the Vault hidden inside the Tomb of the Matriarch, which may contain powerful weapons.
You will then enter the Tomb of the Matriarch with Zebulon and Niles.
Eliminate Protectorate Forces
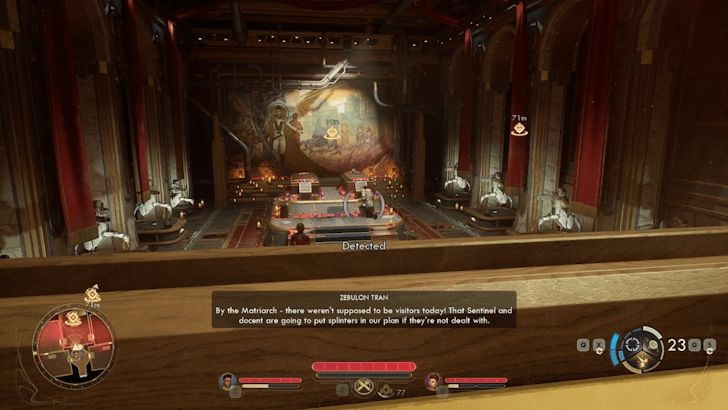
Upon entering the Tomb, you will notice a Museum Docent and Mourning Sentinel by the tombs. You must eliminate these two enemies to continue with the quest. There will also be roaming Automechanicals in the area, but defeating them is not necessary.
There are two ways to eliminate the two enemies. The first is to go to the central area and outright kill them. Alternatively, you can also use the Casket Security Protocols.
How to Activate Casket Security Protocols
| Have a High Hack Skill | |
|---|---|
| 1 | 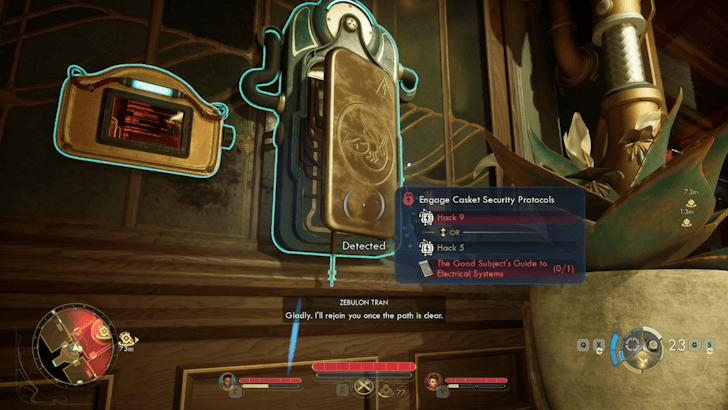 If you have a high enough Hack skill, you can immediately activate the Casket Security Protocols. This can be found by the window overlooking the central area. |
| The Good Subject's Guide to Electrical Systems | |
| 1 | 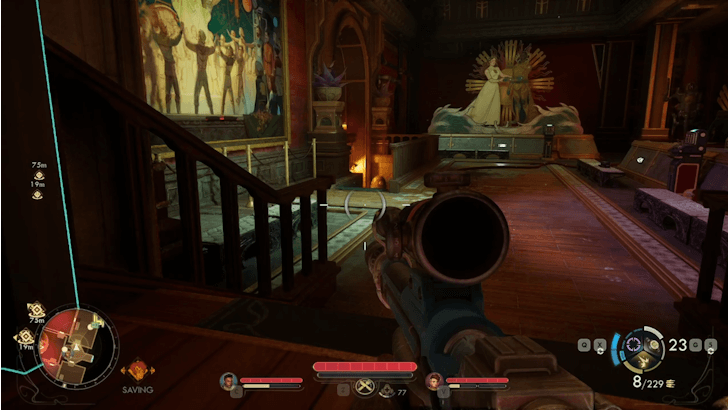 While facing the window overlooking the central area, go through the door to your right and down the staircase. This will lead you to a room with roaming Automechanicals. |
| 2 | 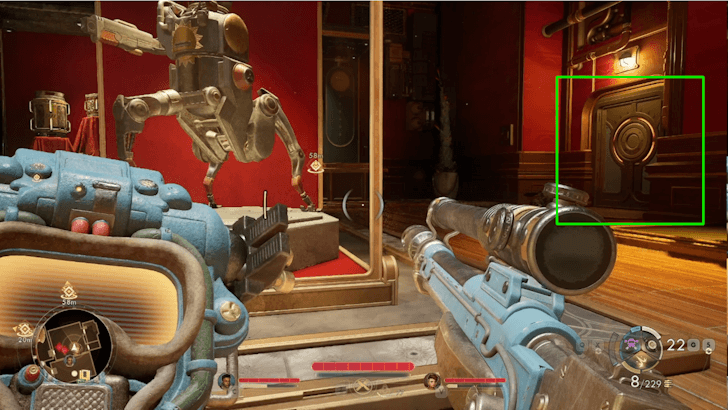 Make your way to the locked door to the right of the room. The door can be opened with a Lockpick skill of 5. You do not need to destroy any of the Automechanicals in this room. |
| 3 | 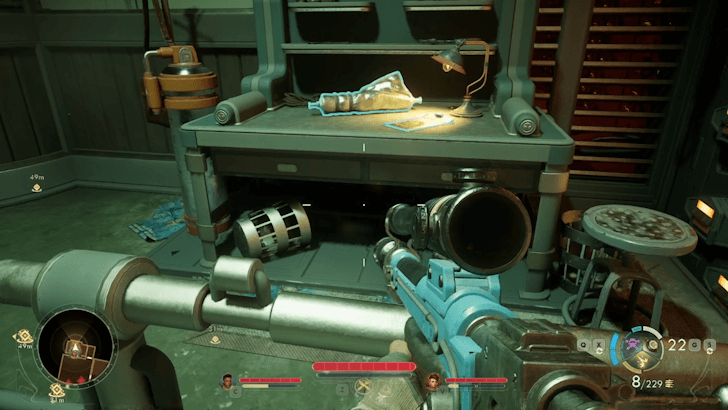 Once inside the room, you will find the Good Subject's Guide to Electrical Systems. |
Once you activate the Casket Security Protocols, a cutscene will play, showing the Mourning Sentinel getting disintegrated by the Casket Security Protocols. You can then make your way to the central area and take down the Museum Docent, who will be distracted by the Mourning Sentinel's death.
Deal with the Curator
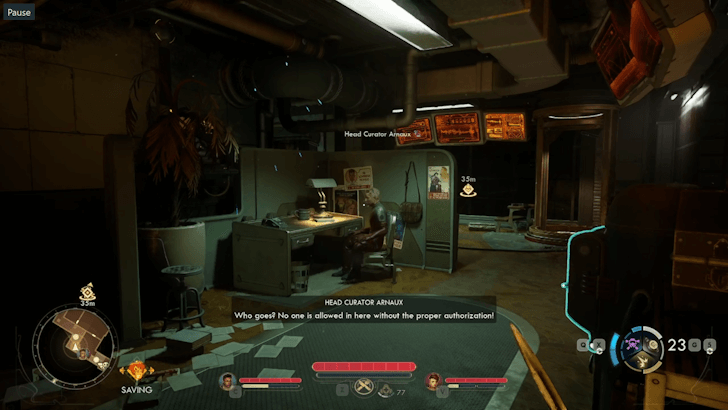
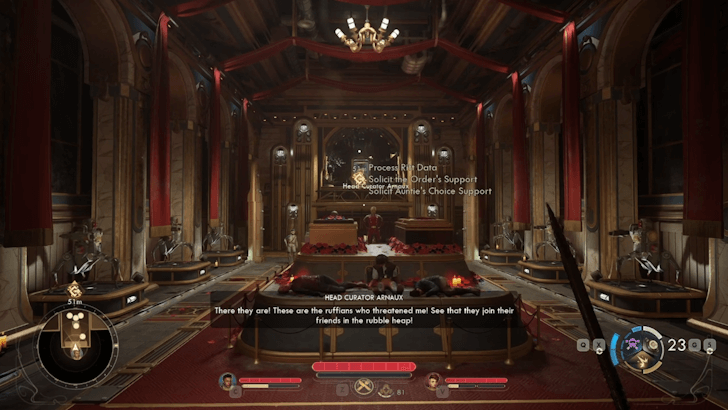
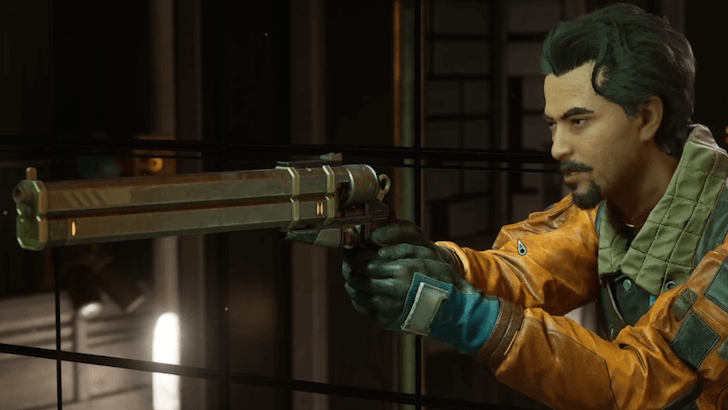
Once you clear out the two enemies in the central area, Zebulon will pull a level that leads to the Tomb's lower levels. There, you will encounter Head Curator Arnaux.
Head Curator Arnaux will immediately start a conversation once you enter the room, preventing you from moving forward. Zebulon will then point his gun at the Curator with the intent of killing him. During this conversation, you can either allow Zebulon to kill the Head Curator, or convince him to spare the Head Curator.
Alternatively, you can also immediately kill the Head Curator, bypassing most of the conversation.
Make Your Way to the Vault
Avoid the Trip Wires
| Avoid the Trip Wires | |
|---|---|
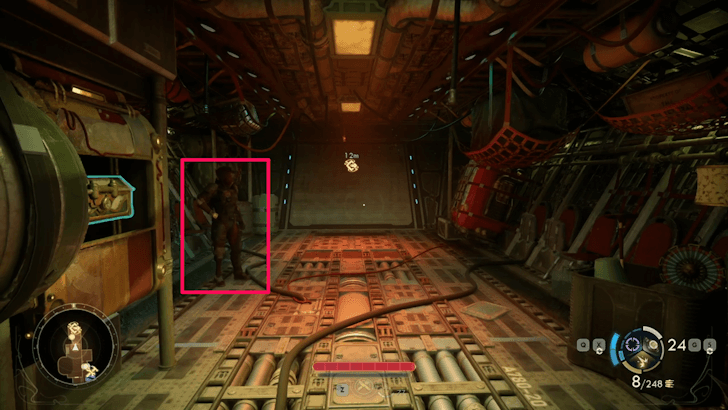
| 1 | 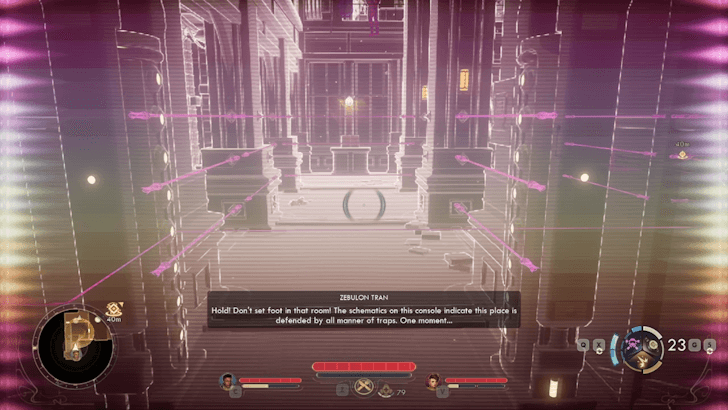 Upon entering the next area, Zebulon will warn you that there are traps here that will electrify the floor if triggered. Equip your N-Ray Scanner to see the invisible wires, and either avoid them or disarm them (drequires Explosives 20). |
| 2 | 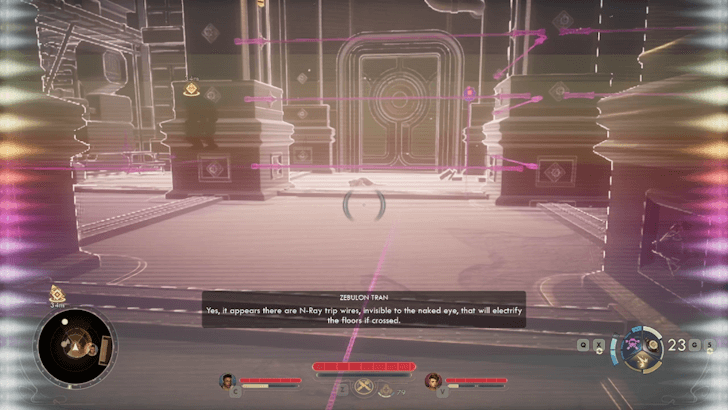 With the N-Ray Scanner equipped, you will see a purple wire connecting the door panel to a switch. Follow the wire and activate the connected switch to open the door. |
| 2.1 | 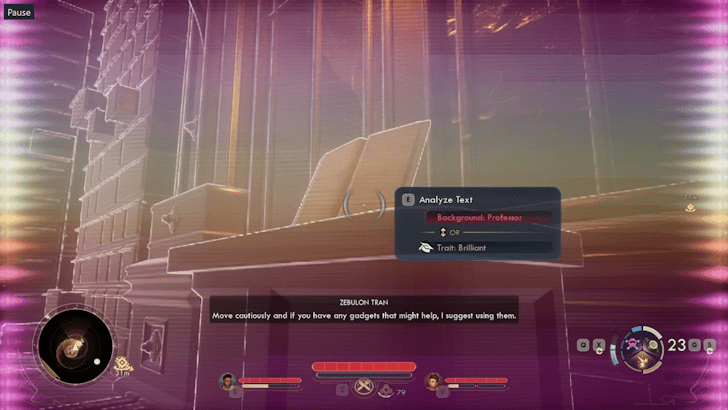 If you have the Professor background or Brilliant trait, you can analyze the nearby text. |
Make Niles Prepare the Explosives

Before going to the next area, Niles will stop you and mention that he found some items that he can convert into explosives. It does not matter what choice you pick here, as Niles will prepare the explosives regardless of what you say. Pick whatever options you like, but take note that Niles will remember how you treated him here.
Flip Levers in the Right Order
You will then enter a room that contains three levels. Zebulon will tell you that the key to opening the door is 1-3-2. Equip your N-Ray Scanner to see the wires connecting the levers to the door. Each lever will have either 1, 2, or 3 wires connecting it to the door.
To solve the puzzle, first flip the switch with one wire connected, then the one with three wires, before finally flipping the lever with two wires. This will open the locked door, allowing you to enter the next area. As you approach the door, Niles will ask you about Zebulon's recent actions. Choose the dialogue options you like.
Blow the Door Up
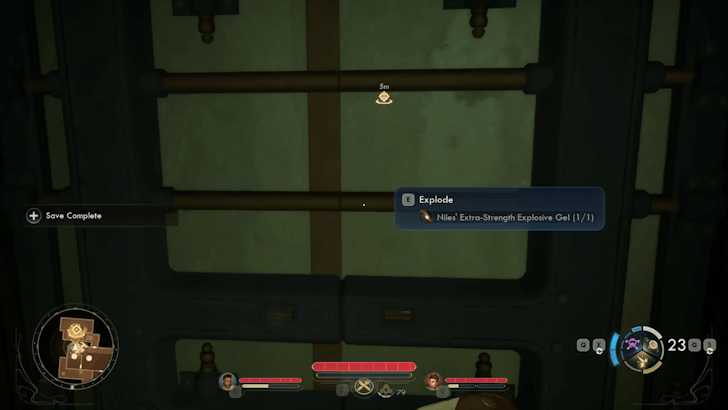
You will find a locked door in the next room, which Zebulon will fail to open. Niles will propose using the explosives he picked up earlier, so interact with the door to apply the explosives and blow the door up. This will give you access to the Vault and its contents. Zebulon will inspect the computer in the Vault and will ask you to talk to him to discuss its contents.
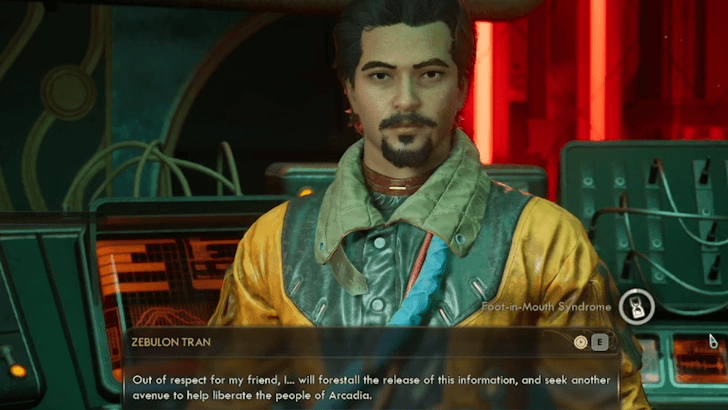
Choose What to Do with Skip Drive Designs
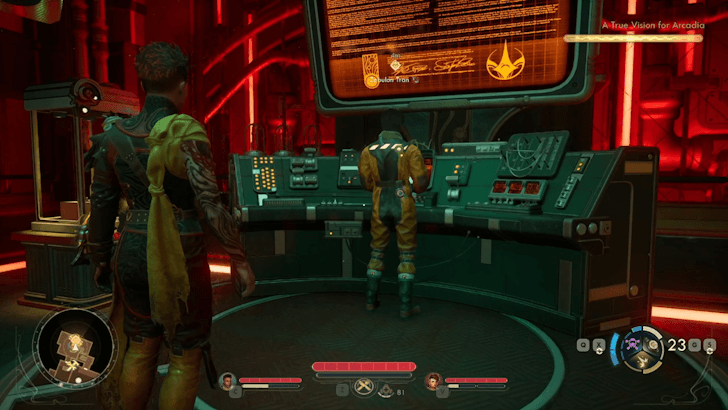
Zeb will reveal that the Earth Directorate and the Protectorate had a deal where the Protectorate would provide Skip Drives to the Earth Directorate. In exchange, the Earth Directorate will not interfere with the Protectorate. This surprises both Niles and Zebulon, with Zebulon now planning to leak the Skip Drive schematics to the Protectorate's enemies.
During this conversation, you can either convince Zebulon not to spread the schematics, or let him spread the schematics. Niles will be against spreading the schematics, as the Skip Drives will just increase the appearance of rifts in Arcadia. Once the conversation is over, the quest will officially end, rewarding you with EXP and Niles' Advanced Mod Kit.
Conversation has Special Dialogue Options
| Choices | |
|---|---|
| 1 | Analyze the book in the laser room: "That would explain the message I found between the Matriarch and the Earth Directorate." Niles will either be surprised or be understanding of the revelation based on whether or not you told him about the message. |
| 2 | Reveal Zebulon's plans to leak the Skip Drive schematics. |
| 3 | Prevent Zebulon from leaking the Skip Drive schematics. |
Exit the Tomb and Talk to Niles
Once you convince Zebulon to either release the schematics or keep them private, make your way out of the Tomb of the Matriarch. If you killed the Head Curator, Zebulon's team will be standing in the central area to greet you and congratulate you for a successful mission. If you instead choose to spare him, you will find the dead bodies of Zebulon's team, with the Head Curator and his reinforcements opening fire at you.
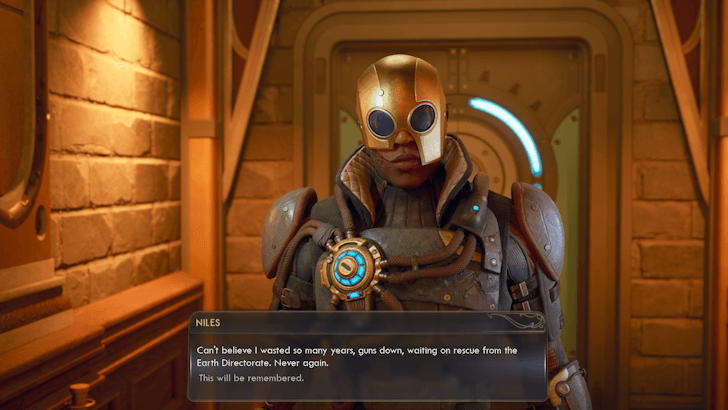
Make your way out of the Tomb (be it peacefully or guns blazing) and talk to Niles outside. He will open up about what he thinks of the Earth Directorate, and his plans moving forward.
Convince Niles to Stay or Defect from the Earth Directorate
| Choices | |
|---|---|
| 1 | Convince Niles to give up on and defect from the Earth Directorate. |
| 2 | Any other option Niles will keep fighting for and believing in the Earth Directorate. |
After leaving the Tomb of the Matriarch, Niles will talk to you about his thoughts. Near the end of the conversation, you have the option to convince Niles to defect from the Earth Directorate. Successfully doing so will reward Niles with the No Problem a Bullet Can't Solve perk. If, on the other hand, you decide to let Niles continue fighting for and believing in the Earth Directorate, he will instead get the Last Defender perk.
You will be able to try and convince Niles to defect from or stay in the Earth Directorate regardless of whether or not you leak the Skip Drive mechanics, although it does provide different dialogue options.
Retrieve the Golden Shroud Before Leaving
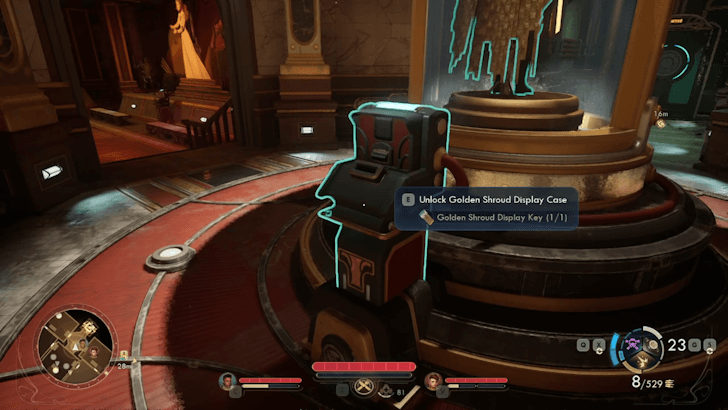
Before leaving the Tomb of the Matriarch, make sure to unlock the Golden Shroud Display Case to get the Golden Shroud. The Golden Shroud Display Key can be looted from the body of the Museum Docent.
Golden Shroud Stats and How to Get
Do More Harm Choices
Killing or Sparing the Head Curator
Your first major choice in this quest is choosing whether to kill or spare the Head Curator. This does not require any Skill checks and can be done by just choosing the options that lean toward the outcome you want.
Killing the Curator will prevent the extra fight as you make your way out of the Tomb of the Matriarch.
Leaking the Skip Drive Schematics or Keeping it Secret
Your second major choice in the quest revolves around the Skip Drive schematics. Choosing to leak the Skip Drive schematics will give the Protectorate's enemies a chance of fighting back, but can potentially create more Rifts. Keeping them secret, on the other hand, will prevent rifts from appearing at a higher rate, but will make the fight against the Protectorate harder.
This choice does not have immediate consequences, but has a huge impact on which ending you will get at the end of the game.
Staying In or Defecting From the Earth Directorate
Your final major choice in the quest is about whether or not Niles remains in the Earth Directorate. Choosing to stay in the Earth Directorate will give Niles the defense-oriented perk Last Defender, while choosing to defect will give him the offense-oriented perk No Problem a Bullet Can't Solve.
Convincing Niles to defect requires a Speech level of 11. Otherwise, he will always stay on the Earth Directorate's side.
Do More Harm Rewards
| Quest Completion Rewards | |
|---|---|
|
・6458 XP ・Niles' Advanced Mod Kit |
Do More Harm Info
| Do More Harm Info | |||||
|---|---|---|---|---|---|
| Type | Niles Companion Quest | ||||
| Location | Praetor | ||||
| Quest Giver | Niles | ||||
| How to Start | |||||
| After finishing Fiends in High Places, fly the Incognito to Praetor. Once there, head down to the hangar. Niles will draw you into conversation, allowing you to accept this companion quest. | |||||
Outer Worlds 2 Related Guides

All Companion Quests
| Companion | Quests |
|---|---|
 Niles Niles |
・Pressing Cares ・Do More Harm |
 VALERIE VALERIE |
・A Healthy Improvement ・Better by Factors |
 Inez Inez |
・Better than Nature ・A Most Extraordinary Specimen ┣ Half Truths in Advertising ┗ Full Measures |
 Tristan Tristan |
・Arbitrary Measures ・Listening For a Clue ・Casting Off the Veil |
 Marisol Marisol |
・Beginning at the Endpoint ・The Midpoint to the Endpoint ・Endpoint's End |
 Aza Aza |
・The Dawn of a Glorious Betrayal ・Stabbing at Shadows |
Comment
1  Anonymous 4 months
You can release the skip drive schematics to the public and keep the Earth Directorate's less-than-honorable deeds a secret. You'll need to have the negotiator perk and first agree with the release of the schematics, and then tell Zeb to hide the Earth Directorate's info.
Author

Do More Harm Walkthrough
Please participate in our site
improvement survey
04/2026
improvement survey
04/2026
Would you assist in
improving Game8's site?
improving Game8's site?

×
We are listening to our users' valuable opinions and discussing how to act on them.
The information collected through this survey will be used for the purpose of improving our services. In addition, the information will only be disclosed a part of a statistic in a format that will not allow identification of personal information.
Begin Survey
Not Now
×
Please rate each item regarding Game8.co's Advertisements.
Amount of Ads
Very Dissatisfied
Somewhat Dissatisfied
Fine
Somewhat Satisfied
Highly Satisfied
Placement of Ads
Timing of Ad Display
Ad Loading Speed
Safeness of Ads
Content of Ads
×
Please rate each item regarding Game8.co's Quality of Articles.
Amount of information
Very Dissatisfied
Somewhat Dissatisfied
Fine
Somewhat Satisfied
Highly Satisfied
Frequency of updates
Speed of new information
Accuracy of articles
Understandibility of articles
Readability of sentences
×
Please rate each item regarding Game8.co's Usability of the Site.
Ease of finding information
Very Dissatisfied
Somewhat Dissatisfied
Fine
Somewhat Satisfied
Highly Satisfied
Loading Speed
Use of Color
Font Size
Visibility of Images
Easy to Understand Layout
×
Please rate each item regarding Game8.co's Message Boards, Comments.
Ease of Writing
Very Dissatisfied
Somewhat Dissatisfied
Fine
Somewhat Satisfied
Highly Satisfied
Readability
Ease in Finding Information
Comment Quality
Comment Quantity
Admin Response
×
Please rate each item regarding Game8.co's Site's new design.
Please rate our site's new design
Very Dissatisfied
Somewhat Dissatisfied
Fine
Somewhat Satisfied
Highly Satisfied
Do you think that the website's design change makes the site easier to use?
Has the new design made it easier for you to find information on the site?
Has the new design improved the overall visual appeal of the site?
How would you rate your overall satisfaction with the new design of the site?
×
How likely are you to recommend Game8 to someone you know?
Very Unlikely
0
1
2
3
4
5
6
7
8
9
10
Very Likely
If you have other opinions regarding potential improvement to the website, please share them with us. We would appreciate your honest opinion.
Note: This is a free response section, so you can proceed without entering anything.
Note: Please be sure not to enter any kind of personal information into your response.
Note: Please be sure not to enter any kind of personal information into your response.
×
Thank You
×
Thank you for participating in our survey! Your answers will help us to improve the quality of our website and services.
We hope you continue to make use of Game8.
We hope you continue to make use of Game8.
Close
Rankings
- We could not find the message board you were looking for.
Gaming News


![Forza Horizon 6 Review [Preview] | Beautiful Roads With a Whole Lot of Oversteer](https://img.game8.co/4460981/a7254c24945c43fbdf6ad9bea52b5ce9.png/thumb)
![Borderlands Mobile Review [Playtest] | The Same Borderlands Made Easy](https://img.game8.co/4465500/aac0c880a39ec5cd46073e49d18f3ed5.png/thumb)
Popular Games

Genshin Impact Walkthrough & Guides Wiki
Crimson Desert Walkthrough & Guides Wiki
Umamusume: Pretty Derby Walkthrough & Guides Wiki
Honkai: Star Rail Walkthrough & Guides Wiki
Monster Hunter Stories 3: Twisted Reflection Walkthrough & Guides Wiki
Wuthering Waves Walkthrough & Guides Wiki
The Seven Deadly Sins: Origin Walkthrough & Guides Wiki
Pokemon TCG Pocket (PTCGP) Strategies & Guides Wiki
Pokemon Pokopia Walkthrough & Guides Wiki
Zenless Zone Zero Walkthrough & Guides Wiki


Recommended Games
Fire Emblem Heroes (FEH) Walkthrough & Guides Wiki
Pokemon Brilliant Diamond and Shining Pearl (BDSP) Walkthrough & Guides Wiki
Super Smash Bros. Ultimate Walkthrough & Guides Wiki
Diablo 4: Vessel of Hatred Walkthrough & Guides Wiki
Cyberpunk 2077: Ultimate Edition Walkthrough & Guides Wiki
Yu-Gi-Oh! Master Duel Walkthrough & Guides Wiki
Elden Ring Shadow of the Erdtree Walkthrough & Guides Wiki
Monster Hunter World Walkthrough & Guides Wiki
The Legend of Zelda: Tears of the Kingdom Walkthrough & Guides Wiki
Persona 3 Reload Walkthrough & Guides Wiki


All rights reserved
© 2025 Obsidian Entertainment, Inc. Obsidian Entertainment, the Obsidian Entertainment logo, The Outer Worlds 2, and The Outer Worlds 2 logos are trademarks or registered trademarks of Obsidian Entertainment, Inc. All rights reserved.
The copyrights of videos of games used in our content and other intellectual property rights belong to the provider of the game.
The contents we provide on this site were created personally by members of the Game8 editorial department.
We refuse the right to reuse or repost content taken without our permission such as data or images to other sites.
If you let the Curator Arnaux go, Audra (if she is still alive) is killed when you exit the facility from the reinforcements Arnaux called.