This survey will take about 1 minute.
Your answers will help us to improve our website.
Outer Worlds 2
The Saboteur of Paradise Walkthrough
This is a walkthrough for the The Saboteur of Paradise main quest in Outer Worlds 2. Read on for a complete The Saboteur of Paradise walkthrough, including the choices you can make and the rewards for completing the quest.
| ◀ Previous Mission | Next Mission ▶ |
|---|---|
| Recalling the Score | On the Trail of the Traitor |
List of Contents
The Saboteur of Paradise Walkthrough
| Objectives | ||||||
|---|---|---|---|---|---|---|
| 1 | Find Information on de Vries in Fairfield | |||||
| 2 | Investigate Town Hall's Records |
|||||
| 3 | Locate de Vries' House | |||||
| 4 | Seek Assistance in Infiltrating the Vox Relay Station (Optional) | |||||
| Option 1 | Option 2 | |||||
| Aid Milverstreet | Aid Kaur | |||||
| 5 | Reach the Northern Part of the Island | |||||
| 6 | Infiltrate the Vox Relay Station | |||||
| Option 1 | Option 2 | |||||
(Requires Writ of Conscription and Speech 3/Leadership 3) |
||||||
| 7 | Explore the Vox Relay Station | |||||
| 8 | Talk to Marshal Corbin (Writ of Conscription and Speech 4 Unlocks Alternative Options) |
|||||
| 9 | Find a Blank Key Card and Encode it with Credentials | |||||
| 10 | Go to the Top of the Command Floor | |||||
| 11 | Defeat Montelli or Make Montelli Surrender | |||||
| Option 1 | Option 2 | |||||
| (Requires Corbin's Help and Speech Level 5) | ||||||
| 12 | Find de Vries' Safe Room | |||||
| 13 | Set Vox Relay's Crash Destination | |||||
| Option 1 | Option 2 | Option 3 | ||||
| Set to Fairfield | Set to Westport | Send it to Space | ||||
| 14 | Escape! | |||||
Click on a step to jump to its section in the walkthrough!
Find Information on de Vries in Fairfield
| # | Walkthrough |
|---|---|
| 1 | 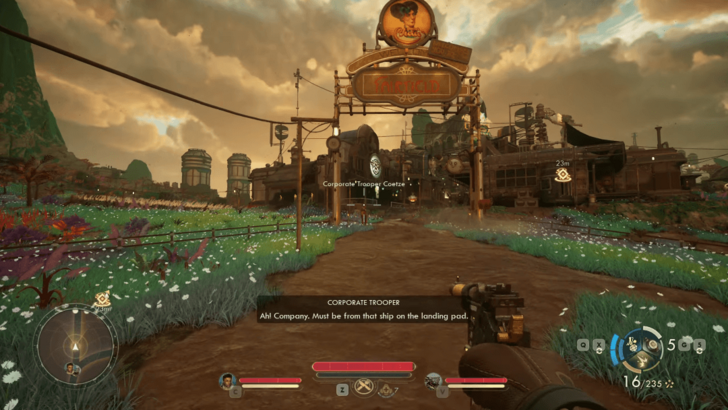 Head towards the marker to discover Fairfield. When you approach the gate, Coetze will speak with you. If you inquire about de Vries, she will advise you to ask Minister Milverstreet for information. |
| 2 | 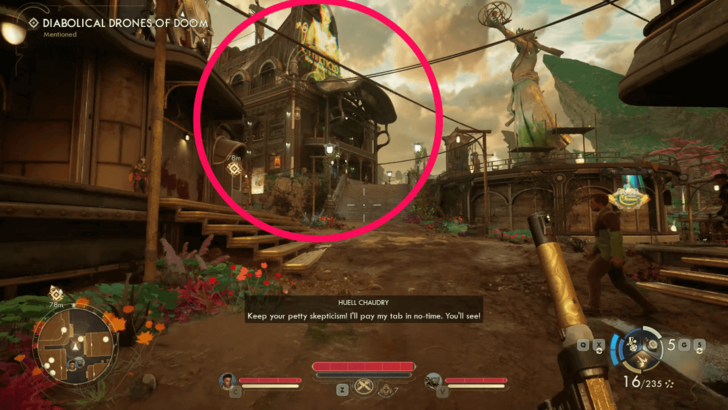 Go to the town hall. |
| 3 | 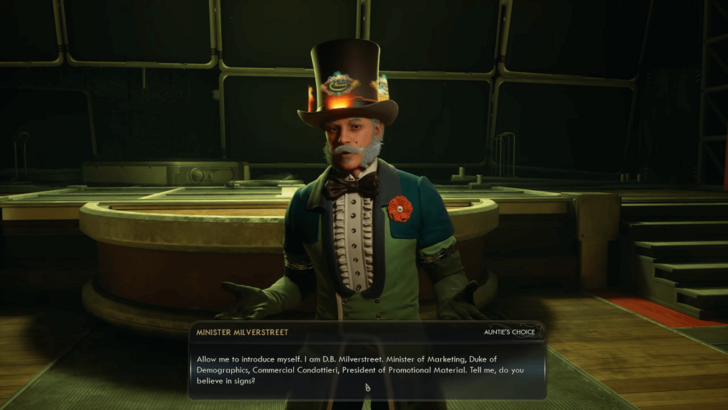 After the scene, Milverstreet will talk to you. Select the dialogue option that mentions de Vries to gain access to the town's records and then exhaust his dialogue. Warning: If you ask him about Vox Relay and offer to help him, you will be locked out of Kaur's quest: Above and Beyond Repair. |
Investigate Town Hall's Records
| # | Walkthrough |
|---|---|
| 1 | 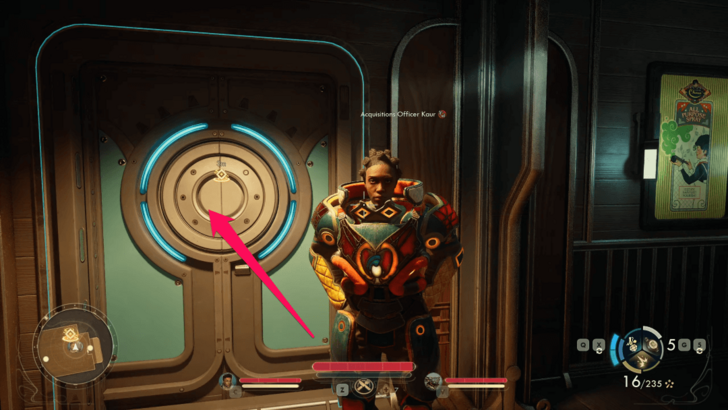 After the conversation with Milverstreet, head back to the receiving area of the Town Hall and look for Officer Kaur (armored lady). She'll be standing in front of a door. Go through it to reach the Town Hall's records room. |
| 2 | 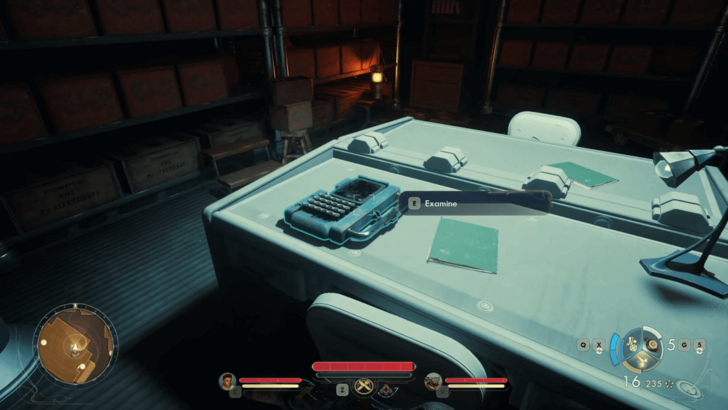 Examine the device on top of the table to get information about de Vries. The information reveals she was assigned a house with a red trim and circle windows. |
Locate de Vries' House
| # | Walkthrough | ||
|---|---|---|---|
| 1 | 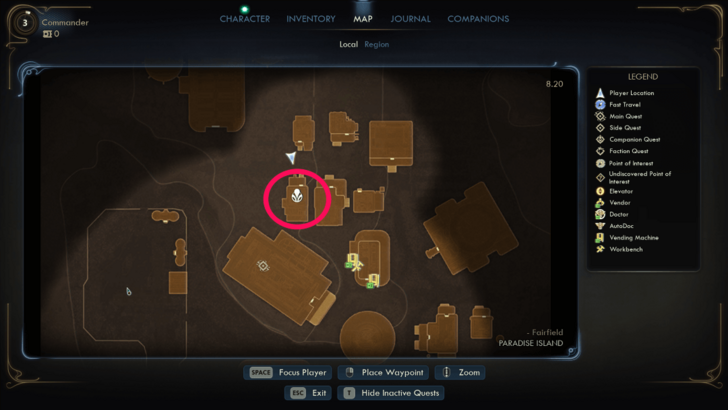 |
 |
|
| Exit the town hall and look for De Vries' house. It is located behind the town hall to the north. | |||
| 2 |
After exiting the town hall, turn left and go round to the back of the town hall. Then, turn to the right to the row of houses, and another right to get in to the front of de Vries house. |
||
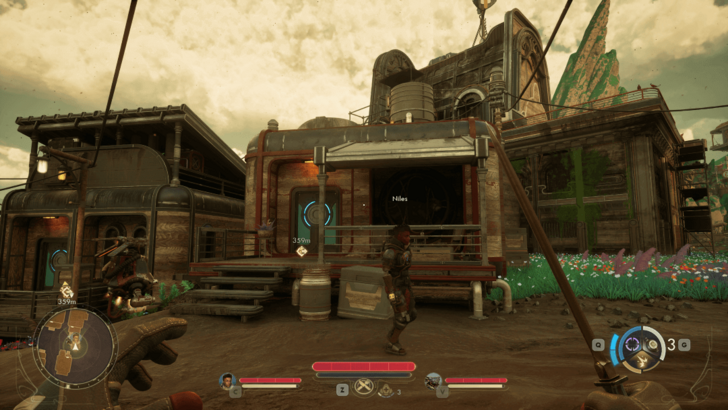
| 3 | 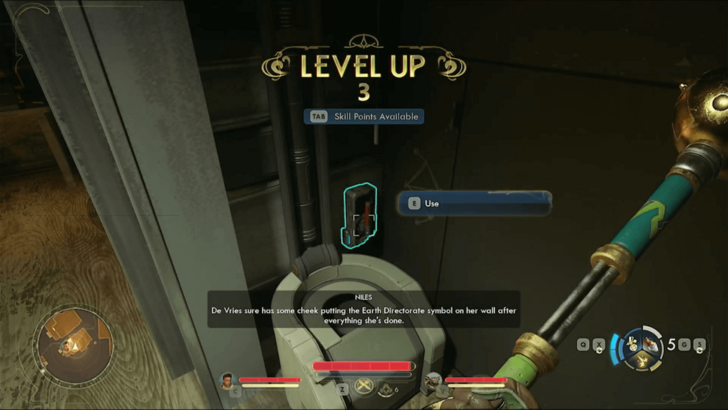 Enter the house and examine everything inside. Once done, investigate and interact with the lever next to the toilet against the wall (near the Earth Directorate symbol that Niles mentions) to reveal a secret room. Note: You can just examine the false wall directly to open it if you have the Observation 4 skill. |
||
| 4 | 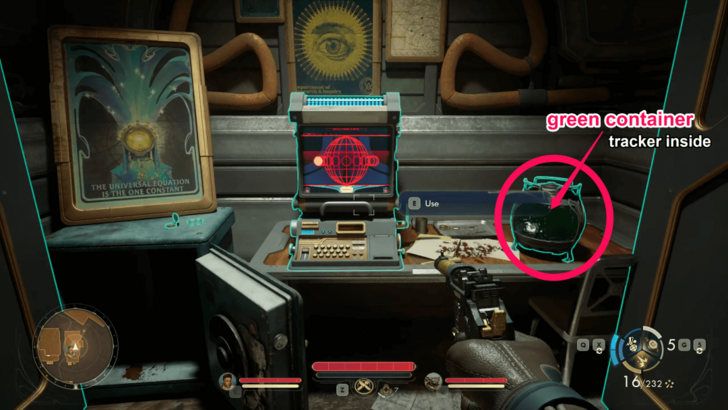 Check the green container to the right to find de Vries' tracker. Use the terminal and read all the messages and listen to all the mission logs to get more information about de Vries. The mission logs indicate that she has likely set up a safe room at the Vox Relay Station. Afterwards, Niles will open up to you about his training days and de Vries. |
||
Seek Assistance in Infiltrating the Vox Relay Station (Optional)
Before going to the Vox Relay Station, you can get assistance from either Milverstreet or Kaur by completing their respective side quests. Accepting one will automatically disqualify you from the other.
Furthermore, The Saboteur of Paradise's ending will vary depending on whether you undertook a side quest at all or bypassed both to go directly to the Vox Relay Station. It is highly recommended that you choose based on the full range of outcomes you wish to achieve (which includes different missable content and rewards).
| Differences of Each Route | |
|---|---|
| 1 | Choosing Milverstreet ・Locks you out of Kaur's quests. ・Allows you to help out Vigilant Hogarth, who grants you an easy way to reach the Vox Relay's interior without combat. ・Grants you the Writ of Conscription through Vigilant Hogarth. ・Quests allow you to evacuate Westport, providing an easy alternative option during the critical final decision later in the quest. ・Minimal combat in his related quests. Note: Writ of Conscription unlocks additional dialogue and route with a character later inside Vox Relay. |
| 2 | Choosing Kaur ・Locks you out of Milverstreet's quests. ・Allows you to get the Gas-Energy Deflection Apparatus early, which allows you to pass through Zyranium-blocked areas. ・Yields a lot of bonus XP due to extensive combat with enemies and wildlife across different quests. ・At higher difficulties, you'll start to feel the strain on your resources during combat. ・Has a quest that damages the Vox Relay's defenses. |
| 3 | Choosing to Go directly to Vox Relay Station ・High potential of missing a companion and locking you out of certain quests. ・You will have to directly assault Vox Relay's entrance or sneak past the guards using a high enough Sneak and Lockpick skill. |
Should You Help Kaur or Milverstreet?
Choosing Milverstreet
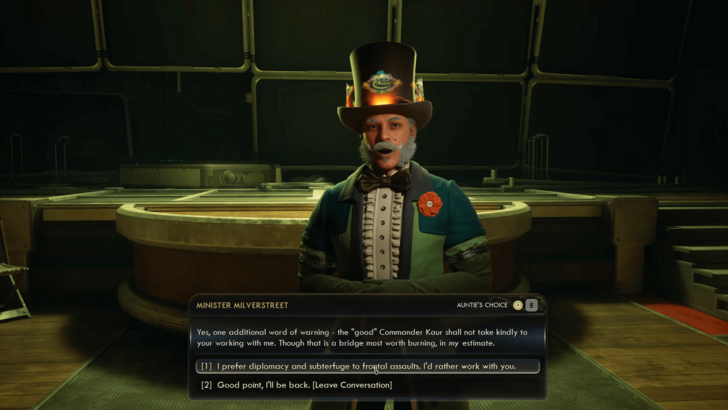
Go to Fairfield's townhall and talk to Milverstreet. Ask him about Vox Relay and agree to help him in exchange for his assistance. This will start the A Refreshing Bit of News side quest.
A Refreshing Bit of News Walkthrough
Choosing Kaur
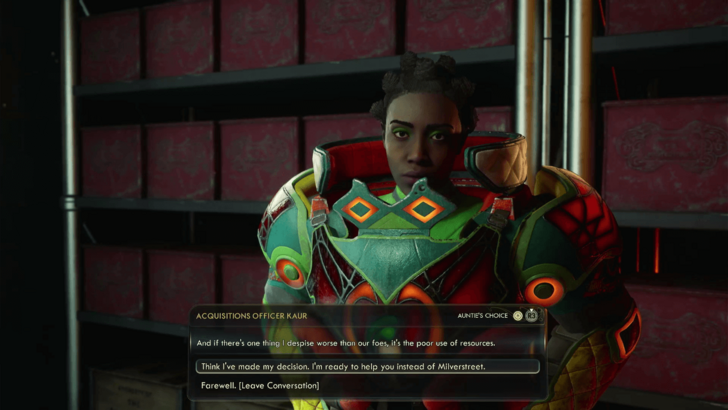
Go to Fairfield's townhall and talk to Kaur. Ask her about Vox Relay and agree to help her in exchange for her assistance. This will start the Above and Beyond Repair side quest.
Above and Beyond Repair Walkthrough
Going Directly to the Vox Relay Station
To go to the Vox Relay Station, you must head to the northern part of the island. Proceed to the next objective to find a way to get across the bridge or the deadly Zyranium field.
Reach the Northern Part of the Island
There are 4 different ways to reach the northern part of the island where the station is:
| Differences of Each Method | |
|---|---|
| 1 | Complete the Saga of Malfunctioning Mechanicals side quest ・Vigilant Hogarth will share a secret way for you to reach the northern part of the island. ・Grants you the Writ of Conscription. |
| 2 | Complete the For Whom the Bridge Tolls side quest ・The guard in the bridge will let you cross freely. |
| 3 | Kill everyone on the bridge ・Automatically marks the quest For Whom the Bridge Tolls as failed. ・Quickest way to gain access across. |
| 4 | Complete the Aegis Against the Miasma side quest ・Grants you the Gas-Energy Deflection Apparatus, which allows you to pass through the deadly Zyranium field north of the Ministry of Accuracy. |
Infiltrate the Vox Relay Station
| Differences of Each Route | |
|---|---|
| 1 | Assault Vox Relay Station ・ Provides more XP as you'll fight the enemies at the entrance and on the way inside Vox Relay. ・ Allows you to collect more items and Bit Cartridges from combat and exploration. |
| 2 | Sneak Inside Vox Relay Station ・Requires the Writ of Conscription. ・Requires Speech 3 or Leadership 3. ・Spawns you inside Vox Relay instantly. ・Less XP as you will not fight the enemies at the entrance and on the way inside Vox Relay. |
Assault Vox Relay Station
| # | Walkthrough |
|---|---|
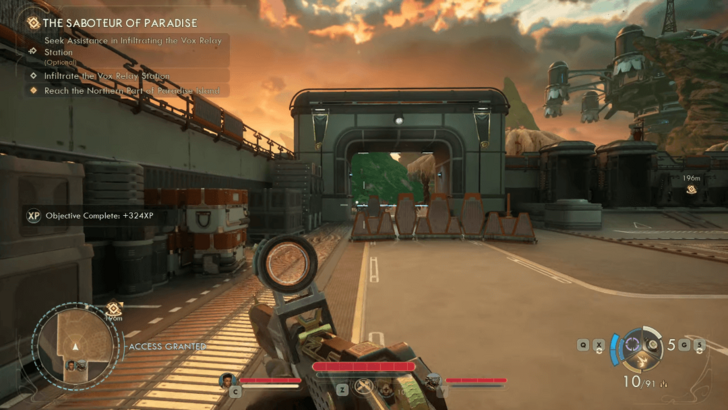
| 1 | 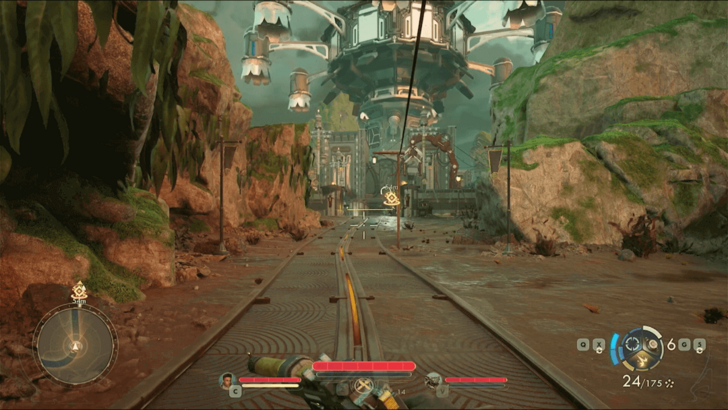 Once you've reached the northern part of the island, proceed to the marker to get to the Vox Relay Station. |
| 2 | 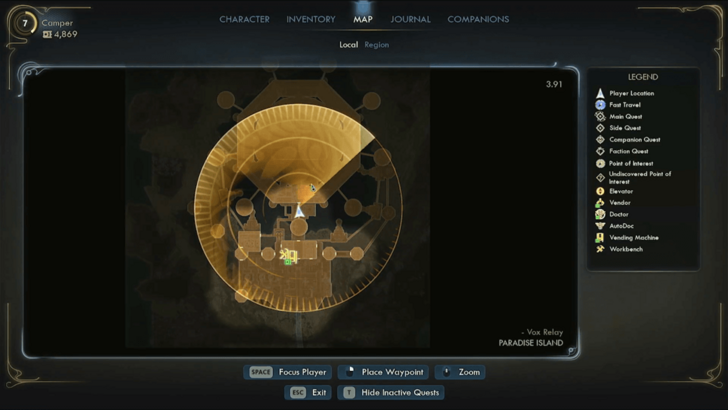 Clear all the enemies in the entrance. After all hostiles has been killed, continue ahead. Explore all the areas you can get to. |
| 3 | 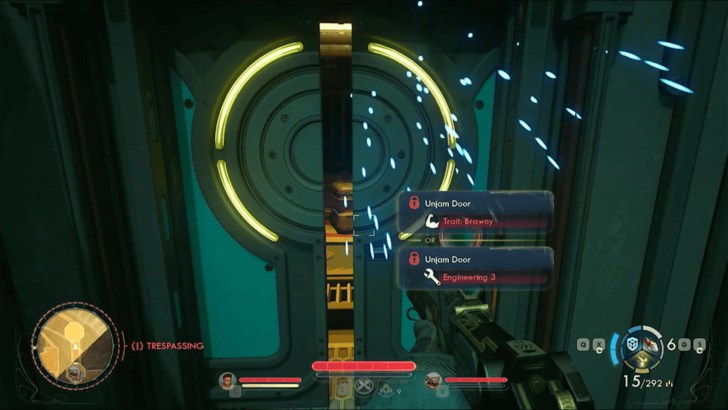 There is a door here that you can only unlock if you have the Brawny trait or Engineering 3 skill. |
| 4 | 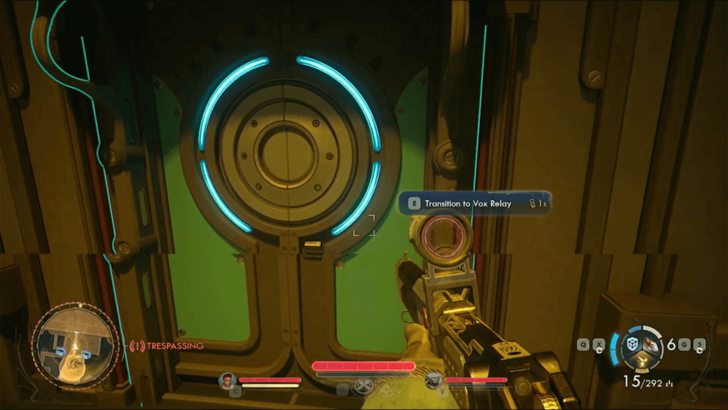 After you have covered all ground, head inside Vox Relay. |
Sneak Inside Vox Relay Station
| # | Walkthrough |
|---|---|
| 1 | 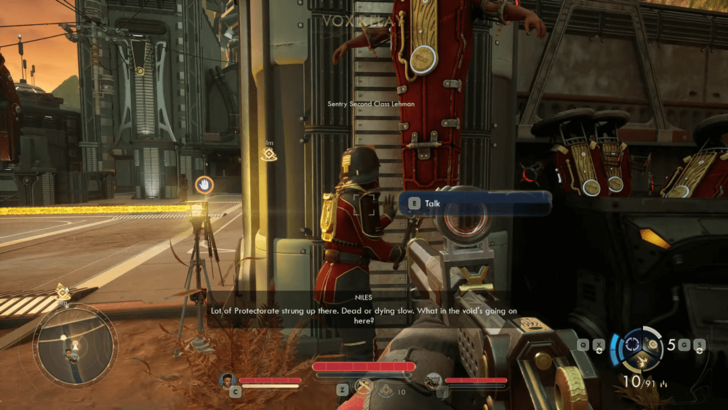 Head to the Vox Relay Station. Talk to Protectorate Sentry Lehman, who is hammering the pillar to the right. |
| 2 | 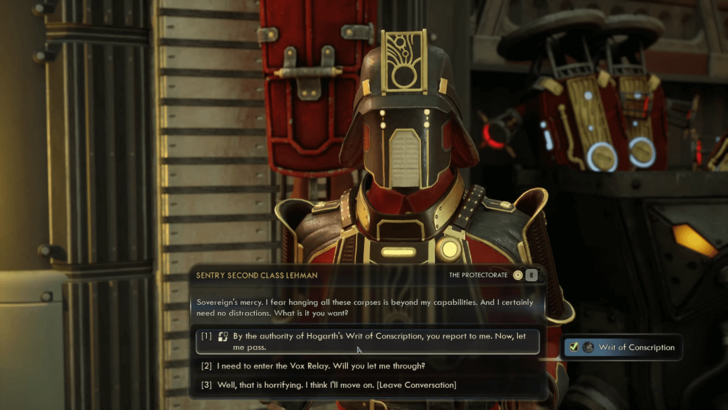 Writ of Conscription and Speech 3 or Leadership 3 Required Show him the Writ of Conscription you got from Hogarth. He will be doubtful, but if you pass the skill check you can convince him. Otherwise, you'll have to assault your way inside. |
| 3 | Agree to pose as a corpse to infiltrate the Vox Relay Station. |
Explore the Vox Relay Station
| # | Walkthrough |
|---|---|
| 1 | 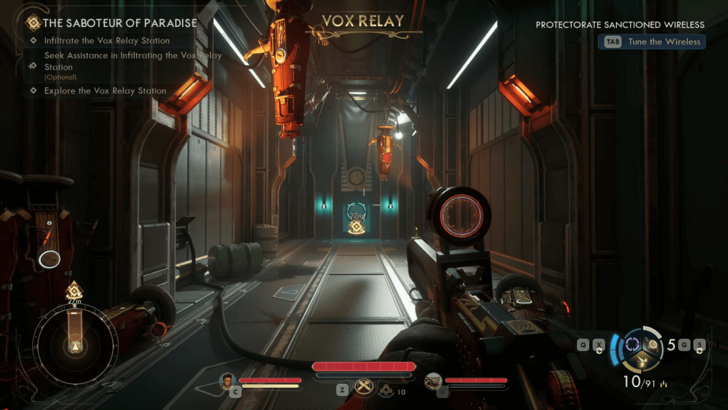 After the guard slips you in as a corpse, you'll find yourself in a hallway inside Vox Relay. |
| 2 | 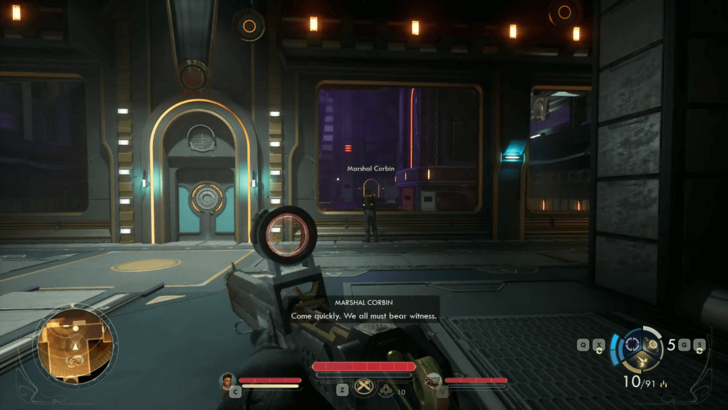 Proceed forward until you reach Corbin, the Cadet you met at Horizon Point is now a Marshal. Note: He will be friendly to you if you completed his side quest The Cadet's Degrading Dilemma. |
Talk to Marshal Corbin
| # | Walkthrough |
|---|---|
| 1 | 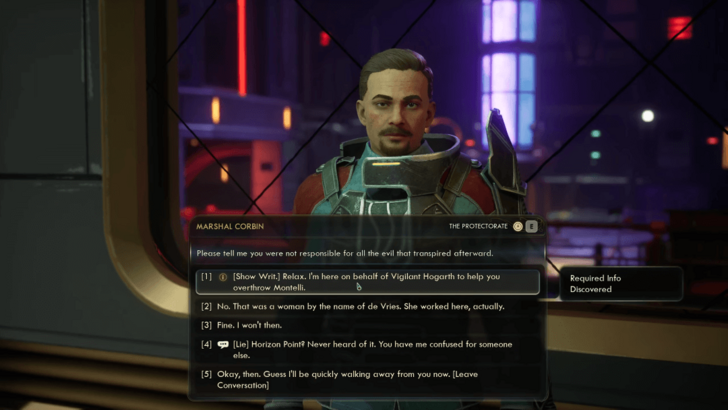 Writ of Conscription Required Show Corbin the Writ of Conscription from Hogarth. He will agree to aid you, but will want to take the diplomatic approach with Montelli. Note: Without the Writ of Consription or Speech 4 Skill, no matter what dialogue option you choose, Corbin will turn hostile and you'll have to kill him. |
| 2 | 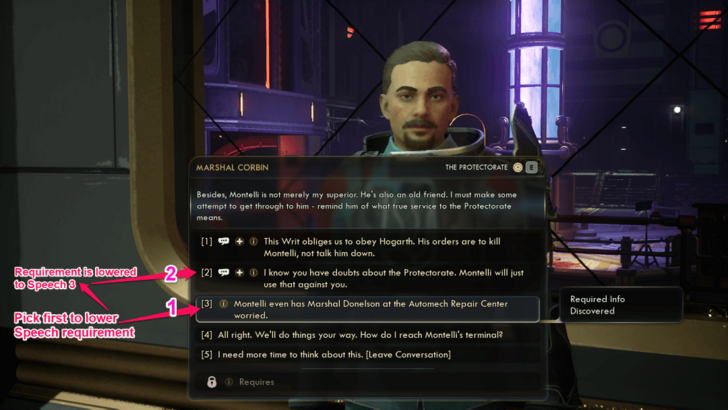 Speech 4 Required Select the dialogue option that "Hogarth thinks it's a bad idea", then choose "Montelli will use his doubts against you" to make him go along with Hogarth's suggestion. After your conversation, look for the keycard that Corbin mentioned. Note: You can lower requirement to Speech 3 by picking the "Marshal Donelson is also worried" option before the "Montelli will use his doubts against you". Doing the ARC Quests, An Aegis Against the Miasma and Vanquishing the Vexing Vapors will allow you to interact with Donelson and unlock this dialogue option. |
| 3 | Optional (Speech 4 Required) You can also convince Corbin to help you without the Writ of Conscription if you have Speech level 4. Select all the Speech 4 unlocked dialogue and agree to send the transfer of command message using Montelli's terminal. Note: This route unlocks the alternative option of making Montelli surrender. (Speech 5 Required) ▶ Steps to Make Montelli Surrender |
Find a Blank Key Card and Encode it with Credentials
| # | Walkthrough |
|---|---|
| 1 | 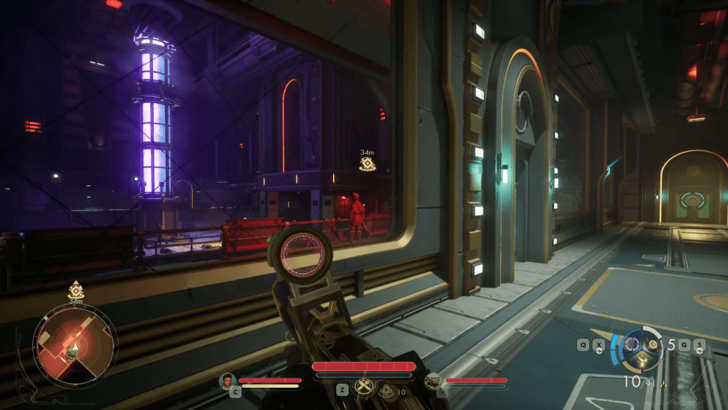 Proceed through the door to your right. |
| 2 | 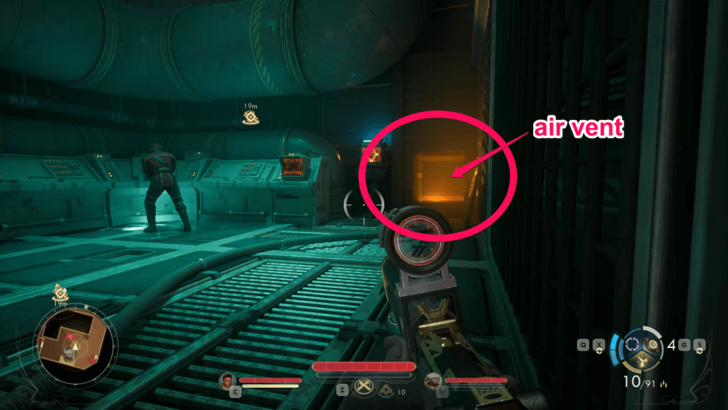 You can get to the Contraband Storage faster through the air vent beyond the guard. Taking the stairs leads to a door to the Contraband Storage, with another guard patrolling the path. Tip: There are no penalties or unique dialogue if you kill the guards, but you will miss earning experience if you go stealth. |
| 3 | Clear the two enemies inside the Contraband Storage to freely look around for the keycard and acess the terminal at the end of the room. |
| 4 | 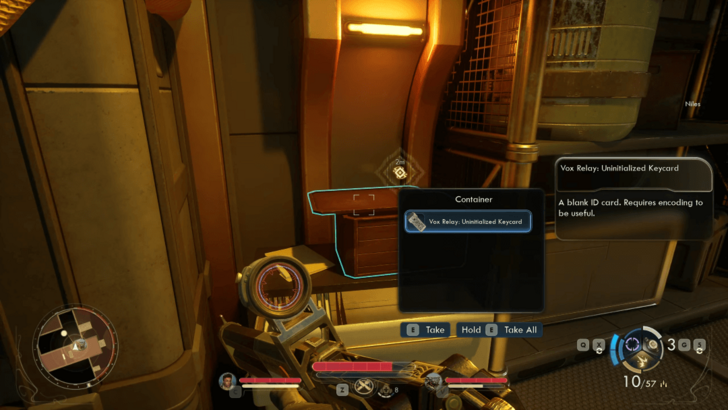 The Uninitialized Card is located inside a container on top of a drawer on the left side of the room. You can access the terminal here, but this is not where you encode the credentials. |
| 5 | 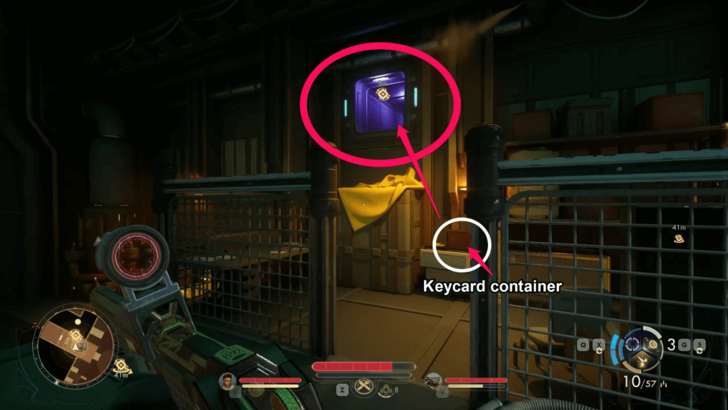 Go through the air vent at the top-left of the container where you found the keycard. |
| 6 | 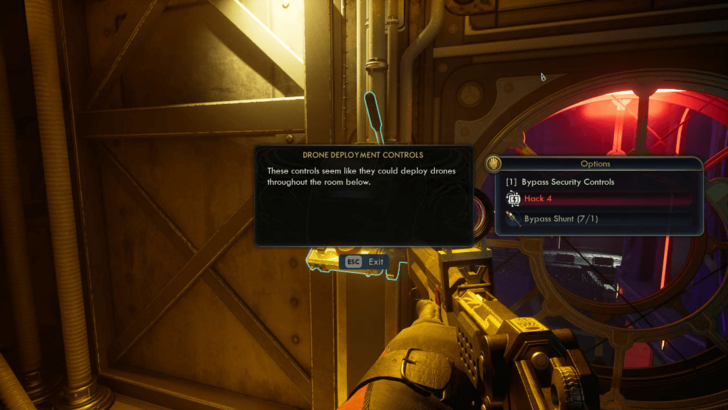 In one of the areas inside the vent, overlooking the Command Floor, there is a lever you can activate if you pass the Hack 4 check to deploy drones in the Command Floor that can help you deal with the guards there. |
| 7 | Keep going until you reach the end of the path. Be careful, there are plenty of enemies including leader types to the other side of the exit. |
| 8 | 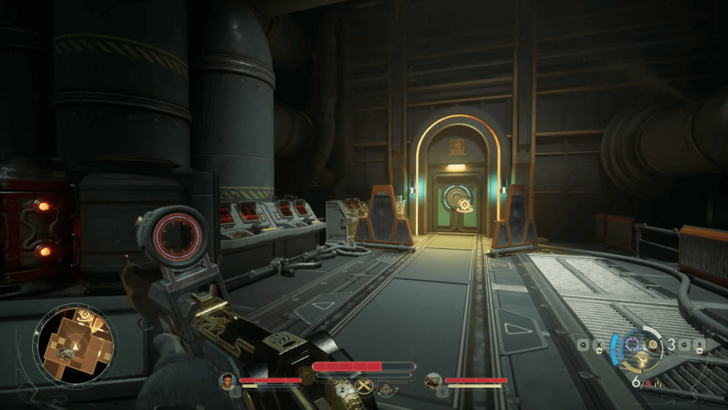 After clearing all enemies, use the left stairs and take another left towards the door. |
| 9 |  Use the terminal, then select Access Clearance Protocols and Insert Credentials. |
| 10 | 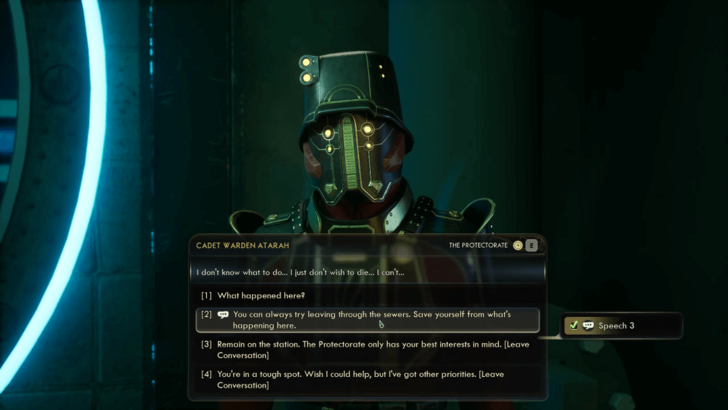 Missable (Speech Skill Required) The room on the other side of the area has a ladder leading down to the sewage tunnel where you'll find Cadet Atarah. If you pass the Speech check, you can persuade her to leave Vox Relay and get the Vox Armory Key from her. |
Go to the Top of the Command Floor
| # | Walkthrough |
|---|---|
| 1 | Head back up the stairs where you landed from exiting the air vent. Past the entryway, proceed to the door at the end of the path to return to the area where you spoke with Corbin. |
| 2 | 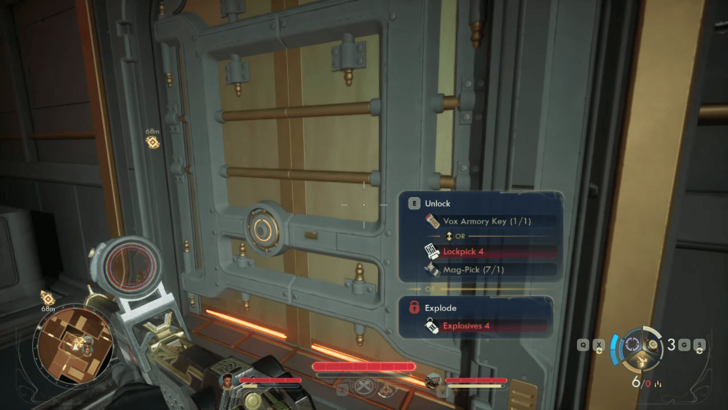 Optional (Vox Armory Key Required) Past the entryway, before proceeding to the door at the end of the path, look for a heavily locked vault door. Use the Vox Armory Key to open it and take the loot inside. Across the armory is the clinic, where you can use an AutoDoc to heal. Tip: You can also open the armory if you have the Lockpick 4 or Explosives 4 skill. |
| 3 | 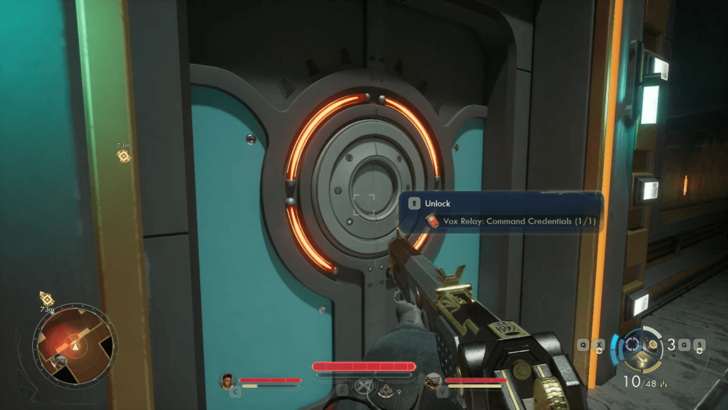 Use the Command Credentials to unlock the main door of the Command Floor. Tip: Make sure to be prepared before storming the area inside as all the enemies there are leader types and are very strong. Otherwise, prioritize stealth to get past without combat. |
| 4 | 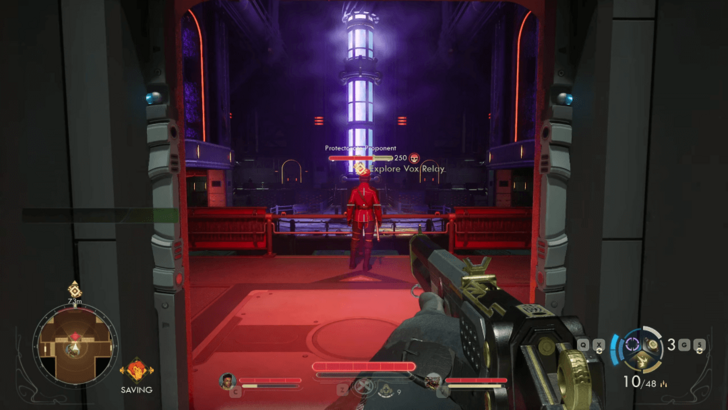 Once the door opens, you'll find a guard with his back turned directly ahead. |
| 5 | 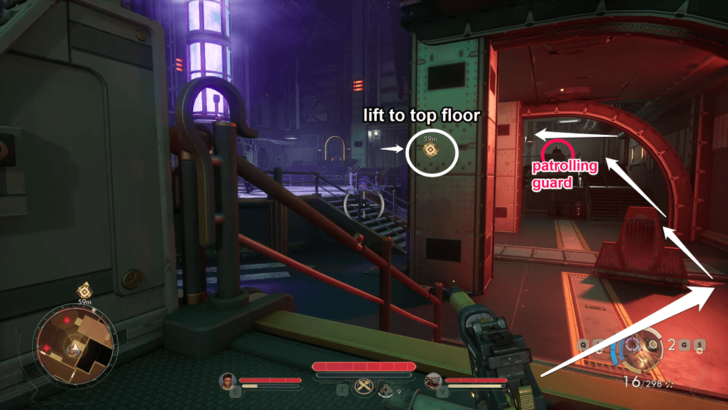 When attempting stealth, use the path on the right and keep track of the patrolling guards. Proceed until you reach the other end of the room. |
| 6 | 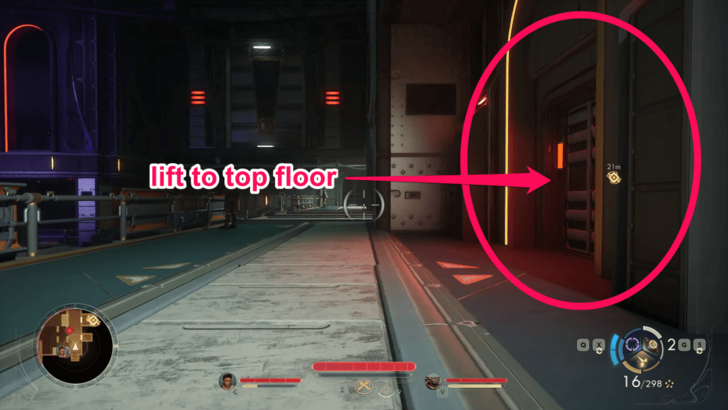 Use the elevator. At the top floor, there is a Vending Machine, Workbench, and an AutoDoc. Before confronting Montelli, enter his office to the right. |
| 7 | 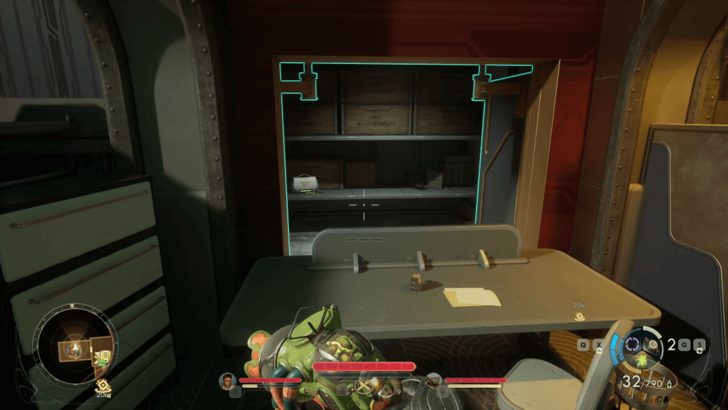 Missable (Observation 5 Required) On the right side of the room, approach the red wall behind the desk. Use Observation skill to reveal the secret vault. You'll find a missable Pitchball Card: Marc Carlton along with an Advanced Decryption Key and other items. |
| 8 | 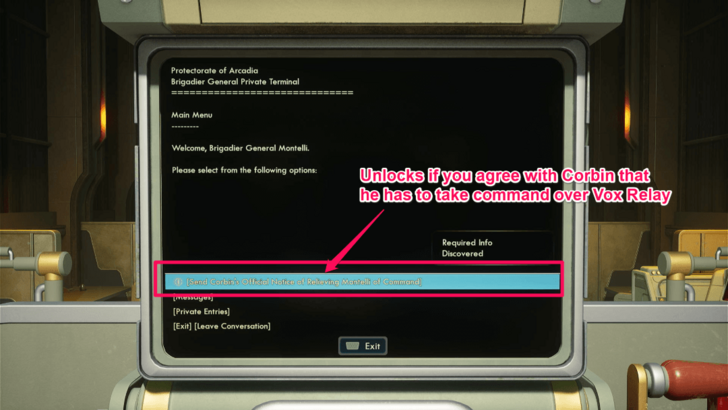 Collect all the items in the room and check the terminal. Note: If you agreed with Corbin to transfer control to him via Montelli's terminal, another option will be unlocked. |
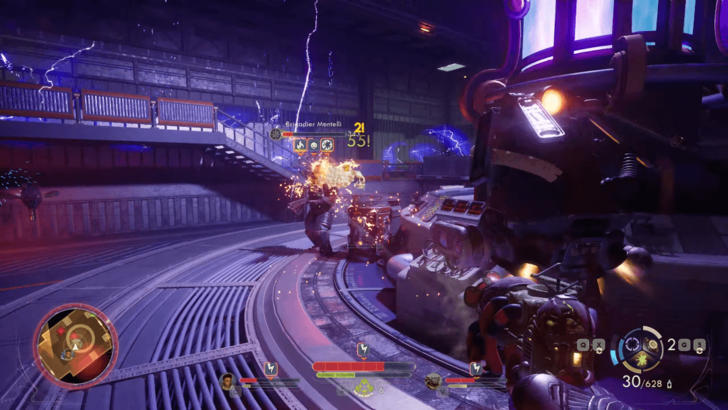
| 9 | Be ready for a boss fight. |
Defeat Montelli or Make Montelli Surrender
| Choices | |
|---|---|
| Defeat Montelli | Make Montelli Surrender |
Defeat Montelli
Without completing the required setup steps and passing the skill check, any dialogue choice you make will result in a fight with Montelli.
Montelli deals shock damage and is supported by two guards and two wasps. Having a Bio-Mass weapon will make killing Montelli easier. Corbin also joins the fight if you manage to convince him to turn against Montelli.
After the fight, loot Montelli. If Corbin survives he'll have a brief conversation with you when heading for the next area.
Make Montelli Surrender

During your conversation, if you completed the steps required and pass the skill check, you can make Montelli surrender.
Choose the following dialogue options during the conversation to make Montelli stand down:
- Crisis? Are you talking about the war with Auntie's Choice?
- I don't think your Sovereign would look kindly on that kind of talk.
- What actions should the Sovereign have taken, in your estimation?
- These extreme measures were never your idea in the first place, were they, Montelli? (Unlocks if you've read everything in Montelli's terminal.)
- Do what you know is right, not what your puppeteer tells you. (Requires Speech 5 Skill)
Montelli will leave his equipment, so you will still be able to get his Chainspark Cannon and Officer Regalia even if you didn't kill him.
Should You Kill or Spare Montelli?
Find de Vries' Safe Room
| # | Walkthrough |
|---|---|
| 1 | After the fight with Montelli, head north towards the control room. |
| 2 | 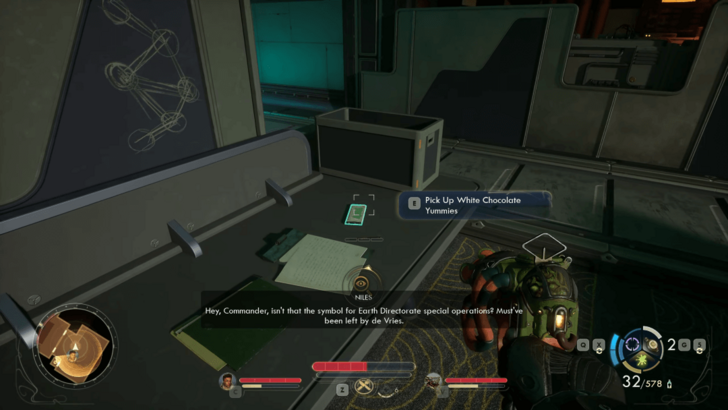 Search the room for a White Chocolate Yummies on top of the desk marked with the Earth Directorate symbol on its partition board. Pick it up along with all other items in the area. |
| 3 | 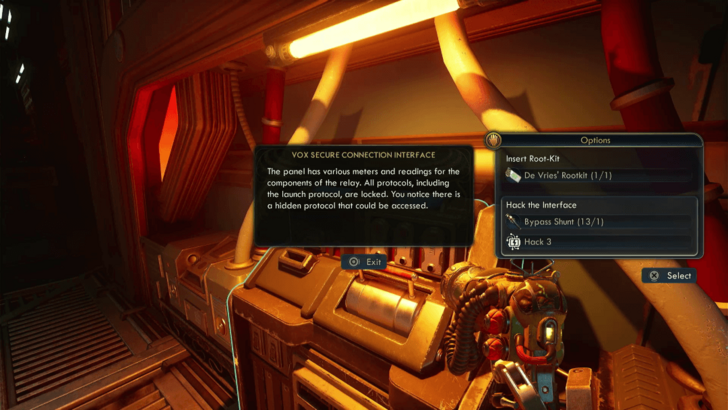 Examine the Connection Interface panel to the north of the room. If you have Hack 3, make sure you have a Bypass Shunt to hack the interface. Otherwise, use de Vries' rootkit then open the safe room. |
| 4 | Enter the safe room and use the terminal. If you hacked the interface, you will be able to use de Vries' agent code. Otherwise, select the option to override access files. |
Set Vox Relay's Crash Destination
| # | Walkthrough |
|---|---|
| 1 | After reading all the messages, de Vries' failsafe recording will play. Exit the safe room and inspect the panel again. Note: If Inez is in your party, a dialogue will begin in which she asks you to save Fairfield. |
| 2 | 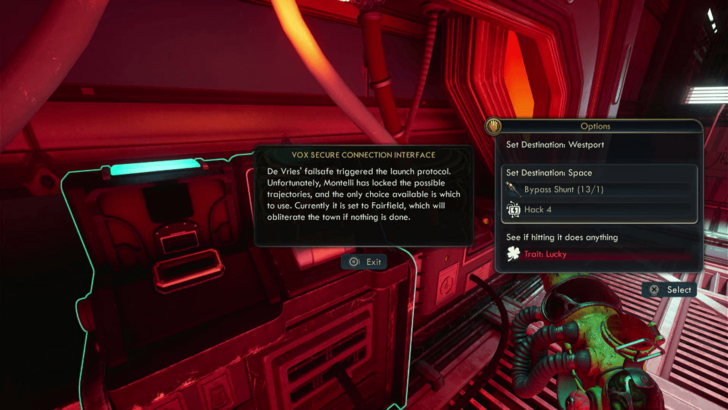 The Vox Relay's self-destruction is programmed to crash at Fairfield by default. However, you have the option to set the crash destination to a different location: ・Redirect to Westport ・Send to Space (Requires either the Hack 4 skill or the Lucky trait.) Note: If you directly assaulted Vox Relay without doing any of the necessary side quests, these alternative crash options won't be available. |
The choice you make regarding the Vox Relay Station will affect missable content and companions.
Set to Fairfield
Allowing Vox Relay to crash at Fairfield will destroy the town. Only Ethel's lab will remain, she will have new dialogue but no quests. All the side quests related to this town will be automatically marked as failed, and you will permanently lose Inez as a companion if you have not completed them before going to Vox Relay Station.
If you managed to recruit Inez before infiltrating Vox Relay but failed to save Fairfield, she will leave your party permanently no matter what response you give her when she confronts you.
Set to Westport
Diverting the crash to Westport will render it inaccessible, except for the sunken area. All the side quests related to Westport will be automatically marked as failed.
You can complete all the quests in Westport and evacuate the townspeople before going to Vox Relay to avoid missing the content and rewards from this area. This is a safe choice if you don't have the requirements to select the Space option.
Send to Space
Sending the Vox Relay Station to space is the best choice if you have not completed any of the town-associated quests yet and recruited Inez before infiltrating Vox Relay. This option ensures that you avoid losing valuable content, preventing the loss of Inez as a companion permanently and the automatic failure of all incomplete town-related quests before the infiltration.
However, this option requires the Hack 4 skill or the Lucky trait.
Escape!
Whatever your choice, head to the elevator to escape the Vox Relay Station. After the cutscene, the next main quest, On the Trail of the Traitor, will begin.
On the Trail of the Traitor Walkthrough
The Saboteur of Paradise Missables
| Missable | How to Get |
|---|---|
| A Refreshing Bit of News Milverstreet's Quest |
Don't accept Kaur's quest and agree to aid Milverstreet when you ask for help in infiltrating Vox Relay. Disqualifies you from Kaur's quest. |
| The Brain Benders of Auntie's Choice! Milverstreet's Quest |
Complete A Refreshing Bit of News and agree to aid Milverstreet again. |
| Above and Beyond Repair Kaur's Quest |
Don't accept Milverstreet's quest and agree to aid Kaur when you ask for help in infiltrating Vox Relay. Disqualifies you from Milverstreet's quest. |
| Ascent in the Howling Tower Kaur's Quest |
Complete Above and Beyond Repair and agree to aid Kaur again. |
| Inez Companion |
Must be done before going to Vox Relay: Accept A Refreshing Bit of News or get an Access Card for ARC in Above and Beyond Repair to meet Inez. Talk to her after completing the quest to recruit her. Note: Fairfield must be saved or else she leaves. |
| Saving Cadet Atarah and Vox Armory Key | Speech Skill Required Go to the sewage tunnel by descending the ladder in the room on the other side of the area, and convince Cadet Atarah to leave. She will give you the Vox Armory Key. |
| Vox Armory Equipment |
Must pass Skill check: ・Lockpick 4 ・ Explosives 4 ・Speech (Convince Cadet Atarah to leave Vox Relay to get the armory key.) |
| Pitchball Card: Marc Carlton Collectible Card |
Observation 5 Required Inside Montelli's office, examine the red wall behind a desk on the right side of the room to open the vault and get the card. |
| Fairfield Quests |
Complete the quests before going to Vox Relay Station or divert crash away from Fairfield. ・A Refreshing Bit of News ・The Brain Benders of Auntie's Choice! ・Above and Beyond Repair ・Ascent in the Howling Tower ・Better than Nature ・The Mystifying Case of the Midnight Marauder ・Schemes of the Secret Smugglers ・Stalking an Associate of Angry Ascendance ・Perilous Journey to the Grove ・Diabolical Drones of Doom |
| Westport Quests |
Complete the quests before going to Vox Relay Station or divert crash away from Westport. ・The Saga of Malfunctioning Mechanicals |
List of All Missables and Points of No Return
The Saboteur of Paradise Choices
| Choice | Effect/Condition |
|---|---|
| Directly Go to Vox Relay Station |
・Lose Inez permanently if crash is not redirected away from Fairfield. ・Automatically fails all incomplete side quests in Fairfield or Westport upon completion of Saboteur of Paradise. |
| Agree to Aid Milverstreet |
・Starts Milverstreet's questline. ・Grants the Writ of Conscription through Vigilant Hogarth. ・Allows you to meet Inez through his first quest. ・Locks you out of Kaur's quest. |
| Agree to Aid Kaur |
・Starts Kaur's questline. ・Allows you to meet Inez through an optional method in her first quest. ・Locks you out of Milverstreet's quest. |
| Kill Everyone in the Bridge to Get to Vox Relay |
・No side quests needed to complete. ・Locks you out of For Whom the Bridge Tolls side quest. |
| Complete Saga of Malfunctioning Mechanicals to Reach Vox Relay |
・Unlocks a secret way revealed by Vigilant Hogarth to reach the northern part of the island. ・Grants the Writ of Conscription |
| Complete For Whom the Bridge Tolls to Reach Vox Relay |
・The guard on the bridge will let you cross freely. ・Does not lock you out of or fail another quest. |
| Complete Aegis Against the Miasma to Reach Vox Relay |
・Grants you the Gas-Energy Deflection Apparatus. ・Allows you to cross the Zyranium field to the north of the Ministry of Accuracy. |
| Assault Vox Relay Station |
・Getting inside Vox Relay takes longer. ・Grants more XP due to more combat. |
| Sneak Inside Vox Relay Station (Conditional) |
・Gets you inside Vox Relay instantly. ・Less XP due to fewer combat. ・Writ of Conscription required. ・Requires Speech 3 or Leadership 3. |
| Convince Corbin to Cooperate (Conditional) |
・You'll get information on how to get to the Command Floor. ・Corbin will help you during the fight against Montelli. ・Allows you to make Montelli withdraw. ・Requires Writ of Conscription or Speech 4 Skill. |
| Attack or Fail to Convince Corbin |
・Corbin will turn hostile. ・Corbin dies. ・You won't get information on how to get to the Command Floor. ・You'll have to figure out how to get to Montelli by yourself through following the marker. ・You won't have Corbin's help during the fight against Montelli. ・You won't be able to make Montelli withdraw. |
| Defeat Montelli |
・You fight Montelli. ・Montelli dies. |
| Make Montelli Surrender (Conditional) |
・You don't have to fight Montelli. ・You obtain Montelli's equipment without combat. ・Montelli's fate is unknown, although he implies he will be hanged. ・Requires convincing Corbin to help you. ・Speech 5 skill required. |
| Destroy Fairfield |
・All side quests in this area will be marked as failed if uncompleted before going to Vox Relay. ・Will destroy Fairfield, except Ethel's Lab (has dialogue update, but no quests). ・Inez will permanently leave the party. |
| Destroy Westport |
・All side quests in this area will be marked as failed if uncompleted before going to Vox Relay. ・Will make Westport inaccessible. |
| Send Vox Relay to Space (Conditional) |
・Best choice to set self-destruct destination. ・Avoids Fairfield and Westport from getting destroyed and being inaccessible. ・Fairfield and Westport side quests will still be available if uncompleted. ・Keeps Inez as a permanent companion. ・Hack 4 skill or Lucky trait required. |
List of Choices and Consequences
Conditions for Corbin's Dialogue Options in Vox Relay
Based on the steps you took to get to Vox Relay, when talking to Marshal Corbin, you can convince him to cooperate with you depending on whether you obtained the Writ of Conscription and if you have at least Speech 2 skill.
| Differences of Each Condition | |
|---|---|
| 1 | Obtained Writ of Conscription from Hogarth ▶ The Saga of Malfunctioning Mechanicals ・Unlocks all dialogue options gated by info that needs to be discovered during conversation with Corbin at this point. ・Allows you to convince Corbin to cooperate with you and follow Hogarth's suggestion. Note: You must choose all the dialogue options that the Writ unlocks to do Hogarth's plan against Montelli. |
| 2 | No Writ of Conscription, Has Atleast Speech 2 Skill ・Unlocks all dialogue options requiring Speech 1 and Speech 2 Skill. ・Allows you to convince Corbin to help you. ・Corbin will tell you to send a message using Montelli's terminal. ・Unlocks an alternative option to deal with a Boss later in the quest. Note: You must choose all the dialogue options that Speech 2 unlocks and agree with Corbin's plan to send a message using Montelli's terminal. |
| 3 | No Writ of Conscription and No Speech 2 ・No matter what dialogue you choose, you won't be able to convince Corbin to help you. ・Corbin will go hostile. ・Corbin dies at this point of the game as you will have to kill him. |
Steps to Make Montelli Surrender
This option is only available if Corbin is alive and if you have Speech 5 Skill.
| # | Steps to Make Montelli Withdraw |
|---|---|
| 1 | Speech 4 Required (Writ of Conscription Optional) Convince Corbin to help you. |
| 2 | Speech 4 Required Agree to Corbin's plan to use Montelli's terminal to send a message that transfers command over to him. |
| 3 | Send the message using the terminal in Montelli's office. Afterwards, make sure to read all the messages and entries in the terminal to obtain the information needed to be discovered to unlock additional dialogue options when you confront Montelli. |
| 4 | At the top floor, after exiting Montelli's office, enter the room to the north where Montelli and Corbin are. |
| 5 | Choose the following dialogue options during the conversation: 1. Crisis? Are you talking about the war with Auntie's Choice? 2. I don't think your Sovereign would look kindly on that kind of talk. 3. What actions should the Sovereign have taken, in your estimation? 4. These extreme measures were never your idea in the first place, were they, Montelli? (Unlocks if you've read everything in Montelli's terminal.) 5. Do what you know is right, not what your puppeteer tells you. (Speech 5 Skill Required) |
The Saboteur of Paradise Rewards
Unlocks Planet Dorado and Free Market Station
Completing The Saboteur of Paradise quest nets you a lot of XP per objective cleared and unlocks the new destinations Planet Dorado and the Free Market Station in the Astrogator.
Vexed the Vox Trophy
Completing The Saboteur of Paradise main quest unlocks the Vexed the Vox silver trophy.
The Saboteur of Paradise Info
| The Saboteur of Paradise Info | |||||
|---|---|---|---|---|---|
| Type | Main Quest | ||||
| Location | Paradise Island | ||||
| How to Start | |||||
| Starts automatically as soon as you land your ship on Paradise Island. | |||||
The Outer Worlds 2 Related Guides

All Main Quests
| # | Main Quests |
|---|---|
| 1 | A Cause Worth Killing For |
| 2 | Recalling the Score |
| 3 | The Saboteur of Paradise |
| 4 | On the Trail of the Traitor ┗ Discrete Mathematics |
| 5 | Fiends in High Places |
| 6 | An Instrument to Unfold Space & Time |
| 7 | A Complication with the Computronic Cerebrum |
| 8 | Sins of the Past on the Precipice of the Future |
Comment
6  RAND0MF00L 5 months
Trying to get the uninitalized keycard in Contraband Storage, but my (level 7) character can't sneak attack any of the guards because they're too strong... what level do I need to reach to be able to sneak attack these guards?
Author

The Saboteur of Paradise Walkthrough
Please participate in our site
improvement survey
04/2026
improvement survey
04/2026
Would you assist in
improving Game8's site?
improving Game8's site?

×
We are listening to our users' valuable opinions and discussing how to act on them.
The information collected through this survey will be used for the purpose of improving our services. In addition, the information will only be disclosed a part of a statistic in a format that will not allow identification of personal information.
Begin Survey
Not Now
×
Please rate each item regarding Game8.co's Advertisements.
Amount of Ads
Very Dissatisfied
Somewhat Dissatisfied
Fine
Somewhat Satisfied
Highly Satisfied
Placement of Ads
Timing of Ad Display
Ad Loading Speed
Safeness of Ads
Content of Ads
×
Please rate each item regarding Game8.co's Quality of Articles.
Amount of information
Very Dissatisfied
Somewhat Dissatisfied
Fine
Somewhat Satisfied
Highly Satisfied
Frequency of updates
Speed of new information
Accuracy of articles
Understandibility of articles
Readability of sentences
×
Please rate each item regarding Game8.co's Usability of the Site.
Ease of finding information
Very Dissatisfied
Somewhat Dissatisfied
Fine
Somewhat Satisfied
Highly Satisfied
Loading Speed
Use of Color
Font Size
Visibility of Images
Easy to Understand Layout
×
Please rate each item regarding Game8.co's Message Boards, Comments.
Ease of Writing
Very Dissatisfied
Somewhat Dissatisfied
Fine
Somewhat Satisfied
Highly Satisfied
Readability
Ease in Finding Information
Comment Quality
Comment Quantity
Admin Response
×
Please rate each item regarding Game8.co's Site's new design.
Please rate our site's new design
Very Dissatisfied
Somewhat Dissatisfied
Fine
Somewhat Satisfied
Highly Satisfied
Do you think that the website's design change makes the site easier to use?
Has the new design made it easier for you to find information on the site?
Has the new design improved the overall visual appeal of the site?
How would you rate your overall satisfaction with the new design of the site?
×
How likely are you to recommend Game8 to someone you know?
Very Unlikely
0
1
2
3
4
5
6
7
8
9
10
Very Likely
If you have other opinions regarding potential improvement to the website, please share them with us. We would appreciate your honest opinion.
Note: This is a free response section, so you can proceed without entering anything.
Note: Please be sure not to enter any kind of personal information into your response.
Note: Please be sure not to enter any kind of personal information into your response.
×
Thank You
×
Thank you for participating in our survey! Your answers will help us to improve the quality of our website and services.
We hope you continue to make use of Game8.
We hope you continue to make use of Game8.
Close
Rankings
- We could not find the message board you were looking for.
Gaming News


![Forza Horizon 6 Review [Preview] | Beautiful Roads With a Whole Lot of Oversteer](https://img.game8.co/4460981/a7254c24945c43fbdf6ad9bea52b5ce9.png/thumb)
![Borderlands Mobile Review [Playtest] | The Same Borderlands Made Easy](https://img.game8.co/4465500/aac0c880a39ec5cd46073e49d18f3ed5.png/thumb)
Popular Games

Genshin Impact Walkthrough & Guides Wiki
Crimson Desert Walkthrough & Guides Wiki
Umamusume: Pretty Derby Walkthrough & Guides Wiki
Honkai: Star Rail Walkthrough & Guides Wiki
Monster Hunter Stories 3: Twisted Reflection Walkthrough & Guides Wiki
Wuthering Waves Walkthrough & Guides Wiki
The Seven Deadly Sins: Origin Walkthrough & Guides Wiki
Pokemon TCG Pocket (PTCGP) Strategies & Guides Wiki
Pokemon Pokopia Walkthrough & Guides Wiki
Zenless Zone Zero Walkthrough & Guides Wiki


Recommended Games
Fire Emblem Heroes (FEH) Walkthrough & Guides Wiki
Pokemon Brilliant Diamond and Shining Pearl (BDSP) Walkthrough & Guides Wiki
Super Smash Bros. Ultimate Walkthrough & Guides Wiki
Diablo 4: Vessel of Hatred Walkthrough & Guides Wiki
Cyberpunk 2077: Ultimate Edition Walkthrough & Guides Wiki
Yu-Gi-Oh! Master Duel Walkthrough & Guides Wiki
Elden Ring Shadow of the Erdtree Walkthrough & Guides Wiki
Monster Hunter World Walkthrough & Guides Wiki
The Legend of Zelda: Tears of the Kingdom Walkthrough & Guides Wiki
Persona 3 Reload Walkthrough & Guides Wiki


All rights reserved
© 2025 Obsidian Entertainment, Inc. Obsidian Entertainment, the Obsidian Entertainment logo, The Outer Worlds 2, and The Outer Worlds 2 logos are trademarks or registered trademarks of Obsidian Entertainment, Inc. All rights reserved.
The copyrights of videos of games used in our content and other intellectual property rights belong to the provider of the game.
The contents we provide on this site were created personally by members of the Game8 editorial department.
We refuse the right to reuse or repost content taken without our permission such as data or images to other sites.
Does anyone know if having Inez in your party locks you out of getting Montelli to surrender? I think I had everything on track but when I confront Montelli after the first choice of dialogue he and Inez argue and then no iteration of the dialogue gets him to surrender.