This survey will take about 1 minute.
Your answers will help us to improve our website.
Outer Worlds 2
Missive From the Lost Days Walkthrough

Missive From the Lost Days is a Golden Ridge side quest in the Outer Worlds 2. Read on for a full walkthrough of the quest, including info on how to unlock the quest and its rewards.
List of Contents
How to Unlock Missive From the Lost Days
Find and Speak to the Secretive Elder Near Guardian Estates
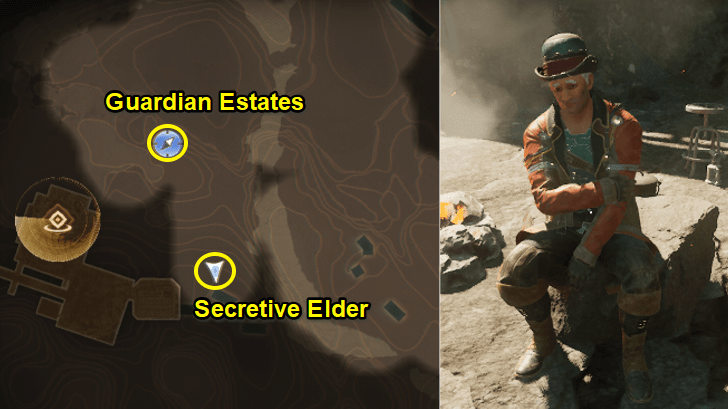
To start Missive From the Lost Days, head to Guardian Estates in Golden Ridge. Find the Secretive Elder camping on a small hill nearby and accept his request to retrieve two precious documents inside the Guardian Estates.
If you completed the side quest, Schemes of the Secret Smugglers, Sub Rosa Agent Kobor will mention this side quest to you when speaking to her in Matriarch's Mercy.
Pick Up the Bounty Contract for Edward Dunsany and Moreton Dunsany
At the top of the Guardian Estates are two boss enemies named Edward Dunsany and Moreton Dunsany. Make sure to pick up their bounty contract via the Matriarch's Mercy bounty terminal so you can complete this side quest alongside Battle with the Beastly Brigands.
Missive From the Lost Days Walkthrough
| Side Quest Objectives | ||||||||||||
|---|---|---|---|---|---|---|---|---|---|---|---|---|
| 1 | Find and Speak to the Secretive Elder | |||||||||||
| 2 | Gain Entry into Guardian Estates | |||||||||||
| Method 1 | Method 2 | |||||||||||
| Shoot Your Way In | Sneak Your Way In | |||||||||||
| 3 | Find the First Set of Documents | |||||||||||
| 4 | Find the Second Set of Documents | |||||||||||
| 5 | Return to the Secretive Elder | |||||||||||
Click on a step to jump to its section in the walkthrough!
Find and Speak to the Secretive Elder
| Step-by-step Walkthrough | |
|---|---|
| 1 | Fast travel to Alexandra Station Entrance and walk along the road. But before reaching the crossroad ahead, turn right into a dirt path. The area is full of Scrappers, so prepare to fight. Proceed until you reach the Scrapper camp at the end of the area. |
| * | 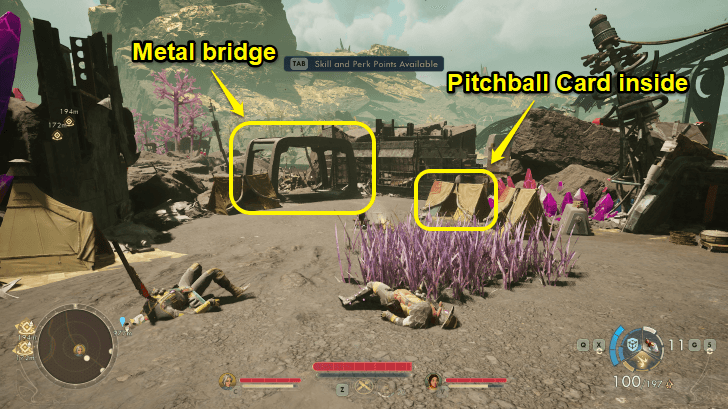 Look for a metal bridge in the camp at the end of the area. Before crossing, find the Pitchball Card: Kevin Andersen inside the tent near the bridge. You'll these cards for the quest, A Collection of Rogues. |
| 2 | 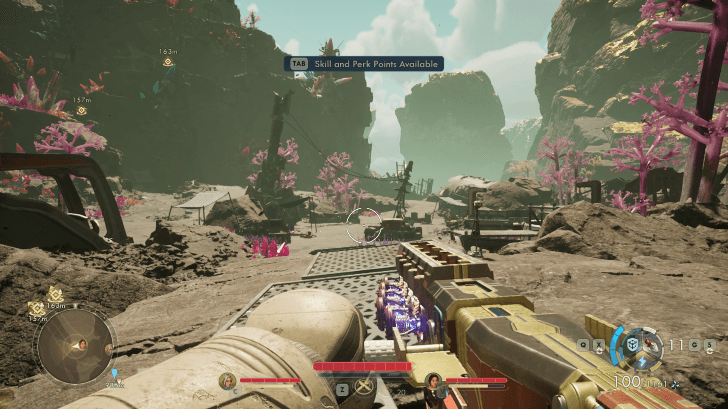 As you cross the bridge, there will be another Scrapper camp nearby. Clear it out and head straight up the hill. |
| 3 | 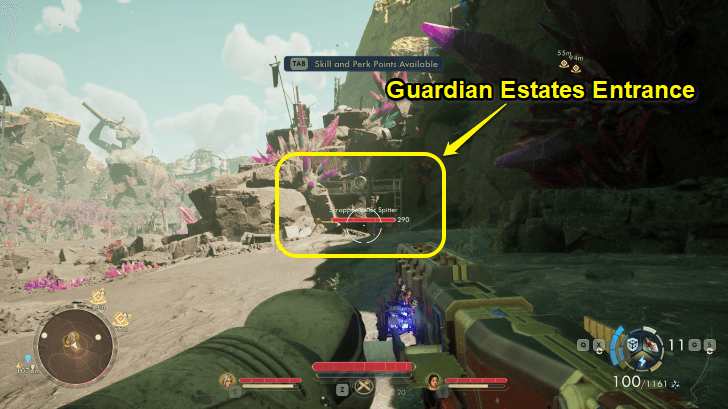 Continue walking until you see a shed. Turn left and you'll see a large cave opening with two Scrapper guards nearby. This is the entrance to Guardian Estates, but do not enter yet. |
| 4 | Instead, turn left from the entrance and follow a path that goes uphill. At the end of this path, you'll see a small camp and an injured Secretive Elder. |
| 5 | 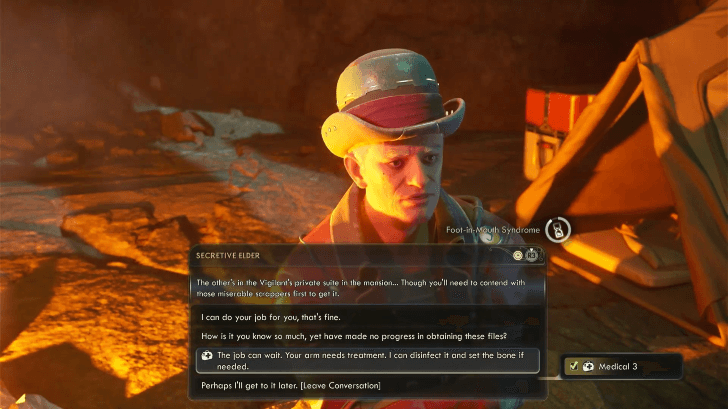 Speak to the Secretive Elder and he'll tell you about his mission to retrieve two sets of documents inside Guardian Estates; one is in the tram station on top of the Estates, second is inside the mansion. Note: You can choose to inspect his injuries with Medical 3 but it is not required to complete the quest. |
| 6 | After speaking with the Secretive Elder, walk back down the hill to Guardian Estates. |
Gain Entry into Guardian Estates
| How to Enter Guardian Estates | |
|---|---|
| Shoot Your Way In | Sneak Your Way In |
Depending on your preference, you can choose to enter Guardian Estates by simply killing all the Scrappers inside, or sneaking in through a hole near the Secretive Elder's camp.
Both methods are viable and doesn't change the outcome or rewards of the quest. However, killing the Scrappers gives additional XP, while sneaking into the estate is faster.
Method 1: Shooting Your Way In
| Step-by-step Walkthrough | |
|---|---|
| 1 | 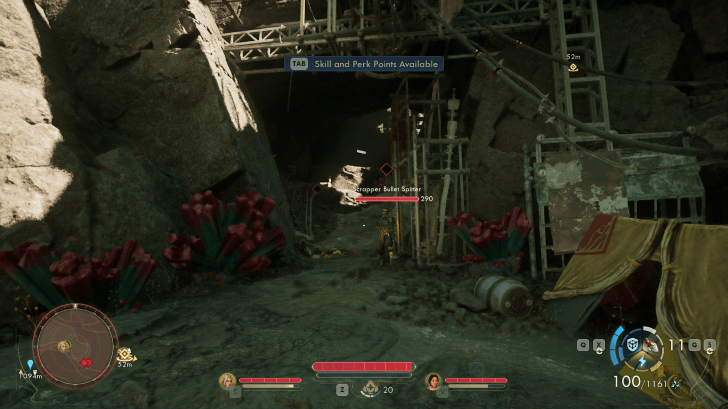 Starting at the entrance, there will be two Scrappers posted nearby. Once dealt with, proceed inside and up the hill. |
| 2 | 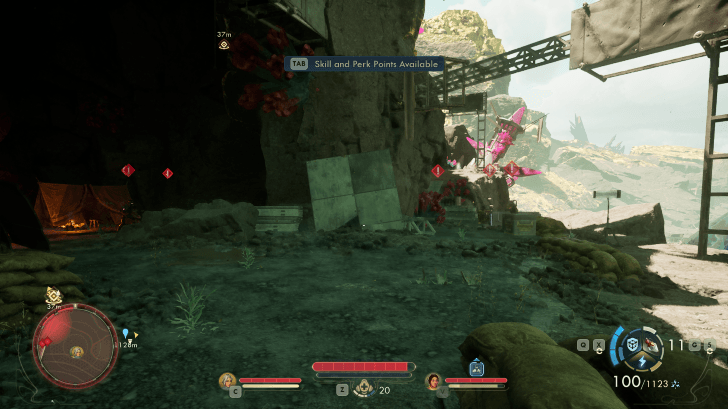 Continue climbing up to reach a large cave opening with tents. Ahead, there will be a Scrapper by the cliff, and two more inside the cave. Deal with them, and continue ahead and up the ramp. Note: Attacking the Scrappers here might also alert the enemies ahead. |
| 4 | 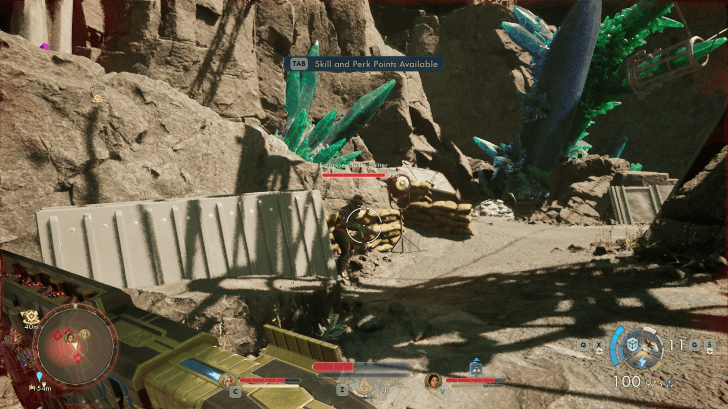 Straight ahead is a small open area with more Scrappers. You can use the crates and sandbags around as cover during the fight. Afterwards, continue forward and up the ramp. |
| 5 |  Proceed down the hill path until you reach a metal ramp leading to the courtyard. Walk up the ramp and be ready to fight as the courtyard is full of Scrappers. |
| * | 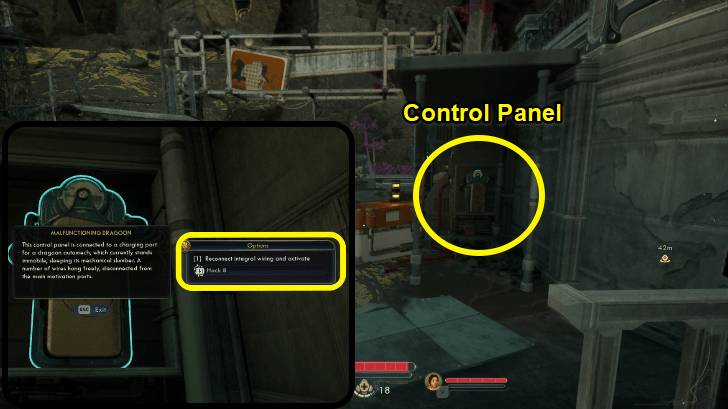 Optional: After walking up the ramp to the coutryard, look to the right to find a control panel. If you have Hack 8 you can use it to activate a Dragoon Automech that will fight the Scrappers for you. |
| 6 | 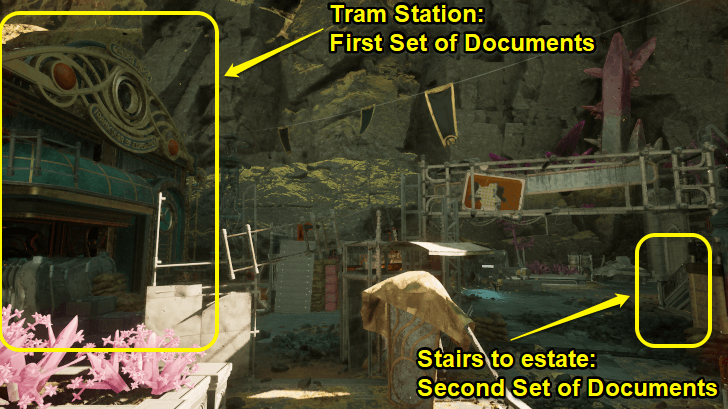 Once the courtyard is cleared, continue the quest either by: ① Going left and entering the tram station to look for the First Set of Documents ② Going right and climbing up the stairs to the estate for the Second Set of Documents |
Method 2: Sneaking Your Way In
| Step-by-step Walkthrough | |
|---|---|
| 1 | There are two ways to enter Guardian Estates undetected; one is to find the hole on the side of the mountain. Walk the path uphill where the Secretive Elder was, but before reaching him, look right to see a huge hole where you can crawl through. Second way is to use a Distraction Device on the Scrappers near the entrance |
| 2 | 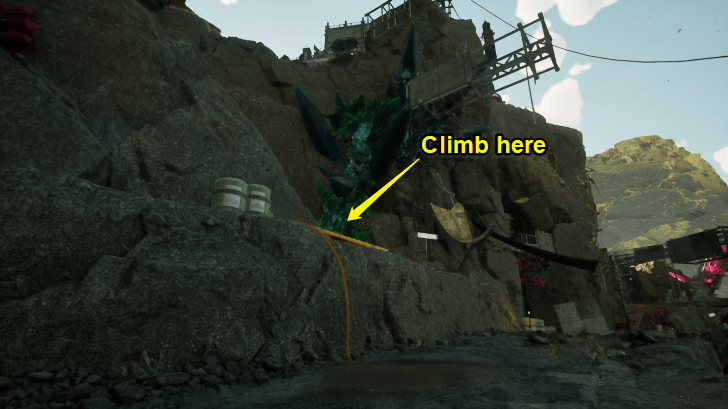 Follow the path uphill until you see a cave opening with tents and a few Scrappers, but don't move forward. Instead, turn left and climb the ledge for a shortcut. |
| 3 |  This path will lead you directly to the estate's courtyard. Be warned that the place is full of Scrappers. You can proceed to the courtyard, or do an optional step below if you have Hack 8 skill. |
| * | Optional: From the ramp to the coutryard, look right to find a control panel on the wall. If you have Hack 8, use it to activate a Dragoon Automech that will fight the Scrappers for you. |
| 4 | Now that you are in the courtyard, you can continue the quest either by: ① Going left and entering the tram station to look for the First Set of Documents. ② Going right and climbing up the stairs to the estate for the Second Set of Documents |
Find the First Set of Documents
| Step-by-step Walkthrough | |
|---|---|
| 1 | 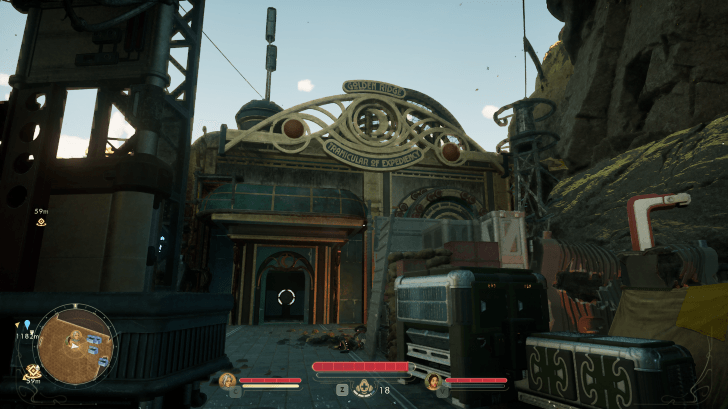 The First Set of Documents is a Suspicious Datapad found in the tram station on the left side of the coutryard. Proceed inside the station. |
| 2 | 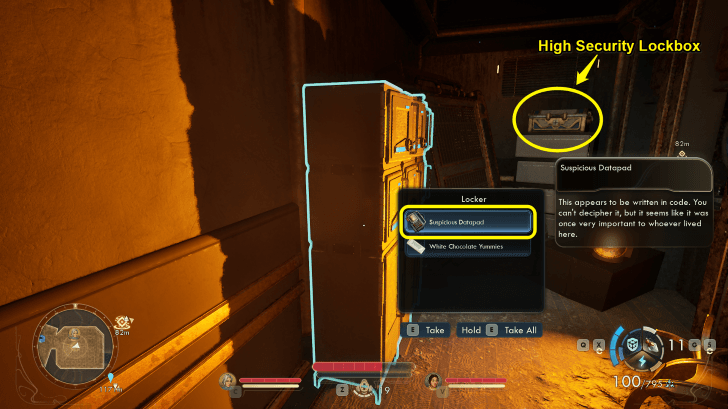 Enter the doorway on the right with a row of lockers. The first locker contains the Suspicious Datapad. Grab it to complete the first objective. Note: There's also a High Security Lockbox on top of the cabinet in this room. |
| 3 | 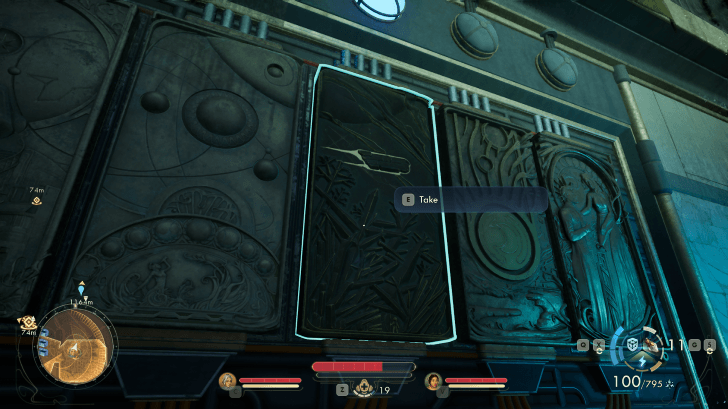 Once you have the Suspicious Datapad, you can explore the area, or fetch the Second Set of Documents. Note: Don't forget to grab the Mural Piece by the entrance. This is for the quest, The Pursuit of the Partite Pentaptych. |
Find the Second Set of Documents
| Step-by-step Walkthrough | |
|---|---|
| 1 | 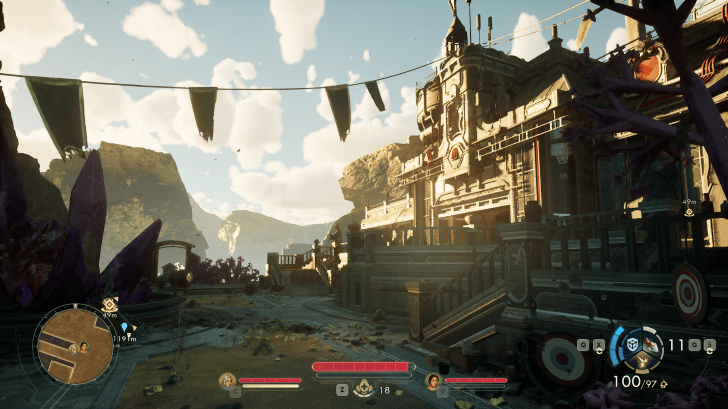 The Second Set of Documents, a Tattered Ledger, is found inside the estate. Head to the right side of the coutryard and climb the staircase leading to the mansion but do not go inside yet. |
| 2 | Before entering the estate, go straight and pass the crystal statue until you see an altar. Leaning inside is Tossball Card: Simon Smith. Afterwards, proceed up the staircase and enter the estate. |
| 3 | 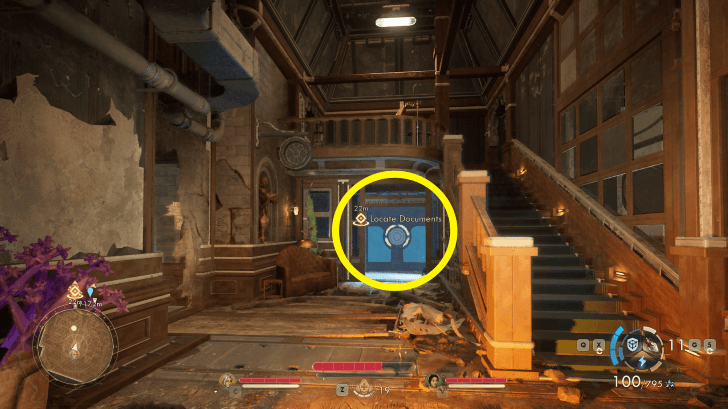 Once inside, ignore the other areas for now and go to the door straight ahead. |
| 4 | 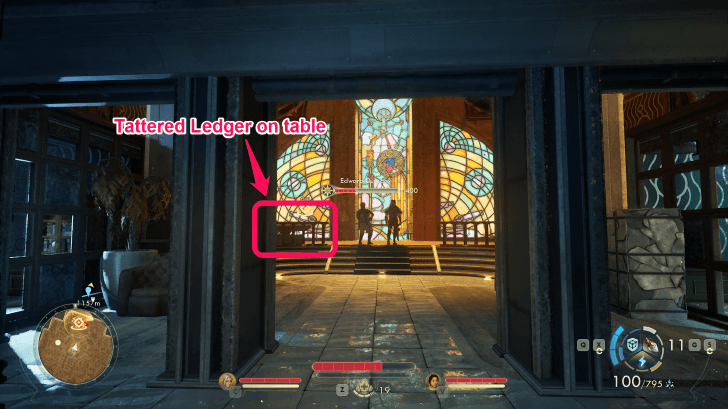 In the stained-glass room, you will see Edward Dunsany and Moreton Dunsany having a conversation. Grab the Tattered Ledger on the table near Edward Dunsany to complete the second objective. Note: We highly recommend killing both Edward and Moreton Dunsany at this point to complete Battle with the Beastly Brigands immediately. |
| 5 | Once you acquired the two sets of documents, you can continue exploring the area or return to the Secretive Elder to complete the quest. |
Return to the Secretive Elder
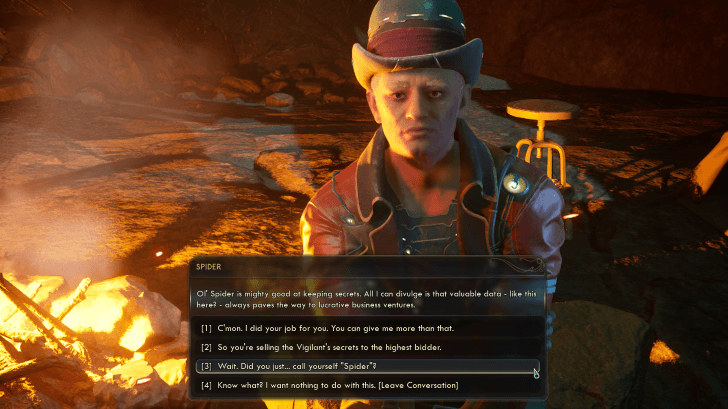
With the two sets of documents in hand, return to the Secretive Elder who will accidentally reveal that he goes by the name Spider. For your efforts, he'll reward you with x500 bits, an Advanced Decryption Key, the Peaky Trench Coat armor, and +5 Rep to Sub Rosa.
Spider will also share some knowledge about the Scrappers and a Protectorate Sentinel on top of your reward.
Missive From the Lost Days Rewards
| Quest Completion Rewards | |
|---|---|
|
・1242 XP ・x500 Bits ・Advanced Decryption Key ・Peaky Trench Coat ・High Security Lockbox (Optional) ・Pitchball Card: Kevin Andersen (Optional) ・Tossball Card: Simon Smith (Optional) |
|
| Faction Reputation | +5 Rep for Sub Rosa |
There is a High Security Lockbox that can be looted inside the tram station where you find the Suspicious Datapad. The lockbox contains Bowlzerker.
Pitchball Card: Kevin Andersen is found inside a tent near the metal bridge in the Scrapper camp in Golden Ridge.
Tossball Card: Simon Smith is found leaning on an altar in the courtyard of Guardian Estates.
Missive From the Lost Days Info
| Missive From the Lost Days Info | |||||
|---|---|---|---|---|---|
| Type | Side Quest | ||||
| Location | Guardian Estates, Golden Ridge | ||||
| Quest Giver | Secretive Elder | ||||
| How to Start | |||||
| Speak to the elderly Sub Rosa agent near Guardian Estates in Golden Ridge. | |||||
Outer Worlds 2 Related Guides
All Quests by Location
| Quest Guides by Location | ||
|---|---|---|
| Paradise Island | Golden Ridge | Free Market Station |
| Praetor | Cloister | Undisputed Claim |
All Side Quest Guides
Comment
Author

Missive From the Lost Days Walkthrough
Please participate in our site
improvement survey
04/2026
improvement survey
04/2026
Would you assist in
improving Game8's site?
improving Game8's site?

×
We are listening to our users' valuable opinions and discussing how to act on them.
The information collected through this survey will be used for the purpose of improving our services. In addition, the information will only be disclosed a part of a statistic in a format that will not allow identification of personal information.
Begin Survey
Not Now
×
Please rate each item regarding Game8.co's Advertisements.
Amount of Ads
Very Dissatisfied
Somewhat Dissatisfied
Fine
Somewhat Satisfied
Highly Satisfied
Placement of Ads
Timing of Ad Display
Ad Loading Speed
Safeness of Ads
Content of Ads
×
Please rate each item regarding Game8.co's Quality of Articles.
Amount of information
Very Dissatisfied
Somewhat Dissatisfied
Fine
Somewhat Satisfied
Highly Satisfied
Frequency of updates
Speed of new information
Accuracy of articles
Understandibility of articles
Readability of sentences
×
Please rate each item regarding Game8.co's Usability of the Site.
Ease of finding information
Very Dissatisfied
Somewhat Dissatisfied
Fine
Somewhat Satisfied
Highly Satisfied
Loading Speed
Use of Color
Font Size
Visibility of Images
Easy to Understand Layout
×
Please rate each item regarding Game8.co's Message Boards, Comments.
Ease of Writing
Very Dissatisfied
Somewhat Dissatisfied
Fine
Somewhat Satisfied
Highly Satisfied
Readability
Ease in Finding Information
Comment Quality
Comment Quantity
Admin Response
×
Please rate each item regarding Game8.co's Site's new design.
Please rate our site's new design
Very Dissatisfied
Somewhat Dissatisfied
Fine
Somewhat Satisfied
Highly Satisfied
Do you think that the website's design change makes the site easier to use?
Has the new design made it easier for you to find information on the site?
Has the new design improved the overall visual appeal of the site?
How would you rate your overall satisfaction with the new design of the site?
×
How likely are you to recommend Game8 to someone you know?
Very Unlikely
0
1
2
3
4
5
6
7
8
9
10
Very Likely
If you have other opinions regarding potential improvement to the website, please share them with us. We would appreciate your honest opinion.
Note: This is a free response section, so you can proceed without entering anything.
Note: Please be sure not to enter any kind of personal information into your response.
Note: Please be sure not to enter any kind of personal information into your response.
×
Thank You
×
Thank you for participating in our survey! Your answers will help us to improve the quality of our website and services.
We hope you continue to make use of Game8.
We hope you continue to make use of Game8.
Close
Rankings
- We could not find the message board you were looking for.
Gaming News


![Forza Horizon 6 Review [Preview] | Beautiful Roads With a Whole Lot of Oversteer](https://img.game8.co/4460981/a7254c24945c43fbdf6ad9bea52b5ce9.png/thumb)
![Borderlands Mobile Review [Playtest] | The Same Borderlands Made Easy](https://img.game8.co/4465500/aac0c880a39ec5cd46073e49d18f3ed5.png/thumb)
Popular Games

Genshin Impact Walkthrough & Guides Wiki
Crimson Desert Walkthrough & Guides Wiki
Umamusume: Pretty Derby Walkthrough & Guides Wiki
Honkai: Star Rail Walkthrough & Guides Wiki
Monster Hunter Stories 3: Twisted Reflection Walkthrough & Guides Wiki
Wuthering Waves Walkthrough & Guides Wiki
The Seven Deadly Sins: Origin Walkthrough & Guides Wiki
Pokemon TCG Pocket (PTCGP) Strategies & Guides Wiki
Pokemon Pokopia Walkthrough & Guides Wiki
Zenless Zone Zero Walkthrough & Guides Wiki


Recommended Games
Fire Emblem Heroes (FEH) Walkthrough & Guides Wiki
Pokemon Brilliant Diamond and Shining Pearl (BDSP) Walkthrough & Guides Wiki
Super Smash Bros. Ultimate Walkthrough & Guides Wiki
Diablo 4: Vessel of Hatred Walkthrough & Guides Wiki
Cyberpunk 2077: Ultimate Edition Walkthrough & Guides Wiki
Yu-Gi-Oh! Master Duel Walkthrough & Guides Wiki
Elden Ring Shadow of the Erdtree Walkthrough & Guides Wiki
Monster Hunter World Walkthrough & Guides Wiki
The Legend of Zelda: Tears of the Kingdom Walkthrough & Guides Wiki
Persona 3 Reload Walkthrough & Guides Wiki


All rights reserved
© 2025 Obsidian Entertainment, Inc. Obsidian Entertainment, the Obsidian Entertainment logo, The Outer Worlds 2, and The Outer Worlds 2 logos are trademarks or registered trademarks of Obsidian Entertainment, Inc. All rights reserved.
The copyrights of videos of games used in our content and other intellectual property rights belong to the provider of the game.
The contents we provide on this site were created personally by members of the Game8 editorial department.
We refuse the right to reuse or repost content taken without our permission such as data or images to other sites.