Best DPS Builds (Update 1.2.1)
Please note that the New World Team has stopped covering the game as of Update 1.2. Information on certain pages may not be up-to-date.
This is a guide on the best DPS builds in New World. Read on to see the recommended stats, skills, armor, and playstyle guides of the best and latest DPS builds for PVE and PVP as of Update 1.2.1!
List of Contents
| List of Role Builds | ||
|---|---|---|
 Best Tank Builds Best Tank Builds |
 Best Healer Builds Best Healer Builds |
 Best DPS Builds Best DPS Builds |
DPS Endgame Builds
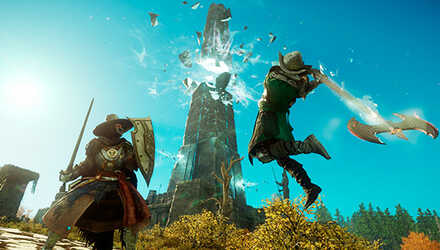
Hatchet / Great Axe Self-Sustain Build
| Build Purpose | |
|---|---|
| PvE | |
| Strengths | Weaknesses |
|
・Solid DPS
・High Survivability ・Ideal for soloing ・Both weapons uses the same Attribute |
・Great Axe swings are very slow
・Weak early on due to the abscence of Defy Death |
Build Stats and Skills
| Stat Priority | Strength → Constitution |
|---|---|
| Strength | 125 |
| Dexterity | 5 |
| Intelligence | 5 |
| Focus | 5 |
| Constitution | 75 |
Stats obtained through armor are not accounted for in this table.
| 1st Weapon | 2nd Weapon |
|---|---|
 Hatchet Hatchet
|
 Great Axe Great Axe
|
| Active Skills | |
| Passive Skills | |
Best Perks and Equipment
| Perks and Equipment Stats | |
|---|---|
 |
Stats: Soldier (Strength) |
 |
Type: None Stats: - |
 |
Weight: Heavy Stats: Soldier (Strength) |
 |
Weight: Heavy Stats: Soldier (Strength) |
 |
Weight: Heavy Stats: Soldier (Strength) |
 |
Weight: Heavy Stats: Soldier (Strength) |
 |
Weight: Heavy Stats: Soldier (Strength) |
Build Playstyle
This build is recommended for players who just want to go in and fight their opponents. Both weapons scale off of Strength, which makes it easier to allocate your stats and maximize the damage output.
This build is good for taking down single targets and groups of enemies. On top of the insane damage you can do to your enemies, the self-sustain of Hatchet's Berserk, coupled with its Defy Death and the life steal you get from Great Axe's Reap. This makes it hard for you to die even if you charge headlong towards groups of enemies.
It's also easy to level these weapons up, as most of the time, you'll be pulling large mobs towards you using Great Axe's Maelstrom and Gravity well. If you're starting out with this build, make sure to ease on the aggression until you get Defy Death later on. Otherwise, you will die quickly pulling mobs if you aren't very careful.
Void Gauntlet / Ice Gauntlet CC Build
| Build Purpose | |
|---|---|
| General (PvP & PvE) | |
| Strengths | Weaknesses |
|
・Both weapons scale off Intelligence
・High Burst Damage ・Lots of CC and AoE |
・Requires good mana management
・Requires proper set-up for combos ・Squishy |
Build Stats and Skills
| Stat Priority | Intelligence → Constitution |
|---|---|
| Strength | 5 |
| Dexterity | 5 |
| Intelligence | 165 |
| Focus | 5 |
| Constitution | 35 |
Stats obtained through armor are not accounted for in this table.
| 1st Weapon | 2nd Weapon |
|---|---|
 Void Gauntlet Void Gauntlet
|
 Ice Gauntlet Ice Gauntlet
|
| Active Skills | |
| Passive Skills | |
Best Perks and Equipment
| Perks and Equipment Stats | |
|---|---|
 |
Stats: Scholar (Intelligence) |
 |
Type: None Stats: - |
 |
Weight: Light Stats: Scholar (Intelligence) |
 |
Weight: Light Stats: Scholar (Intelligence) |
 |
Weight: Light Stats: Scholar (Intelligence) |
 |
Weight: Light Stats: Scholar (Intelligence) |
 |
Weight: Light Stats: Scholar (Intelligence) |
Build Playstyle
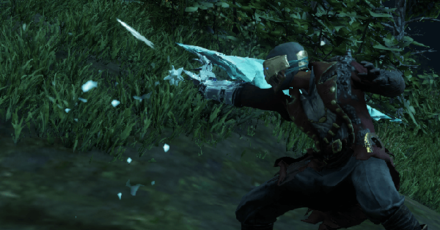
This build uses the ice and void gauntlets to inflict crowd control effects and deal heavy damage to opponents. Void Gauntlet will be your primary weapon against your opponents. Orb of Decay is a powerful tool against enemies as it is an AoE attack that can also explode using the Detonating Orb perk.
If you hit an opponent and detonated it correctly afterward, it can acquire two stacks of Void Essence, which can potentially reset all your skills. Successfully landing a Petrifying Scream at your opponent will disable their movement and make it easier to land your combo. Applying Baleful Tether prior will also help maximize the DPS to delete a chunk of their health or kill them outright.
Then we use the Ice Gauntlet mainly as a support weapon as It can fill your mana back, place down AoE to slow opponents, and inflict DoT and crowd control effects to your opponents. This makes it easier for you to land your Void Gauntlet skills, making it an ideal support weapon to pair it up with.
DPS Starter Builds
AoE Axe Duo Build

| Build Purpose | |
|---|---|
| PvE | |
| Stat Priority | |
| Strength → Constitution | |
| Strengths | Weaknesses |
|
・Good against multiple mobs
・High Damage output |
・Can be easily swarmed by enemies if not prepared
・Limited movement options |
Build Skills
| 1st Weapon | 2nd Weapon |
|---|---|
 Great Axe Great Axe
|
 Hatchet Hatchet
|
| Active Skills | |
| Passive Skills | |
Best Perks and Equipment
| Perks and Equipment Stats | |
|---|---|
 |
Stats: Barbarian (Strength → Constitution) |
 |
Type: None Stats: - |
 |
Weight: Heavy Stats: Barbarian (Strength → Constitution) |
 |
Weight: Heavy Stats: Barbarian (Strength → Constitution) |
 |
Weight: Heavy Stats: Barbarian (Strength → Constitution) |
 |
Weight: Heavy Stats: Barbarian (Strength → Constitution) |
 |
Weight: Heavy Stats: Barbarian (Strength → Constitution) |
Build Playstyle
This is a semi-tank DPS build that specializes in inflicting AoE damage. It is a good starter build for PvE that lets you grind your way to end-game by allowing you to deal with hordes of enemies without much trouble.
You start by luring all the enemies you can see around you by using the Hatchet's throw attack perk with the Berserk buff active. Once you've caught all their attention, switch to your Great Axe and use Maelstrom to keep them in one place. After which, cut them all down using your Whirlwind with Reap to finish them off.
Musket / Rapier Build
| Build Purpose | |
|---|---|
| PvE | |
| Stat Priority | |
| Dexterity | |
| Strengths | Weaknesses |
|
・Good amount of DPS.
・Very good with |
・Uses ammo that you have to buy/craft.
・Very squishy. |
Build Skills
| 1st Weapon | 2nd Weapon |
|---|---|
 Musket Musket
|
 Rapier Rapier
|
| Active Skills | |
| Passive Skills | |
Best Perks and Equipment
| Perks and Equipment Stats | |
|---|---|
 |
Stats: Ranger (Dexterity) |
 |
Type: None Stats: - |
 |
Weight: Medium Stats: Ranger (Dexterity) |
 |
Weight: Medium Stats:Ranger (Dexterity) |
 |
Weight: Medium Stats: Ranger (Dexterity) |
 |
Weight: Medium Stats: Ranger (Dexterity) |
 |
Weight: Medium Stats: Ranger (Dexterity) |
Build Playstyle
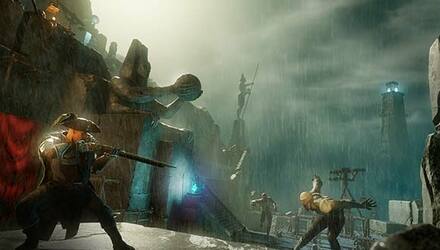
A Musket build that aims to maximize the damage using the Shooter's Stance. Powder Burn is a better DPS skill compared to Power Shot. It provides some nice bonus to our damage while our enemies are burning via Backdraft. Back it Up helps with kiting, and Weakened Defense is great for enemies using shields.
Use Sticky Bomb to engage your enemies, then apply DPS following it up with a Fleche execute. While the Bleed extension is wasted on the Rapier setup, we are still able to get a steady counterattack combo via Flurry and Riposte. The Finalize stagger also makes finishing the fight with Fleche much easier.
For the Rapier, we focus on utilizing Fleche's cooldown resets since we initially deal damage from afar and we let enemies approach us for the execute once they're in melee combat. Lure with high burst from the Musket then kill!
Rapier / Gauntlet Bleed Build
| Build Purpose | |
|---|---|
| PvP | |
| Stat Priority | |
| Dexterity → Intelligence | |
| Strengths | Weaknesses |
|
・Perfect for annoying people
・High Survivability |
・Low Damage Output
・Enemies with high constitution are harder to kill |
Build Skills
| 1st Weapon | 2nd Weapon |
|---|---|
 Rapier Rapier
|
 Ice Gauntlet Ice Gauntlet
|
| Active Skills | |
| Passive Skills | |
Best Perks and Equipment
| Perks and Equipment Stats | |
|---|---|
 |
Stats:Trickster (Dexterity → Intelligence) |
 |
Type: None Stats: - |
 |
Weight: Light Stats: Trickster (Dexterity → Intelligence) |
 |
Weight: Light Stats: Trickster (Dexterity → Intelligence) |
 |
Weight: Light Stats: Trickster (Dexterity → Intelligence) |
 |
Weight: Light Stats: Trickster (Dexterity → Intelligence) |
 |
Weight: Light Stats: Trickster (Dexterity → Intelligence) |
Build Playstyle
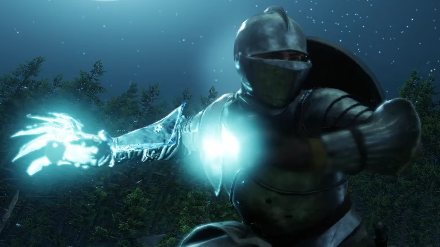
This build mainly focuses on applying DoT to your enemies using Rapier's bleed while using the Ice Gauntlet to stall for time.
We make use of Rapier's Tondo to inflict bleed
to your opponent while using the Ice Gauntlet's Ice Storm and Ice Pylon to slow their advances. Rapier's Evade and Riposte will make it harder for the opponent to attack you and Ice Gauntlet's Entombed makes sure that you have a constant supply of mana and protection against attacks.
New World Related Guides

List of Role Builds
| List of Role Builds | ||
|---|---|---|
 Best Tank Builds Best Tank Builds |
 Best Healer Builds Best Healer Builds |
 Best DPS Builds Best DPS Builds |
Best Weapon Builds
| Best PVE and PVP Weapon Builds | |||
|---|---|---|---|
 Sword & Shield Sword & Shield |
 Rapier Rapier |
 Hatchet Hatchet |
 Spear Spear |
 Great Axe Great Axe |
 War Hammer War Hammer |
 Bow Bow |
 Musket Musket |
 Fire Staff Fire Staff |
 Life Staff Life Staff |
 Ice Gauntlet Ice Gauntlet |
 Void Gauntlet Void Gauntlet |
Comment
For the Musket / Rapier, you've put 2 times critical reload (instead of 1 backdraft i guess ?)
Author
Best DPS Builds (Update 1.2.1)
improvement survey
03/2026
improving Game8's site?

Your answers will help us to improve our website.
Note: Please be sure not to enter any kind of personal information into your response.

We hope you continue to make use of Game8.
Rankings
- We could not find the message board you were looking for.
Gaming News
Popular Games

Genshin Impact Walkthrough & Guides Wiki

Honkai: Star Rail Walkthrough & Guides Wiki

Umamusume: Pretty Derby Walkthrough & Guides Wiki

Pokemon Pokopia Walkthrough & Guides Wiki

Resident Evil Requiem (RE9) Walkthrough & Guides Wiki

Monster Hunter Wilds Walkthrough & Guides Wiki

Wuthering Waves Walkthrough & Guides Wiki

Arknights: Endfield Walkthrough & Guides Wiki

Pokemon FireRed and LeafGreen (FRLG) Walkthrough & Guides Wiki

Pokemon TCG Pocket (PTCGP) Strategies & Guides Wiki
Recommended Games

Diablo 4: Vessel of Hatred Walkthrough & Guides Wiki

Cyberpunk 2077: Ultimate Edition Walkthrough & Guides Wiki

Fire Emblem Heroes (FEH) Walkthrough & Guides Wiki

Yu-Gi-Oh! Master Duel Walkthrough & Guides Wiki

Super Smash Bros. Ultimate Walkthrough & Guides Wiki

Pokemon Brilliant Diamond and Shining Pearl (BDSP) Walkthrough & Guides Wiki

Elden Ring Shadow of the Erdtree Walkthrough & Guides Wiki

Monster Hunter World Walkthrough & Guides Wiki

The Legend of Zelda: Tears of the Kingdom Walkthrough & Guides Wiki

Persona 3 Reload Walkthrough & Guides Wiki
All rights reserved
© 2019-2021, Amazon.com, Inc. or its affiliates. All rights reserved.
The copyrights of videos of games used in our content and other intellectual property rights belong to the provider of the game.
The contents we provide on this site were created personally by members of the Game8 editorial department.
We refuse the right to reuse or repost content taken without our permission such as data or images to other sites.


![Monster Hunter Stories 3 Review [First Impressions] | Simply Rejuvenating](https://img.game8.co/4438641/2a31b7702bd70e78ec8efd24661dacda.jpeg/thumb)


Whoops! Yes, that's right — the second one is supposed to be Backdraft. Our Musket/Rapier table should be displaying the correct skills now. Thank you very much for pointing this out! :)