Kasane and Yuito Route | Phase 12: Path to the Future and Freedom Walkthrough
The password from Episode 6 of Scarlet Nexus for the password-cracking mini-game has been found! Refer to our page on Scarlet Nexus Musubi Codes for the latest Musubi code update!
This is a story walkthrough for Phase 12: Path to the Future and Freedom in Scarlet Nexus for the Xbox, Playstation, and PC. Here you'll find a guide on how to complete this area, story section, boss strategies, a list of enemies, and a list of items that can be found.
| Previous | Next |
|---|---|
| Phase 11 | - |
List of Contents
Phase 12 Maps
| Sumeragi Tomb | |
|---|---|
| Entrance - Floor 1 | 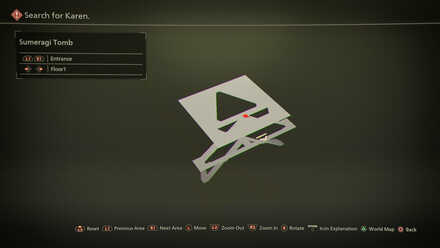 |
| Entrance - Floor 2 | 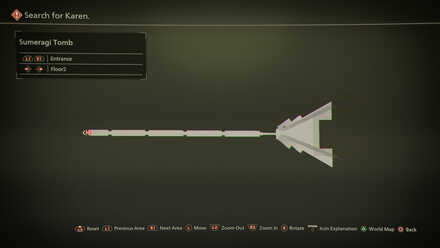 |
| Memories of the Beginning | 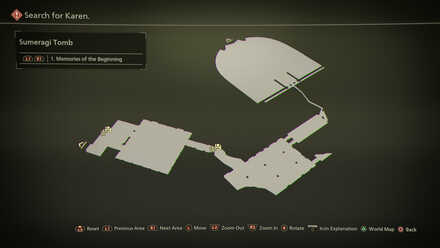 |
| Memories of Fighting | 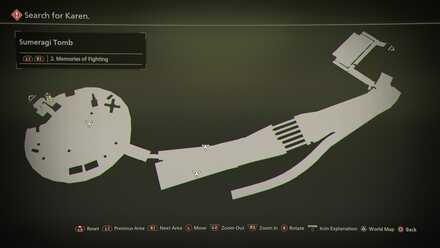 |
| Memories of Longing | 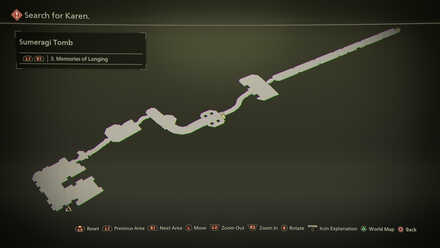 |
| The Forgotten Stage | 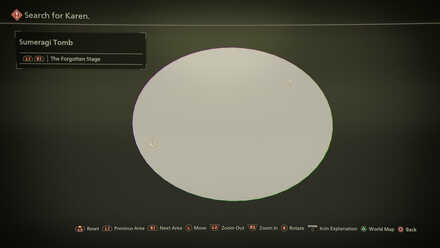 |
| Memories of Pursuit | 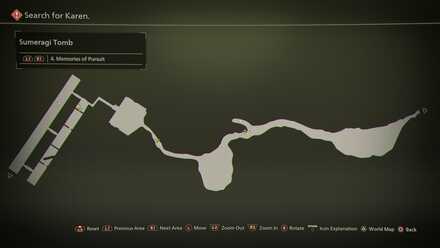 |
| Memories of Rebellion | 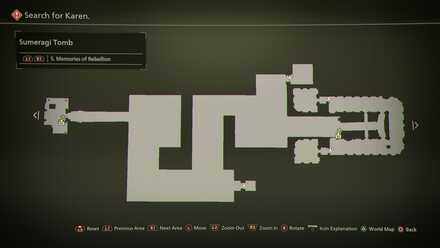 |
| Memories of Nightmare | 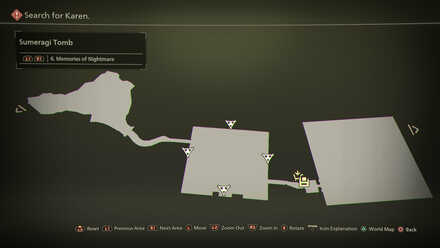 |
| Memories of Impasse | 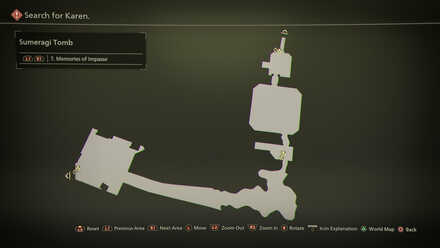 |
| Millenium Hall | 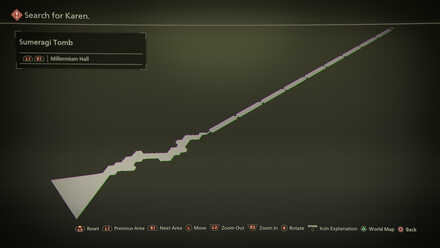 |
| Ring of Time | 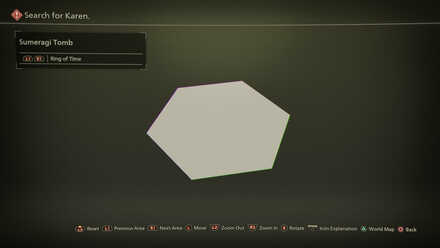 |
Phase 12: Story Walkthrough
| Objectives | |
|---|---|
| 1 | Starting in Sumeragi Tomb, descend the bottom floor using either sets of |
| 2 | Take out the Others in the area. Use your psychokinetic ability to break the enemies' tough shells. |
| 3 | Afterwards, progress forward to the new objective while clearing the area. Enter Memories of Fighting. |
| 4 | Progress forward to the objective and clear the area. Midway, a cutscene will play. |
| 5 | Afterwards, progress to the objective and clear the area. Enter Memories of Longing in the Sumeragi Tomb. |
| 6 | Progress forward to the objective and clear the area. We recommend using combos of Hypervelocity + Duplication, Sclerokinesis + Double Psychokinesis, and Electrokinesis + Duplication to defeat the Others in the area. |
| 7 | Once you reach the objective, investigate the holographic structure in front of you. A cutscene will play. Prepare for a boss fight before proceeding. |
| Boss Fight | 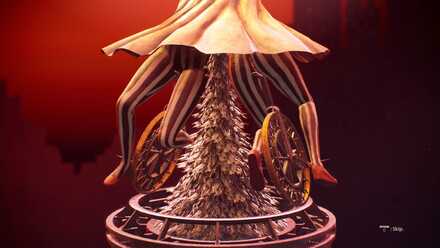 Boss Battle: Dominus Circus Boss Battle: Dominus CircusThis battle has 4 phases. We suggest using Teleportation to penetrate through its water barrier and hit it with all you got, and then, ideally, execute brain drive. |
| 9 | Afterwards, continue forward and enter Memories of Pursuit. Clear the area and then progress to the objective. Enter the next area of the dungeon. |
| 10 | 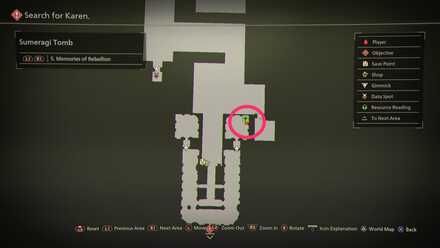 Progress forward and clear the the area. Obtain Key Card No. ??? as illustrated in the photo. |
| 11 | Afterwards use the key card on the gate objective to move to the next part of the dungeon. |
| 12 | Continue forward. A cutscene will play. Continue forward, clear the area, and then use Electrokinesis on the two pillars in the square room. |
| 13 | Afterwards, progress forward and clear the area. Then enter Memories of Impasse. |
| 14 | Continue forward. A cutscene will play. Progress forward to the new objective while clearing the area. Enter Millennium Hall. |
| 15 | Pace forward to reach Karen Travers. Prepare for a boss fight against Karen before proceeding. |
| Boss Fight |  Boss Battle: Karen Travers |
| 17 | Afterwards, face around the area for cutscene. Just keep mobile and damage Karen for the cutscenes to play until all SAS become available once again. Defeat Karen for good. This last fight against Karen is only for cinematic purposes. |
| 18 | After several cutscenes, go speak with all the members in the area. |
| 18 | You have finished the game! |
Phase 12: Standby Phase Available Bonds
Standby Phase 12
No Available Bonds in Phase 12
This is the last chapter of the game. There no more available bonds to explore.
Phase 12 Boss Fights
Dominus Circus

| Level | 56 |
|---|---|
| Weaknesses | Various weak spot in body parts. Most prominent in the arm |
Use Teleportation to Get Through Water Barrier
Dominus Circus will be at its more vulnerable when it starts animating a water barrier around itself. Use Teleportation to get through the water barrier and unleash hell.
Karen Travers (Final Boss)

| Level | 70 |
|---|---|
| Weaknesses | Karen has no particular weakness, however, using Clairvoyance
Teleportation, and Sclerokinesis goes a long way. |
How to Beat Karen Travers (Final Phase Encounter)
Prepare for the Final Boss Fight
Avoid saving items like Restoratives as this is the final battle! Don't hesitate to use Brain Field Convergence as well to make sure that you can take out Karen easier!
List of Enemies Encountered
This is a list of enemies that players will encounter throughout Phase 12. Use the navigation table to quickly see what enemies await you in the different memories of Major General Karen.
| Enemies Per Memory | ||
|---|---|---|
| The Beginning | Fighting | Longing |
| Pursuit | Rebellion | Nightmare |
| Impasse | ||
Memories of the Beginning
| Enemies Encountered | |
|---|---|
|
|
|
|
|
|
|
|
|
Memories of Fighting
| Enemies Encountered | |
|---|---|
|
|
|
|
|
|
|
|
|
Memories of Longing
| Enemies Encountered | |
|---|---|
|
|
|
|
|
|
|
|
|
Memories of Pursuit
| Enemies Encountered | |
|---|---|
|
|
|
|
|
|
|
|
|
Memories of Rebellion
| Enemies Encountered | |
|---|---|
|
|
|
|
|
|
|
|
|
Memories of Nightmare
| Enemies Encountered | |
|---|---|
|
|
|
|
|
|
|
|
|
Memories of Impasse
| Enemies Encountered | |
|---|---|
|
|
|
|
|
|
|
|
|
General Tips
Master Rush Follow-Up Attacks and Perfect Dodge
At this point in the game, mastering rush follow-up attacks and Perfect Dodge will help you deal a lot more damage and not take damage. We recommend always applying them on stronger enemies with a large health pool.
Buy As Many Brain Field Gears As You Can
Use them to enter Brain Field Convergence as fast as possible. Brain Field Convergence will help a great deal to clear through dungeons.
Mix Up the SAS Available
You will now have access to both Yuito and Kasane platoons' SAS. Mix up your attacks and use them on the appropriate enemies. We highly recommend using two skills together as you'll be able to deal a lot more damage per second.
Use Double Psychokinesis to Break Tough Shells
We recommend using both of Yuito and Kasane's psychokinetic abilities to destroy Others' tough shells. Simply press L2 and R2 at the same time while Kasane's SAS is active.
Explore the Surrounding Area for Loot
There is a lot of loot to be gathered in this area. Make sure to explore the level thoroughly to obtain helpful HP recovery items for battle.
Phase 12 Obtainable Items
Marked Items & Data Spot Locations
| Sumeragi Tomb | |
|---|---|
| Memories of the Beginning | 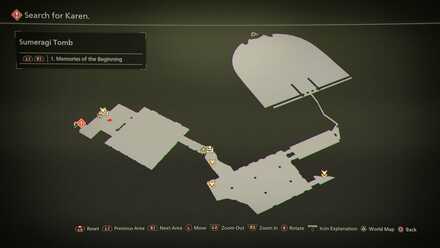 |
| Memories of Fighting | 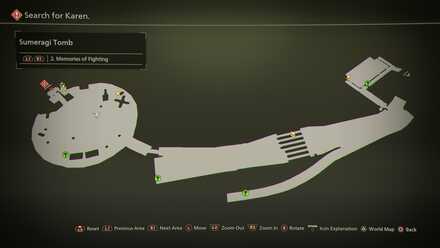 |
| Memories of Longing - Part 1 | 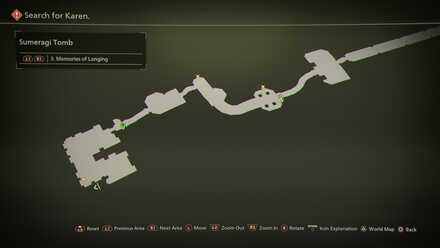 |
| Memories of Longing - Part 2 | 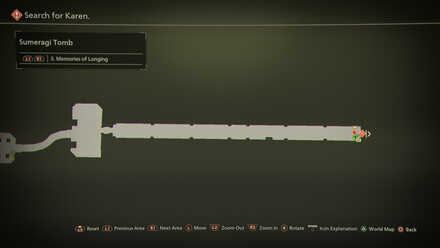 |
| Memories of Pursuit | 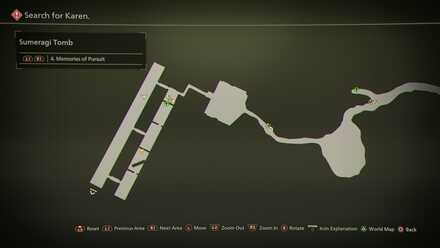 |
| Memories of Rebellion | 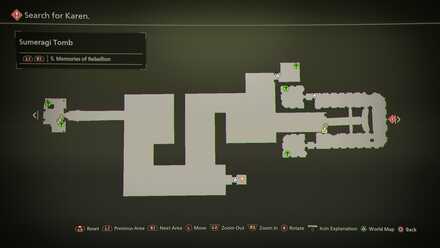 |
| Memories of Nightmare | 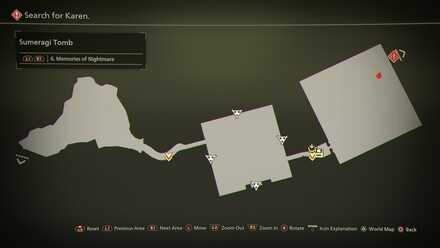 |
| Memories of Impasse | 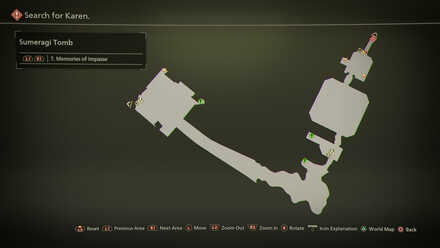 |
Scarlet Nexus Related Guides
Yuito Route

Yuito Route Guides
| Demo Edition | Phase 0 |
| Phase 1 | Phase 2 |
| Phase 3 | Phase 4 |
| Phase 5 | Phase 6 |
| Phase 7 | Phase 8 |
| Phase 9 | Phase 10 |
| Phase 11 | Phase 12 |
Author
Kasane and Yuito Route | Phase 12: Path to the Future and Freedom Walkthrough
improvement survey
03/2026
improving Game8's site?

Your answers will help us to improve our website.
Note: Please be sure not to enter any kind of personal information into your response.

We hope you continue to make use of Game8.
Rankings
- We could not find the message board you were looking for.
Gaming News
Popular Games

Genshin Impact Walkthrough & Guides Wiki

Honkai: Star Rail Walkthrough & Guides Wiki

Umamusume: Pretty Derby Walkthrough & Guides Wiki

Pokemon Pokopia Walkthrough & Guides Wiki

Resident Evil Requiem (RE9) Walkthrough & Guides Wiki

Monster Hunter Wilds Walkthrough & Guides Wiki

Wuthering Waves Walkthrough & Guides Wiki

Arknights: Endfield Walkthrough & Guides Wiki

Pokemon FireRed and LeafGreen (FRLG) Walkthrough & Guides Wiki

Pokemon TCG Pocket (PTCGP) Strategies & Guides Wiki
Recommended Games

Fire Emblem Heroes (FEH) Walkthrough & Guides Wiki

Diablo 4: Vessel of Hatred Walkthrough & Guides Wiki

Yu-Gi-Oh! Master Duel Walkthrough & Guides Wiki

Super Smash Bros. Ultimate Walkthrough & Guides Wiki

Pokemon Brilliant Diamond and Shining Pearl (BDSP) Walkthrough & Guides Wiki

Elden Ring Shadow of the Erdtree Walkthrough & Guides Wiki

Monster Hunter World Walkthrough & Guides Wiki

The Legend of Zelda: Tears of the Kingdom Walkthrough & Guides Wiki

Persona 3 Reload Walkthrough & Guides Wiki

Cyberpunk 2077: Ultimate Edition Walkthrough & Guides Wiki
All rights reserved
© BANDAI NAMCO Entertainment America Inc. All third party content, brands, names, and logos are used under license and remain property of their respective owners. All rights reserved.
The copyrights of videos of games used in our content and other intellectual property rights belong to the provider of the game.
The contents we provide on this site were created personally by members of the Game8 editorial department.
We refuse the right to reuse or repost content taken without our permission such as data or images to other sites.


