Tartarus Exploration Guide and Tips

Tartarus is the main place of exploration in Persona 3 Reload (P3R), consisting of 264 floors of winding paths littered with Shadows. Find out useful tips on exploring it quickly and proficiently, as well as other details about it in this guide!
| This section currently uses information based on Persona 3 Portable. |
List of Contents
Exploring Tartarus
Random Layout Every Visit
One good thing to remember is that each time you explore a floor in Tartarus, its layout will change once you revisit it on another night, so don't worry too much about having each floor mapped perfectly.
If you revisit a floor on the same night, however, its layout will stay the same. So if you missed an item on the previous floor, you don't have to worry about mapping the floor all over again.
Mapping Out a Floor
When entering a floor, your minimap will be blank, and it's up to you and your teammates to fill it out. Your priority should be to find the stairs to the next floor and have it appear in the map. From there, exploration will be a breeze.
Don't be afraid of dead ends, for they will highly likely contain treasures. These treasures are also randomized per visit, so be sure to grab as much as you can before you proceed to the next floor!
Teleport Waypoints
Some floors in Tartarus will house a strange green device that you can interact with. Doing so will enable you to teleport directly to the entrance of Tartarus, or on any other previously-explored floor that also has the device.
It's very likely that these floors will not change its layout per visit. So if you missed some things, you can use these teleport waypoints to get around Tartarus much easier!
Issuing Commands
As the leader, you have the authority and capability to issue commands to your teammates when exploring. These commands can be useful for quickly mapping out a floor, checking out points of interest, or clearing out Shadows.
Split Up
This command will have your teammates spread out and explore the current floor on their own, regularly informing you if they've found the stairs to the next floor, or if they've found an item. None of your teammates will progress to the next floor.
When this command is given, your teammates will not actively seek out enemies, but can get into a fight on their own should they run into one. If another teammate is nearby, that teammate will also join in on the fight.
Seek Out Shadows
This command will have your teammates ignore exploration, and simply spread out and eradicate every enemy on the current floor. This is a useful command for when a some party members are a little short on level.
Do keep in mind that once your teammates get into battles on their own, they are at risk of getting killed. In this case, be sure to keep an eye out for your teammates' health, and join their fight should they need assistance!
Gather Around
This command only becomes available once you've issued the orders above and your teammates are scattered. Ordering your team to gather will have them return to your side.
After they make their way back to you, they will hand over all the items they have found. You cannot proceed to the next floor unless all party members have returned to you.
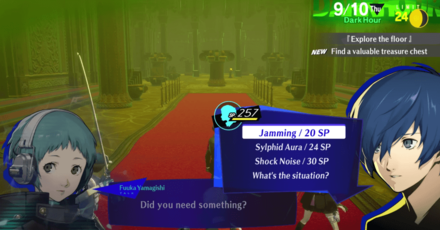
Use Fuuka's Abilities

Apart from analyzing enemies' weaknesses and helping you map out floors, Fuuka possesses a wide array of abilities to aid your exploration.
Be sure to use these abilities to your advantage to either make exploration much easier, or gain the upper hand in battle!
Floor Anomalies
Sometimes, strange occurrences happen once you arrive at a floor. Some of these occurrences may be positive, like having the entire floor immediately mapped or the floor having more items for you to pick up.
But be wary, because some of these anomalies can also be negative, like the current floor having more powerful Shadows, being split up from your teammates, or something else...
A Major Threat...
One more thing to remember: if it's chains you hear, get out of here! The sound of chains heralds the arrival of the Reaper, an extremely powerful enemy that can one-shot your entire party!
It will appear if you pull a cursed card during Shuffle Time, if you stay on a floor for too long, or if your navigator informs you of a floor anomaly—that there are no Shadows on the floor.
Tartarus Information
Tartarus Introduction
Tartarus is the gigantic tower that Gekkoukan High transforms into during the Dark Hour, the hour between one day and the next. Floor upon floor, its halls are laid out like a labrynth, and never stays the same.
In light of this, no matter if you've already explored a particular floor, its layout will change should you choose to visit it again next time.
Tartarus Blocks
Tartarus is divided into 6 blocks, each possessing their own unique environment and ambiance.
Thebel Block
Thebel is the first block of Tartarus, characterized by its eerie green atmosphere. Its distortion is not as severe, taking its fairly normal design into consideration. It houses floor 2 to 16.
Arqa Block
Arqa is the second block of Tartarus, and presents an ominous purple environment. Its distortions manifest in the form of curved and jagged walls. It houses floors 17 to 69.
Yabbashah Block: Floors 70-114
Yabbashah is the third block of Tartarus, and is characterized by its oddly futuristic distortions with teal, blue, and green hues. It houses floors 70 to 144.
Tziah Block: Floors 115-164
Tziah is the fourth block of Tartarus, and appears a little ostentiatious due to its prominent gold coloration. It houses floors 115 to 164.
Harabah Block: Floors 165-214
Harabah is the fifth block of Tartarus, and harbors psychadelic designs, and kaleidoscopic patterns and colors. It houses floors 165 to 214.
Adamah Block: Floors 215-263
Adamah is the sixth and final block of Tartarus. It's predominantly white and silver, like a canvas free of any color. Its distortions also seem oddly celestial. It houses floors 215 to 263, up until Tartarus' apex.
Persona 3 Reload Related Guides

Episode Aigis
Daily Life Tips
Social Link Tips
| All Social Links Tips and Tricks | |
|---|---|
| Fix Reversed Social Links | All Romance Options |
| Best Social Links to Max First | All Clubs You Can Join and Their Schedules |
Exploration and Battle
Persona Fusion and Leveling Tips
| All Persona Fusion and Leveling Tips and Tricks | |
|---|---|
| Fusion Guide: Normal and Triangle Fusion | Can You Inherit Skills? |
| All the Best Personas | Fusion Accidents |
| How to Increase Persona Slots | How to Skip Fusion Animation |
| List of All Special Fusions | |
Farming Guides
| All Farming Tips and Tricks | |
|---|---|
| Twilight Fragments Farming Guide | Gem Farming Guide |
| Money Farming Guide | How to Level Up Fast |
Rare Enemy Guides
| Rare Enemy Weaknesses | |
|---|---|
| Rare and Greedy Shadows | Wealth Hands |
| Precious Hands | Supreme Hands |
| Ethereal Hands | Luxury Hands |
| Miracle Hands | Glorious Hands |
Regular Shadow Guides
| Tartarus Shadows and Weaknesses | |
|---|---|
| Thebel Block Shadows | Arqa Block Shadows |
| Yabbashah Block Shadows | Tziah Block Shadows |
| Harabah Block Shadows | Adamah Block Shadows |
Miscellaneous Tips and Tricks
Author
Tartarus Exploration Guide and Tips
Rankings
- We could not find the message board you were looking for.
Gaming News
Popular Games

Genshin Impact Walkthrough & Guides Wiki

Umamusume: Pretty Derby Walkthrough & Guides Wiki

Pokemon Pokopia Walkthrough & Guides Wiki

Honkai: Star Rail Walkthrough & Guides Wiki

Monster Hunter Stories 3: Twisted Reflection Walkthrough & Guides Wiki

Arknights: Endfield Walkthrough & Guides Wiki

Wuthering Waves Walkthrough & Guides Wiki

Zenless Zone Zero Walkthrough & Guides Wiki

Pokemon TCG Pocket (PTCGP) Strategies & Guides Wiki

Monster Hunter Wilds Walkthrough & Guides Wiki
Recommended Games

Fire Emblem Heroes (FEH) Walkthrough & Guides Wiki

Diablo 4: Vessel of Hatred Walkthrough & Guides Wiki

Cyberpunk 2077: Ultimate Edition Walkthrough & Guides Wiki

Yu-Gi-Oh! Master Duel Walkthrough & Guides Wiki

Super Smash Bros. Ultimate Walkthrough & Guides Wiki

Pokemon Brilliant Diamond and Shining Pearl (BDSP) Walkthrough & Guides Wiki

Elden Ring Shadow of the Erdtree Walkthrough & Guides Wiki

Monster Hunter World Walkthrough & Guides Wiki

The Legend of Zelda: Tears of the Kingdom Walkthrough & Guides Wiki

Persona 3 Reload Walkthrough & Guides Wiki
All rights reserved
©ATLUS. ©SEGA. All rights reserved.
The copyrights of videos of games used in our content and other intellectual property rights belong to the provider of the game.
The contents we provide on this site were created personally by members of the Game8 editorial department.
We refuse the right to reuse or repost content taken without our permission such as data or images to other sites.


![Monster Hunter Stories 3 Review [First Impressions] | Simply Rejuvenating](https://img.game8.co/4438641/2a31b7702bd70e78ec8efd24661dacda.jpeg/thumb)
![The Seven Deadly Sins: Origin [First Impressions] | A Promising Start](https://img.game8.co/4440581/584e0bfb87908f12c4eab6e846eb1afd.png/thumb)


Is there a guide here for the shadows in each block and their weaknesses/resistances?