This survey will take about 1 minute.
Your answers will help us to improve our website.
Persona 3 Reload (P3R)
Ptolomea Door Complete Guide and Walkthrough
This is a walkthrough for the Ptolomea Door in Persona 3 Reload (P3R) Episode Aigis DLC. Read on to see a complete guide to the shadows and bosses, what you can unlock, and other tips to clear the door!
| The Abyss of Time Full Guide | |
|---|---|
| ◀ Previous Door | Next Door ► |
| Antenora | Judecca |
Ptolomea Walkthrough
| No. | Objectives |
|---|---|
| 1 | The elites and enemies here have physical resistances but several of them are weak to Lightning and Ice. Akihiko and Mitsuru are highly recommended as a party member with one healer added to the mix (Yukari or Ken). |
| 2 | Make your way through Ptolomea and head until you reach the 7th floor. This is your first checkpoint and going to the next floor will pit you against Slaughter Drive and Spastic Turret. Keep your current roster as they are weak to Ice and Electric respectively. ► Spastic Turret and Slaughter Drive Boss Fight Guide |
| 3 | For the next layout, enemies are mostly weak to Strike, Lightning, and Fire. Consider swapping out Mitsuru for Junpei to get a solid physical damage dealer that can dish out fire damage for thsi part. |
| 4 | Your next checkpoint is Floor 16. Replenish your resources by exitting the Abyss of Time or by using the clock and spending Fragment before resuming your journey. |
| 5 | You'll fight Acheron Seeker and Ice Raven which are weak to physical attacks (Strike and Slash respectively). Acheron Seeker is also weak to Fire and Lightning while also posessing Evade Slash. We highly recommend Akihiko, Junpei, and Ken as Acheron will be draining your resources so characters that can hit their weaknesses while recovering their SP is recommended for the fight. ► Acheron Seeker and Ice Raven Boss Fight Guide |
| 6 | Enemies in the next layer after the boss fight are mostly weak to Lightning, Fire, Ice, and Physical attacks. Koromaru or Junpei is a great addition to your party as well as Akihiko or Ken. Mitsuru or Mettis are also great options to consider. |
| 7 | Progress until the 25th floor to clear Ptolomea. There are no more bosses after Acheron Seeker and Ice Raven so feel free to spend your resources to clear the enemies you encounter along the way. |
List of Bosses in Ptolomea
| Guardian Bosses | |
|---|---|
| Spastic Turret and Slaughter Drive | Acheron Seeker and Ice Raven |
| Monad Bosses | |
| Emperor and Adamant Beetle | World Balance |
| Death Castle | Crazy Twins |
Click the names above to skip to a certain boss.
Ptolomea Guardian Bosses
Spastic Turret and Slaughter Drive
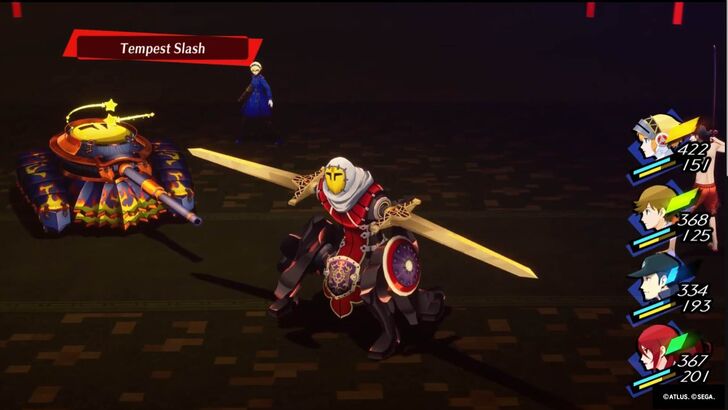
Akihiko, Mitsuru and Ken are fantastic party members to bring to this fight. Ken can support with his healing, using Tetrakarn and using his electric skills, Akihiko can provide lots of damage with his Theurgy, and Mitsuru supplies Ice to cover both weaknesses.
Spastic Turret and Slaughter Drive Boss Guide
Acheron Seeker and Ice Raven
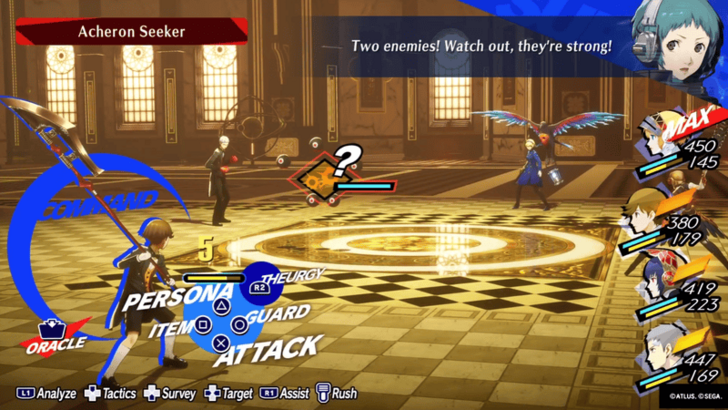
It's recommended to bring primarily Physical Attackers like Akihiko, Metis, and Junpei. This way, you have members who can target the bosses' Strike and Slash weaknesses while also ignoring Acheron Seeker draining your SP.
Ideally, you want to use Junpei since he can target both the Seeker and Raven's weaknesses with Fire and Slash respectively.
Acheron Seeker and Ice Raven Boss Guide
Ptolomea Monad Bosses
Emperor and Adamant Beetle
The Emperor and Adamant Beetles are a Monad Door boss located inside Ptolomea. They're both easily beaten by AoE Fire Skills, just make sure to dispel any buffs the two Beetles cast.
Emperor and Adamant Beetle Boss Guide
World Balance

World Balance is another Monad Door boss that can be found in Ptolomea. It's accompanied by a Mind Dice that inflicts status ailments on your party, so make sure to take the dice down first before focusing on the main boss.
World Balance (Ptolomea) Boss Guide
Death Castle
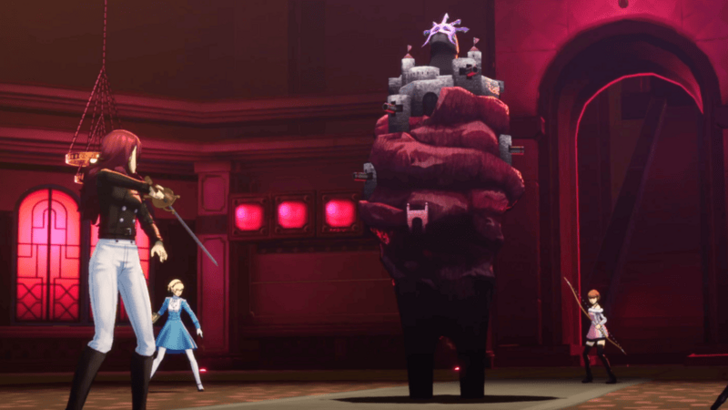
Death Castle is the third Ptolomea Monad Door boss that you can find. It's weak to Ice and it uses a lot of Fire attacks, so make sure to protect Mitsuru if you decide to bring her along.
Death Castle (Ptolomea) Boss Guide
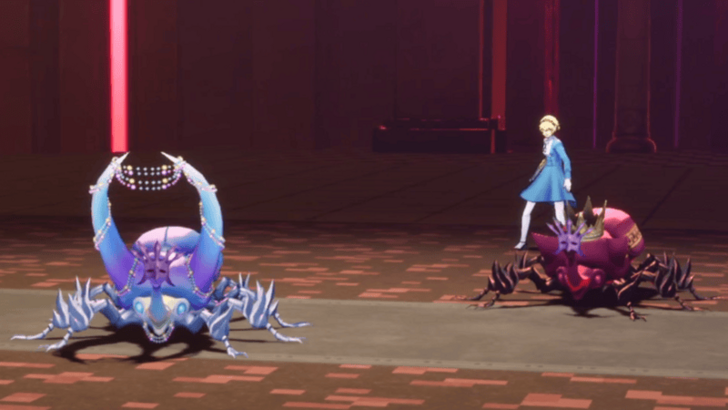
Crazy Twins
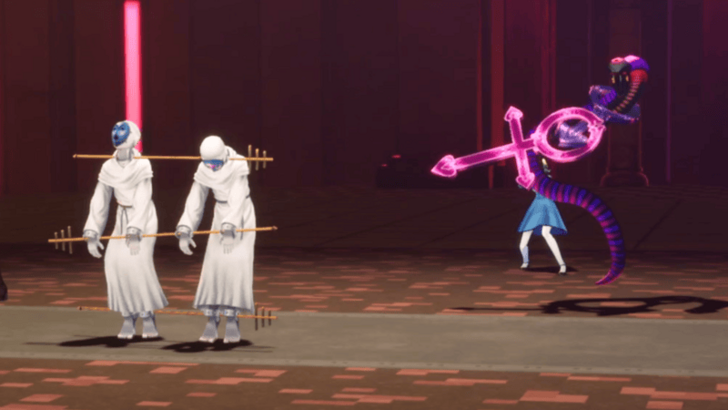
Crazy Twins is the final Monad Door boss that you can encounter in Ptolomea. The Twins and the Immoral Snake that show up in this fight are both weak to Slash, so make sure to bring someone like Junpei who can use AoE Slash Skills.
Crazy Twins (Ptolomea) Boss Guide
List of Regular Shadows in Ptolomea
List of All Shadows and Weaknesses
| Shadow | Weak | Resist | Null | Drain | Repel |
|---|---|---|---|---|---|
| Adamant Beetle | - | - | - | ||
| Almighty Hand | - | ||||
| Ardent Dancer | - | - | |||
| Beastial Wheel | - | - | |||
| Death Twins | - | - | |||
| Devoted Cupid | - | - | |||
| Immoral Snake | - | - | |||
| Indolent Maya | - | - | - | ||
| Iron Dice | - | - | - | ||
| Jotun of Evil | - | - | - | ||
| Jupiter Eagle | - | - | |||
| Luxury Hand | - | - | - | ||
| Magical Magus | - | - | - | ||
| Mind Dice | - | - | |||
| Minotaur III | - | - | - | ||
| Perpetual Sand | - | - | - | ||
| Pistil Mother | - | - | - | ||
| Phantom Lord | - | ||||
| Silent Book | - | - | |||
| Vehement Idol | - | - | |||
| Writhing Tiara | - | - | - |
Tips and Tricks for Exploring Ptolomea
Party Member Ranking
| Rank | Character | Explanation |
|---|---|---|
| 1 |
 Metis Metis
|
Amazing character for this area thanks to her amazing coverage with both Wind and Ice along with Strike attacks. You should get Herculean Strike and Gigantic Fist at this point which massively improves your damage. |
| 2 |
 Akihiko Akihiko
|
A ton of enemies are weak to either Electric or Strike attacks. If you can get any gear that has Auto-Tarukaja or a Persona with Auto Mataru, can become an offensive threat in terms of both Physical and Magic. |
| 3 |
 Mitsuru Mitsuru
|
Despite being a magic user, Mitsuru can still act as a great support thanks to her Status Condition Characteristic. Freezing enemies with her Mabufu will almost always guarantee a Crit for other party members. |
| 4 |
 Junpei Junpei
|
Fares better in this dungeon due to the great amount of enemies being susceptible to Physical attacks. His Strike and Pierce attacks are nothing to write home about, but he can still dish out decent damage with his Slash skills. |
| 5 |
 Yukari Yukari
|
Decent healer especially now that she can lower SP costs for healing skills. Not a lot of enemies here really Drain or Block Wind so she's best picked to fill any slot. |
| 6 |
 Koromaru Koromaru
|
Amazing coverage with Fire, Strike, Slash, and Dark skills. Can work well with Mitsuru for guaranteed Crits thanks to his Virus Breath combined with Power Howling. |
| 7 |
 Ken Ken
|
Falls off heavily due to a ton of enemies either resisting or even nullifying Light. Can still work as a Physical Pierce attacker, but his growths lean more on Magic instead of Strength. |
Linked Episode Items Are Now Worth Two Twilight Fragments

After beating the bosses in B5 and B17, the locked chests that contain the items for new Linked Episodes now need two Twilight Fragments. These are needed for Junpei's, Akihiko's, Mitsuru's, and Yukari's Second Linked Episodes, so make sure to allot 8 Twilight Fragments for these.
How to Farm Twilight Fragments and All Locations
Obtain The Rest of the Parties' Second Theurgies
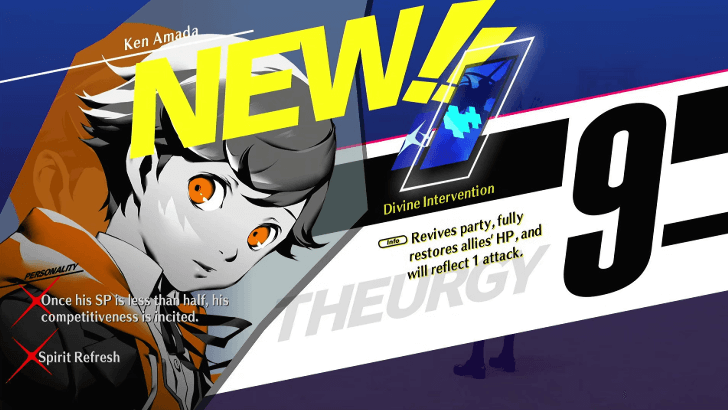
After finishing B17 of Ptolomea, you can unlock Ken's Divine Intervention and Yukari's Tranquility. But do note that you need to head back to the dorm first to unlock the Theurgies.
Finishing B25 will also unlock Junpei's Blaze of Life and Mitsuru's Blade of Execution. At this point you should now have all second level Theurgies for your party members!
RE Custom Parts Can be Found in a Locked Treasure Chest

After finishing B17 of Ptolomea, you can also get the RE Custom Parts for Aigis's Ambush inside a Locked Tresure Chest. Make you have two Twilight Fragments for it as it allows you to break items with Aigis' dash.
Persona 3 Reload Related Guides

Episode Aigis Abyss of Time Walkthroughs
| All Episode Aigis Walkthroughs | |
|---|---|
| Malebolge | Cocytus |
| Caina | Antenora |
| Ptolomea | Judecca |
| Empyrean | Colosseo Purgatorio |
Persona 3 Reload All Months Guide
| Walkthrough By Month | ||
|---|---|---|
| April | May | June |
| July | August | September |
| October | November | December |
| January | ||
Author

Ptolomea Door Complete Guide and Walkthrough
Please participate in our site
improvement survey
03/2026
improvement survey
03/2026
Would you assist in
improving Game8's site?
improving Game8's site?

×
We are listening to our users' valuable opinions and discussing how to act on them.
The information collected through this survey will be used for the purpose of improving our services. In addition, the information will only be disclosed a part of a statistic in a format that will not allow identification of personal information.
Begin Survey
Not Now
×
Please rate each item regarding Game8.co's Advertisements.
Amount of Ads
Very Dissatisfied
Somewhat Dissatisfied
Fine
Somewhat Satisfied
Highly Satisfied
Placement of Ads
Timing of Ad Display
Ad Loading Speed
Safeness of Ads
Content of Ads
×
Please rate each item regarding Game8.co's Quality of Articles.
Amount of information
Very Dissatisfied
Somewhat Dissatisfied
Fine
Somewhat Satisfied
Highly Satisfied
Frequency of updates
Speed of new information
Accuracy of articles
Understandibility of articles
Readability of sentences
×
Please rate each item regarding Game8.co's Usability of the Site.
Ease of finding information
Very Dissatisfied
Somewhat Dissatisfied
Fine
Somewhat Satisfied
Highly Satisfied
Loading Speed
Use of Color
Font Size
Visibility of Images
Easy to Understand Layout
×
Please rate each item regarding Game8.co's Message Boards, Comments.
Ease of Writing
Very Dissatisfied
Somewhat Dissatisfied
Fine
Somewhat Satisfied
Highly Satisfied
Readability
Ease in Finding Information
Comment Quality
Comment Quantity
Admin Response
×
Please rate each item regarding Game8.co's Site's new design.
Please rate our site's new design
Very Dissatisfied
Somewhat Dissatisfied
Fine
Somewhat Satisfied
Highly Satisfied
Do you think that the website's design change makes the site easier to use?
Has the new design made it easier for you to find information on the site?
Has the new design improved the overall visual appeal of the site?
How would you rate your overall satisfaction with the new design of the site?
×
How likely are you to recommend Game8 to someone you know?
Very Unlikely
0
1
2
3
4
5
6
7
8
9
10
Very Likely
If you have other opinions regarding potential improvement to the website, please share them with us. We would appreciate your honest opinion.
Note: This is a free response section, so you can proceed without entering anything.
Note: Please be sure not to enter any kind of personal information into your response.
Note: Please be sure not to enter any kind of personal information into your response.
×
Thank You
×
Thank you for participating in our survey! Your answers will help us to improve the quality of our website and services.
We hope you continue to make use of Game8.
We hope you continue to make use of Game8.
Close
Rankings
- We could not find the message board you were looking for.
Gaming News


![Everwind Review [Early Access] | The Shaky First Step to A Very Long Journey](https://img.game8.co/4440226/ab079b1153298a042633dd1ef51e878e.png/thumb)

![Monster Hunter Stories 3 Review [First Impressions] | Simply Rejuvenating](https://img.game8.co/4438641/2a31b7702bd70e78ec8efd24661dacda.jpeg/thumb)
Popular Games

Genshin Impact Walkthrough & Guides Wiki
Honkai: Star Rail Walkthrough & Guides Wiki
Umamusume: Pretty Derby Walkthrough & Guides Wiki
Pokemon Pokopia Walkthrough & Guides Wiki
Resident Evil Requiem (RE9) Walkthrough & Guides Wiki
Monster Hunter Wilds Walkthrough & Guides Wiki
Wuthering Waves Walkthrough & Guides Wiki
Arknights: Endfield Walkthrough & Guides Wiki
Pokemon FireRed and LeafGreen (FRLG) Walkthrough & Guides Wiki
Pokemon TCG Pocket (PTCGP) Strategies & Guides Wiki


Recommended Games
Diablo 4: Vessel of Hatred Walkthrough & Guides Wiki
Fire Emblem Heroes (FEH) Walkthrough & Guides Wiki
Yu-Gi-Oh! Master Duel Walkthrough & Guides Wiki
Super Smash Bros. Ultimate Walkthrough & Guides Wiki
Pokemon Brilliant Diamond and Shining Pearl (BDSP) Walkthrough & Guides Wiki
Elden Ring Shadow of the Erdtree Walkthrough & Guides Wiki
Monster Hunter World Walkthrough & Guides Wiki
The Legend of Zelda: Tears of the Kingdom Walkthrough & Guides Wiki
Persona 3 Reload Walkthrough & Guides Wiki
Cyberpunk 2077: Ultimate Edition Walkthrough & Guides Wiki


All rights reserved
©ATLUS. ©SEGA. All rights reserved.
The copyrights of videos of games used in our content and other intellectual property rights belong to the provider of the game.
The contents we provide on this site were created personally by members of the Game8 editorial department.
We refuse the right to reuse or repost content taken without our permission such as data or images to other sites.
Jotun of Evil is actually weak to Pierce