
This survey will take about 1 minute.
Your answers will help us to improve our website.
Persona 3 Reload (P3R)
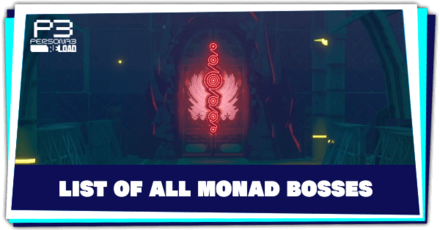
List of All Monad Bosses
Tartarus Monad Bosses are fought inside Monad Doors throughout Tartarus in Persona 3 Reload (P3R). Read on to learn more about the weaknesses and resistances of each Monad Boss, and tips on how to beat them in the game.
List of Contents
List of All Monad Passage Bosses
Monad Passage Bosses are difficult boss encounters found at the end of each block, starting at 91F. These bosses can reward you with powerful new equipment.
| Tartarus Blocks |
|---|
|
|
Select a Block to head to that section!
Yabbashah Block
| Cowardly Maya |
Recommended Level: 33+
Location: 91F Tartarus |
|||||||||||
|---|---|---|---|---|---|---|---|---|---|---|---|---|
| Rampage Drive |
Recommended Level: 34+
Location: 91F Tartarus |
|||||||||||
| Shouting Tiara |
Recommended Level: 34+
Location: 91F Tartarus |
|||||||||||
| Magical Magus |
Recommended Level: 34+
Location: 91F Tartarus |
|||||||||||
| Bronze Dice |
Recommended Level: 40+
Location: 117F Tartarus |
|||||||||||
| Muttering Tiara |
Recommended Level: 40+
Location: 117F Tartarus |
|||||||||||
| Iron Dice |
Recommended Level: 40+
Location: 117F Tartarus |
|||||||||||
| Silent Book |
Recommended Level: 40+
Location: 117F Tartarus |
|||||||||||
| Platinum Dice |
Recommended Level: 40+
Location: 117F Tartarus |
|||||||||||
Tziah Block
| Dogmatic Tower |
Recommended Level: 47+
Location: 143F Tartarus |
|||||||||||
|---|---|---|---|---|---|---|---|---|---|---|---|---|
| Natural Dancer |
Recommended Level: 47+
Location: 143F Tartarus |
|||||||||||
| Vehement Idol |
Recommended Level: 47+
Location: 143F Tartarus |
|||||||||||
| Minotaur II |
Recommended Level: 54+
Location: 171F Tartarus |
|||||||||||
| Haunted Castle |
Recommended Level: 55+
Location: 171F Tartarus |
|||||||||||
| Spiritual Castle |
Recommended Level: 55+
Location: 171F Tartarus |
|||||||||||
| Intrepid Knight |
Recommended Level: 55+
Location: 171F Tartarus |
|||||||||||
| Change Relic |
Recommended Level: 55+
Location: 171F Tartarus |
|||||||||||
Harabah Block
| Devious Maya |
Recommended Level: 66+
Location: 198F Tartarus |
|||||||||||
|---|---|---|---|---|---|---|---|---|---|---|---|---|
| Amorous Snake |
Recommended Level: 66+
Location: 198F Tartarus |
|||||||||||
| Heat Balance |
Recommended Level: 66+
Location: 198F Tartarus |
|||||||||||
| Sky Balance |
Recommended Level: 66+
Location: 198F Tartarus |
|||||||||||
| Light Balance |
Recommended Level: 66+
Location: 198F Tartarus |
|||||||||||
| Omnipotent Balance |
Recommended Level: 66+
Location: 198F Tartarus |
|||||||||||
| Phantom Master |
Recommended Level: 69+
Location: 225F Tartarus |
|||||||||||
| Morbid Book |
Recommended Level: 69+
Location: 225F Tartarus |
|||||||||||
| White Hand |
Recommended Level: 69+
Location: 225F Tartarus |
|||||||||||
| Black Hand |
Recommended Level: 69+
Location: 225F Tartarus |
|||||||||||
| Pink Hand |
Recommended Level: 69+
Location: 225F Tartarus |
|||||||||||
| Silver Hand |
Recommended Level: 69+
Location: 225F Tartarus |
|||||||||||
| Gold Hand |
Recommended Level: 69+
Location: 225F Tartarus |
|||||||||||
Adamah Block
| Hallowed Turret |
Recommended Level: 75+
Location: 255F Tartarus |
|||||||||||
|---|---|---|---|---|---|---|---|---|---|---|---|---|
| Hakurou Musha |
Recommended Level: 75+
Location: 255F Tartarus |
|||||||||||
| Kaiden Musha |
Recommended Level: 75+
Location: 255F Tartarus |
|||||||||||
| Onnen Musha |
Recommended Level: 75+
Location: 255F Tartarus |
|||||||||||
| Tenjin Musha |
Recommended Level: 75+
Location: 255F Tartarus |
|||||||||||
| Shadow of the Void |
Recommended Level: 75+
Location: 255F Tartarus |
|||||||||||
List of All Monad Door Bosses
Monad Bosses are difficult encounters you can find inside Monad Doors starting at 80F. These bosses can reward you with more Major Arcana cards as well as special, rare crafting items.
| Tartarus Blocks |
|---|
|
|
Select a Block to head to that section!
Yabbashah Block
| Elegant Mother |
Recommended Level: 28+
Location: 70F - 89F Tartarus |
|||||||||||
|---|---|---|---|---|---|---|---|---|---|---|---|---|
| Phantom Mage |
Recommended Level: 29+
Location: 70F - 89F Tartarus |
|||||||||||
| Red Sigil |
Recommended Level: 29+
Location: 70F - 89F Tartarus |
|||||||||||
| Nemean Beast |
Recommended Level: 36+
Location: 92F - 116F Tartarus |
|||||||||||
| Eternal Eagle |
Recommended Level: 36+
Location: 92F - 116F Tartarus |
|||||||||||
| Chaos Cyclops |
Recommended Level: 38+
Location: 92F - 116F Tartarus |
|||||||||||
Tziah Block
| Judgment Sword |
Recommended Level: 42+
Location: 119F - 142F Tartarus |
|||||||||||
|---|---|---|---|---|---|---|---|---|---|---|---|---|
| Minotaur III |
Recommended Level: 43+
Location: 119F - 142F Tartarus |
|||||||||||
| Grand Magus |
Recommended Level: 45+
Location: 119F - 142F Tartarus |
|||||||||||
| Crazy Twins |
Recommended Level: 49+
Location: 145F - 154F Tartarus |
|||||||||||
| Emperor Beetle |
Recommended Level: 49+
Location: 145F - 154F Tartarus |
|||||||||||
| Death Castle |
Recommended Level: 50+
Location: 145F - 154F Tartarus |
|||||||||||
Harabah Block
| Void Giant |
Recommended Level: 64+
Location: 173-197F Tartarus |
|||||||||||
|---|---|---|---|---|---|---|---|---|---|---|---|---|
| World Balance |
Recommended Level: 64+
Location: 173-197F Tartarus |
|||||||||||
| Eternal Sand |
Recommended Level: 64+
Location: 173-197F Tartarus |
|||||||||||
| Rampage Drive (Harabah) |
Recommended Level: 67+
Location: 199-224F Tartarus |
|||||||||||
| Vehement Idol (Harabah) |
Recommended Level: 67+
Location: 199-224F Tartarus |
|||||||||||
| Phantom King |
Recommended Level: 67+
Location: 199-224F Tartarus |
|||||||||||
Adamah Block
| Fanatic Tower |
Recommended Level: 73+
Location: 227-251F Tartarus |
|||||||||||
|---|---|---|---|---|---|---|---|---|---|---|---|---|
| Reckoning Dice |
Recommended Level: 73+
Location: 227-251F Tartarus |
|||||||||||
| Intrepid Knight (Monad) |
Recommended Level: 73+
Location: 227-251F Tartarus |
|||||||||||
Persona 3 Reload Related Guides
All Episode Aigis Bosses
List of Episode Aigis DLC Bosses
All Story Bosses
| Story Bosses | ||
|---|---|---|
| Priestess | Emperor & Empress | Hierophant |
| Lovers | Chariot & Justice | Hermit |
| Strength & Fortune | Jin & Takaya | Hanged Man |
| Chidori Yoshino | Jin Shirato | Takaya Sakaki |
| Nyx Avatar | ||
All Guardian Bosses
All Superbosses
| Superbosses | |
|---|---|
| Reaper | Elizabeth |
All Monad Bosses
Comment
Author

List of All Monad Bosses
Please participate in our site
improvement survey
03/2026
improvement survey
03/2026
Would you assist in
improving Game8's site?
improving Game8's site?

×
We are listening to our users' valuable opinions and discussing how to act on them.
The information collected through this survey will be used for the purpose of improving our services. In addition, the information will only be disclosed a part of a statistic in a format that will not allow identification of personal information.
Begin Survey
Not Now
×
Please rate each item regarding Game8.co's Advertisements.
Amount of Ads
Very Dissatisfied
Somewhat Dissatisfied
Fine
Somewhat Satisfied
Highly Satisfied
Placement of Ads
Timing of Ad Display
Ad Loading Speed
Safeness of Ads
Content of Ads
×
Please rate each item regarding Game8.co's Quality of Articles.
Amount of information
Very Dissatisfied
Somewhat Dissatisfied
Fine
Somewhat Satisfied
Highly Satisfied
Frequency of updates
Speed of new information
Accuracy of articles
Understandibility of articles
Readability of sentences
×
Please rate each item regarding Game8.co's Usability of the Site.
Ease of finding information
Very Dissatisfied
Somewhat Dissatisfied
Fine
Somewhat Satisfied
Highly Satisfied
Loading Speed
Use of Color
Font Size
Visibility of Images
Easy to Understand Layout
×
Please rate each item regarding Game8.co's Message Boards, Comments.
Ease of Writing
Very Dissatisfied
Somewhat Dissatisfied
Fine
Somewhat Satisfied
Highly Satisfied
Readability
Ease in Finding Information
Comment Quality
Comment Quantity
Admin Response
×
Please rate each item regarding Game8.co's Site's new design.
Please rate our site's new design
Very Dissatisfied
Somewhat Dissatisfied
Fine
Somewhat Satisfied
Highly Satisfied
Do you think that the website's design change makes the site easier to use?
Has the new design made it easier for you to find information on the site?
Has the new design improved the overall visual appeal of the site?
How would you rate your overall satisfaction with the new design of the site?
×
How likely are you to recommend Game8 to someone you know?
Very Unlikely
0
1
2
3
4
5
6
7
8
9
10
Very Likely
If you have other opinions regarding potential improvement to the website, please share them with us. We would appreciate your honest opinion.
Note: This is a free response section, so you can proceed without entering anything.
Note: Please be sure not to enter any kind of personal information into your response.
Note: Please be sure not to enter any kind of personal information into your response.
×
Thank You
×
Thank you for participating in our survey! Your answers will help us to improve the quality of our website and services.
We hope you continue to make use of Game8.
We hope you continue to make use of Game8.
Close
Rankings
- We could not find the message board you were looking for.
Gaming News


Popular Games

Genshin Impact Walkthrough & Guides Wiki
Honkai: Star Rail Walkthrough & Guides Wiki
Umamusume: Pretty Derby Walkthrough & Guides Wiki
Pokemon Pokopia Walkthrough & Guides Wiki
Resident Evil Requiem (RE9) Walkthrough & Guides Wiki
Monster Hunter Wilds Walkthrough & Guides Wiki
Wuthering Waves Walkthrough & Guides Wiki
Arknights: Endfield Walkthrough & Guides Wiki
Pokemon FireRed and LeafGreen (FRLG) Walkthrough & Guides Wiki
Pokemon TCG Pocket (PTCGP) Strategies & Guides Wiki


Recommended Games
Diablo 4: Vessel of Hatred Walkthrough & Guides Wiki
Fire Emblem Heroes (FEH) Walkthrough & Guides Wiki
Yu-Gi-Oh! Master Duel Walkthrough & Guides Wiki
Super Smash Bros. Ultimate Walkthrough & Guides Wiki
Pokemon Brilliant Diamond and Shining Pearl (BDSP) Walkthrough & Guides Wiki
Elden Ring Shadow of the Erdtree Walkthrough & Guides Wiki
Monster Hunter World Walkthrough & Guides Wiki
The Legend of Zelda: Tears of the Kingdom Walkthrough & Guides Wiki
Persona 3 Reload Walkthrough & Guides Wiki
Cyberpunk 2077: Ultimate Edition Walkthrough & Guides Wiki


All rights reserved
©ATLUS. ©SEGA. All rights reserved.
The copyrights of videos of games used in our content and other intellectual property rights belong to the provider of the game.
The contents we provide on this site were created personally by members of the Game8 editorial department.
We refuse the right to reuse or repost content taken without our permission such as data or images to other sites.