
 How to Start Episode Aigis
 What Carries Over From the Base Game?
 Differences From the Answer
 How to Transfer Save Data
 The Abyss of Time Guide
 How to Get Lady's Stool
 Elizabeth's Request (Episode Aigis)
 All Episode Aigis Theurgy
This survey will take about 1 minute.
Your answers will help us to improve our website.
Persona 3 Reload (P3R)
Episode Aigis Walkthrough

This is a complete walkthrough for the Persona 3 Reload (P3R) Episode Aigis DLC. Check out how to start Episode Aigis, a step-by-step guide on how to beat the DLC, a list of bosses per area, and how long it will take to beat!
| Walkthrough Guides | |
|---|---|
 Base Game Base Game |
Episode Aigis DLC |
How to Start Episode Aigis DLC
Select Change Episode
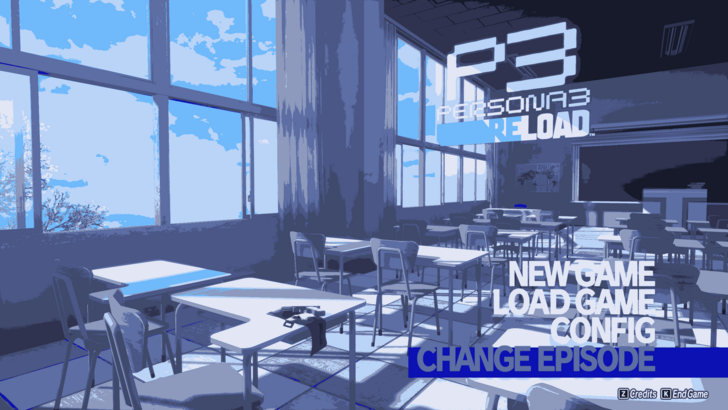
If you have the Episode Aigis DLC purchased, you'll have the option to Change Episodes in the main menu. From there, you can simply start a New Game once the background has changed.
Episode Aigis DLC Walkthrough
- Iwatodai Dorm
- Maleboge
- Cocytus
- Caina
- Antenora
- Ptolomea
- Judecca
- Empyrean
- Colosseo Purgatorio
- The Final Door
Iwatodai Dorm Story Walkthrough
| Objectives | |
|---|---|
| 1 | After the opening cinematic, you will start off with Fuuka and Yukari's phone call. You will then see some of the members of SEES meeting up to return their Evokers. |
| 2 | After Dinner, Aigis decides to head back to her room to prepare to go back to the lab. |
| 3 | After another night of being unable to sleep, Fuuka will barge in saying that there's a problem at the lobby. |
| 4 | You get to the lobby and see another Anti-Shadow Suppression Weapon, Metis. Here, you need to take Metis down. |
| 5 | Once you beat Metis and Aigis shuts down from obtaining the Wild Card, everyone will regroup and you are now open to explore the Abyss of Time. |
Malebolge Story Walkthrough
| Objectives | |
|---|---|
| 1 | You will be limited to only Ken, Yukari, Akihiko, and Metis as your available party members for now. Choose your party for now and proceed to head inside the Malebolge door. |
| 2 | Similar to Tartarus, the dungeons here are randomly generated, so make your way down up to B7. |
| 3 | Once you reach B7, Fuuka will warn you that there are powerful enemies on the floor below. Use the teleporter and regroup as needed. |
| 4 | Once ready, head down to B8 and you need to fight a 2 Shouting Tiaras and a Wrathful Book. |
| 5 | After beating the Guardian Boss, you will unlock a door that lets you travel back and forth to the Desert of Doors and B8 of Malebolge. Use this chance to recoup and prep for the next stretch. |
| 6 | From B8, head down and you need to go down another set of randomly generated dungeons, so make your way down up to B15. |
| 7 | At B15, you will see a giant door that will lead you to Paulownia Mall from the past. You now have access to an area where you can get new items and gear. |
| 8 | Once you get everything you need at Paulownia Mall, head out from the door you came from and you will be taken back to the Dorm Lobby. Take a breather for now before heading back to the Abyss. |
Malebolge Door Complete Guide and Walkthrough
Cocytus Story Walkthrough
| Objectives | |
|---|---|
| 1 | Junpei and Koromaru will join the roster of your available party members. Choose your party for now and proceed to head inside the Cocytus door. |
| 2 | Similar to Tartarus, the dungeons here are randomly generated, so make your way down to B8. |
| 3 | Once you reach B8, Fuuka will warn you that there are powerful enemies on the floor below. Use the teleporter and regroup as needed. |
| 4 | Once ready, head down to B9 and you need to fight another set of bosses. This time it's a Cowardly Maya, a Crying Table, and a Wondrous Magus. |
| 5 | After beating the Guardian Boss, you will unlock a door that lets you travel back and forth to the Desert of Doors and B9 of Cocytus. Use this chance to recoup and prep for the next stretch. |
| 6 | From B9, head down and you need to go down another set of randomly generated dungeons, so make your way down up to B15. |
| 7 | At B15, you will see another giant door, head towards it to open it and you get a glimpse of Ken's life right after his mother's death. Confused, the group decides to regroup for now. |
Cocytus Door Complete Guide and Walkthrough
Caina Story Walkthrough
| Objectives | |
|---|---|
| 1 | Mitsuru will join the roster of your available party members. Choose your party for now and proceed to head inside the Caina door. |
| 2 | Make your way down to B7 and Fuuka will warn you that there are powerful enemies on the floor below. Use the teleporter and regroup as needed |
| 3 | Once ready, head down to B7 and you need to fight another set of bosses. This time it's a Harem Dancer and Natural Dancer. |
| 4 | After beating the Guardian Boss, you will unlock a door that lets you travel back and forth to the Desert of Doors and B8 of Caina. Use this chance to recoup and prep for the next stretch. |
| 5 | From B8, continue down to B7 and the next powerful enemies are at B14. So go ahead and head down there |
| 6 | Once you're at B14 there is another set of bosses. This time it's a Harmony Giant and the Judgement Sword. |
| 7 | After beating the Guardian Boss, you will unlock another door that lets you travel back and forth to the Desert of Doors and B14 of Caina. Use this chance to recoup and prep for the final stretch. |
| 8 | From B14, head down and you need to go down another set of randomly generated dungeons, so make your way down up to B20. |
| 9 | At B20, you will see another giant door, head towards it to open it and you get a glimpse of Akihiko's being recruited by Mitsuru to join SEES. Again, the group decides to regroup for now. |
Caina Door Complete Guide and Walkthrough
Antenora Story Walkthrough
| Objectives | |
|---|---|
| 1 | Similar to Caina, you'll have access to your full party roster. We highly recommend having Yukari and Koromaru in your party as there are several enemies weak to Wind and Darkness ahead. |
| 2 | Your first checkpoint is the 10th floor of Antenora where you'll be fighting Frivolous Maya. |
| 3 | After defeating Frivolous Maya, you'll enter the second layer of Antenora. Your next checkpoint will be on floor 19 and you'll be fighting Death Castle and Avenger Knight. |
| 4 | There will be no bosses after Death Castle and Avenger Knight. Head deeper until you reach the 25th floor to clear Antenora. |
Antenora Door Complete Guide and Walkthrough
Ptolomea Story Walkthrough
| Objectives | |
|---|---|
| 1 | The elites and enemies here have a resistance to physical attacks, but several of them are weak to Lightning and Ice. Akihiko and Mitsuru are highly recommended as a party member with one healer added to the mix (Yukari or Ken). |
| 2 | Make your way through Ptolomea and head until you reach the 7th floor. This is your first checkpoint and going to the next floor will pit you against Slaughter Drive and Spastic Turret. Keep your current roster as they are weak to Ice and Electric respectively. |
| 3 | For the next layout, enemies are mostly weak to Strike, Lightning, and Fire. Consider swapping out Mitsuru for Junpei to get a solid physical damage dealer that can dish out fire damage for this part. |
| 4 | Your next checkpoint is Floor 16. Replenish your resources by exiting the Abyss of Time or by using the clock and spending Fragment before resuming your journey. |
| 5 | You'll fight Acheron Seeker and Ice Raven which are weak to physical attacks (Strike and Slash respectively). Acheron Seeker is also weak to Fire and Lightning while also possessing Evade Slash. We highly recommend Akihiko, Junpei, and Ken as Acheron will be draining your resources so characters that can hit their weaknesses while recovering their SP are recommended for the fight. |
| 6 | Enemies in the next layer after the boss fight are mostly weak to Lightning, Fire, Ice, and Physical attacks. Koromaru or Junpei is a great addition to your party as well as Akihiko or Ken. Mitsuru or Metis are also great options to consider. |
| 7 | Progress until the 25th floor to clear Ptolomea. There are no more bosses after Acheron Seeker and Ice Raven so feel free to spend your resources to clear the enemies you encounter along the way. |
Ptolomea Door Complete Guide and Walkthrough
Judecca Story Walkthrough
| Objectives | |
|---|---|
| 1 | Enemies in the area are weak to Strike, Fire, Lightning, and Wind. Yukari is the recommended healer for this area while Akihiko and Junpei are great damage dealers to include. |
| 2 | Make your way to Judecca B7 to find your first checkpoint. Heading 1 floor lower will pit you against the Killer Twins and Red Sigil which are weak to Fire and Ice respectively. |
| 3 | Moving forward, the enemies' weaknesses will vary and consist of Darkness, Light, Fire, Slash, and Pierce. Koromaru and Ken are great party members to swap over for this layer of Judecca to tackle these weaknesses. Mitsuru is a great option to consider as well due to the elites in the area being weak to Ice. |
| 4 | Make your way to B16 to find your first checkpoint. Prepare for a boss fight on the next floor against Reckoning Dice and Eternal Sand. Both can block all elemental attacks and have no weaknesses so bring your strongest physical damage dealers. They can also inflict a team-wide poison attack so a healer that can purge these ailments like Yukari is also great to have. |
| 5 | On the next layer, you'll find enemies weak to Strike, Slash, Pierce, Light, Electric, Ice, and Dark. Ken is one of the best characters you can have in this layer as well as Koromaru once again. Metis is a great option too for strike damage as well as covering your team for Ice and potentially, even wind damage types. |
| 6 | Continue making your way until B25 using your chosen team to complete the whole Judecca dungeon. |
Judecca Door Complete Guide and Walkthrough
Empyrean Story Walkthrough
| Objectives | |
|---|---|
| 1 | Enemies in the area are weak to Fire, Ice, Wind, Lightning, Darkness, and Strike. With how late the game goes, you can pretty much draft any party members as long as you cover the missing elemental attacks your party can't provide but we still recommend Yukari, Metis, and Akihiko for the first layer as these three can cover the 4 main elements with their kit. |
| 2 | Push your way until B8 and change your current roster to be more physical damage-focused. Head to B9 to encounter the Musha Squad which has several immunities to elemental attacks but all will have no resistance to any physical damage attacks. |
| 3 | Enemy weaknesses range from all elemental types in this layer. Metis and Akihiko are great options as few enemies here negate strike damage. Yukari is also a great healer due to her SP conservative playstyle as well as the layer having few enemies weak to wind. |
| 4 | Push your way until B18 to find your next checkpoint. On the next floor, you'll fight Neo Minotaur and Rebellious Cyclops. Both have no weaknesses and both can nullify your Fire, Ice, and Wind attacks. |
| 5 | Enemies in the next layer will have Fire, Ice, Electric, Light, Slash, and Pierce weaknesses. Ken will be strong as a healer in this layer while Mitsuru will also prove invaluable not just because of her ice attacks but also her ailments against enemies with no weaknesses. Koromaru or Jumpei are both great choices as the last member to deal fire damage. |
| 6 | Head to B26 to find your last checkpoint and prepare for an upcoming boss fight. |
Empyrean Door Complete Guide and Walkthrough
Colosseo Purgatorio Story Walkthrough
| Objectives | |
|---|---|
| 1 | There will be no exploration in this part of the story. Instead, it will be three rounds of combat between your teammates. You'll start your first fight against Akihiko and Ken who are immune to Lightning and Light and use the same move respectively. We highly recommend preparing a Persona with healing capabilities as you'll be playing only with Metis for the upcoming battles. |
| 2 | Your next fight will be against Koromaru and Junpei so prepare Personas that can negate or resist Fire, Physical, and Darkness damage. |
| 3 | Lastly, you'll be fighting against Yukari and Mitsuru which are strong magic users. Prepare Personas that can block Ice and Wind to easily win the fight. |
Colosseo Purgatorio Complete Guide and Walkthrough
The Final Door Story Walkthrough
| Objectives | |
|---|---|
| 1 | After you forge the true key and head into the final door, SEES finds out that the protagonist became the Great Seal which prevents Erebus from bringing about the Fall. Defeating Erebus here will signify the end of the Episode Aigis update and after a few scenes, the credits will roll. ▶ Episode Aigis Ending Explained |
Erebus Weakness and How to Beat
List of DLC Bosses
| Bosses by Area | |
|---|---|
| Iwatodai Dorm | Malebolge |
| Cocytus | Caina |
| Antenora | Ptolomea |
| Judecca | Empyrean |
| Colosseo Purgatorio | The Final Door |
| Optional Area: Monad Chambers | |
List of Episode Aigis DLC Bosses
Iwatodai Dorm Bosses
| Metis |
Malebolge Bosses
| Wrathful Book | Shouting Tiara (Malebolge) |
Cocytus Bosses
| Wondrous Magus | Crying Table (Cocytus) | Cowardly Maya (Cocytus) |
| Phantom Mage (Cocytus) | Elegant Mother (Cocytus) | Muttering Tiara (Cocytus) |
| Maniacal Book | Red Sigil (Cocytus) | Blue Sigil |
Caina Bosses
| Harem Dancer | Natural Dancer (Caina) | Harmony Giant |
| Judgement Sword (Caina) | Chaos Cyclops (Caina) | Eternal Eagle (Caina) |
| Jealous Cupid | Nemean Beast (Caina) | Enslaved Beast |
Antenora Bosses
| Frivolous Maya | Jotun of Blood | Avenger Knight |
| Death Castle (Antenora) | Judgement Sword (Antenora) | Grand Magus (Antenora) |
| Prime Magus | Magical Magus (Antenora) | Minotaur III (Antenora) |
| Minotaur IV |
Ptolomea Bosses
Judecca Bosses
Empyrean Bosses
Colosseo Purgatorio Bosses
| Akihiko | Ken | Junpei |
| Koromaru | Yukari | Mitsuru |
The Final Door Bosses
| Erebus (Normal) | Erebus (Charging) | Erebus (Downed) |
Monad Chambers Bosses
How Long to Beat Episode Aigis DLC?
Around 20 Hours to Beat the DLC

| Time to Beat | |
|---|---|
| Persona 3 Reload | ~80 Hours |
| Episode Aigis DLC | ~20 Hours |
| Total | ~100 Hours |
According to a developer interview, the Episode Aigis DLC will take around 20 hours to beat. This is significantly faster than the estimated 30 hours needed to beat The Answer, which is the original version of the DLC in Persona 3 FES.
Persona 3 Reload Related Guides
Episode Aigis Walkthroughs
| All Episode Aigis Walkthroughs | |
|---|---|
| Malebolge | Cocytus |
| Caina | Antenora |
| Ptolomea | Judecca |
| Empyrean | Colosseo Purgatorio |
Episode Aigis New Bosses
Episode Aigis Tips and Tricks
Episode Aigis News
| All Episode Aigis DLC News | |
|---|---|
 Release Time and Countdown Release Time and Countdown |
 Ending Explained Ending Explained |
 How Long is Episode Aigis How Long is Episode Aigis |
- |
Comment
Author

Episode Aigis Walkthrough
Please participate in our site
improvement survey
04/2026
improvement survey
04/2026
Would you assist in
improving Game8's site?
improving Game8's site?

×
We are listening to our users' valuable opinions and discussing how to act on them.
The information collected through this survey will be used for the purpose of improving our services. In addition, the information will only be disclosed a part of a statistic in a format that will not allow identification of personal information.
Begin Survey
Not Now
×
Please rate each item regarding Game8.co's Advertisements.
Amount of Ads
Very Dissatisfied
Somewhat Dissatisfied
Fine
Somewhat Satisfied
Highly Satisfied
Placement of Ads
Timing of Ad Display
Ad Loading Speed
Safeness of Ads
Content of Ads
×
Please rate each item regarding Game8.co's Quality of Articles.
Amount of information
Very Dissatisfied
Somewhat Dissatisfied
Fine
Somewhat Satisfied
Highly Satisfied
Frequency of updates
Speed of new information
Accuracy of articles
Understandibility of articles
Readability of sentences
×
Please rate each item regarding Game8.co's Usability of the Site.
Ease of finding information
Very Dissatisfied
Somewhat Dissatisfied
Fine
Somewhat Satisfied
Highly Satisfied
Loading Speed
Use of Color
Font Size
Visibility of Images
Easy to Understand Layout
×
Please rate each item regarding Game8.co's Message Boards, Comments.
Ease of Writing
Very Dissatisfied
Somewhat Dissatisfied
Fine
Somewhat Satisfied
Highly Satisfied
Readability
Ease in Finding Information
Comment Quality
Comment Quantity
Admin Response
×
Please rate each item regarding Game8.co's Site's new design.
Please rate our site's new design
Very Dissatisfied
Somewhat Dissatisfied
Fine
Somewhat Satisfied
Highly Satisfied
Do you think that the website's design change makes the site easier to use?
Has the new design made it easier for you to find information on the site?
Has the new design improved the overall visual appeal of the site?
How would you rate your overall satisfaction with the new design of the site?
×
How likely are you to recommend Game8 to someone you know?
Very Unlikely
0
1
2
3
4
5
6
7
8
9
10
Very Likely
If you have other opinions regarding potential improvement to the website, please share them with us. We would appreciate your honest opinion.
Note: This is a free response section, so you can proceed without entering anything.
Note: Please be sure not to enter any kind of personal information into your response.
Note: Please be sure not to enter any kind of personal information into your response.
×
Thank You
×
Thank you for participating in our survey! Your answers will help us to improve the quality of our website and services.
We hope you continue to make use of Game8.
We hope you continue to make use of Game8.
Close
Rankings
- We could not find the message board you were looking for.
Gaming News


![Forza Horizon 6 Review [Preview] | Beautiful Roads With a Whole Lot of Oversteer](https://img.game8.co/4460981/a7254c24945c43fbdf6ad9bea52b5ce9.png/thumb)
Popular Games

Genshin Impact Walkthrough & Guides Wiki
Crimson Desert Walkthrough & Guides Wiki
Umamusume: Pretty Derby Walkthrough & Guides Wiki
Honkai: Star Rail Walkthrough & Guides Wiki
Monster Hunter Stories 3: Twisted Reflection Walkthrough & Guides Wiki
Wuthering Waves Walkthrough & Guides Wiki
The Seven Deadly Sins: Origin Walkthrough & Guides Wiki
Pokemon TCG Pocket (PTCGP) Strategies & Guides Wiki
Pokemon Pokopia Walkthrough & Guides Wiki
Zenless Zone Zero Walkthrough & Guides Wiki


Recommended Games
Monster Hunter World Walkthrough & Guides Wiki
Fire Emblem Heroes (FEH) Walkthrough & Guides Wiki
Pokemon Brilliant Diamond and Shining Pearl (BDSP) Walkthrough & Guides Wiki
Super Smash Bros. Ultimate Walkthrough & Guides Wiki
Diablo 4: Vessel of Hatred Walkthrough & Guides Wiki
Cyberpunk 2077: Ultimate Edition Walkthrough & Guides Wiki
Yu-Gi-Oh! Master Duel Walkthrough & Guides Wiki
Elden Ring Shadow of the Erdtree Walkthrough & Guides Wiki
The Legend of Zelda: Tears of the Kingdom Walkthrough & Guides Wiki
Persona 3 Reload Walkthrough & Guides Wiki


All rights reserved
©ATLUS. ©SEGA. All rights reserved.
The copyrights of videos of games used in our content and other intellectual property rights belong to the provider of the game.
The contents we provide on this site were created personally by members of the Game8 editorial department.
We refuse the right to reuse or repost content taken without our permission such as data or images to other sites.