
This survey will take about 1 minute.
Your answers will help us to improve our website.
Chrono Cross Remaster: Radical Dreamers
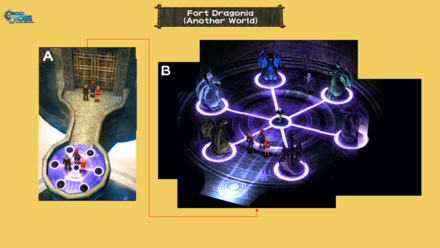
Fort Dragonia Walkthrough and Yellow Crystal Puzzle Solution
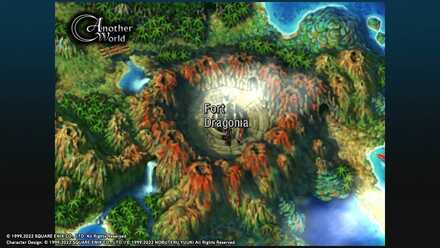
Fort Dragonia (Another World) is one of the main quest areas in Chrono Cross Remaster: Radical Dreamers that you visit as part of the story. Read on for a detailed walkthrough, including how to solve the Yellow Crystal puzzle using the Head Tail Body hint, a list of items, enemies, bosses, and more!
| Previous Quest | Next Quest |
|---|---|
| Mount Pyre (Another World) | Dimensional Vortex |
List of Contents
Fort Dragonia (Another World) Overview
Basic Information
| # 25: Fort Dragonia (Another World) | |
|---|---|
 Visions of the Fort haunt you. What awaits you at Fort Dragonia? |
|
| Enemies encountered: | Items: |
| Earth Charm, Sea Charm, Flame Charm, Angel Charm, & Daemon Charm | |
| Elements: | |
| Electro Bolt, Heal All, Bushbasher, Antidote, Trap Tornado, Aero Blaster, Trap Volcano, Magma Burst, Fire Pillar, Capsule, & Meteor Shower | |
Recruitable Characters
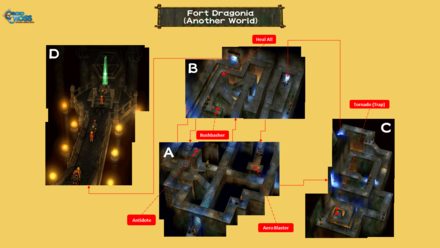
Fort Dragonia (Another World) Walkthrough
 View Full Map Image |
| Objectives | |
|---|---|
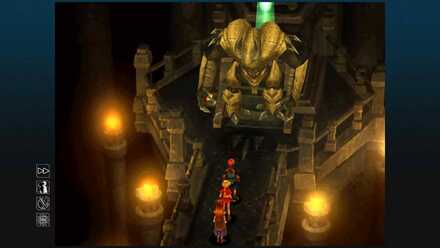
| 1 | 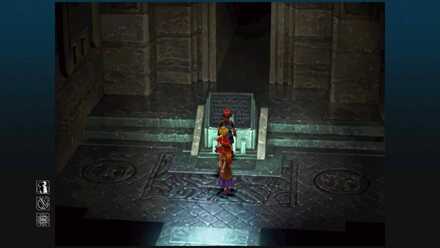 ・Enter Fort Dragonia If you have Macha or Glenn recruited or gained the Frog Prince Summon then you will find no resistance in entering the Fort. If you do not meet the criteria however, you will have to fight the Dragoon. Once they've been defeated you may enter the Fort. |
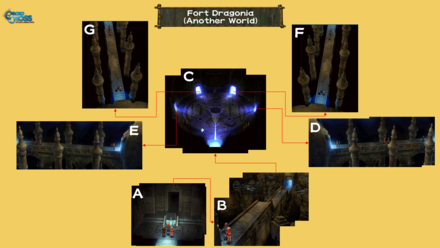
| 2 | 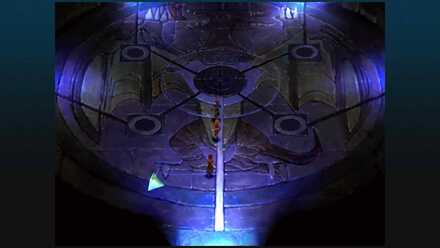 ・Choose your Path Upon entering the fort, you will find a Record of Fate, and 4 different paths to take. Each of these paths have their own puzzle to solve and boss to defeat. From the entrance take the first door to the right. |
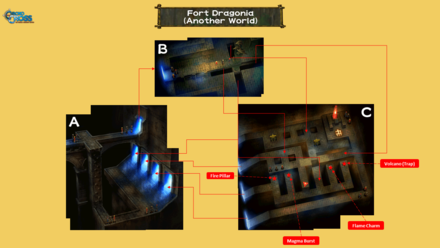 View Full Map Image |
Obtainable Items and Elements
| Area | Items and Elements |
|---|---|
| A | - |
| B | - |
| C | ・Volcano (Trap) ・Flame Charm ・Magma Burst ・Fire Pillar |
| Objectives | |
|---|---|
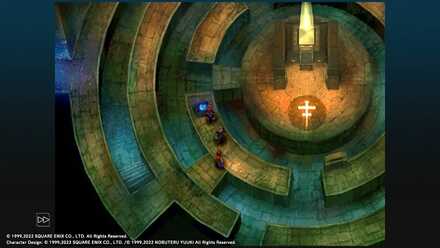
| 3 | 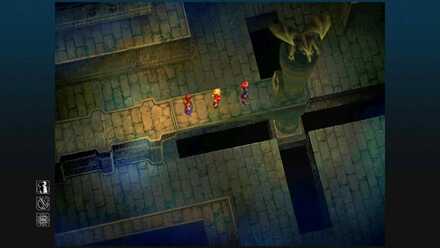 ・Turn the Statue Upon entering the room, you'll find a Dragon Statue in the center, facing a random way each time. Wherever the dragon is facing is north. You'll need to keep this in mind when choosing a direction as this will determine which side you're facing when the platform disappears and you fall into the rooms below. |
| 4 | 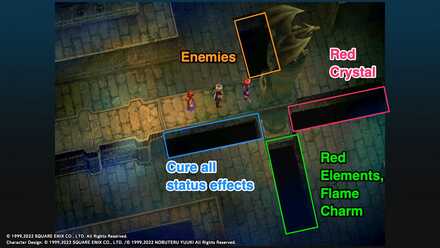 ・Select Your Room The crystal that you need to deactivate is on the right side, but you can take the time to check out the other sections too! The left gap will lead you to a room where you can cure all status effects and fill up the party's Star energy. The bottom gap drops into a room of chests where you can find Red Elements and a Flame Charm. The last room to the top will drop you into an area where there are enemies. |
 View Full Map Image |
Obtainable Items and Elements
| Area | Items and Elements |
|---|---|
| A | ・Antidote ・Aero Blaster |
| B | ・Heal All ・Bush Basher |
| C | ・Tornado (Trap) |
| D | - |
| Objectives | |
|---|---|
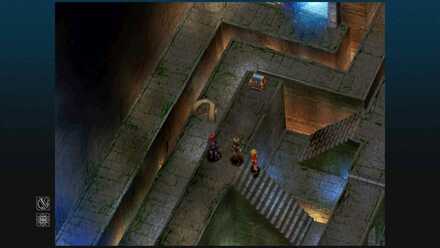
| 5 | 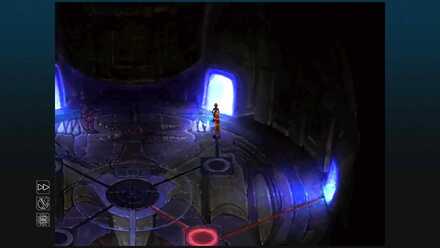 ・Head Back Up After deactivating the crystal, head back across the bridge to the central room. You'll see a red glowing light on the ground from deactivating the Red Crystal. Go to the room on the right above the Red Crystal's chamber. |
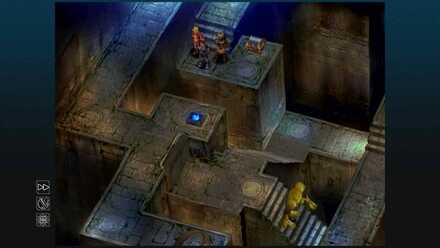
| 6 | 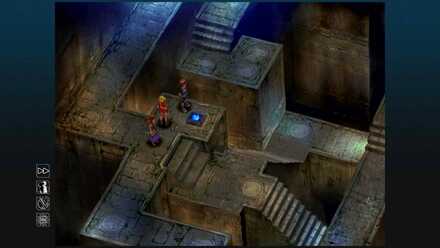 ・Navigate the Maze This room is an elaborate maze that protects the Green Crystal. Navigate through and use the blue button to lower the stairs that help you leave the room. To get to the blue button, take stairs on the left that lead to the path going right to the next room. In this room, follow the path until it branches going north and south. Be sure to grab the Trap Tornado Element by taking the southern path first, then go through the northern of the room to exit. From here, head down the steps to grab Aero Blaster, then back up to head up the next set of stairs. Follow the path as it wraps down until you come to the blue button. Activate it, then take the path north to the boss room. |
| Boss 7 |
 ・Defeat the Taurusoid In order to deactivate the Green Crystal, you'll need to defeat the Taurusoid. Once you've defeated it, you can proceed back to the center room, this time heading through the room on the top left. |
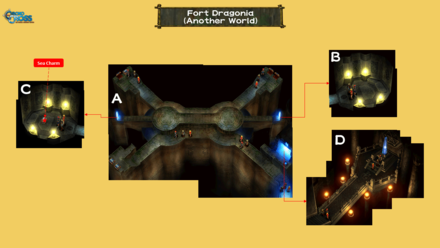 View Full Map Image |
Obtainable Items and Elements
| Area | Items and Elements |
|---|---|
| A | - |
| B | - |
| C | ・Sea Charm |
| D | - |
| Objectives | |
|---|---|
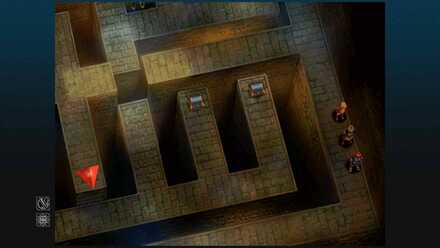
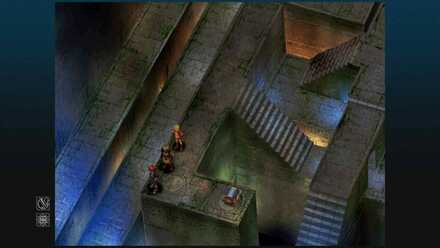
| 8 | 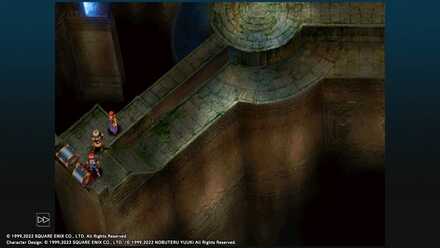 ・Solve the Puzzle of the Blue Crystal In this room, you'll find a number of chests. Opening these chests moves and rotates the platforms. You'll need to open them in a certain order to solve the puzzle. Begin with the chests on the lower left side, and while facing the chests, close the right chest and open the left. This will turn the left platform. Cross over to the upper right corner. |
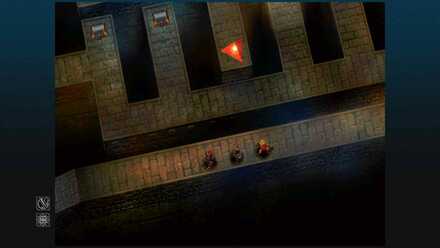
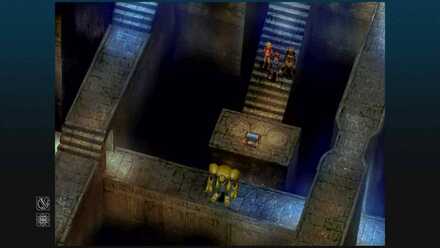
| 9 | 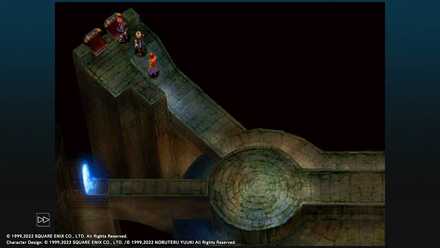 ・Continue Solving the Puzzle Do not touch the chests on the next platform and continue to the upper left side. Open both of the chests to put the left platform in the center. Follow the path to the upper right corner, ignoring the two chests and making your way to the doorway on the left to find a chest with a Sea Charm. |
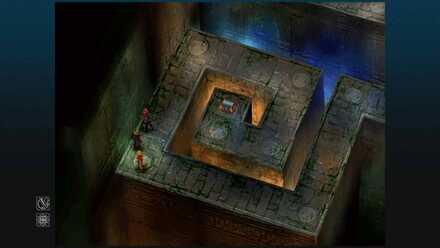
| 10 | 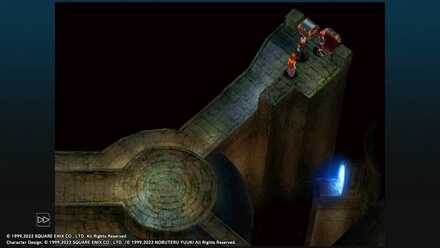 ・Head to the Bottom Right Return to the upper right corner. Close the left chest and open the right chest to move the path to the bottom right corner. Then, go back to the chests in the top-left corner (where you just came from), close the left chest and open the right chest, connecting the platform to the other path you just moved. Follow the newly-connected path to the doorway near where you first entered the room. Activate the blue button to lower the staircase, then enter the blue glowing door for the next boss fight. |
| Boss 11 |
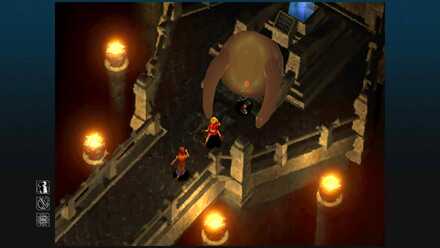 ・Defeat the Giant Gloop The Boss waiting for you and protecting the Blue Crystal is a large slime like creature called the Giant Gloop. Defeat it in then deactivate the Blue Crystal! |
 View Full Map Image |
Obtainable Items and Elements
| Area | Items and Elements |
|---|---|
| A | ・Electro-Bolt ・Earth Charm |
| B | - |
| Objectives | 12 | 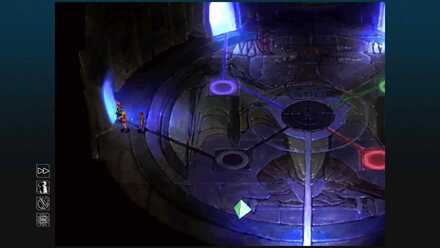 ・Enter the Maze After deactivating the Blue Crystal, exit into the center once more and enter the last room. This is the room of the Yellow Crystal, a maze that opens depending on the party order. |
|---|---|
| 13 | 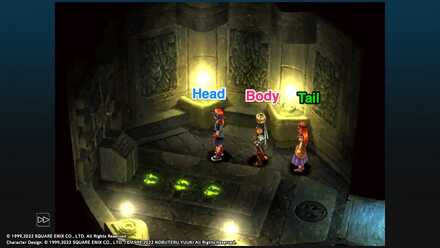 ・Determine Order Go all the way across until you exit a doorway. You'll see 3 pairs of footprints on the floor. First, step on the footprints and this will lock in the current order of your team as Head, Body, and Tail. The game will tell you which character is which. For instance, if you step on the footprints with Serge in front, Glenn in the middle, and Leena in back, they will be assigned as the Head, Body, and Tail, respectively. You can change the order of your party by pressing the - button on the Nintendo Switch. |
| 14 | 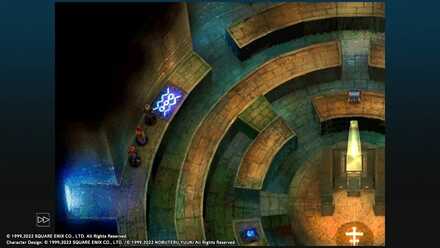 ・Use the switch The blue rug to the right of the room is a switch that will allow you to reorganize your party members over to get the Head-Body-Tail combinations needed to reach the crystal and various chests in the room. You can also use the Record of Fate in the central chamber to rearrange the party. Each time you've achieved the desired party organization, head back into the room with the footprints and interact with the device to activate a platform in the maze room.
|
| 15 | 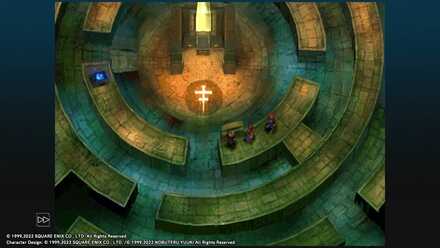 ・Activate the Final Switch To reach the Yellow Crystal, you'll first need to lower the steps using the original composition (Head-Body-Tail), then to get to the actual Yellow Crystal, change into Tail-Body-Head and activate the machine in the footprints room. You then need to hit one more switch just below the Yellow Crystal. Interact with the switch that looks like a headstone, and once you've deactivated the Yellow Crystal, head back out to the center and save your game. You'll find that the room has changed a bit. |
 View Full Map Image |
| Objectives | |
|---|---|
| Boss 16 |
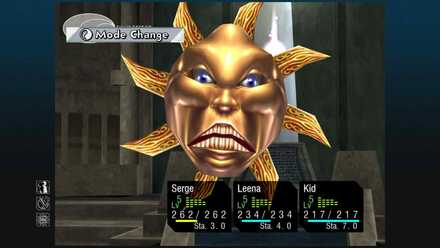 ・Defeat the Sun of a Gun Entering the last room, you'll be facing the large Sun Boss! It protects the White Crystal so you'll have no choice but to defeat it to proceed! |
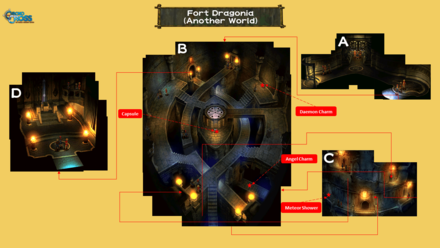 View Full Map Image |
Obtainable Items and Elements
| Area | Items and Elements |
|---|---|
| A | - |
| B | ・Capsule ・Angel Charm ・Daemon Charm |
| C | ・Meteor Shower |
| D | - |
| Objectives | |
|---|---|
| 17 | 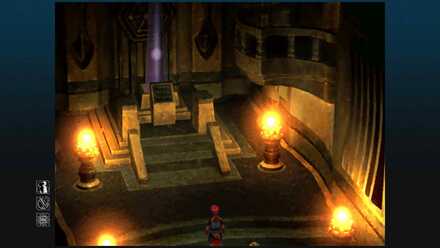 ・Approach the Black Crystal Once you've defeated Son of a Gun, deactivate the White Crystal and head up with the elevator. Continue moving through while avoiding enemies and you'll eventually reach the Black Crystal. Take the exit going outside, and re-enter through the other door. Head to the north end of the area to enter a familiar crystal chamber. |
| Boss 18 |
 ・Defeat the Bunyip Once you're near the Black Crystal, Bunyip will descend upon your party. Note that this is only it's first form! You'll need to defeat it completely to deactivate the Black Crystal. |
| 19 | ・Save Your Game Once the battle is over, you can head to the central platform and use the teleporter. But we recommend heading back up instead to save your game as the next section is going to be a doozy! |
 View Full Map Image |
| Objectives | |
|---|---|
| Boss 20 |
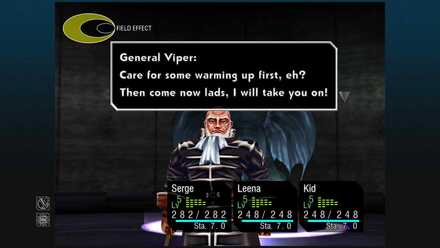 ・Head to the Tower Take the Teleporter up and you'll watch a cutscene before you're attacked by General Viper! |
| Boss 21 |
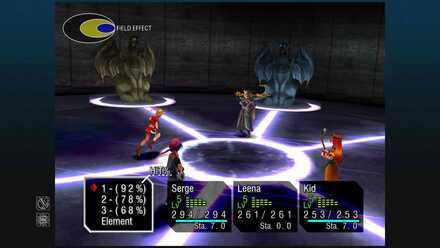 ・Defeat Lynx With General Viper handled, you'll now have to face Lynx himself. After defeating him, Kid will eventually join in the battle. |
| 22 | 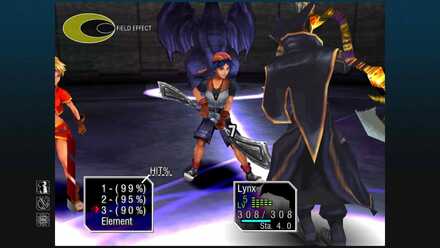 ・Rematch against the Party After defeating Lynx you'll have to fight again. This time it will be against your own party as Lynx! Don't worry about trying too hard, the odds are stacked against you in this fight and you are likely to lose. |
| Previous Quest | Next Quest |
|---|---|
| Mount Pyre (Another World) | Dimensional Vortex |
Yellow Crystal Puzzle Solution
First, Head to the Footprints Room
The way to solve the yellow crystal puzzle is to use the blue switch on the floor in conjuction with the character change button on the game controller to switch party members (the - Button on the Nintendo Switch) and then register the composition in the footprints room.
First, head over to the chamber on the left side of the room and step onto the footprints. The first character in your party of three is assigned as the Head, the middle character is assigned as the Body, and your last character is assigned as the Tail.
Press the Blue Button in the Maze Room
Once you've activated the machine in the footprints room with the original Head-Body-Tail composition, press the blue button in the maze room to drop the steps. Then, head immediately over to the blue wavy switch outside the footprints room.
Use the Change Lead Character Button and the Blue Switch
The blue rug-like switch just outside the footprints room will allow you to reorganize your party members to get the combination needed to reach the crystal. Press the Change Lead Character ( - ) Button once, then step on the blue switch once. Now that you've achieved the Tail-Body-Head party formation, head back into the room with the footprints and interact with the device to activate a platform in the maze room.
Hit the Final Switch Below the Yellow Crystal
Finally, activate the switch on the platform just below the Yellow Crystal to gain access to it and solve the puzzle.
In Summary
- The order you need to reach the blue switch to lower the steps is Head, Body, Tail (no change). Activate the machine in the footprints room with Head-Body-Tail composition.
- Press the blue button in the main maze room to drop the steps.
- The order you need to reach the Yellow Crystal is Tail, Body, Head. With the original Head-Body-Tail composition, press the Change Lead Character button once.
- Step onto the blue switch outside the footprints room.
- Activate the machine in the footprints room with Tail-Body-Head composition.
- Activate the final switch on the raised platform below the yellow symbol on the floor.
- Interact with the yellow crystal to solve the puzzle.
Tips and Strategies
Prepare Trap Tornado Elements
Tornado is one of the Taurusoid's most powerful abilities and can really hurt your party if used. You can attempt to steal this powerful Element though which could be extremely useful later on!
Otherwise, you can use Yellow Elements and Turn Elements to make the fight much easier.
Do Not Allow Giant Gloop to Use Blue Field
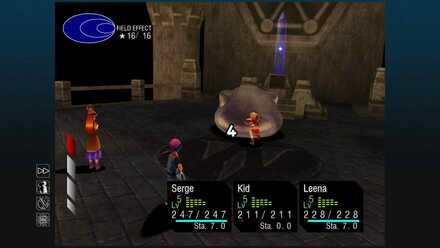
GiantGloop is an Innate Blue boss, and will deal quite a bit of damage. But, what you'll really need to worry about is its BlueField ability. This turns the whole field Blue, making its attacks more powerful and potentially lethal. Use any different colored Element to avoid the effects of this.
Watch Sun of a Gun's Expressions
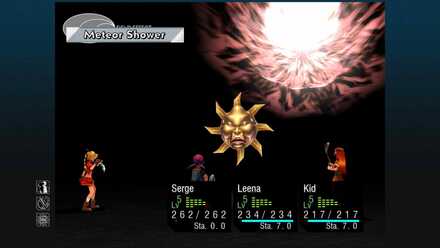
This ray of literal sunshine can be quite a pain to deal with, but watch out for its expressions to know what you'll need to do! If it's smiling, focus on Physical Attacks and charging up your Element Power. Once it begins to grow sad, be ready for it to debilitate your party with potential status effects.
The most dangerous is when it's angry. This means it will perform a series of attacks that could take one of your party out of the fight. So hit it hard with loads of Black Elements and Skills or defend yourself for the onslaught!
Bunyip Changes from Red to Black
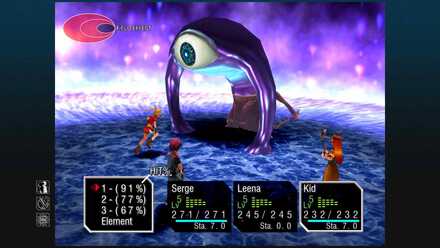
Avoid having a White Innate in the party, other than Serge as this Boss can take them out very quickly once it has taken about 300 damage and transformed into its new form. Keep Revive and White Elements spread out throughout the party, especially since the Black Innate version of Bunyip is likely to take Serge out.
You can prepare for this by focusing on Physical Attacks until it transforms and then unleashing all the charged Element Power onto it! In addition, you can also use a Trap FreeFall to take it's FreeFall Ability and keep this powerful Element for yourself!
Viper's G-Force
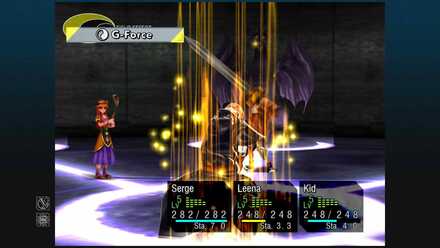
General Viper, while he seems imposing, is not the most difficult of bosses. Using combined Tech Skills and Turn Elements should make the fight relatively quick. In addition, General Viper will not be able to use G-Force consecutively, so you'll have time between each use to use summons or whittle down his HP.
Use White Elements
If you're looking to beat Lynx, you'll need to distribute and use White Elements. In addition, given that Serge and Lynx are Element opposites, you may need to give some Revive Elements to your party to keep Serge up.
Do not be fooled though if you do use Black Elements, as Lynx will occasionally use White Elements, hurting any Black Innate characters you might have with you. Trying to use Anti-Black won't work either so keep your focus on damaging him as quickly as possible to end this fight!
Obtainable Items and Elements
Items
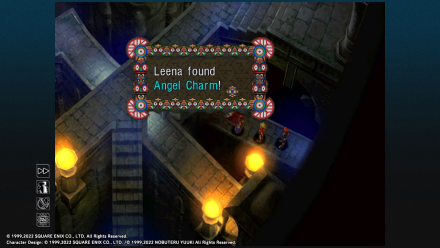
Angel and Daemon Charm
 |
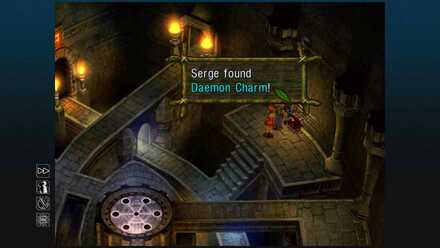 |
After completing the Crystal chambers, head up the tower, exit the door to the right, and take the next exit to the right as well. You will enter a room with multiple stairways and pathways. The Daemon Charm will be on the top right corner of the map, while the Angel Charm will be on the bottom right corner.
Elements
| Elements |
|---|
|
|
Trap Volcano, Flame Charm, Magma Burst, & Fire Pillar
 Flame Charm & Trap Volcano |
 Fire Pillar & Magma Burst |
Found in the bottom gap of the the Red Crystal's chamber!
Antidote
Found in the Green Crystal chamber on the upper left corner of the first area.
Bushbasher & Heal All
 Heal All |
 Bushbasher |
Both are found in the Green Crystal chamber. Head north and take the stairs. turning left, you'll see the Heal All to the north and the Bushbasher to the south.
Aero Blaster
Found in the upper right corner of the first area in the Green Crystal Chamber.
Trap Tornado
In the Green Crystal Chamber, go left and then cross under the bridge to the north. Head to the rightmost exit and you'll see a Trap Tornado south of this exit!
Capsule
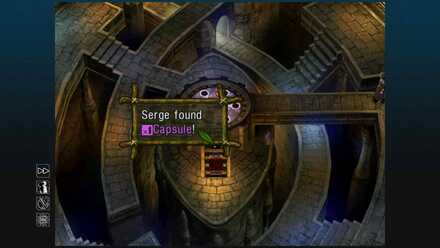
In the same room as the Angel and Demon Charms, you will find a Capsule in the center.
Meteor Shower
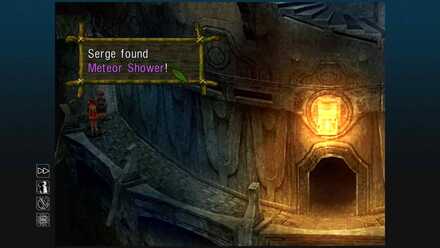
From the Angel and Demon Charms, head south to the central exit then turn left. You'll find the Meteor Shower Element at the end.
Enemies
Bosses
| Boss | Innate Element | HP |
|---|---|---|
| Lynx Part 2 | Black | 1000 |
| Viper | Yellow | 820 |
| Bunyip | Red, Black | 400 |
| SunOfAGun | White | 365 |
| Giant Gloop | Blue | 800 |
| Taurusoid | Green | 1200 |
| Dragoon | Red | 700 |
Regular Enemies
| Enemy | Innate Element | HP |
|---|---|---|
| Alphabat (Another World) | Black | 100 |
| Combat | Black | 200 |
| Cybot (Another World) | Yellow | 314 |
| Googhoul | Yellow | 180 |
| Paper Boy | Yellow | 165 |
| Taurminator | Red | 658 |
| Acacia PVT (Second Enounter) | Yellow | 210 |
| Acacia SGT (Second Encounter) | Yellow | 240 |
Chrono Cross Remaster: Radical Dreamers Related Guides
Author
Fort Dragonia Walkthrough and Yellow Crystal Puzzle Solution
Please participate in our site
improvement survey
03/2026
improvement survey
03/2026
Would you assist in
improving Game8's site?
improving Game8's site?

×
We are listening to our users' valuable opinions and discussing how to act on them.
The information collected through this survey will be used for the purpose of improving our services. In addition, the information will only be disclosed a part of a statistic in a format that will not allow identification of personal information.
Begin Survey
Not Now
×
Please rate each item regarding Game8.co's Advertisements.
Amount of Ads
Very Dissatisfied
Somewhat Dissatisfied
Fine
Somewhat Satisfied
Highly Satisfied
Placement of Ads
Timing of Ad Display
Ad Loading Speed
Safeness of Ads
Content of Ads
×
Please rate each item regarding Game8.co's Quality of Articles.
Amount of information
Very Dissatisfied
Somewhat Dissatisfied
Fine
Somewhat Satisfied
Highly Satisfied
Frequency of updates
Speed of new information
Accuracy of articles
Understandibility of articles
Readability of sentences
×
Please rate each item regarding Game8.co's Usability of the Site.
Ease of finding information
Very Dissatisfied
Somewhat Dissatisfied
Fine
Somewhat Satisfied
Highly Satisfied
Loading Speed
Use of Color
Font Size
Visibility of Images
Easy to Understand Layout
×
Please rate each item regarding Game8.co's Message Boards, Comments.
Ease of Writing
Very Dissatisfied
Somewhat Dissatisfied
Fine
Somewhat Satisfied
Highly Satisfied
Readability
Ease in Finding Information
Comment Quality
Comment Quantity
Admin Response
×
Please rate each item regarding Game8.co's Site's new design.
Please rate our site's new design
Very Dissatisfied
Somewhat Dissatisfied
Fine
Somewhat Satisfied
Highly Satisfied
Do you think that the website's design change makes the site easier to use?
Has the new design made it easier for you to find information on the site?
Has the new design improved the overall visual appeal of the site?
How would you rate your overall satisfaction with the new design of the site?
×
How likely are you to recommend Game8 to someone you know?
Very Unlikely
0
1
2
3
4
5
6
7
8
9
10
Very Likely
If you have other opinions regarding potential improvement to the website, please share them with us. We would appreciate your honest opinion.
Note: This is a free response section, so you can proceed without entering anything.
Note: Please be sure not to enter any kind of personal information into your response.
Note: Please be sure not to enter any kind of personal information into your response.
×
Thank You
×
Thank you for participating in our survey! Your answers will help us to improve the quality of our website and services.
We hope you continue to make use of Game8.
We hope you continue to make use of Game8.
Close
Rankings
- We could not find the message board you were looking for.
Gaming News


Popular Games

Genshin Impact Walkthrough & Guides Wiki
Honkai: Star Rail Walkthrough & Guides Wiki
Umamusume: Pretty Derby Walkthrough & Guides Wiki
Pokemon Pokopia Walkthrough & Guides Wiki
Resident Evil Requiem (RE9) Walkthrough & Guides Wiki
Monster Hunter Wilds Walkthrough & Guides Wiki
Wuthering Waves Walkthrough & Guides Wiki
Arknights: Endfield Walkthrough & Guides Wiki
Pokemon FireRed and LeafGreen (FRLG) Walkthrough & Guides Wiki
Pokemon TCG Pocket (PTCGP) Strategies & Guides Wiki


Recommended Games
Diablo 4: Vessel of Hatred Walkthrough & Guides Wiki
Fire Emblem Heroes (FEH) Walkthrough & Guides Wiki
Yu-Gi-Oh! Master Duel Walkthrough & Guides Wiki
Super Smash Bros. Ultimate Walkthrough & Guides Wiki
Pokemon Brilliant Diamond and Shining Pearl (BDSP) Walkthrough & Guides Wiki
Elden Ring Shadow of the Erdtree Walkthrough & Guides Wiki
Monster Hunter World Walkthrough & Guides Wiki
The Legend of Zelda: Tears of the Kingdom Walkthrough & Guides Wiki
Persona 3 Reload Walkthrough & Guides Wiki
Cyberpunk 2077: Ultimate Edition Walkthrough & Guides Wiki


All rights reserved
© 2022 SQUARE ENIX LTD. All Rights Reserved. SQUARE ENIX and the SQUARE ENIX logo are trademarks or registered trademarks of Square Enix Holdings Co., Ltd.
Square Enix, Inc., 999 N. Pacific Coast Highway, 3rd Floor, El Segundo, CA 90245
The copyrights of videos of games used in our content and other intellectual property rights belong to the provider of the game.
The contents we provide on this site were created personally by members of the Game8 editorial department.
We refuse the right to reuse or repost content taken without our permission such as data or images to other sites.