Yankui Disciples Re-Emerge Quest Guide
☆ New: Tier List Maker & Co-Op Board!
★ 2.7: Nangong Yu, Cissia, & 2.7 Livestream
☆ 2.6 Phase 1: Sunna & Yixuan
★ 2.6 Phase 2: Aria & Yuzuha
☆ Tier Lists: Agents | W-Engines | Bangboos | Teams
★ Redeem Codes for free Polychromes!

Yankui Disciples Re-Emerge is a main story quest in Zenless Zone Zero (ZZZ) 2.0. See how to unlock this main commission, the complete quest guide, all the Hollow walkthroughs, and its rewards here!
| ◄ Previous Quest | Next Quest ▶ |
|---|---|
| Misfortune Strikes Today | Turbulence Brewing |
List of Contents
How to Unlock Yankui Disciples Re-Emerge
Complete the Previous Quest
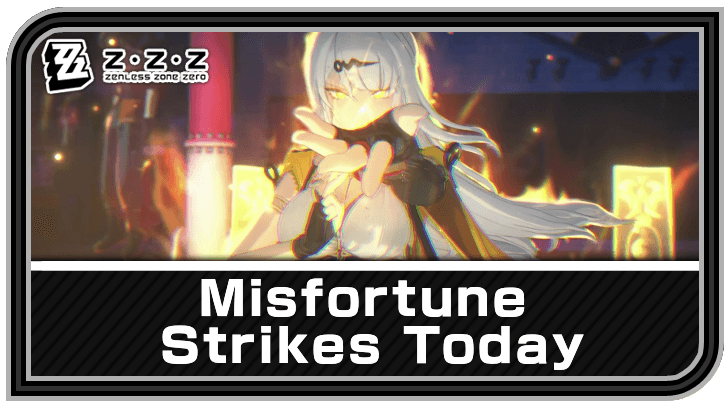
Yankui Disciples Re-Emerge will be unlocked after completing the Misfortune Strikes Today Main Story!
Misfortune Strikes Today Quest Guide
Yankui Disciples Re-Emerge Walkthrough
Yankui Disciples Re-Emerge Guide
- Check Out the Protesting Crowd
- Find the Exaltist Hideout
- Investigate the Exaltist Base
- Report the Situatiuon to Shifu
- Defeat the Enemies
- Find a Way to Break the Ether Barrier
- Defeat the Exalting Hymnist
- Destroy the Miasma Tumor
- Disable the Second Ether Barrier
- Keep Pushing On
- Defeat the Ambushing Enemies
- Investigate the First Clue
- Defeat Avarus
- Use Revelation to Shut Down the Engine
- Defeat the Overseer - Mevorakh
Check Out the Protesting Crowd
After talking to Damian, check out the protesting crowd and announce to them about Porcelumex's free anti-corruption medicine kiosk by the Siubian Temple. Once done, talk to your sibling.
Find the Exaltist Hideout
With the blessing of your seniors, find the Exaltist Hideout by going into the Hollow once more. As with the other Hollow Explorations, you'll be loaned a free trial version of Ju Fufu and Pan Yinhu.
Investigate the Exaltist Base
As soon as you enter the Hollow, you'll be greeted by a bunch of enemies going your way. Defeat all the incoming enemies then investigate the Exaltist Base nearby. Once there, destroy the Exaltist Supplies to decrease their sustenance, then defeat the enemies that spawn after doing so.
Report the Situatiuon to Shifu
Following the events from raiding the Exaltist Base, report the situation to Shifu in Suibian Temple. Recount all what happened during the raid; from destroying their supplies, defeating some of their enemies, Dr. Lohr's suicide, as well as the identity referred to as the Overseer.
After going thru Yixuan's conversation with you, enter the Lemnian Hollow together to end things once and for all.
Defeat the Enemies
After stepping inside the Hollow, your group notices the people who have ingested Alleviating Water and whose corruption levels have gone extremely awry. Then, investigate the area and defeat the enemies you encounter along the way.
Find a Way to Break the Ether Barrier
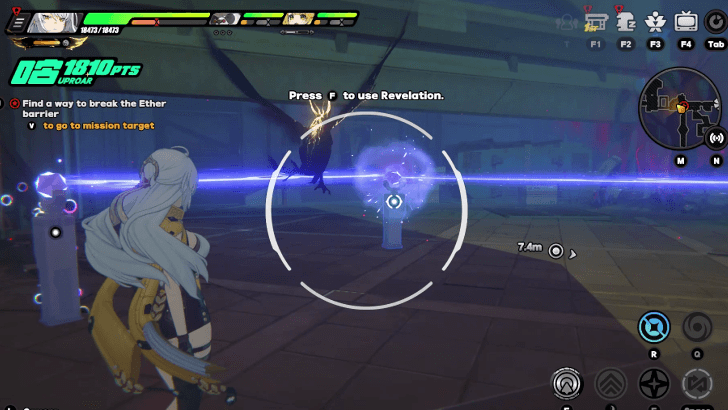
To break the Ether Barrier, use your Revelation Ability to reveal the afterimage of the laser and refracting device, and guide the laser it emits to shatter it. Simply point towards the afterimage then press F to reveal, which auto-dissipates the nearby shield. Lastly, access the control panel to open the nearby locked door.
Defeat the Exalting Hymnist
After passing thru the door, press on until you see an open area with an Exalting Hymnist. This type of enemy continously spawn Ethereals, so cut through all the mobs and head straight to it. Defeating it should also expunge all the Ethereals nearby!
Destroy the Miasma Tumor
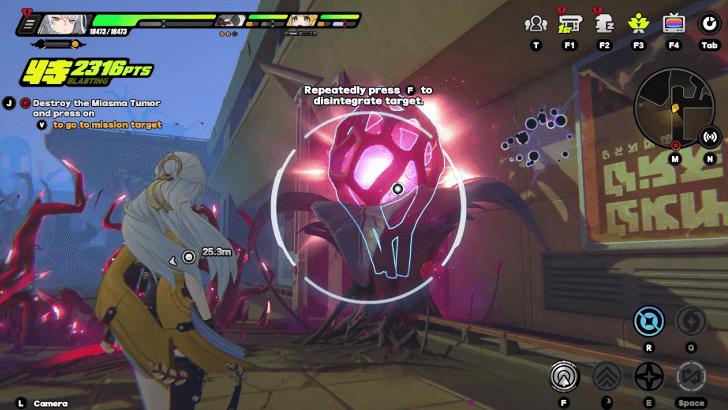
As you press on, destroy the Miasma Tumor blocking your way. Its weak spots are located a bit to its right, so simply scan them apiece and overload the tumor until it pops to oblivion.
Disable the Second Ether Barrier
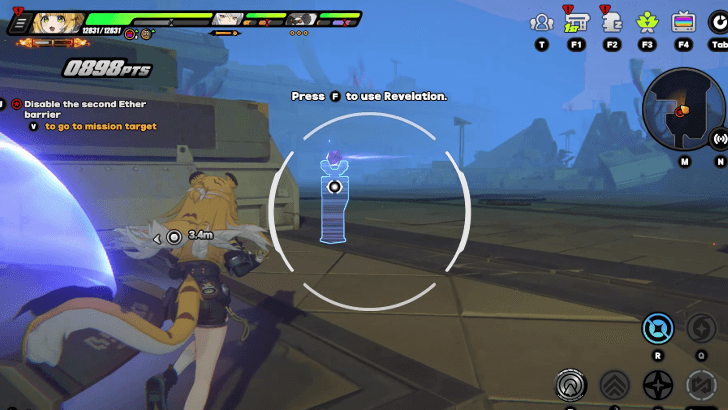
From the location of the Miasma Tumor, continue forward until you see a group of enemies and a second energy barrier. Defeat the mobs first, then head straight to the barrier to disable it. There are four devices circling the barrier, so simply reveal all of them to disable it.
Fortunately, there's no order when it comes to revealing the devices, so simply reveal them all to shatter the barrier.
Keep Pushing On
After disabling the second Ether barrier, walk past the door that opens nearby and keep pushing on until you see the next Fissure Beacon. You will encounter clumps of Miasma Coagula along the way which you must avoid, lest your team will accumulate corruption rapidly!
Defeat the Ambushing Enemies
From the Fissure Beacon, the Miasma gets thicker as you go in deeper, which would inevitably chip a percentage of your team's overall HP when your corruption meter is maxed out. There are also ambushing enemies along the way which you must defeat to progress the quest!
Investigate the First Clue
After defeating the enemies, investigate the first clue that Ju Fufu has found on the ground, which turns out to be experiment logs for the medicine. You'll spot two more clues along the way, as well as a live footage of a giant Miasma Coagula, which should be enough to convince other citizens that the Exaltists are sacrificing people for their ritual.
Defeat Avarus
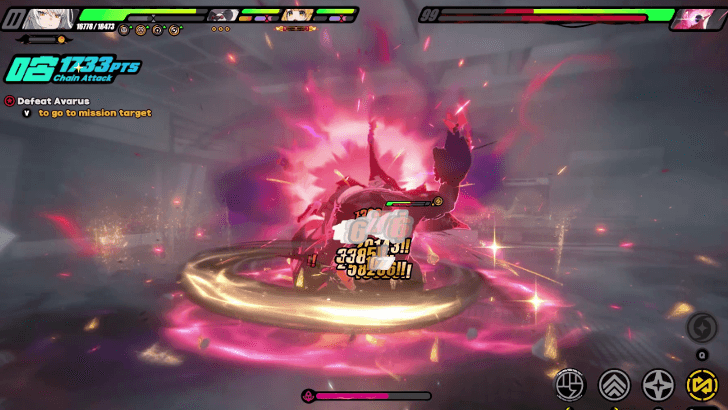
Afterwards, continue heading in deeper, then defeat Avarus. Avarus is a special type of Ethereal that has a Miasmic Shield, which could only be effectively dealth with using Rupture characters such as Yixuan. Fortunately, Avarus' skills are too telegraphed, so simply swap in Yixuan when he has Miasmic Shield up, otherwise, cycle your team as usual.
Use Revelation to Shut Down the Engine
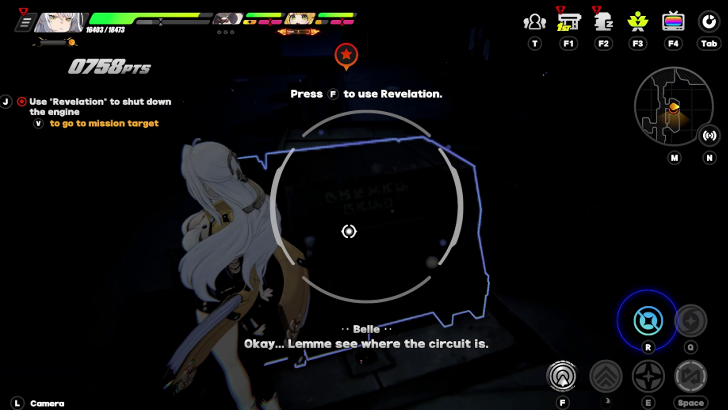
Even after completing Avarus, you'll notice that your team is still accumulating Corruption from the environment, which you can counteract by shutting down the nearby engine using your Revelation ability. Once done, simply keep pushing on, and prepare to head to the Sacred Space.
Defeat the Overseer - Mevorakh
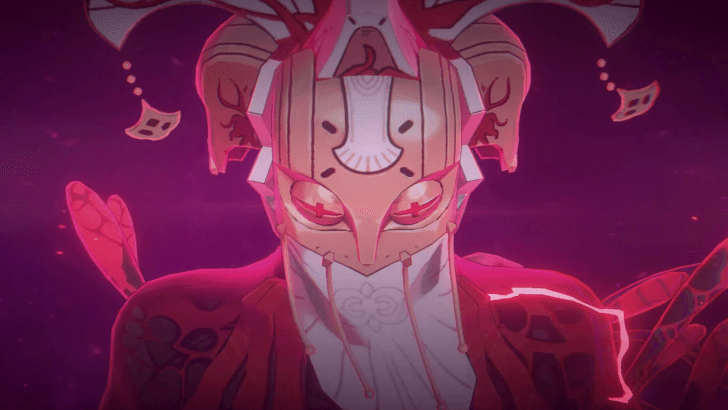
The Overseer - Mevorakh, is a Miasma Priest, which means it's weak to Ether-type Agents, as well as Special Ether-type Agents such as Yixuan with her Auric Ink affinity. Mevorakh's main damage output are mostly in melee range, which means you have to properly manage your dodges and counters, otherwise your Corruption meter increases.
In addition, Mevorakh will fully recover its HP once, after bringing its health down to a certain amount. During this phase, a cutscene also triggers which eventually leads to an easier fight against the Overseer.
Yankui Disciples Re-Emerge Rewards
Quest Rewards
| All Quest Rewards | |||
|---|---|---|---|
|
|
|
|
|
|
|
|||
Zenless Zone Zero Related Guides

All Main Commissions
Comment
Author
Yankui Disciples Re-Emerge Quest Guide
improvement survey
03/2026
improving Game8's site?

Your answers will help us to improve our website.
Note: Please be sure not to enter any kind of personal information into your response.

We hope you continue to make use of Game8.
Rankings
- We could not find the message board you were looking for.
Gaming News
Popular Games

Genshin Impact Walkthrough & Guides Wiki

Honkai: Star Rail Walkthrough & Guides Wiki

Umamusume: Pretty Derby Walkthrough & Guides Wiki

Pokemon Pokopia Walkthrough & Guides Wiki

Resident Evil Requiem (RE9) Walkthrough & Guides Wiki

Monster Hunter Wilds Walkthrough & Guides Wiki

Wuthering Waves Walkthrough & Guides Wiki

Arknights: Endfield Walkthrough & Guides Wiki

Pokemon FireRed and LeafGreen (FRLG) Walkthrough & Guides Wiki

Pokemon TCG Pocket (PTCGP) Strategies & Guides Wiki
Recommended Games

Fire Emblem Heroes (FEH) Walkthrough & Guides Wiki

Diablo 4: Vessel of Hatred Walkthrough & Guides Wiki

Yu-Gi-Oh! Master Duel Walkthrough & Guides Wiki

Super Smash Bros. Ultimate Walkthrough & Guides Wiki

Pokemon Brilliant Diamond and Shining Pearl (BDSP) Walkthrough & Guides Wiki

Elden Ring Shadow of the Erdtree Walkthrough & Guides Wiki

Monster Hunter World Walkthrough & Guides Wiki

The Legend of Zelda: Tears of the Kingdom Walkthrough & Guides Wiki

Persona 3 Reload Walkthrough & Guides Wiki

Cyberpunk 2077: Ultimate Edition Walkthrough & Guides Wiki
All rights reserved
Copyright © 2024 HoYoverse, COGNOSPHERE. All Rights Reserved.
The copyrights of videos of games used in our content and other intellectual property rights belong to the provider of the game.
The contents we provide on this site were created personally by members of the Game8 editorial department.
We refuse the right to reuse or repost content taken without our permission such as data or images to other sites.


![Slay the Spire 2 Review [Early Access] | Still the Deckbuilder to Beat](https://img.game8.co/4433115/44e19e1fb0b4755466b9e516ec7ffb1e.png/thumb)

![Resident Evil Village Review [Switch 2] | Almost Flawless Port](https://img.game8.co/4432790/e1859f64830960ce4248d898f8cd38d9.jpeg/thumb)


