 Aria
Aria Ye Shunguang
 Banyue
 Yidhari
 Lucia
Lucia Orphie and Magus
 Seed
Seed Alice
Alice Yuzuha
 Ju Fufu
 Yixuan
 Hugo
Hugo Vivian
 Trigger
 Soldier 0 Anby
 Evelyn
 Lighter
 Yanagi
 Burnice
 Jane
Jane Zhu Yuan
 Ellen
Ellen Koleda
 Miyabi
 Soldier 11
 Lycaon
 Nekomata
This survey will take about 1 minute.
Your answers will help us to improve our website.
Zenless Zone Zero (ZZZ)
Harumasa Best Builds and Teams
☆ New: Tier List Maker & Co-Op Board!
★ 2.7: Nangong Yu, Cissia, & 2.7 Livestream
☆ 2.6 Phase 1: Sunna & Yixuan
★ 2.6 Phase 2: Aria & Yuzuha
☆ Tier Lists: Agents | W-Engines | Bangboos | Teams
★ Redeem Codes for free Polychromes!
ZZZ's Harumasa is an Electric Attack Agent from Section 6. See Zenless Zone Zero's Harumasa best build, best teams and bangboo, skill priority, W-Engines, Drive Discs, how to play Harumasa, and Harumasa's materials in this Zenless Zone Zero (ZZZ) guide!
| Related Articles | ||
|---|---|---|
|
|
||
List of Contents
ZZZ Harumasa Character Profile
ZZZ Harumasa Information
| Harumasa Character Details | |||
|---|---|---|---|
 |
|||
| Rarity | Attribute | ||
| Specialty | Faction | ||
| Type | Core Stat | CRIT Rate | |
| Ability Trigger | 1. Stun Agents 2. Anomaly Agents |
||
Harumasa Tier List Ranking
| Overall | DPS | Stun | Support |
|---|---|---|---|
|
|
|
- | - |
How would you rate Harumasa?
Let us know why in the comments!
Harumasa Base Stats
| Stat | Base @ Lv. 60 |
|---|---|
| HP | 7405 |
| ATK | 840 |
| DEF | 600 |
| Impact | 90 |
| Anomaly Mastery | 80 |
| Anomaly Proficiency | 95 |
Harumasa Strengths and Weaknesses
| Strengths | |||
|---|---|---|---|
|
• Fun and engaging playstyle as Harumasa is very mobile and has access to fast-hitting moves. • Doesn't rely on his Ultimate to deal massive damage and instead has access to an awakened state. • Can switch between ranged and melee attacks. |
|||
| Weaknesses | |||
|
• Combos are hard to perform during burst windows. A single mistake may lead to wasting Electro Quivers and resulting in a huge DPS loss. • Since his playstyle requires you to generate Electro Quivers and apply Electro Prison for the Awakened State, it may be hard for him to consistently deal his burst damage as it depends on the enemy's stun timer. |
Harumasa Base Stats
| Stat | Base @ Lv. 60 |
|---|---|
| HP | 7405 |
| ATK | 840 |
| DEF | 600 |
| Impact | 90 |
| Anomaly Mastery | 80 |
| Anomaly Proficiency | 95 |
Harumasa Agent Enhancement
Available in Version 2.6
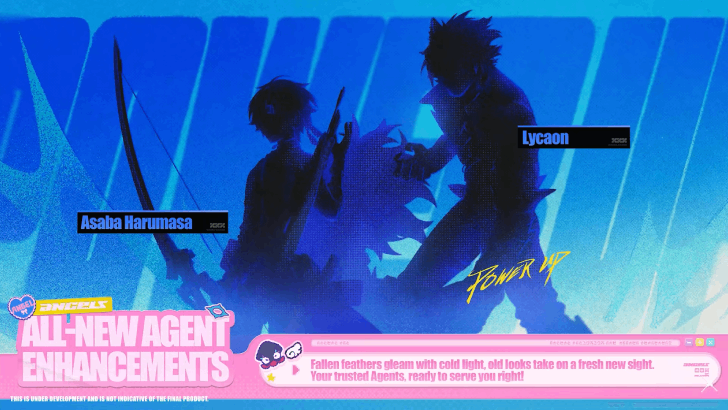
Harumasa's Potential Vision Agent Enhancement is now available with the release of Version 2.6. These enhancements will give him an enhanced EX Special Attack, stat boosts, and combo optimizations, making them easier to perform!
Harumasa Best Builds
Harumasa DPS Build
| Best W-Engine | |
|---|---|
| Alt. W-Engines |
3.
|
| Drive Disc Build |
|
| Disc Main Stats | 6: ATK |
| 5: Electric DMG | |
| 4: CRIT Rate or CRIT DMG | |
| Disc Substats | CRIT DMG, CRIT Rate, ATK, PEN |
This Harumasa build will have your typical CRIT stats and is best used on Mono-Electric Teams. You can use the 4-piece Woodpecker Electro if Harumasa is used with mostly non-Electric Agents.
Harumasa Best Teams and Bangboo
Harumasa F2P Team
| Harumasa F2P Team | Bangboo | ||
|---|---|---|---|
 Harumasa Harumasa
Attack |
 Anby Anby
Stun |
 Nicole Nicole
Support |
 Electroboo Electroboo
|
| Bangboo Alternatives |
• •
|
||
For Harumasa's free-to-play team, all you need is Anby to activate his Additional Ability. With Anby on the team, you can have Nicole as your third Agent for DEF shred.
Harumasa Generalist Team
| Harumasa Generalist Team | Bangboo | ||
|---|---|---|---|
|
Harumasa
Attack |
 Dialyn Dialyn
Stun |
 Astra Astra
Support |
 Plugboo Plugboo
|
| Bangboo Alternatives | |||
Harumasa's best team usually consists of a Stun unit and a Support Unit. Dialyn is the best Stun unit for Harumasa since she can trigger more of his Ultimates and increase the team's damage output. Astra is here to provide multiple buffs and healing to the party.
| Alternative | Explanation |
|---|---|
 Qingyi Qingyi | Stun Replacement Qingyi is a great Stun unit for Harumasa as she can increase Stun DMG Multipliers. |
 Caesar Caesar | Stun Replacement Caesar can provide shields and ATK buffs while providing some decent Daze. |
| Anby | Stun Replacement Anby is your free-to-play alternative for Stun units. |
 Sunna Sunna | Support Replacement Sunna can provide both ATK buffs and healing. |
 Zhao Zhao | Support Replacement Zhao can provide HP restoration and ATK buffs. |
| Nicole | Support Replacement Nicole can be used as a free-to-play alternative if Anby is on the team. |
 Soukaku Soukaku | Support Replacement Soukaku can provide an ATK buff to Harumasa. |
Harumasa Anomaly Team
| Harumasa Anomaly Team | Bangboo | ||
|---|---|---|---|
|
Harumasa
Attack |
 Grace Grace
Anomaly |
 Rina Rina
Support |
Plugboo
|
| Bangboo Alternatives | |||
Harumasa can also work with other Anomaly units to trigger his Additional Ability. Use Grace to inflict Shock on enemies so that Harumasa can deal increased DMG to them.
| Alternative | Explanation |
|---|---|
| Any Anomaly Unit of a Different Attribute | Anomaly Replacement You can pretty much use any Anomaly unit of another attribute to help trigger Disorder. |
 Lucy Lucy | Support Replacement Lucy can buff everyone's ATK with her EX Special Attack and Chain Attack. |
 Seth Seth | Support Replacement Seth can be used to provide Shields and increase the Anomaly Proficiency of the Agent before him. |
Harumasa Best W-Engines
Recommended Harumasa W-Engines
These W-Engines are rated based on their performance at Update Level 0.
| W-Engine | Effect | |
|---|---|---|
| 1 |
|
Growth Through Adversity CRIT Rate increases by 10%. Dash Attack Electric DMG increases by 40%. When any squad member applies an Attribute Anomaly or Stuns an enemy, the equipper's CRIT Rate increases by an additional 10% for 12s. |
| 2 |
|
Tranquil Blossom CRIT DMG +30%. When equipper's Basic Attack, Special Attack, or Aftershock hits, gain 1 buff stack that increases CRIT DMG by an additional 10%, max 3 stacks, and lasts for 30s. Stack durations are calculated separately and triggers once per skill use. Max stacks grant +20% Electric DMG. |
| 3 |
|
Scorching Breath Upon hitting an enemy with a Basic Attack, Dash Attack, or Dodge Counter, the equipper's ATK increases by 3.5% for 8s, stacking up to 8 times. This effect can trigger once every 0.5s. The duration of each stack is calculated separately. |
| 4 |
|
Oversized Barrel Increases CRIT Rate by 7.5%. Attacks that land a critical hit on an enemy will inflict an additional 200% of ATK as DMG. This effect can trigger once every 8s. |
| 5 |
|
Hell's Generator When launching an EX Special Attack, Electric DMG from Basic Attacks and Dash Attacks increases by 50% for 10s. This effect can trigger once every 15s. |
| 6 |
|
Knight's Combo Launching a Dodge Counter or Quick Assist increases the equipper's ATK by 12% for 12s. |
Zanshin Herb Case is the Best for Harumasa
Zanshin Herb Case will be Harumasa's best W-Engine since it increases his CRIT stats and Electric DMG. For alternatives, you can use other W-Engines that provide ATK% or Electric DMG.
Harumasa Best Drive Discs
Best Drive Discs and Set Bonuses
| Drive Disc | Rating and Merits |
|---|---|
|
(4-pc) (2-pc) |
★★★ - Best Set! Shadow Harmony is Harumasa's best Drive Disc set since it increases his Dash Attack DMG. This will also increase his CRIT Rate and ATK. The 2pc. Branch Blade and Song will provide CRIT DMG. |
|
(4-pc) (2-pc) |
★★☆ - 2nd Best Woodpecker Electro is a great alternative since it increases Harumasa's ATK when he CRITs with a Basic Attack, Dodge Counter, or EX Special Attack. |
Harumasa Skill Priority
Harumasa Skill Priority
| Skill | Priority | Explanation |
|---|---|---|
| ★★★★★ | Prioritize the Core Skill first, as this will increase Harumasa's CRIT Rate and CRIT DMG from his Dash Attack. | |
| ★★☆☆☆ | You'll mostly use Basic Attack only to generate Electro Quiver, so you can skip this and prioritize other skills first. | |
| ★★★★★ | Harumasa's main damage will mostly come from his Dash Attack during his awakened state, so make sure you upgrade this after the Core Skill. | |
| ★☆☆☆☆ | You can upgrade this last as this doesn't contribute much to his overall kit. | |
| ★★★★☆ | You can upgrade this next after Dash Attack as you'll frequently use Special Attack in your combos to generate Electro Quivers. | |
| ★★★★☆ | Upgrade Harumasa's Ultimate for the damage increase. |
Harumasa's Core Skill is a top priority as this will increase Harumasa's CRIT Rate and CRIT Damage for his Dash Attack: Hiten no Tsuru - Slash. Next is prioritizing his Dash Attack as this is where his damage will mostly come from.
You can then upgrade either Special Attack or Chain Attack as you'll frequently use these during his combo. Basic Attack can be next since you use this to generate Electro Quivers, with Assist at the very last as it doesn't contribute that much to his kit.
Harumasa Skills
Harumasa Potential Vision Buff Summary
| Node | Unlock |
|---|---|
| Sure Shot I | • Upgraded: Dash Attack: Hiten no Tsuru - Slash • New: EX Special Attack: Nowhere to Run - Patrol • New: Ultimate: Zanshing - Scattered Blossoms • Upgraded: Core Passive: Day Break |
| Sure Shot II | • New: Potential Awakening: Focus |
| Sure Shot III | • Upgraded: Awakened Potential: Focus |
| Sure Shot IV | • Upgraded: Awakened Potential: Focus |
| Sure Shot V | • Upgraded: Awakened Potential: Focus |
| Sure Shot VI | • Upgraded: Awakened Potential: Focus |
This is a summary of the upgraded skills from Harumasa's unlockable buffs. Listed below is a mix of the base and the enhanced skills!
Core Skill
| Skill Effects |
|---|
|
Core Passive - Day Break
The CRIT Rate of Dash Attack: Hiten no Tsuru - Slash increases by 10.6%, and when Harumasa's Dash Attack: Hiten no Tsuru - Slash triggers a critical hit against an enemy, he gains 1 stack of Gleaming Edge, for up to a maximum of 3 stacks per use of the skill and stacking up to 6 times, lasting 5s, repeated triggers reset the duration. Each stack of Gleaming Edge increases the CRIT DMG of Dash Attack: Hiten no Tsuru - Slash by 6%. Potential Vision Unlocked: The CRIT Rate of Dash Attack: Hiten no Tsuru - Slash, Chasing Thunder, and Ultimate increase by 25%. When Harumasa's Dash Attack: Hiten no Tsuru - Slash/Ultimate triggers a critical hit against an enemy, he gains 1/6 stacks of Gleaming Edge. Dash Attack: Hiten no Tsuru - Slash can grant a maximum of 3 stacks per activation, and Gleaming Edge can stack up to 6 times, lasting 5s. Repeated Triggers reset the duration. Each stack of Gleaming Edge increases the CRIT DMG of Dash Attack: Hiten no Tsuru - Slash, Chasing Thunder, and Ultimate by 12%. |
|
Additional Ability - Overclock
When another character in your squad is a Stun or Anomaly character: When Harumasa's attacks hit Stunned enemies or enemies under Attribute Anomaly, his DMG increases by 40%. When Harumasa's Falling Feather hits Stunned enemies or enemies under Attribute Anomaly, it will apply 2 stacks of Electro Prison to the target. |
|
Potential Awakening - Focus
When activating an EX Special Attack, Chain Attack, or Ultimate, increases ATK by 4%. Dash Atack: Hiten no Tsuru - Slash and Chasing Thunder ignore 5% of the target's Electric RES for 12s. Repeated triggers reset the duration. Extends duration of Core Passive's Gleaming Edge to 10s. |
Core Skill Enhancements
| Total Core Stat Upgrade Bonus |
|---|
| CRIT Rate +14.4% Base ATK 75 |
| Final Core Passive Upgrade Effect |
| The CRIT Rate of Dash Attack: Hiten no Tsuru - Slash increases by 25%, and when Harumasa's Dash Attack: Hiten no Tsuru - Slash triggers a critical hit against an enemy, he gains 1 stack of Gleaming Edge, for up to a maximum of 3 stacks per use of the skill and stacking up to 6 times, lasting 5s, repeated triggers reset the duration. Each stack of Gleaming Edge increases the CRIT DMG of Dash Attack: Hiten no Tsuru - Slash by 12%. |
| Core Enhancement | |
|---|---|
| A | • CRIT Rate increases by 4.8% • Core Passive: Day Break Skill Lv. +1 |
| B | • Base ATK increases by 25 • Core Passive: Day Break Skill Lv. +1 |
| C | • CRIT Rate increases by 4.8% • Core Passive: Day Break Skill Lv. +1 |
| D | • Base ATK increases by 25 • Core Passive: Day Break Skill Lv. +1 |
| E | • CRIT Rate increases by 4.8% • Core Passive: Day Break Skill Lv. +1 |
| F | • Base ATK increases by 25 • Core Passive: Day Break Skill Lv. +1 |
Basic Attack
| Skill Effects |
|---|
|
Basic Attack - Cloud Piercer
Press Basic Attack to activate: Launch up to five piercing attacks ahead, dealing Physical DMG and Electric DMG. When the 5th hit of the Basic Attack hits an enemy, it generates 2 Electro Quivers. After activating a Chain Attack, the next time Harumasa activates the 5th hit of Basic Attack: Cloud Piercer and hits an enemy with it, it generates 6 Electro Quivers. |
|
Basic Attack - Cloud Piercer - Drift
During Basic Attack: Cloud Piercer, drag the joystick and press Basic Attack to activate: Shoot a ranged piercing attack and reposition towards the corresponding drag direction, dealing Physical DMG. |
|
Basic Attack - Falling Feather
After the 5th hit of Basic Attack: Cloud Piercer, a Special Attack, an EX Special Attack, or a Chain Attack, hold Special Attack to activate: Immediately shoot Falling Feather at enemies ahead, dealing Electric DMG. Hold Basic Attackto aim at a target and release Basic Attack to activate: After drawing the bowstring and aiming, shoot Falling Feather at the target, dealing Electric DMG. |
|
Basic Attack - Ha-Oto no Ya
When the 5th hit of Basic Attack: Cloud Piercer/EX Special Attack/Chain Attack hits an enemy or the ground, it can generate 2/6/6 Electro Quivers. If there are no Electro Quivers on the field when any squad member applies an Attribute Anomaly to an enemy, generate 6 Electro Quivers. This effect can trigger once every 12s. There can be up to 6 Electro Quivers present at a time. If there are any Electro Quivers present when Harumasa fires and hits enemies with Falling Feather, the Electro Quivers will activate and fire Ha-Oto no Ya at the enemies hit by Falling Feather, dealing Electric DMG. Ha-Oto no Ya will apply Electro Prison to enemies hit, stacking up to 8 times and lasting 10s, repeated triggers reset the duration. While a target has at least 2 stacks of Electro Prison, they will be X-Marked. |
Dodge
| Skill Effects |
|---|
|
Dodge - Quick Flash
Press Dodge to activate: A quick dash dodge. Character is invulnerable while using this skill. |
|
Dash Attack - Hiten no Tsuru
Press Basic Attack during a dodge to activate: Launch multiple piercing attacks ahead, dealing Physical DMG. |
|
Dash Counter - Hidden Edge
Press Basic Attack during a Perfect Dodge to activate: Pierces enemies in front, dealing Electric DMG. Character is invulnerable while using this skill. |
|
Dash Attack - Hiten no Tsuru - Slash
While there are X-Marked enemies on the field, Harumasa will enter the Awakened state, switching Dash Attack: Hiten no Tsuru for Dash Attack: Hiten no Tsuru - Slash. While in the Awakened state, press Basic Attack during a dodge to activate: Rush forwards to the closest X-Marked enemy and execute a powerful slash, dealing Electric DMG. When the slash hits the target, it consumes 2 stacks of Electro Prison. With less than 2 stacks of Electro Prison, X-Marked will be removed from the enemy. Before X-Marked is removed, repeatedly press Basic Attack to repeatedly use Dash Attack: Hiten no Tsuru - Slash. While no X-Marked enemies exist on the field, Harumasa leaves the Awakened state. While in the Awakened state, press Basic Attack after Basic Attack: Falling Feather to quickly follow up with Dash Attack: Hiten no Tsuru - Slash. During skill activation, Anti-Interrupt level increases, and DMG taken is reduced by 40%. Potential Vision Unlocked: While there are X-Marked enemies on the field, Harumasa will enter the Awakened state, switching Dash Attack: Hiten no Tsuru for Dash Attack: Hiten no Tsuru - Slash. While in the Awakened state, press Basic Attack during a dodge to activate: Rush forwards to the closest X-Marked enemy and execute a powerful slash, dealing Electric DMG. When the slash hits the target, it consumes 2 stacks of Electro Prison. With less than 2 stacks of Electro Prison, X-Marked will be removed from the enemy. Before X-Marked is removed, repeatedly press Basic Attack to repeatedly use Dash Attack: Hiten no Tsuru - Slash. While no X-Marked enemies exist on the field, Harumasa leaves the Awakened state. While in the Awakened state, press Basic Attack after Basic Attack: Falling Feather to quickly follow up with Dash Attack: Hiten no Tsuru - Slash. During skill activation, Anti-Interrupt level increases, and DMG taken is reduced by 40%. |
Assist
| Skill Effects |
|---|
|
Quick Assist - Braced Bow
When the on-field character is launched, press Assist to activate: Unleash a piercing attack at enemies ahead, dealing Electric DMG. Character is invulnerable while using this skill. |
|
Defensive Assist - Yugamae
When the on-field character is about to be attacked, press Assist to activate: Parries the enemy's attack, dealing massive Daze. Character is invulnerable while using this skill. |
|
Assist Follow Up - Yugamae - Slash
Press Basic Attack after a Defensive Assist to activate: Unleash a series of slashes at enemies ahead, dealing Electric DMG. Character is invulnerable while using this skill. |
Special Attack
| Skill Effects |
|---|
|
Special Attack - Nowhere to Hide
Press Special Attack to activate: Launch an arrow forward, dealing Electric DMG. Anti-Interrupt level is increased while using this skill. |
|
EX Special Attack - Nowhere to Run
With enough Energy, press Special Attack to activate: Launch daggers and an enhanced arrow ahead, dealing massive Electric DMG. When the enhanced arrow hits an enemy or the ground, it generates 6 Electro Quivers. Character is invulnerable while using this skill. |
|
EX Special Attack - Nowhere to Run - Patrol
With enough energy, press Special Attack after using the 4th/5th attack of Basic Attack: Cloud Piercer, Dash Attack: Hiten no Tsuru - Slash, an Ultimate, Dodge Counter: Hidden Edge, or Quick Assist: Braced Bow to activate: Fire enhanced arrows forward in rapid succession, dealing massive Electric DMG. When the first enhanced arrow hits an enemy or the ground, 6 Electro Quivers are generated. When the final enhanced arrow hits an enemy, it activates the Electro Quivers on the field, firing Ha-Oto no Ya at the target, dealing Electric DMG. When the target's Electro Prison stacks are close to the maximum, fewer Electro Quivers will be activated. Character is invulnerable while using this skill. |
Chain Attack
| Skill Effects |
|---|
|
Chain Attack - Kai - Hanare
When a Chain Attack is triggered, select the character to activate: Unleash a piercing attack on enemies in a large area ahead then fire an enhanced arrow, dealing massive Electric DMG. When the arrow hits the ground, it generates 6 Electro Quivers. Character is invulnerable while using this skill. |
|
Ultimate - Zanshin
When Decibel Rating is at Maximum, press Ultimate to activate: Unleash a piercing attack on enemies in a large area ahead, dealing massive Electric DMG. Character is invulnerable while using this skill. |
|
Ultimate - Zanshin - Scattered Blossoms
Activates ALT automatically after Ultimate: Zanshin: Unleashes a wide-area piercing attack against enemies in front, dealing Electric DMG. This is considered Ultimate DMG. Character is invulnerable while using this skill. |
How to Play Harumasa
Harumasa Skills and Talent Overview
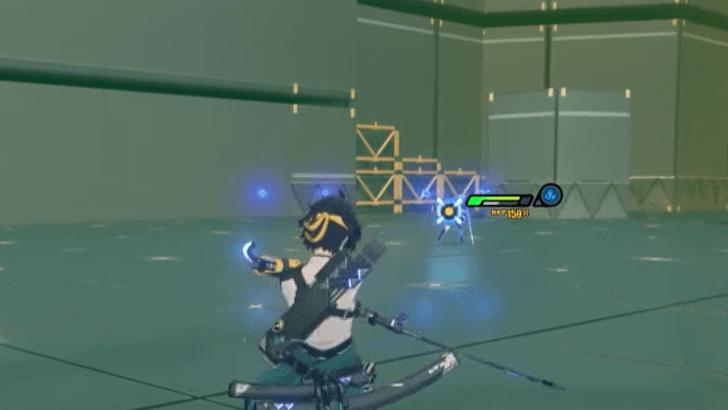
Accumulate Electro Quivers

Harumasa's kit can generate Electro Quiver on the field every time he uses his EX Special attack, Chain Attacks, the 5th hit of his Basic Attack - Cloud Piercer, or whenever an ally applies an Attribute Anomaly. A maximum of 6 Electro Quivers can be generated on the field.
If Harumasa has enough meter, using his EX Special Attack can generate 6 Electro Quivers upon hitting an enemy or the ground.
Apply Electro Prison to Enemies
Holding the Special or Basic Attack will trigger the Electro Quivers on the field, firing Ha-Oto No Ya straight to your enemies and applying Electro Prison, stacking up to 8 times and lasting 10 seconds.
If there are 2 stacks of Electro Prison, enemies will be inflicted with X-Marked, which allows Harumasa to enter the Awakened state.
Perform Empowered Dash Attacks
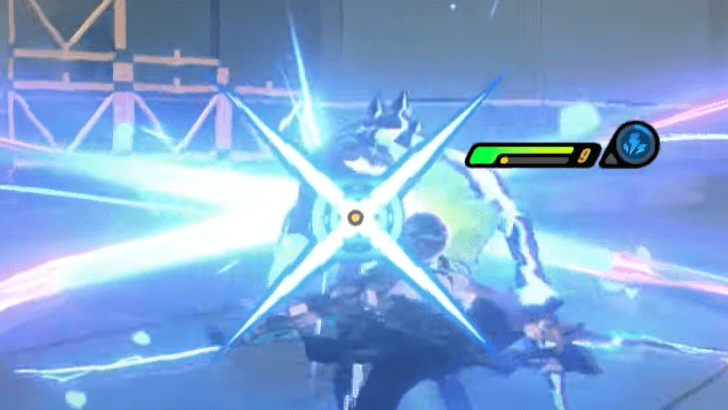
Whenever there are enemies with the X-Marked effect, Harumasa enters the Awakened state. During this state, Harumasa can use his empowered Dash Attack, Hiten no Tsuru - Slash, to close in on an enemy and unleash a powerful slash attack.
This will consume 2 stacks of Electro Prison from the enemy target. If there are less than 2 stacks of Electro Prison, X-Marked will be removed from the enemy.
Harumasa Promotion and Skill Upgrade Materials
Harumasa Total Upgrade Materials
| Total Promotion Materials |
|---|
|
|
| Total Skill Upgrade Materials |
|
|
| Total Core Skill Upgrade Materials |
|
|
Promotion Materials Per Level
| Lv. | Character Promotion Materials |
|---|---|
| 10 ↓ 20 |
|
| 20 ↓ 30 |
|
| 30 ↓ 40 |
|
| 40 ↓ 50 |
|
| 50 ↓ 60 |
|
Skill Materials Per Level
| Lv. | Skill Materials |
|---|---|
| 02 |
|
| 03 |
|
| 04 |
|
| 05 |
|
| 06 |
|
| 07 |
|
| 08 |
|
| 09 |
|
| 10 |
|
| 11 |
|
| 12 |
|
Core Skill Materials Per Level
| Materials | |
|---|---|
| A | |
| B |
|
| C |
|
| D |
|
| E |
|
| F |
|
Harumasa Mindscape Cinema (Duplicates)
Recommended Cinema
| Why We Recommend It | |
|---|---|
| M1 | ★★★★★ - Amazing Increases the stack limit for Electro Prison to 14, which allows you to use his Awakened Dash Attack more. This also makes it easier for you not to waste Electro Quivers. |
| M2 | ★★★☆☆ - Good Harumasa gains a new stack called Electro Blitz, which he can get from performing Chain Attacks and Ultimates, allowing him to increase the DMG of his Awakened Dash Attack by 50%. |
| M4 | ★★★★☆ - Great This allows Harumasa to consistently use his Ultimate more often and be able to apply Electro Prison and deal damage against multiple enemies. |
| M6 | ★★★★★ - Amazing Provides a massive increase in Harumasa's damage output through his Electro Quivers. |
M3 and M5 are excluded since they are only for skill enhancement.
Mindscape Cinema List and Effects
| Cinema Effect | |
|---|---|
| M1 | ''High Spirit'' The maximum stack limit of Electro Prison from Basic Attack: Ha-Oto no Ya increases to 14 stacks. When an Electro Quiver is triggered, 2 consecutive Ha-Oto no Ya will be fired at the target. |
| M2 | Languish When using an Chain Attack or Ultimate, Harumasa gains 7 stacks of Electro Blitz, up to a max of 7 stacks. While possessing Electro Blitz, the DMG of Dash Attack: Hiten no Tsuru - Slash increases by 50%. Consume 1 stack of Electro Blitz once Dash Attack: Hiten no Tsuru - Slash ends. |
| M3 | White Lies Basic Attack, Dodge, Assist, Special Attack, and Chain Attack Lv. +2 |
| M4 | Occasionally Motivated Electro Prison now lasts for 20s. When Dash Attack: Hiten no Tsuru - Slash hits enemies, Harumasa gains 30 Decibels once per use of this skill. Upon activating an Ultimate, apply the maximum stacks of Electro Prison to all on-field enemies. |
| M5 | No One Knows Basic Attack, Dodge, Assist, Special Attack, and Chain Attack Lv. +2 |
| M6 | Tacit Understanding After Ha-Oto no Ya hits Stunned enemies or enemies under Attribute Anomalies, Harumasa will ignore 15% of the target's Electric RES for 12s. Every 12 times an enemy is hit by Ha-Oto no Ya, trigger an extra electromagnetic explosion, dealing 1,500% of Harumasa's ATK to the target as Electric DMG. |
How to Get Harumasa
Obtain From A Limited Banner
| Per Aspera Banner | |
|---|---|
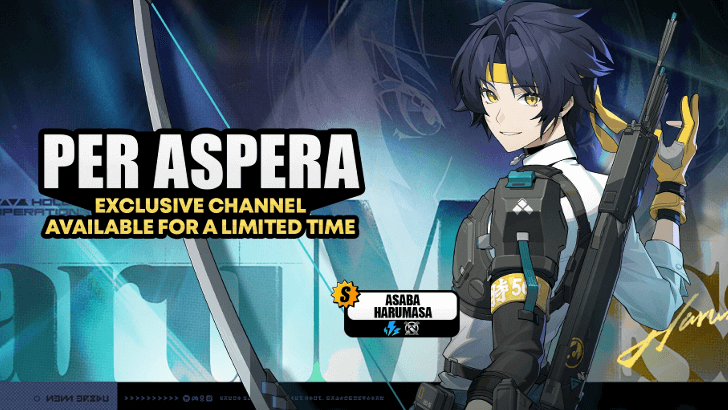 Per Aspera Per Aspera |
|
| Latest Run | |
| Version 1.4 December 18, 2024 - January 21, 2025 |
Harumasa was available from the Limited Banner Per Aspera that ran in Version 1.4 of Zenless Zone Zero (ZZZ) from December 18, 2024 to January 21, 2025.
Asaba Harumasa Voice Actor and Lore
Voice Actor and Basic Info
| English VA | TBD |
|---|---|
| Japanese VA | Kakihara Tetsuya (柿原徹也様) |
| Korean VA | Jeong Eui-Taek (정의택) |
| Chinese VA | 徐翔 |
| Gender | Male |
| Birthday | July 9 |
| Height | 173cm |
Zenless Zone Zero Related Guides

S Rarity Characters
A Rarity Characters
 Manato Manato
|
 Pan Yinhu Pan Yinhu
|
 Pulchra Pulchra
|
|
Seth
|
 Piper Piper
|
Lucy
|
|
Soukaku
|
 Ben Ben
|
 Corin Corin
|
 Anton Anton
|
Nicole
|
 Billy Billy
|
|
Anby
|
Unreleased Characters
 Nangong Yu Nangong Yu
|
 Cissia Cissia
|
Comment
25  Anonymous about 2 months
wish they would post stats to aim for. Like should be between X-XX crit rate etc. Those are really helpful
Author

Harumasa Best Builds and Teams
Please participate in our site
improvement survey
03/2026
improvement survey
03/2026
Would you assist in
improving Game8's site?
improving Game8's site?

×
We are listening to our users' valuable opinions and discussing how to act on them.
The information collected through this survey will be used for the purpose of improving our services. In addition, the information will only be disclosed a part of a statistic in a format that will not allow identification of personal information.
Begin Survey
Not Now
×
Please rate each item regarding Game8.co's Advertisements.
Amount of Ads
Very Dissatisfied
Somewhat Dissatisfied
Fine
Somewhat Satisfied
Highly Satisfied
Placement of Ads
Timing of Ad Display
Ad Loading Speed
Safeness of Ads
Content of Ads
×
Please rate each item regarding Game8.co's Quality of Articles.
Amount of information
Very Dissatisfied
Somewhat Dissatisfied
Fine
Somewhat Satisfied
Highly Satisfied
Frequency of updates
Speed of new information
Accuracy of articles
Understandibility of articles
Readability of sentences
×
Please rate each item regarding Game8.co's Usability of the Site.
Ease of finding information
Very Dissatisfied
Somewhat Dissatisfied
Fine
Somewhat Satisfied
Highly Satisfied
Loading Speed
Use of Color
Font Size
Visibility of Images
Easy to Understand Layout
×
Please rate each item regarding Game8.co's Message Boards, Comments.
Ease of Writing
Very Dissatisfied
Somewhat Dissatisfied
Fine
Somewhat Satisfied
Highly Satisfied
Readability
Ease in Finding Information
Comment Quality
Comment Quantity
Admin Response
×
Please rate each item regarding Game8.co's Site's new design.
Please rate our site's new design
Very Dissatisfied
Somewhat Dissatisfied
Fine
Somewhat Satisfied
Highly Satisfied
Do you think that the website's design change makes the site easier to use?
Has the new design made it easier for you to find information on the site?
Has the new design improved the overall visual appeal of the site?
How would you rate your overall satisfaction with the new design of the site?
×
How likely are you to recommend Game8 to someone you know?
Very Unlikely
0
1
2
3
4
5
6
7
8
9
10
Very Likely
If you have other opinions regarding potential improvement to the website, please share them with us. We would appreciate your honest opinion.
Note: This is a free response section, so you can proceed without entering anything.
Note: Please be sure not to enter any kind of personal information into your response.
Note: Please be sure not to enter any kind of personal information into your response.
×
Thank You
×
Thank you for participating in our survey! Your answers will help us to improve the quality of our website and services.
We hope you continue to make use of Game8.
We hope you continue to make use of Game8.
Close
Rankings
- We could not find the message board you were looking for.
Gaming News


![Monster Hunter Stories 3 Review [First Impressions] | Simply Rejuvenating](https://img.game8.co/4438641/2a31b7702bd70e78ec8efd24661dacda.jpeg/thumb)
Popular Games

Genshin Impact Walkthrough & Guides Wiki
Honkai: Star Rail Walkthrough & Guides Wiki
Umamusume: Pretty Derby Walkthrough & Guides Wiki
Pokemon Pokopia Walkthrough & Guides Wiki
Resident Evil Requiem (RE9) Walkthrough & Guides Wiki
Monster Hunter Wilds Walkthrough & Guides Wiki
Wuthering Waves Walkthrough & Guides Wiki
Arknights: Endfield Walkthrough & Guides Wiki
Pokemon FireRed and LeafGreen (FRLG) Walkthrough & Guides Wiki
Pokemon TCG Pocket (PTCGP) Strategies & Guides Wiki


Recommended Games
Diablo 4: Vessel of Hatred Walkthrough & Guides Wiki
Cyberpunk 2077: Ultimate Edition Walkthrough & Guides Wiki
Fire Emblem Heroes (FEH) Walkthrough & Guides Wiki
Yu-Gi-Oh! Master Duel Walkthrough & Guides Wiki
Super Smash Bros. Ultimate Walkthrough & Guides Wiki
Pokemon Brilliant Diamond and Shining Pearl (BDSP) Walkthrough & Guides Wiki
Elden Ring Shadow of the Erdtree Walkthrough & Guides Wiki
Monster Hunter World Walkthrough & Guides Wiki
The Legend of Zelda: Tears of the Kingdom Walkthrough & Guides Wiki
Persona 3 Reload Walkthrough & Guides Wiki


All rights reserved
Copyright © 2024 HoYoverse, COGNOSPHERE. All Rights Reserved.
The copyrights of videos of games used in our content and other intellectual property rights belong to the provider of the game.
The contents we provide on this site were created personally by members of the Game8 editorial department.
We refuse the right to reuse or repost content taken without our permission such as data or images to other sites.
Agreed with the previous comment, a stat threshold list would be nice to see! And Harumasa's birthday is actually July 19 (same as mine!)