This survey will take about 1 minute.
Your answers will help us to improve our website.
Zenless Zone Zero (ZZZ)
Bury Your Tears With The Past Part 2 Quest Guide
☆ New: Tier List Maker & Co-Op Board!
★ 2.7: Nangong Yu, Cissia, & 2.7 Livestream
☆ 2.6 Phase 1: Sunna & Yixuan
★ 2.6 Phase 2: Aria & Yuzuha
☆ Tier Lists: Agents | W-Engines | Bangboos | Teams
★ Redeem Codes for free Polychromes!
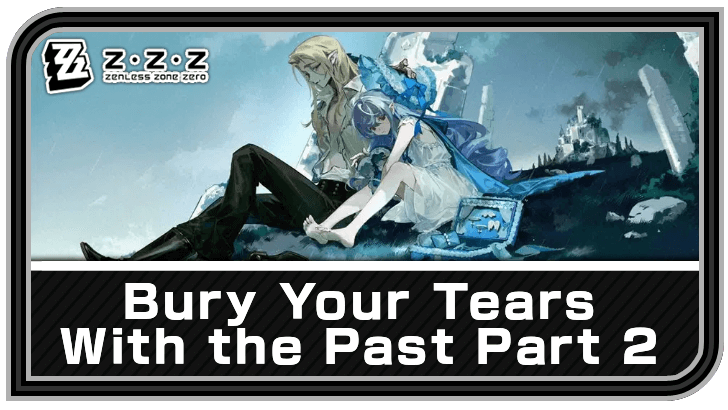
Bury Your Tears With the Past Part 2 is a main quest in Zenless Zone Zero (ZZZ). See how to unlock Bury Your Tears With the Past B, the complete quest guide, all the Hollow walkthroughs, and its rewards here!
| ◄ Previous Quest | Next Quest ▶ |
|---|---|
| Bury Your Tears With the Past | Leisurely Lull - Wandering Visitor |
List of Contents
Bury Your Tears With The Past Part 2 Quest Information
Bury Your Tears With the Past Main Story Details
| Location | Sixth Street, Random Play | ||
|---|---|---|---|
| Client | Vivian | ||
| Time | Anytime | ||
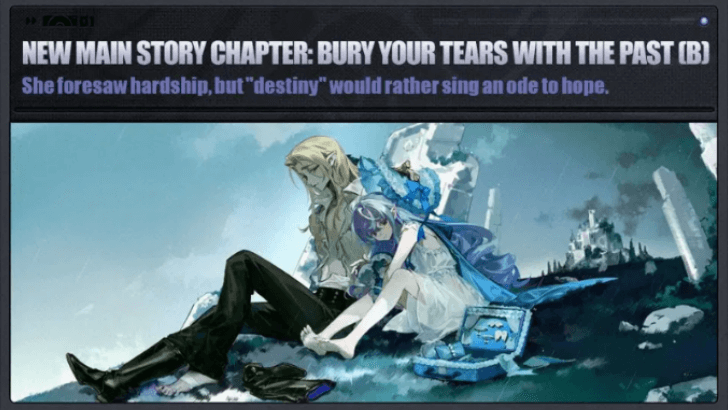
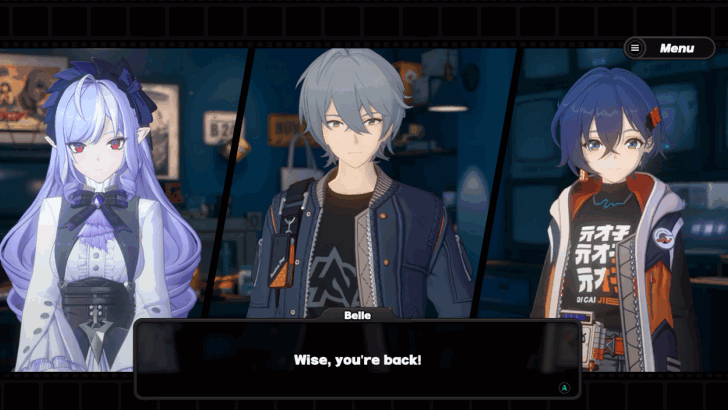
Bury Your Tears With the Past is the second part of the Bury Your Tears With the Past main story of our beloved Proxies, where they will uncover the mystery behind the Mockingbird faction involving Hugo and Vivian.
Main Commissions and Story Chapter List
How to Unlock Bury Your Tears With The Past Part 2
Complete Bury Your Tears With The Past Part 1
Bury Your Tears With The Past Part 2 will be unlocked after completing the Bury Your Tears With The Past Part 1 Main Story.
Bury Your Tears With the Past (A) Quest
Talk to the Other Proxy Inside Random Play
The Bury Your Tears With the Past B main commission can be started by talking to the other Proxy inside Random Play.
Bury Your Tears With the Past Part 2 Walkthrough
Bury Your Tears With the Past B Guide
- Rest on the Sofa
- Talk to Lycaon
- Go the Ballet Twins and Talk to Lycaon
- Head into the Hollow with Vivian
- Go and Investigate With Vivian
- Go to the Video Store
- Go the Hollow and Stop the Deal
- Find the Black Bird
- Go Meet Burton
- Go to Where Lycaon Is
- Find Lycaon
- Find Serena
- Reunite with Lycaon
- Foil Dina's Plans
- Take a Break
Rest on the Sofa
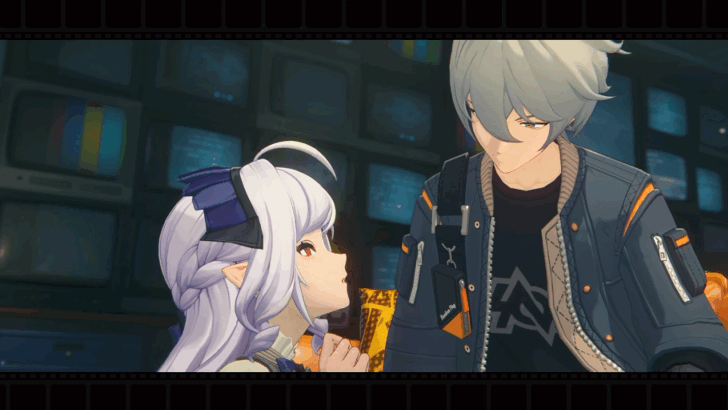
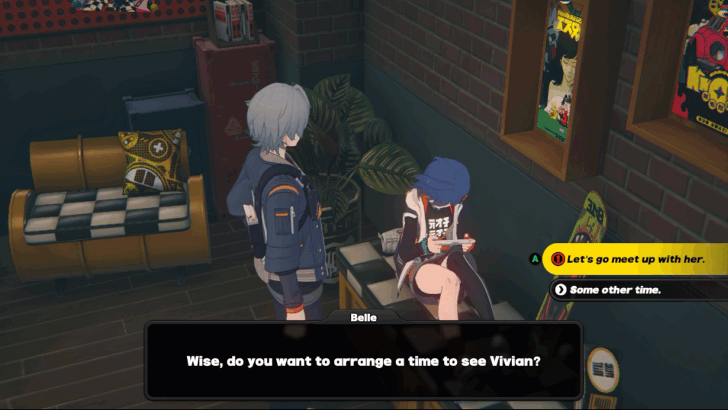
While waiting for Vivian to come over, you decide to rest on the sofa. You eventually end up falling asleep, but you immediately wake up when you hear a voice nearby.
After talking to Vivian, you will get teleported in front of the Random Play video store on Sixth Street.
Talk to Lycaon
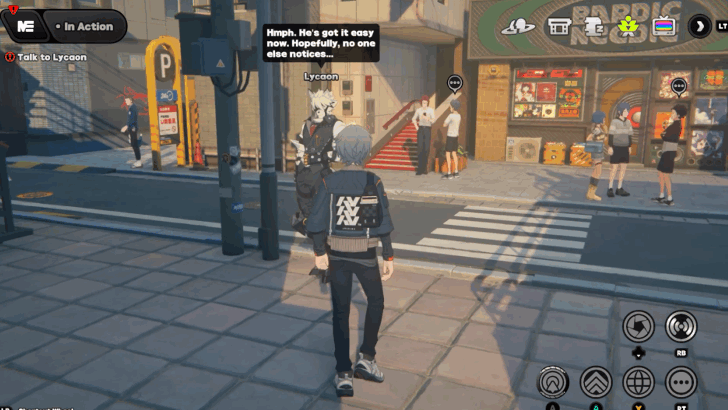
Talk to Lycaon in front of the Random Play video store about the Mayor's request based on the recent events with Hugo.
After talking to Lycaon, you will be teleported back inside Random Play and can be seen talking to Vivian and the other Proxy.
Go the Ballet Twins and Talk to Lycaon
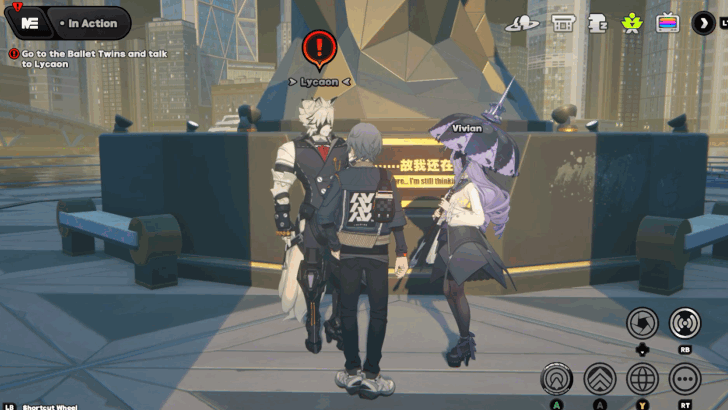
Go to the Ballet Twins Road and talk to Lycaon about the next part of the Mayor's request. He can be seen standing beside Vivian and the huge statue in the middle of the area.
After approaching the two, Lycaon will get in touch with the Mayor via a special call.
Head into the Hollow with Vivian
After talking to the Mayor, head into the Hollow with Vivian to find the Dormant Sacrifices. Note that in this Hollow, you will get a free trial of Vivian and Robin Bangboo, and you can only use two characters.
Lycaon cannot be used in this Hollow as he is part of another side of this story quest.
Vivian Hollow Walkthrough
| Vivian Hollow Walkthrough | |
|---|---|
| 1 | Head down the stairs and follow the objective marker. At the bottom of the stairs, multiple enemies will spawn. Defeat all of them to progress further. |
| 2 | Head to the next room where the Dormant Sacrifice is located. A cutscene will also trigger with Vivian saying that the Sacrifice isn't here and that we should keep searching the whole area for it. |
| 3 | Follow the objective marker to the next room and try to find the Dormant Sacrifice. Upon reaching the next room, you will encounter multiple enemies again, and you need to defeat them to progress further. Checking the surroundings, the Dormant Sacrifice is still not in sight, so you keep searching the other rooms. |
| 4 | Head to the upper floor to try and look for it. You will then encounter another wave of enemies. |
| 5 | Eventually, you reach a room where you meet Camille, an Exaltist who Vivian is familiar with. After talking to Camille, a couple of enemies will immediately spawn around you. Afterward, you discuss everything with the other Proxy and Vivian on how to find the location of the Dormant Sacrifices, thus concluding this Hollow exploration. |
Go and Investigate With Vivian
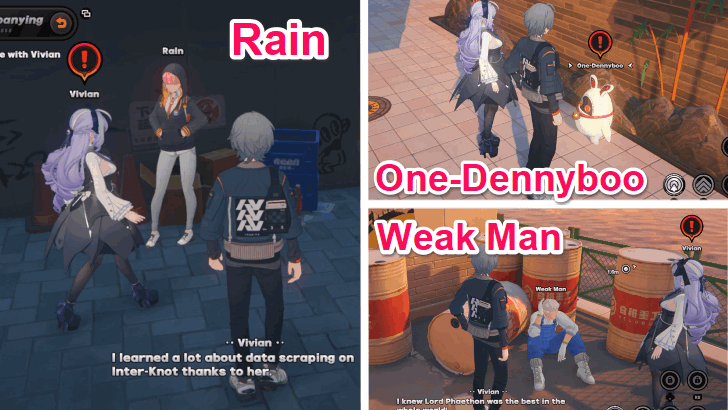
Go to Lumina Square and meet up with Vivian's contacts to investigate the location of the Dormant Sacrifices. During this time, you only need to follow Vivian around and talk to the person she stops in front of.
You will need to talk to Rain in the back alley, One-Dennyboo near the Coff Cafe, and a Weak Man in the playground, who was recently kidnapped by the Ravenlock Family.
Go to the Video Store
Head back to the video store to discuss your findings about the Dormant Sacrifices to the other Proxy. Eventually, you managed to pinpoint the location inside a Hollow.
Go the Hollow and Stop the Deal
Go back to the Hollow with Vivian and try to stop Hartman's deal. Similar to the previous Hollow exploration, you will be given a free trial of Vivian and Robin Bangboo, and you can only use two characters.
Lycaon is once again unavailable to be used in this Hollow exploration as well because he is part of another side of this story quest.
Yi Xuan Hollow Walkthrough
| Yi Xuan Hollow Walkthrough | |
|---|---|
| 1 | Head through the hallway and go towards the right. You will encounter the first wave of enemies and you need to defeat them to progress further. |
| 2 | Go down the stairs, then make a right and a left. You will encounter the second wave of enemies. Defeat them to progress further. |
| 3 | Follow the objective marker to the next room on the left of the next staircase. You will encounter the third and fourth waves of enemies. |
| 4 | Keep following the objective marker until you reach the elevator. Afterward, you will be teleported to the rooftop where Hartman's deal is happening. |
| 5 | After defeating Hartman's bodyguards, you finally confront him and ask him about the Dormant Sacrifice. |
| 6 | Eventually, Dina, Vivian's old friend turned evil, steps in and reveals that she is behind the lost Dormant Sacrifice. |
| 7 | After talking to Dina, you try to defeat the last wave of enemies. However, the last wave is too much for you and Vivian, but you get rescued by Yi Xuan. After Yi Xuan defeats the rest of the enemies, she will help you get out of the Hollow. |
Find the Black Bird

Outside the Hollow, Vivian finally tells you about her past relationship with Dina, where she says that she met her way back when she was under Landon's care and the Exaltists.
After some time, you meet up with Vivian in Lumina Square, where you need to find a black bird containing the video of Hugo's deal with the Ravenlock Family. The black bird will be located in an alley behind the San-Z Studio.
Go Meet Burton
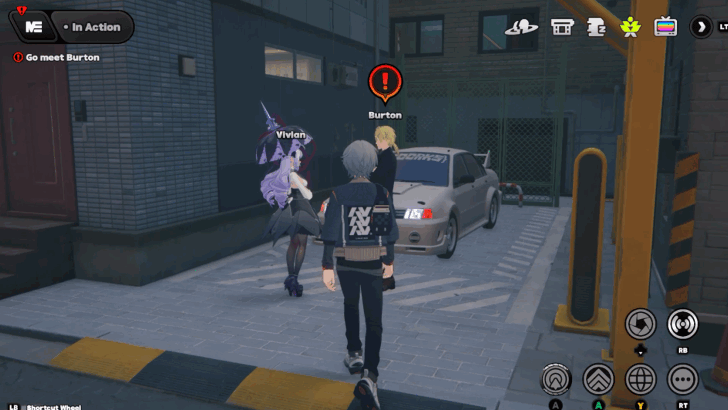
Meet Burton on Sixth Street with Vivian, who will take you to the manor of the Ravenlock Family. After talking to Burton, he leads you to the location of the Sacrifice, but Hartman is there to stop you.
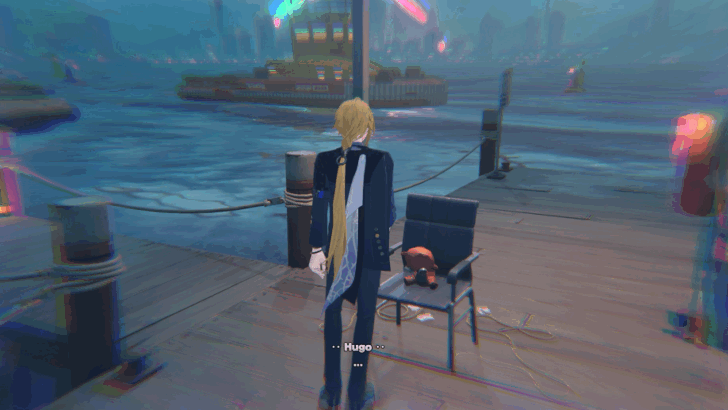
Surprisingly, Hugo comes to your rescue and confronts Hartman about their deal regarding the Sacrifice Core and the Ravenlock Family.
Go to Where Lycaon Is
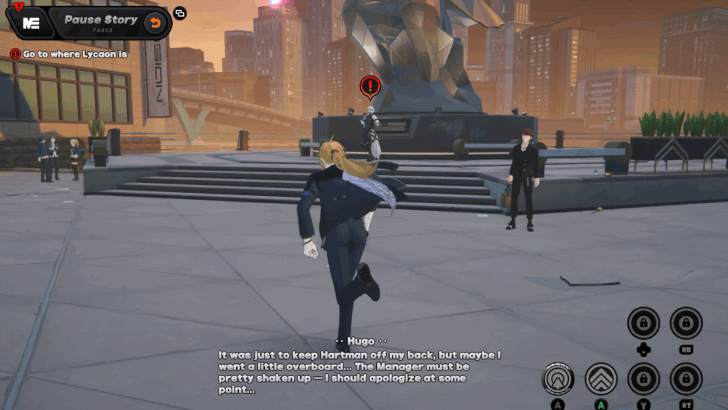
At this point of the quest, you will be able to control Hugo to progress further. You go to where Lycaon is, beside the huge statue on Ballet Twins Road.
After talking to Lycaon, Hugo explains his plan to remove the serum Hartman injected into him before. However, Hugo must overcome the side effects before it truly wears off.
Find Lycaon
During this objective, you will enter a series of illusions and scenarios based on Hugo's tragic backstory. The first scenario will be about his late mother, where you need to talk to the old lady near the benches in front of you.
After talking to her, you will go back to where Hugo spawned before.
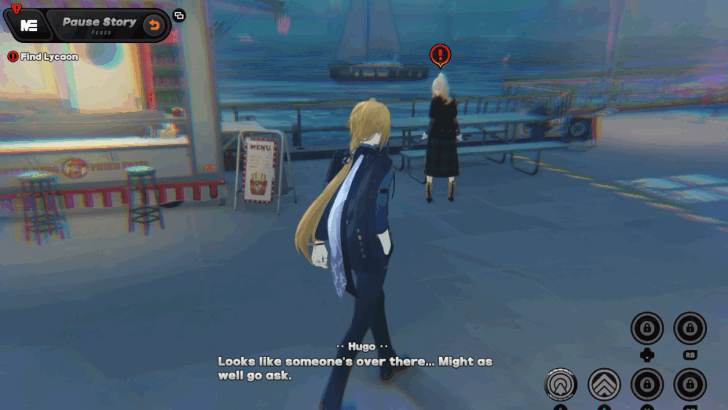
Find Serena
The second scenario is where you need to find Serena around Port Elpis, where all you need to do is wait for the voice lines in the background to finish and go to the objective marker on the map.
You will need to do this multiple times before you can finish this quest objective.
Reunite with Lycaon
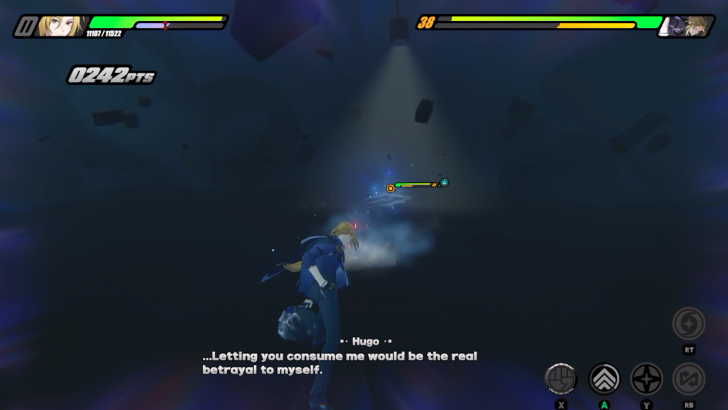
The last scenario is where you need to talk to Lycaon near the benches in front of you. Afterward, you will be teleported into a dimensional plane where you need to defeat Hugo's Inner Demon in a one-on-one battle.
You can defeat it easily by parrying its attacks with perfect dodges. After defeating it, you will be teleported back to the real world and into a Hollow exploration with Hugo and Lycaon.
Hugo and Lycaon Hollow Walkthrough
| Hugo and Lycaon Hollow Walkthrough | |
|---|---|
| 1 | Head up the stairs and into the first area. Defeat all the enemies and rescue the kidnapped workers on the side. |
| 2 | Head to the higher floors and into the second area. Once more, defeat all the enemies and rescue the kidnapped workers. |
| 3 | Ride the elevator and go to the last area. Defeat the enemies, rescue the workers, and find out about Hartman's plans. |
Foil Dina's Plans
With all the information gathered, you, Hugo, Lycaon, and Vivian meet up at Port Elpis and get ready to foil Dina's plans in the Hollow.
For this Hollow exploration, you will only be able to use Vivian, Hugo, and Lycaon to progress through.
Dina Hollow Walkthrough
| Dina Hollow Walkthrough | |
|---|---|
| 1 | Follow the objective marker and head to the first area to defeat Dina's henchmen. |
| 2 | Then, head to the second area to stop the other henchmen. |
| 3 | Head to the third area and destroy three potion chests, which are the stacked brown boxes scattered around. There will also be waves of enemies that will try to stop you. After destroying all the boxes, a cutscene will occur where Vivian sees the future of the outcome of the mission. |
| 4 | After the cutscene, you get isolated with Vivian in another area to try and find the rest of Landon's serum by following the path in front of you. |
| 5 | At the end of the path, you will see Camille enter a Hollow Fissure, where Dina is on the other side. |
| 6 | You go through the Hollow Fissure and confront Dina. However, she injects herself with Landon's serum and turns into a corrupted monster, Tepes, that you need to defeat. After defeating Dina, a cutscene where Phaethon saves Vivian from getting corrupted occurs and concludes this Hollow Exploration. |
Take a Break
After waking up from passing out in the Hollow, you get teleported back into the Random Play video store. Vivian thanks you for saving her, and then Hugo and Lycaon congratulate you on behalf of the Mayor.
Then, after talking to everybody, you take a break in your warm bed.
Bury Your Tears With the Past Part 2 Rewards
Quest Rewards
| All Quest Rewards | |||
|---|---|---|---|
|
|
|
|
|
|
|
|
||
Get The Song for Tomorrow Achievement
| Title | How to Get and Rewards |
|---|---|
| The Song for Tomorrow |
Complete "Bury Your Tears With The Past Part 2" in Phaethon's Story
|
Completing the Bury Your Tears With the Past Part 2 will reward you with the The Song for Tomorrow achievement!
Zenless Zone Zero Related Guides

All Main Commissions
Comment
Author

Bury Your Tears With The Past Part 2 Quest Guide
Please participate in our site
improvement survey
03/2026
improvement survey
03/2026
Would you assist in
improving Game8's site?
improving Game8's site?

×
We are listening to our users' valuable opinions and discussing how to act on them.
The information collected through this survey will be used for the purpose of improving our services. In addition, the information will only be disclosed a part of a statistic in a format that will not allow identification of personal information.
Begin Survey
Not Now
×
Please rate each item regarding Game8.co's Advertisements.
Amount of Ads
Very Dissatisfied
Somewhat Dissatisfied
Fine
Somewhat Satisfied
Highly Satisfied
Placement of Ads
Timing of Ad Display
Ad Loading Speed
Safeness of Ads
Content of Ads
×
Please rate each item regarding Game8.co's Quality of Articles.
Amount of information
Very Dissatisfied
Somewhat Dissatisfied
Fine
Somewhat Satisfied
Highly Satisfied
Frequency of updates
Speed of new information
Accuracy of articles
Understandibility of articles
Readability of sentences
×
Please rate each item regarding Game8.co's Usability of the Site.
Ease of finding information
Very Dissatisfied
Somewhat Dissatisfied
Fine
Somewhat Satisfied
Highly Satisfied
Loading Speed
Use of Color
Font Size
Visibility of Images
Easy to Understand Layout
×
Please rate each item regarding Game8.co's Message Boards, Comments.
Ease of Writing
Very Dissatisfied
Somewhat Dissatisfied
Fine
Somewhat Satisfied
Highly Satisfied
Readability
Ease in Finding Information
Comment Quality
Comment Quantity
Admin Response
×
Please rate each item regarding Game8.co's Site's new design.
Please rate our site's new design
Very Dissatisfied
Somewhat Dissatisfied
Fine
Somewhat Satisfied
Highly Satisfied
Do you think that the website's design change makes the site easier to use?
Has the new design made it easier for you to find information on the site?
Has the new design improved the overall visual appeal of the site?
How would you rate your overall satisfaction with the new design of the site?
×
How likely are you to recommend Game8 to someone you know?
Very Unlikely
0
1
2
3
4
5
6
7
8
9
10
Very Likely
If you have other opinions regarding potential improvement to the website, please share them with us. We would appreciate your honest opinion.
Note: This is a free response section, so you can proceed without entering anything.
Note: Please be sure not to enter any kind of personal information into your response.
Note: Please be sure not to enter any kind of personal information into your response.
×
Thank You
×
Thank you for participating in our survey! Your answers will help us to improve the quality of our website and services.
We hope you continue to make use of Game8.
We hope you continue to make use of Game8.
Close
Rankings
Gaming News


![Monster Hunter Stories 3 Review [First Impressions] | Simply Rejuvenating](https://img.game8.co/4438641/2a31b7702bd70e78ec8efd24661dacda.jpeg/thumb)
Popular Games

Genshin Impact Walkthrough & Guides Wiki
Honkai: Star Rail Walkthrough & Guides Wiki
Umamusume: Pretty Derby Walkthrough & Guides Wiki
Pokemon Pokopia Walkthrough & Guides Wiki
Resident Evil Requiem (RE9) Walkthrough & Guides Wiki
Monster Hunter Wilds Walkthrough & Guides Wiki
Wuthering Waves Walkthrough & Guides Wiki
Arknights: Endfield Walkthrough & Guides Wiki
Pokemon FireRed and LeafGreen (FRLG) Walkthrough & Guides Wiki
Pokemon TCG Pocket (PTCGP) Strategies & Guides Wiki


Recommended Games
Diablo 4: Vessel of Hatred Walkthrough & Guides Wiki
Cyberpunk 2077: Ultimate Edition Walkthrough & Guides Wiki
Fire Emblem Heroes (FEH) Walkthrough & Guides Wiki
Yu-Gi-Oh! Master Duel Walkthrough & Guides Wiki
Super Smash Bros. Ultimate Walkthrough & Guides Wiki
Pokemon Brilliant Diamond and Shining Pearl (BDSP) Walkthrough & Guides Wiki
Elden Ring Shadow of the Erdtree Walkthrough & Guides Wiki
Monster Hunter World Walkthrough & Guides Wiki
The Legend of Zelda: Tears of the Kingdom Walkthrough & Guides Wiki
Persona 3 Reload Walkthrough & Guides Wiki


All rights reserved
Copyright © 2024 HoYoverse, COGNOSPHERE. All Rights Reserved.
The copyrights of videos of games used in our content and other intellectual property rights belong to the provider of the game.
The contents we provide on this site were created personally by members of the Game8 editorial department.
We refuse the right to reuse or repost content taken without our permission such as data or images to other sites.