Mesmald Boss Guide: Recommended Setup and How to Beat
☆ Earn bonuses before you start the DLC.
★ Clear campaign & sub-quests | Get max lvl
☆ Learn all the ingredients in this new Gourmet Saga!
★ Get all Beyond the Dawn Trophies with these guides:
☆ Ryugola Weapons | All Portraits | Hero of the Summit
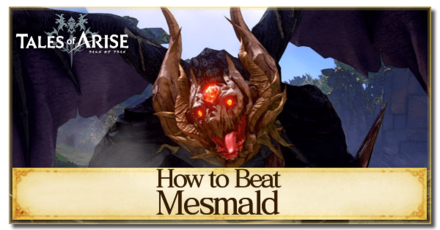
This is a guide on how to beat Mesmald in Tales of Arise! Learn more about Mesmald's stats, weaknesses, attack patterns, and the best party setup including Artes and Equipment for this boss fight!
List of Contents
Mesmald Stats and General Info
Mesmald Location
| Map | Actual Location |
|---|---|
 |
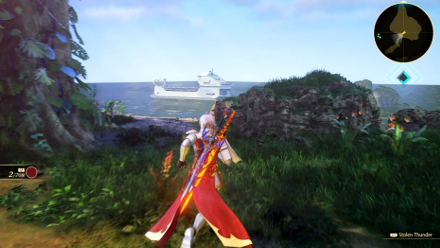 |
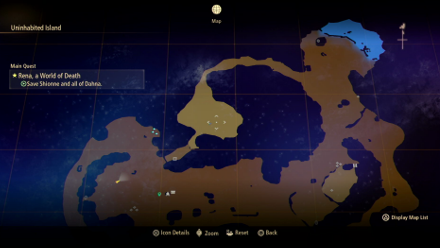
Mesmald can be found on the Uninhabited Island during the Sub-Quest Beyond the Grave. You will need to take the boat in the Hidden Wharf to reach this area.
Beyond the Grave Sub-Quest Walkthrough: Rewards and How to Clear
Mesmald Stats
| Recommended Level: 60 | |||
|---|---|---|---|
 HP: 380,420 |
|||
| Attack | 3807 | Defense | 1524 |
| Elemental Attack | 3461 | Elemental Defense | 1341 |
| Penetration | 3438 | Resistance | 3619 |
| Weakness | Resistance | ||
Item to Drop
| No items to display. |
How to Beat Mesmald
| Tips |
|---|
Try to Attack Its Head or Tail

There are two primary Weak Points that you can target on Mesmald's body – its head and its tail. These points are difficult to attack head-on, however, as Mesmald can easily use its massive claws to attack you from the front or swing its tail around to defend itself whenever you attack it.
It is recommended that you attack its tail, however, as it will mostly focus on attacking your other allies with its claws rather than focus on your player-controlled character throughout the fight.
Bring Plenty of Healing Items
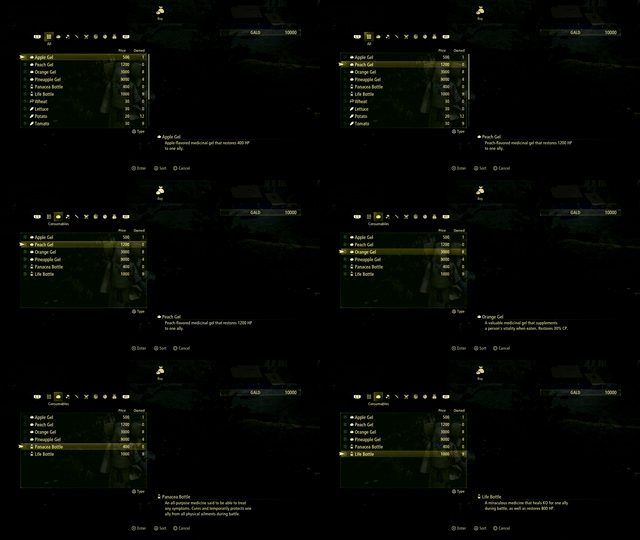
Unless you can manage to deal high and sustained amounts of damage throughout the fight, it is highly suggested that you bring along plenty of recovery items, as Mesmald's attacks can easily drain your HP, which may result in your CP being drained as well as you try to heal your party members.
Overlevel
Despite looking like a seemingly wounded animal when you encounter Mesmald once again, it is a very dangerous boss to go up against. Most of its attacks can drain your HP to a third of what it was, if not outright causing a one-hit K.O.
By leveling yourself above Mesmald's level, you won't take as much damage since you will have higher defense stats going into the fight on top of increasing your damage output against Mesmald.
Recommended Party Setup for Mesmald
Party Members
| Leader | Members | ||
|---|---|---|---|
 Alphen Alphen
Lv.60 |
 Shionne Shionne
Lv.60 |
 Law Law
Lv.60 |
 Rinwell Rinwell
Lv.60 |
Boost Attack Power
Due to Mesmald having no elemental weakness, you should try to boost your attack and elemental attack parameters as much as you can to deal more damage. Equip any accessory that will provide these stat boosts before going into the fight.
Alphen Equipment and Artes
 Alphen Alphen
Lv.60 |
Equipment |
|---|---|
| El Vahf | |
| Gahm Arthalys | |
| Protect Ring | |
| Ground Artes | Aerial Artes |
| First Set | |
| Lightning Thrust | Rising Falcon |
| Eternal Devastation | Stardust |
| Sword Rain: Alpha | Mirage |
| Second Set | |
| Swallow Blade | Luna Rondo |
| Demon Fang | Devastation |
| Vacuum Blades | Soaring Light Spear |
Use Boost Attacks
When your party is in dire need of healing, use Alphen's Boost Attack to stun Mesmald and cause it to lay down on the ground, leaving it vulnerable to your attacks.
Shionne Equipment and Artes
 Shionne Shionne
Lv.60 |
Equipment |
|---|---|
| Caritas Bouquet | |
| Wedding Dress | |
| Magic Emblem | |
| Ground Artes | Aerial Artes |
| First Set | |
| Burning Strike | Displode |
| Flare Tornado | Scorched Earth |
| Explosion | Aqueous Impact |
| Second Set | |
| Healing Circle | Spear Sweep |
| Spread | Toxicity |
| Flare Tornado | Glacio Celestra |
Primary Healer
Apart from serving as the group's primary healer, you can swap Shionne out for Dohalim, particularly if you're planning to rely heavily on recovery items for your healing needs. Using items that will recover your CP is also recommended if you do not wish to use healing items throughout the fight.
Law Equipment and Artes
 Law Law
Lv.60 |
Equipment |
|---|---|
| Divine Wrath | |
| Canine Vest | |
| Protect RIng | |
| Ground Artes | Aerial Artes |
| First Set | |
| Dragon Shot | Eagle Dive |
| Talon Storm | Eagle Assault |
| Fang Blast | Death Blossom |
| Second Set | |
| Super Swallow Dance | Glimmer Dragon |
| Talon Hurricane | Fang Bolero |
| - | - |
Use Boost Attacks Against Weak Points
Whenever it becomes available, use Law's Boost Attack against Mesmald's Weak Points. His attacks can deal high amounts of damage, allowing you to break Weak Points easier later on.
Rinwell Equipment and Artes
 Rinwell Rinwell
Lv.60 |
Equipment |
|---|---|
| Heavenly Gaze | |
| Holy Cloak | |
| Pierce Emblem | |
| Ground Artes | Aerial Artes |
| First Set | |
| Holy Lance | Electric Discharge |
| Thunder Blade | Celestial Hammer |
| Photon Flash | Placid Pool |
| Second Set | |
| Tempest Whirl | Swallow's Flight |
| Meteor Storm | Razor Cyclone |
| Shooting Star | Subzero Confinement |
Allow to Freely Cast
With Alphen or Law taking Mesmald's attention with their close-ranged attacks, this will leave both Shionne and Rinwell free to cast their Artes. Try and switch to either of them to move them further from the battle whenever they gravitate close to Mesmald automatically whenever you're not controlling them to prevent their casting from being interrupted.
Mesmald Attack Patterns
Claw Attack
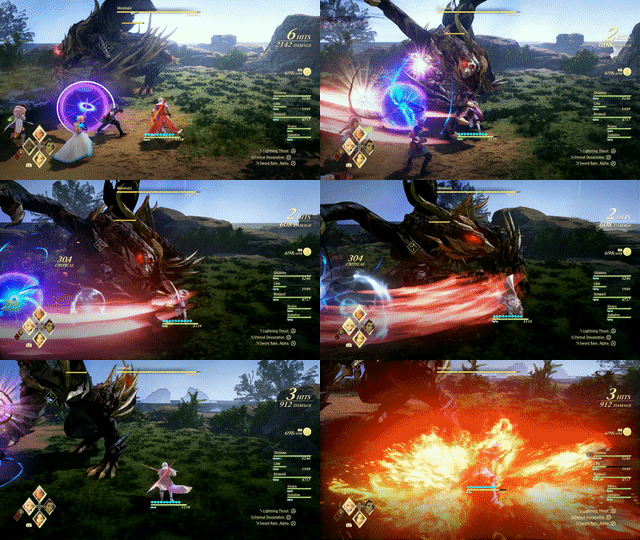
Throughout the majority of the battle, Mesmald will primarily use its claws to swipe at you. It performs these attacks frequently when you are battling it from up close, and is a good way to prevent it from performing its elemental-based attacks.
Wind Beams
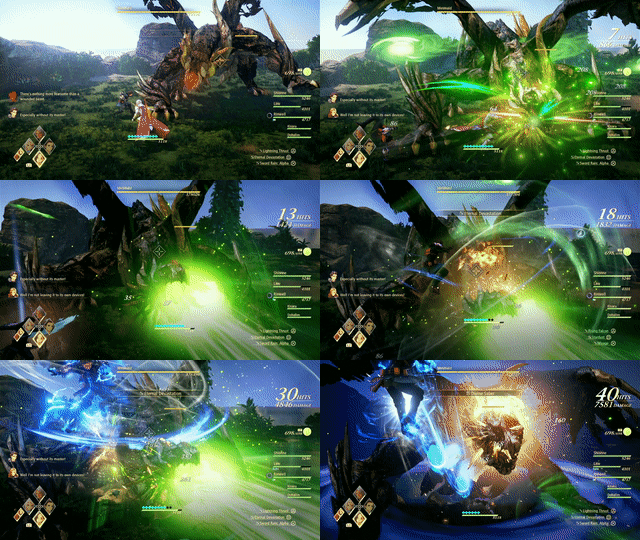
Similar to how it was during your fight against it and Almeidrea, Mesmald will also commonly use Wind-type attacks against you. Specifically, it can perform a Wind Beam attack that can easily K.O. you in one hit.
This attack can easily be dodged or avoided by observing the ground before it fires the beam – it will glow a faint shade of green before the beam is fired, allowing you to move to the aside to avoid it.
Flying Attacks
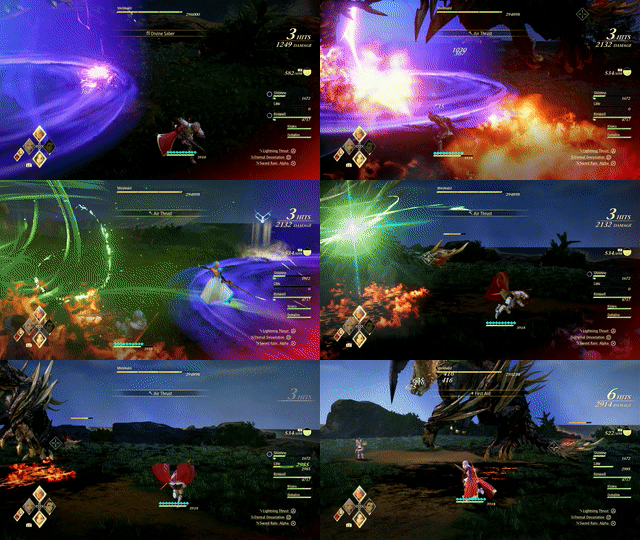
Mesmald has two attacks it can perform when it flies up into the air. These attacks are:
- Spewing fire from its mouth while moving, and;
- Shooting projectiles from its mouth that turn into cyclones.
These attacks are easy to avoid – do not, however, stay beneath it when it lands, as it will cause you significant damage.
Tales of Arise Related Guides
Beyond the Dawn DLC Bosses
Beyond the Dawn Story Bosses
| Story Bosses | |
|---|---|
 Nimus Pandemonium Nimus Pandemonium |
 Venoflage Venoflage |
 Nazamil Nazamil |
 Nazamil Nether Nazamil Nether
|
 Ooze Hive Ooze Hive |
 Nazamil Nether Nazamil Nether (2nd Encounter) |
 Nazamil Nether Nazamil Nether (3rd Encounter) |
 Captive Nazamil Captive Nazamil |
 Oppressor Oppressor |
 Emergence Suppressor Emergence Suppressor |
Beyond the Dawn Optional Bosses
| Optional Bosses | ||
|---|---|---|
 Ruthless Ruthless
|
 Boisterous Roper Boisterous Roper
|
 Cruel Keeper Cruel Keeper |
 Megawrecker Megawrecker |
 Ghoulish Arms Ghoulish Arms |
 Nimus Juggernaut Nimus Juggernaut |
 Grinymuk Grinymuk |
 Mother Boomy Mother Boomy |
- |
Story Bosses
Optional Bosses
Author
Mesmald Boss Guide: Recommended Setup and How to Beat
improvement survey
03/2026
improving Game8's site?

Your answers will help us to improve our website.
Note: Please be sure not to enter any kind of personal information into your response.

We hope you continue to make use of Game8.
Rankings
- We could not find the message board you were looking for.
Gaming News
Popular Games

Genshin Impact Walkthrough & Guides Wiki

Honkai: Star Rail Walkthrough & Guides Wiki

Umamusume: Pretty Derby Walkthrough & Guides Wiki

Pokemon Pokopia Walkthrough & Guides Wiki

Resident Evil Requiem (RE9) Walkthrough & Guides Wiki

Monster Hunter Wilds Walkthrough & Guides Wiki

Wuthering Waves Walkthrough & Guides Wiki

Arknights: Endfield Walkthrough & Guides Wiki

Pokemon FireRed and LeafGreen (FRLG) Walkthrough & Guides Wiki

Pokemon TCG Pocket (PTCGP) Strategies & Guides Wiki
Recommended Games

Fire Emblem Heroes (FEH) Walkthrough & Guides Wiki

Diablo 4: Vessel of Hatred Walkthrough & Guides Wiki

Yu-Gi-Oh! Master Duel Walkthrough & Guides Wiki

Super Smash Bros. Ultimate Walkthrough & Guides Wiki

Pokemon Brilliant Diamond and Shining Pearl (BDSP) Walkthrough & Guides Wiki

Elden Ring Shadow of the Erdtree Walkthrough & Guides Wiki

Monster Hunter World Walkthrough & Guides Wiki

The Legend of Zelda: Tears of the Kingdom Walkthrough & Guides Wiki

Persona 3 Reload Walkthrough & Guides Wiki

Cyberpunk 2077: Ultimate Edition Walkthrough & Guides Wiki
All rights reserved
© BANDAI NAMCO Entertainment America Inc. All third party content, brands, names, and logos are used under license and remain property of their respective owners. All rights reserved.
The copyrights of videos of games used in our content and other intellectual property rights belong to the provider of the game.
The contents we provide on this site were created personally by members of the Game8 editorial department.
We refuse the right to reuse or repost content taken without our permission such as data or images to other sites.

 Balseph
 Ice Wolf Leader
 Ooze Hive
 Lord Ganabelt
 Zacarania
 Kisara
 Dohalim
 Venoflage
 Temararus
 Grinymuk
 Almeidrea & Mesmald
 Meria Phein
 Kalmarzel & Kaldinzel
 Vholran
 Eljarania
 Efreet
 Tormented Limbs
 Red Woman
 Valclynimus
 Great Astral Spirit
 Subsumer
 Vholran (Final Boss)
 Toxidillo
 Boisterous Roper
 Polycephus
 Great Dragon
 Relentless Charger
 Flamewrecker
 Alpha Reaper
 Stormbringer
 Elemental
 Regent Bee
 Agony Keeper
 Mother Boomy
 Ruthless
 Thunderite
 Mantis
 Calamity Arms
 Meneiys
 Ezamamuk
 Sword Dancer
 Undine Drop
 Luo Undine
 Grand Gnome & Vas Phein
 Masher Mare & Masher Bull
 Procella Sylph & Sylph Zloa
 Edna
Edna Nimus Origin
 Eizen
Eizen Edna & Eizen
 Chronos
 Dulneiys, Maleiys, & Vasneiys


![Slay the Spire 2 Review [Early Access] | Still the Deckbuilder to Beat](https://img.game8.co/4433115/44e19e1fb0b4755466b9e516ec7ffb1e.png/thumb)

![Resident Evil Village Review [Switch 2] | Almost Flawless Port](https://img.game8.co/4432790/e1859f64830960ce4248d898f8cd38d9.jpeg/thumb)


