Dulneiys, Maleiys, & Vasneiys Boss Guide: Recommended Setup and How to Beat
☆ Earn bonuses before you start the DLC.
★ Clear campaign & sub-quests | Get max lvl
☆ Learn all the ingredients in this new Gourmet Saga!
★ Get all Beyond the Dawn Trophies with these guides:
☆ Ryugola Weapons | All Portraits | Hero of the Summit
This is a guide on how to beat Dulneiys, Maleiys, & Vasneiys in Tales of Arise! Learn more about Dulneiys, Maleiys, & Vasneiys's stats, weaknesses, attack patterns, and the best party setup including Artes and Equipment for this boss fight!
List of Contents
Dulneiys, Maleiys, & Vasneiys Stats and General Info
Dulneiys, Maleiys, & Vasneiys Location
| Map | Actual Location |
|---|---|
 |
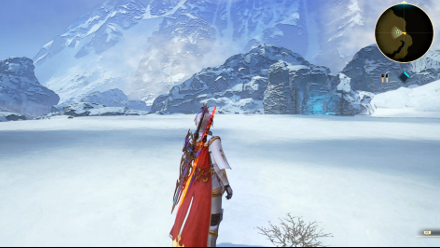 |
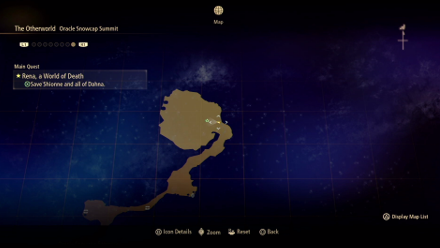
All three creatures can be found in the Oracle Snowcap Summit in The Otherworld during the Sub-Quest Otherworldly Visitors.
Otherworldly Visitors Sub-Quest Walkthrough: Rewards and How to Clear
Dulneiys, Maleiys, & Vasneiys Stats
Dulneiys
| Recommended Level: 72 | |||
|---|---|---|---|
 HP: 196180 |
|||
| Attack | 2864 | Defense | 1279 |
| Elemental Attack | 3043 | Elemental Defense | 1563 |
| Penetration | 2862 | Resistance | 3013 |
| Weakness | Resistance | ||
Maleiys
| Recommended Level: 72 | |||
|---|---|---|---|
 HP: 201140 |
|||
| Attack | 2954 | Defense | 1421 |
| Elemental Attack | 2327 | Elemental Defense | 1279 |
| Penetration | 2862 | Resistance | 3013 |
| Weakness | Resistance | ||
Vasneiys
| Recommended Level: 72 | |||
|---|---|---|---|
 HP: 198660 |
|||
| Attack | 3043 | Defense | 1279 |
| Elemental Attack | 2864 | Elemental Defense | 1137 |
| Penetration | 2862 | Resistance | 3013 |
| Weakness | Resistance | ||
Item to Drop
| Astral Crystal (4) | Records of the Fallen |
How to Beat Dulneiys, Maleiys, & Vasneiys
| Tips |
|---|
Focus On One

Due to having three enemies to fight against, it is highly recommended that you focus on one at a time before going after the others. The goal here is to reduce the number of enemies on the field as fast as possible to make the remainder of the fight more manageable.
Note that the currently targeted boss' HP bar will appear above their head rather than at the top of the screen.
Target Their Weak Points
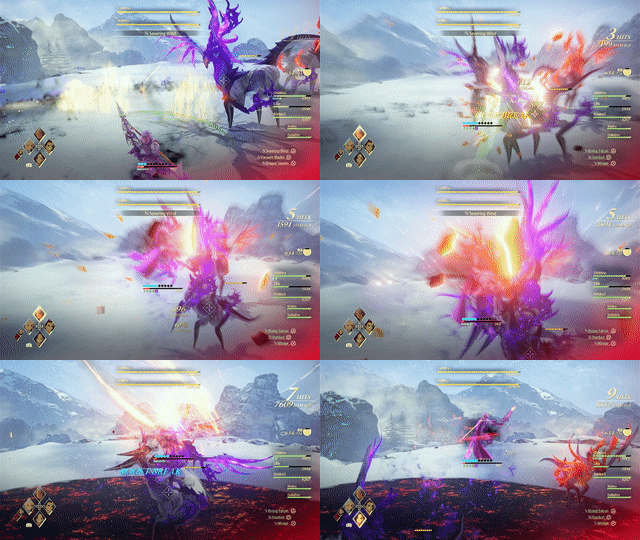
All three creatures will have their Weak Points located on their chests – focus your attacks on these points to Core Break them. In particular, use Boost Attacks while targeting Weak Points for higher damage. Alternatively [red]use Boost Attacks to immediately stop their charges, which may also damage their Weak Points so long as you can manage to score a direct hit.
Use Different Elemental Attacks
All three bosses will have an elemental weakness and resistance. Switch Artes in between fighting each one to deal more elemental damage against them. The weaknesses of each boss are:
- Dulneiys - Light-based Artes
- Maleiys - Dark-based Artes, and;
- Vasneiys - Water-based Artes
Recommended Party Setup for Dulneiys, Maleiys, & Vasneiys
Party Members
| Leader | Members | ||
|---|---|---|---|
 Alphen Alphen
Lv.67 |
 Shionne Shionne
Lv.67 |
 Law Law
Lv.67 |
 Rinwell Rinwell
Lv.67 |
Bring Plenty of Healing Items
Since this fight has three separate boss targets, taking damage is nearly unavoidable. To avoid burning through CP too quickly, be sure to stock up on both HP and CP recovery items before going into this battle.
Alphen Equipment and Artes
 Alphen Alphen
Lv.67 |
Equipment |
|---|---|
| El Vahf | |
| Heavenly Armor | |
| Protect Ring | |
| Ground Artes | Aerial Artes |
| First Set | |
| Severing Wind | Rising Falcon |
| Vacuum Blades | Stardust |
| Dragon Swarm | Mirage |
| Second Set | |
| Lightning Thrust | Luna Rondo |
| Shockwave Slash | Devastation |
| Thunder Fang | Soaring Light Spear |
Primary Attacker
Apart from using Alphen as the primary attacker in your group, you can also use his Boost Attacks to stop any charging attacks.
However, we suggest leaving charging attacks to Kisara's Boost Attack, as Alphen's Boost Attack can stun any of the bosses in this fight at any time outside of their Over Limit. It's best to use Alphen's Boost Attack to interrupt the more dangerous attacks of the bosses or to stun them to buy time for healing casts.
Shionne Equipment and Artes
 Shionne Shionne
Lv.67 |
Equipment |
|---|---|
| Sacred Karma | |
| Wedding Dress | |
| Magic Emblem | |
| Ground Artes | Aerial Artes |
| First Set | |
| Burning Strike | Displode |
| Flare Tornado | Scorched Earth |
| Explosion | Aqueous Impact |
| Second Set | |
| Healing Circle | Spear Sweep |
| Spread | Toxicity |
| Flare Tornado | Glacio Celestra |
Equip Accessories that Decrease Aggro
Shionne should be largely left to heal and deal damage freely in this fight, but it's best to equip an Accessory with Decreased Aggro L if you have one. This will help ensure that the other two targets you aren't focusing on won't go after your primary healer. If you find Shionne's HP getting dangerously low, you can always switch to controlling her directly until her HP is in a safer range.
Law Equipment and Artes
 Law Law
Lv.67 |
Equipment |
|---|---|
| Divine Wrath | |
| Prismatic Jacket | |
| Protect Ring | |
| Ground Artes | Aerial Artes |
| First Set | |
| Dragon Shot | Eagle Dive |
| Talon Storm | Tres Ventos |
| Fang Blast | Death Blossom |
| Second Set | |
| Super Swallow Dance | Glimmer Dragon |
| Talon Hurricane | Fang Bolero |
| - | - |
Use Boost Attacks to Weaken Weak Points
Law at this level is a very good option to use when you're trying to get a Core Break on Weak Points quickly. If your controlled character is positioned in front of one of the boss' Weak Points you can activate Law's Boost Attack for a direct hit dealing a few thousand damage. Just be careful with the timing since if the boss is moving, Law's Boost Attack can miss entirely.
Rinwell Equipment and Artes
 Rinwell Rinwell
Lv.67 |
Equipment |
|---|---|
| Oblivion Ring | |
| Dahnas Animus | |
| Pierce Emblem | |
| Ground Artes | Aerial Artes |
| First Set | |
| Holy Lance | Electric Discharge |
| Thunder Blade | Celestial Hammer |
| Photon Flash | Placid Pool |
| Second Set | |
| Tempest Whirl | Swallow's Flight |
| Meteor Storm | Razor Cyclone |
| Shooting Star | Subzero Confinement |
Elemental Attacker - Can Be Switched Out
If you feel like it, you can replace Rinwell with Dohalim to gain some additional Dark-type Artes for the party, leaving any Water and Light based Artes to Shionne.
If you do not wish to switch her out, however, it is best to let Rinwell cast Astral Artes freely, as her attacks deal a nice amount of elemental damage to any of the bosses over a short amount of time.
Dulneiys, Maleiys, & Vasneiys Attack Patterns
Charge Attacks
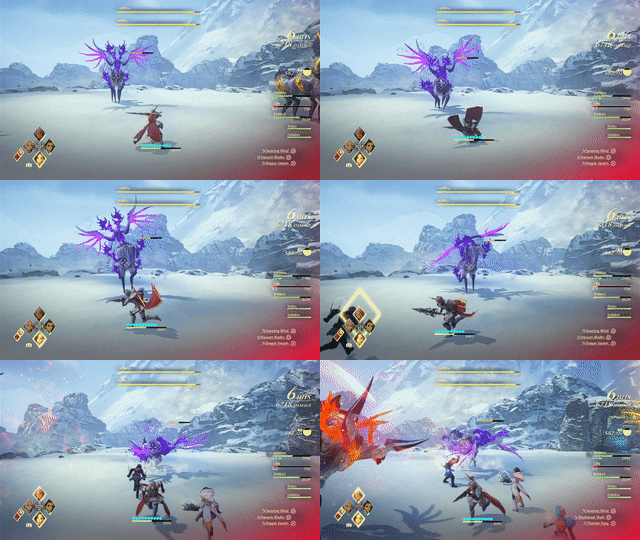
All three bosses will have the ability to charge straight at you, using the antlers on their heads to damage you, knocking you to the ground. These attacks can be stopped by using Kisara's Boost Attack to stop them in their tracks.
Elemental Attacks
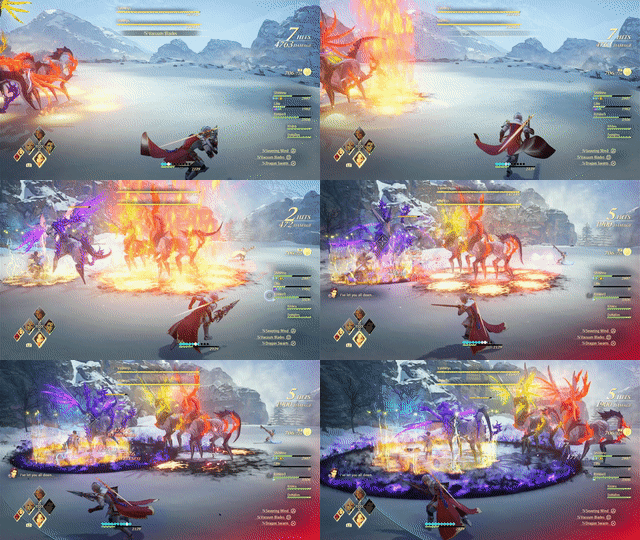
Not only can all three bosses charge at you, but they are also able to use elemental attacks according to their respective elements. While each attack's elemental type is different, they all serve the same following functions:
- Ranged elemental projectiles;
- Area-of-effect attacks that usually come in the form of an elemental attack that pushes outward from the creature in a wave, and;
- Element-charged basic attacks where they will use their feet to knock you to the ground.
Tales of Arise Related Guides
Beyond the Dawn DLC Bosses
Beyond the Dawn Story Bosses
| Story Bosses | |
|---|---|
 Nimus Pandemonium Nimus Pandemonium |
 Venoflage Venoflage |
 Nazamil Nazamil |
 Nazamil Nether Nazamil Nether
|
 Ooze Hive Ooze Hive |
 Nazamil Nether Nazamil Nether (2nd Encounter) |
 Nazamil Nether Nazamil Nether (3rd Encounter) |
 Captive Nazamil Captive Nazamil |
 Oppressor Oppressor |
 Emergence Suppressor Emergence Suppressor |
Beyond the Dawn Optional Bosses
| Optional Bosses | ||
|---|---|---|
 Ruthless Ruthless
|
 Boisterous Roper Boisterous Roper
|
 Cruel Keeper Cruel Keeper |
 Megawrecker Megawrecker |
 Ghoulish Arms Ghoulish Arms |
 Nimus Juggernaut Nimus Juggernaut |
 Grinymuk Grinymuk |
 Mother Boomy Mother Boomy |
- |
Story Bosses
Optional Bosses
Author
Dulneiys, Maleiys, & Vasneiys Boss Guide: Recommended Setup and How to Beat
improvement survey
03/2026
improving Game8's site?

Your answers will help us to improve our website.
Note: Please be sure not to enter any kind of personal information into your response.

We hope you continue to make use of Game8.
Rankings
- We could not find the message board you were looking for.
Gaming News
Popular Games

Genshin Impact Walkthrough & Guides Wiki

Honkai: Star Rail Walkthrough & Guides Wiki

Umamusume: Pretty Derby Walkthrough & Guides Wiki

Pokemon Pokopia Walkthrough & Guides Wiki

Resident Evil Requiem (RE9) Walkthrough & Guides Wiki

Monster Hunter Wilds Walkthrough & Guides Wiki

Wuthering Waves Walkthrough & Guides Wiki

Arknights: Endfield Walkthrough & Guides Wiki

Pokemon FireRed and LeafGreen (FRLG) Walkthrough & Guides Wiki

Pokemon TCG Pocket (PTCGP) Strategies & Guides Wiki
Recommended Games

Diablo 4: Vessel of Hatred Walkthrough & Guides Wiki

Fire Emblem Heroes (FEH) Walkthrough & Guides Wiki

Yu-Gi-Oh! Master Duel Walkthrough & Guides Wiki

Super Smash Bros. Ultimate Walkthrough & Guides Wiki

Pokemon Brilliant Diamond and Shining Pearl (BDSP) Walkthrough & Guides Wiki

Elden Ring Shadow of the Erdtree Walkthrough & Guides Wiki

Monster Hunter World Walkthrough & Guides Wiki

The Legend of Zelda: Tears of the Kingdom Walkthrough & Guides Wiki

Persona 3 Reload Walkthrough & Guides Wiki

Cyberpunk 2077: Ultimate Edition Walkthrough & Guides Wiki
All rights reserved
© BANDAI NAMCO Entertainment America Inc. All third party content, brands, names, and logos are used under license and remain property of their respective owners. All rights reserved.
The copyrights of videos of games used in our content and other intellectual property rights belong to the provider of the game.
The contents we provide on this site were created personally by members of the Game8 editorial department.
We refuse the right to reuse or repost content taken without our permission such as data or images to other sites.

 Balseph
 Ice Wolf Leader
 Ooze Hive
 Lord Ganabelt
 Zacarania
 Kisara
 Dohalim
 Venoflage
 Temararus
 Grinymuk
 Almeidrea & Mesmald
 Meria Phein
 Kalmarzel & Kaldinzel
 Vholran
 Eljarania
 Efreet
 Tormented Limbs
 Red Woman
 Valclynimus
 Great Astral Spirit
 Subsumer
 Vholran (Final Boss)
 Toxidillo
 Boisterous Roper
 Polycephus
 Great Dragon
 Relentless Charger
 Flamewrecker
 Alpha Reaper
 Stormbringer
 Elemental
 Regent Bee
 Agony Keeper
 Mother Boomy
 Ruthless
 Thunderite
 Mantis
 Calamity Arms
 Meneiys
 Ezamamuk
 Sword Dancer
 Undine Drop
 Luo Undine
 Grand Gnome & Vas Phein
 Masher Mare & Masher Bull
 Procella Sylph & Sylph Zloa
 Mesmald
 Edna
Edna Nimus Origin
 Eizen
Eizen Edna & Eizen
 Chronos


![Everwind Review [Early Access] | The Shaky First Step to A Very Long Journey](https://img.game8.co/4440226/ab079b1153298a042633dd1ef51e878e.png/thumb)

![Monster Hunter Stories 3 Review [First Impressions] | Simply Rejuvenating](https://img.game8.co/4438641/2a31b7702bd70e78ec8efd24661dacda.jpeg/thumb)


