Ruthless Boss Guide
☆ Earn bonuses before you start the DLC.
★ Clear campaign & sub-quests | Get max lvl
☆ Learn all the ingredients in this new Gourmet Saga!
★ Get all Beyond the Dawn Trophies with these guides:
☆ Ryugola Weapons | All Portraits | Hero of the Summit
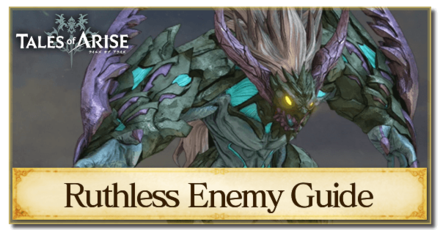
Ruthless is a Gigant Boss that you can fight in the Tales of Arise (Beyond the Dawn)! Read on to learn how to beat Ruthless, as well as its stats, weaknesses, attack patterns, and the best party setup in this boss guide!
List of Contents
Ruthless Stats and General Info
Ruthless (Beyond the Dawn) Location
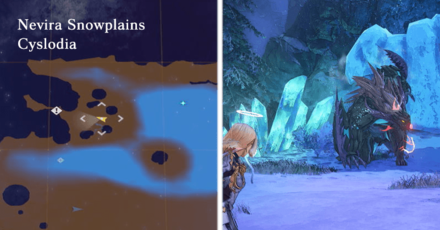
Ruthless can be seen in the middle of the lake in Nevira Snowplains in Cyslodia.
Ruthless (Beyond the Dawn) Stats
| Recommended Level: 77 | |||
|---|---|---|---|
 HP: 196159 |
|||
| Attack | 3736 | Defense | 1227 |
| Elemental Attack | 3203 | Elemental Defense | 1116 |
| Penetration | 3295 | Resistance | 3470 |
| Weakness | Resistance | ||
Item to Drop
| Astral Flower | Large Demihuman Talon (6) |
Ruthless Location
| Map | Actual Location |
|---|---|
 |
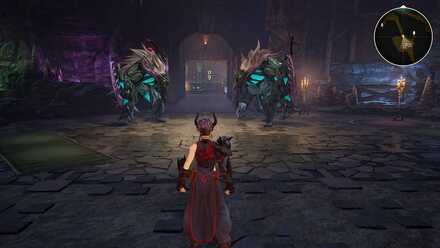 |
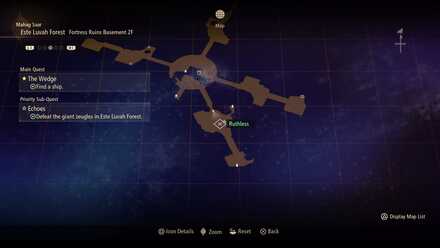
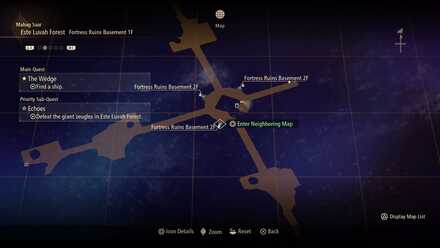
Ruthless will only spawn in Este Luvah Forest 2F after accepting the sub-quest Echoes. Use the elevator to reach the Fortress Ruins Basement 1F then drop down the ledge on the southwest to reach the target.
Echoes Sub-Quest Walkthrough: Rewards and How to Clear
Ruthless Stats
| Recommended Level: 41 | |||
|---|---|---|---|
 HP: 56250 |
|||
| Attack | 1500 | Defense | 821 |
| Elemental Attack | 1286 | Elemental Defense | 747 |
| Penetration | 1890 | Resistance | 1990 |
| Weakness | Resistance | ||
Item to Drop
| Astral Flower | Large Demihuman Talon (6) |
How to Beat Ruthless
To aid in your battle against Ruthless, here are some tips that you can utilize in your fight.
Focus on One Enemy First

You'll go against two enemies in this fight, both having 1,500 attack. You'd want to focus on taking down one of them first since it will be really difficult especially if both of them enter Over Limit mode at the same time.
Disable Their Dodging Abilities
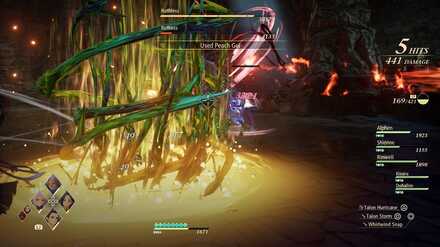
Both of them are fleet-footed enemies, meaning they can perform an evasive maneuver and be invulnerable for a moment. Disable this ability using Dohalim's boost attack.
Check their status first by holding L1 (for PS4/PS5) to see if they regained their dodging abilities before using Dohalim's boost attack again. You'll know if their ability is disabled if the fleet-footed icon is blocked.
Recommended Party Setup for Ruthless
Party Members
| Leader | Members | ||
|---|---|---|---|
 Law Law
Lv. 37 |
 Alphen Alphen
Lv. 37 |
 Rinwell Rinwell
Lv. 37 |
 Shionne Shionne
Lv. 37 |
Use boost attacks
Alphen's boost attack can achieve a boost break everytime unless they're in Over Limit mode. Dohalim's boost attack can also achieve a boost break only if their fleet-footed ability is active.
Remember that you can still use Dohalim's boost attack even if he's not in your combat party.
Switch between Rinwell and Dohalim
Bring Rinwell along if you need more damage but if you find the battle difficult, switch out Rinwell with Dohalim for an additional healer/support that can deal decent damage.
Law Equipment and Artes
 Law Law
Lv. 37 |
Equipment |
|---|---|
| Black Iron Gauntlets | |
| Jet Black Vest | |
| Warrior Emblem | |
| Ground Artes | Aerial Artes |
| First Set | |
| Talon Hurricane | Eagle Assault |
| Talon Storm | Glimmer Dragon |
| Whirlwind Snap | - |
| Second Set | |
| Steel | - |
| - | - |
| - | - |
Main damage dealer
Try to maintain Law's Awakening to increase damage output. Cast Steel beforehand to increase it even more. Unlock the Mid-Air Evasion skill from the skill panel so you can dodge their attacks in case your combo brings you airborne.
Alphen Equipment and Artes
 Alphen Alphen
Lv. 37 |
Equipment |
|---|---|
| Solid Edge | |
| Battle Suit | |
| Pierce Emblem | |
| Ground Artes | Aerial Artes |
| First Set | |
| Severing Wind | Mirage |
| Swallow Blade | Stardust |
| Dragon Swarm | Hurricane Thrust |
Use boost attack for instant boost break
Alphen's boost attack can always boost break his target as long as it's not in Over Limit mode. Use his boost attack if their dodging ability is already disabled and you need an opportunity to get a few hits in.
Rinwell Equipment and Artes
 Rinwell Rinwell
Lv. 37 |
Equipment |
|---|---|
| The Dark Wings | |
| Silk Robe | |
| Magic Emblem | |
| Ground Artes | Aerial Artes |
| First Set | |
| Thunder Field | Placid Pool |
| Air Thrust | Razor Cyclone |
| Spread | Subzero Confinement |
| Second Set | |
| Sharpness | - |
| - | - |
| - | - |
Main range attacker
Another damage dealer but a lot more squishy. Retain aggro on your melee characters or equip her with an accessory with Decrease Aggro L skill.
Shionne Equipment and Artes
 Shionne Shionne
Lv. 37 |
Equipment |
|---|---|
| Shaded Aster | |
| Sapphire One Piece | |
| Magic Emblem | |
| Ground Artes | Aerial Artes |
| First Set | |
| First Aid | - |
| Healing Circle | - |
| Magna Ray | - |
| Second Set | |
| Resurrection | - |
| - | - |
| - | - |
Keep aggro away from Shionne
Same as Rinwell, keep aggro away from Shionne as she's your main healer. Equip her with an accessory with Decrease Aggro L skill as well and try to avoid controlling her unless you're used to her moveset.
Ruthless Attack Patterns
Fireball

Releases a fireball straight ahead. In Over Limit mode, both of them can release multiple fireballs in quick succession.
Roar
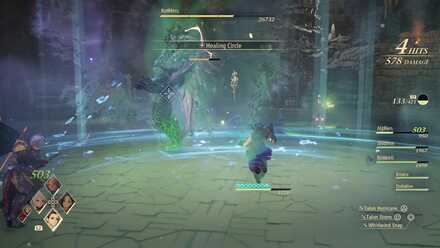
Let's out a roar that damages and staggers nearby party members.
Rend
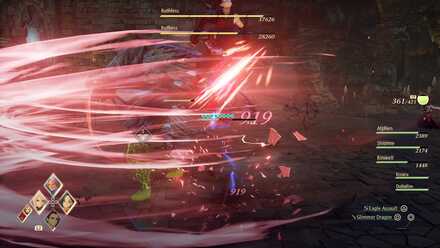
Charges forward while slashing. This attack has a long reach so be sure to stay out of its way once it starts slashing rapidly
Tales of Arise (Beyond the Dawn) Related Guides

List of Gigants
Author
Ruthless Boss Guide
improvement survey
03/2026
improving Game8's site?

Your answers will help us to improve our website.
Note: Please be sure not to enter any kind of personal information into your response.

We hope you continue to make use of Game8.
Rankings
- We could not find the message board you were looking for.
Gaming News
Popular Games

Genshin Impact Walkthrough & Guides Wiki

Honkai: Star Rail Walkthrough & Guides Wiki

Umamusume: Pretty Derby Walkthrough & Guides Wiki

Pokemon Pokopia Walkthrough & Guides Wiki

Resident Evil Requiem (RE9) Walkthrough & Guides Wiki

Monster Hunter Wilds Walkthrough & Guides Wiki

Wuthering Waves Walkthrough & Guides Wiki

Arknights: Endfield Walkthrough & Guides Wiki

Pokemon FireRed and LeafGreen (FRLG) Walkthrough & Guides Wiki

Pokemon TCG Pocket (PTCGP) Strategies & Guides Wiki
Recommended Games

Diablo 4: Vessel of Hatred Walkthrough & Guides Wiki

Fire Emblem Heroes (FEH) Walkthrough & Guides Wiki

Yu-Gi-Oh! Master Duel Walkthrough & Guides Wiki

Super Smash Bros. Ultimate Walkthrough & Guides Wiki

Pokemon Brilliant Diamond and Shining Pearl (BDSP) Walkthrough & Guides Wiki

Elden Ring Shadow of the Erdtree Walkthrough & Guides Wiki

Monster Hunter World Walkthrough & Guides Wiki

The Legend of Zelda: Tears of the Kingdom Walkthrough & Guides Wiki

Persona 3 Reload Walkthrough & Guides Wiki

Cyberpunk 2077: Ultimate Edition Walkthrough & Guides Wiki
All rights reserved
© BANDAI NAMCO Entertainment America Inc. All third party content, brands, names, and logos are used under license and remain property of their respective owners. All rights reserved.
The copyrights of videos of games used in our content and other intellectual property rights belong to the provider of the game.
The contents we provide on this site were created personally by members of the Game8 editorial department.
We refuse the right to reuse or repost content taken without our permission such as data or images to other sites.
 Mother Boomy
 Boisterous Roper
 Cruel Keeper
 Grinymuk
 Toxidillo
 Polycephus
 Great Dragon
 Flamewrecker
 Relentless Charger
 Alpha Reaper
 Stormbringer
 Elemental
 Regent Bee
 Agony Keeper
 Thunderite
 Mantis
 Calamity Arms
 Masher Bull
 Masher Mare
 Ezamamuk
 Sword Dancer


![Everwind Review [Early Access] | The Shaky First Step to A Very Long Journey](https://img.game8.co/4440226/ab079b1153298a042633dd1ef51e878e.png/thumb)

![Monster Hunter Stories 3 Review [First Impressions] | Simply Rejuvenating](https://img.game8.co/4438641/2a31b7702bd70e78ec8efd24661dacda.jpeg/thumb)


