Venoflage Boss Guide: Recommended Setup and How to Beat
☆ Earn bonuses before you start the DLC.
★ Clear campaign & sub-quests | Get max lvl
☆ Learn all the ingredients in this new Gourmet Saga!
★ Get all Beyond the Dawn Trophies with these guides:
☆ Ryugola Weapons | All Portraits | Hero of the Summit
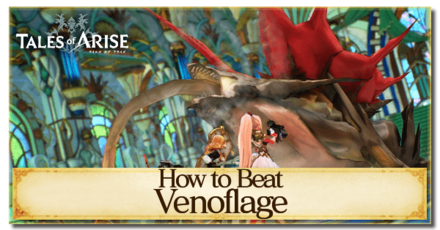
Venoflage is a Unique Boss that you can fight in the Tales of Arise (Beyond the Dawn)! Read on to learn how to beat Venoflage, as well as its stats, weaknesses, attack patterns, and the best party setup in this boss guide!
Venoflage General Info
Venoflage (Base Game) Stats and Location
| Recommended Level: 22 | |||
|---|---|---|---|
 HP: 85500 |
|||
| Attack | 433 | Defense | 345 |
| Elemental Attack | 413 | Elemental Defense | 345 |
| Penetration | 499 | Resistance | 526 |
| Weakness | Resistance | ||
Location
| Autelina Palace |
Item to Drop
| Bizzare Megacore (3) |
Venoflage (Beyond the Dawn) Stats and Location
| Recommended Level: 70 | |||
|---|---|---|---|
 HP: 124659 |
|||
| Attack | 1973 | Defense | 692 |
| Elemental Attack | 1882 | Elemental Defense | 692 |
| Penetration | 1819 | Resistance | 959 |
| Weakness | Resistance | ||
Location
| Traslida Highway |
Item to Drop
| Mystical Luminacore (3) |
How to Beat Venoflage
To aid in your battle against Venoflage in the base game and the Beyond the Dawn DLC, here are some tips that you can utilize in your fight.
Attack its Weak Spot
The Weak Spot for Venoflage can easily be found near the bottom of its tail tip. Navigating your way to the back of the beast can easily be done when he performs Tongue Whip and Poison Spit attacks, where it'll stay in place allowing you to circle around to its back. You can also achieve this once it moves locations when it becomes invisible.
Use Kisara's Boost Attack
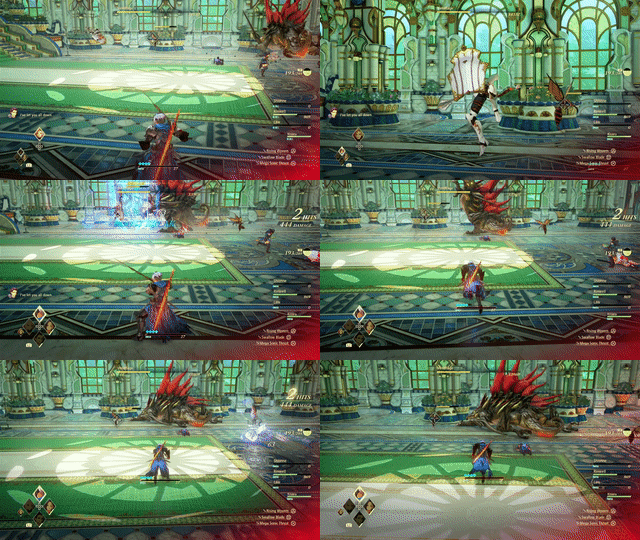
Venoflage will begin to charge at your party and will move from place to place until it stops. You can end this attack quickly by having Kisara use her Boost Attack while it charges at you – this will force it to collapse to the ground, allowing you to freely attack it.
Use Alphen's Boost Attack
Alternatively, you can always use Alphen and his Boost Attack to quickly stagger an opponent even if the stagger gauge hasn't fully filled up.
Ignore the Bees (Base Game Only)
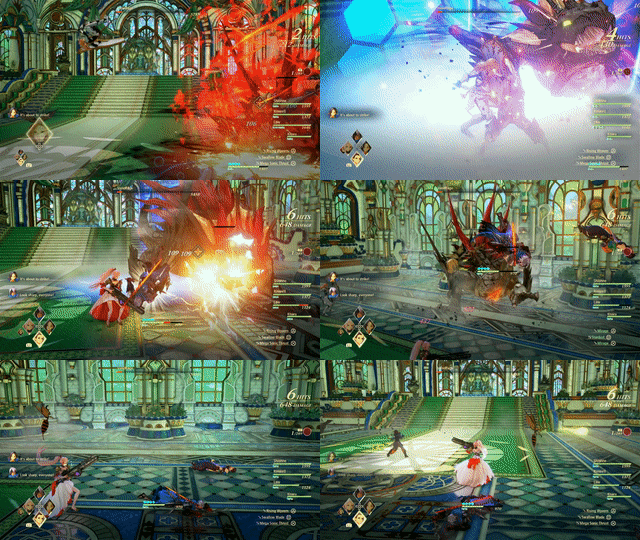
In the base game, Bees will spawn during the battle's second phase to provide small distractions to the attack of your team. You can choose to quickly defeat them or concentrate all your attacks on Venoflage itself, as the Bees will cause you little harm so long as you remain outside of their attack range.
Recommended Party Setup for Venoflage
Party Members
| Leader | Members | ||
|---|---|---|---|
 Law Law
Lv.22 / 70 |
 Alphen Alphen
Lv.22 / 70 |
 Shionne Shionne
Lv.22 / 70 |
 Rinwell Rinwell
Lv.22 / 70 |
Law Equipment and Artes
 Law LawLv. 70 | Equipment |
|---|---|
| Battle-Hardened Iron Gauntlets | |
| Silver Wolf Vest Revised | |
| Grit Emblem | |
| Ground Artes | Aerial Artes |
| First Set | |
| Talon Hurricane | Eagle Dive |
| Tectonic Punch | Inferno Punch |
| Inspiration | Glimmer Dragon |
| Second Set | |
| Talon Storm | - |
| Swallow Dance | - |
| Fang Blast | - |
 Law LawLv.22 | Equipment |
|---|---|
| Flaming Knights | |
| Zeugle Shell Vest | |
| Pierce Emblem | |
| Ground Artes | Aerial Artes |
| Talon Storm | Eagle Dive |
| Tectonic Punch | Eagle Assault |
| Fang Blast | Death Blossom |
Perform Quick Attacks on Venoflage's Weak Spot
Although the leadership role can be interchanged between Alphen and Law, choosing Law to start right out of the gate is a better choice due to his ability to perform faster attacks. When Venoflage tries to attack you, it will stand in place, allowing you to use Law to navigate to its tail to attack the Weak Spot there with multiple attacks.
You can switch back to Alphen later on if you wish to have more control over the way he uses his Boost Attacks or Mystic Artes.
Alphen Equipment and Artes
 Alphen AlphenLv. 70 | Equipment |
|---|---|
| Gladius Rene | |
| Sincleaver Armor Revised | |
| Warrior Emblem | |
| Ground Artes | Aerial Artes |
| First Set | |
| Lightning Thrust | Mirage |
| Shockwave Slash | Luna Rondo |
| Double Demon Fang | Stardust |
| Second Set | |
| Swallow Blade | - |
| Sonic Thrust | - |
| Sword Rain: Alpha | - |
 Alphen AlphenLv.22 | Equipment |
|---|---|
| Flare Claw | |
| Topaz Mail | |
| Pierce Emblem | |
| Ground Artes | Aerial Artes |
| Destruction | Rising Falcon |
| Shockwave Slash | Stardust |
| Eternal Devastation | Mirage |
Use Boost Attacks to Bring Down Venoflage
Alphen's Boost Attack can easily be used to "stun" Venoflage, causing it to collapse to the ground. Whenever it becomes available, feel free to use it at any time apart from when Venoflage is using his Charge Attacks.
Shionne Equipment and Artes
 Shionne ShionneLv. 70 | Equipment |
|---|---|
| Deep Red Noble Rose | |
| Noble Scarlet Revised | |
| Poison Charm | |
| Ground Artes | Aerial Artes |
| First Set | |
| Healing Circle | Scorched Earth |
| Ignis Celestra | Toxicity |
| Gemini Aqua | Displode |
| Second Set | |
| Resurrection | Aranea Celestra |
| Flare Tornado | Tres Ventos |
| Burning Strike | Scorched Earth |
 Shionne ShionneLv.22 | Equipment |
|---|---|
| Innocent Lily | |
| Topaz One Piece | |
| Poison Charm | |
| Ground Artes | Aerial Artes |
| Healing Circle | Toxicity |
| Gravitas Field | Spear Sweep |
| Tonitus Celestra | Glacio Celestra |
Primary Healer
You can swap out Shionne for Kisara if you require more physical firepower or if you have no need for party-wide healing. If using Shionne, keep her at a safe distance and cast healing spells for the party. Equip her with a Poison Charm to increase her survivability against Venoflage's poison attacks.
Rinwell Equipment and Artes
 Rinwell RinwellLv. 70 | Equipment |
|---|---|
| Secrets of the Stars Variant Edition | |
| Inherited Coat Revised | |
| Magic Emblem | |
| Ground Artes | Aerial Artes |
| First Set | |
| Spread | Placid Pool |
| Holy Lance | Electric Discharge |
| Tempest Whirl | Swallow's Flight |
| Second Set | |
| Galeforce | Razor Cyclone |
| Thunder Field | Subzero Confinement |
| Divine Saber | Swallow's Flight |
 Rinwell RinwellLv.22 | Equipment |
|---|---|
| Nature's Beauty | |
| Zeugle Shell Mage Coat | |
| Alexandrite | |
| Ground Artes | Aerial Artes |
| Concentrate | Razor Cyclone |
| Thunder Blade | Swallow's Flight |
| Air Thrust | Placid Pool |
Fire at Will
Rinwell can also be interchanged with Kisara if you wish, but it is recommended to keep Rinwell on due to her powerful Wind attacks. Allow her to cast her Artes freely, and only intervene when she is in danger or in need of healing.
Venoflage Attack Patterns
Venoflage's attack patterns do not differ all that much in the base game nor in the Beyond the Dawn DLC. Its attack patterns are as follows:
Tongue Whip
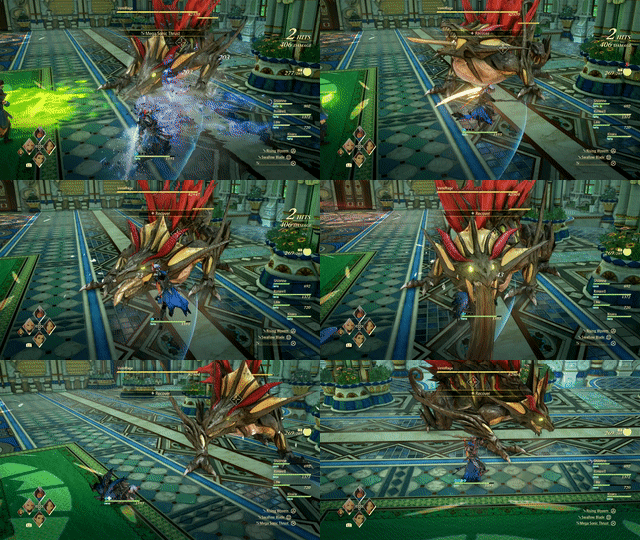
An attack performed often by Venoflage, it will whip its long tongue around the area, causing significant damage to any party member in the way. This attack, and any damage from it, can be avoided by executing dodges and countering.
Poison Spit
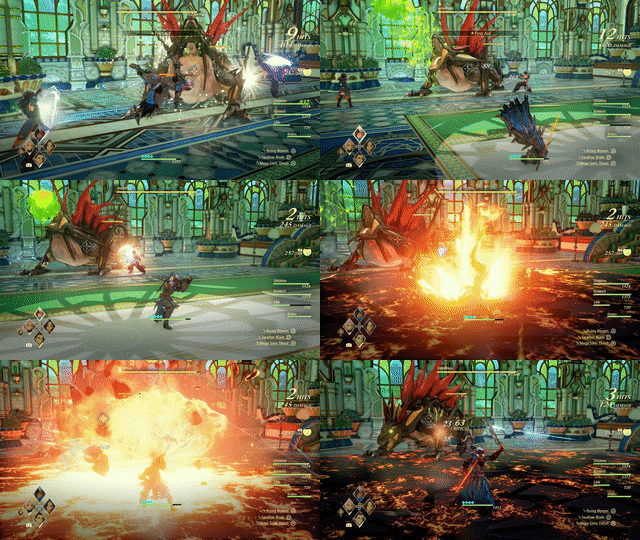
Commonly done after it executes its Tongue Whip attack, Venoflage will stand still before unleashing globs of its poisonous spit around the area. Getting hit by the spit, or the small puddle it leaves behind, will cause large amounts of damage.
Stalagmite
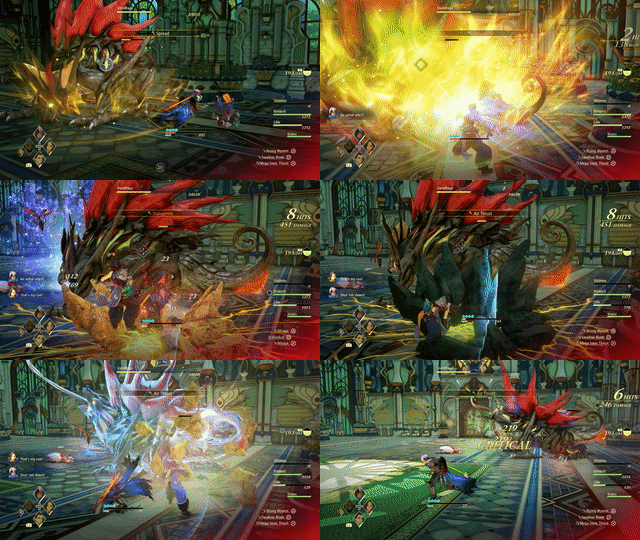
An attack that occurs mostly during the second phase of the fight will see Venoflage casting an Artes that causes rocky Stalagmites to protrude from the ground. This attack can cause minimal damage but does leave you in place for some time, leaving you vulnerable to other enemy attacks.
You can interrupt this attack using Rinwell's Boost Attack.
Invisibility
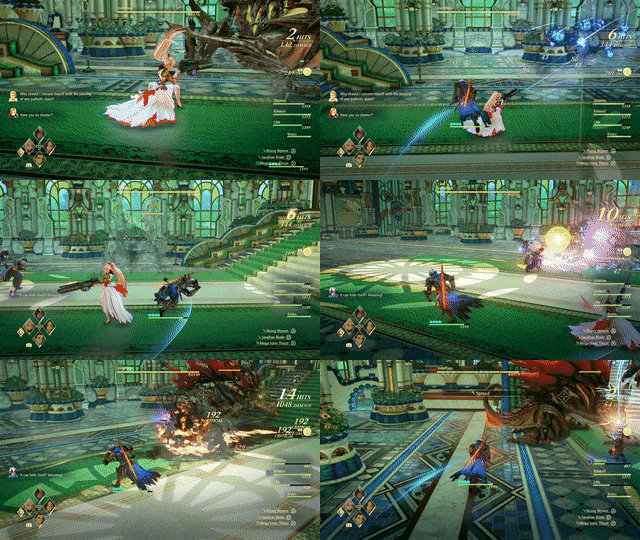
Not strictly an attack, but rather a move Venoflage does to move away from the group. It will scurry backward to escape your attacks before completely disappearing from your sight. It will then reappear behind the group, staying invisible for a few more moments before reappearing to commence new attacks.
Keep your target locked on to Venoflage throughout this entire process will allow you to track it even when it changes positions.
Poison Cloud
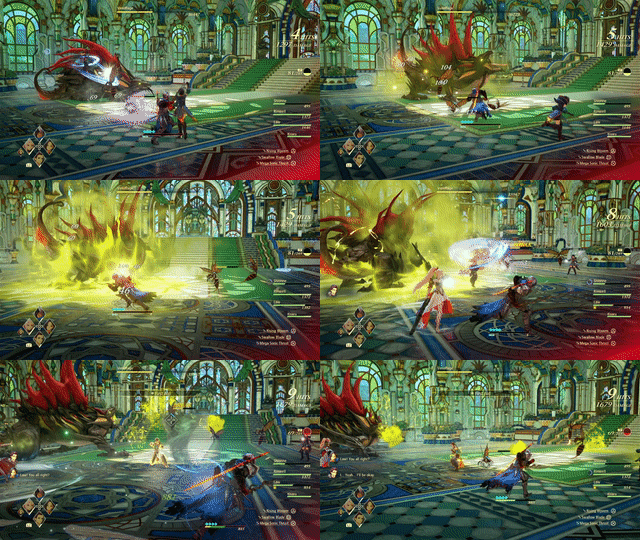
After releasing a road, a great mist will surround Venoflage. This cloud can cause major damage should a character be within its effective area and can inflict the Poison Physical Ailment, which reduces their overall HP over time.
Charge Attack
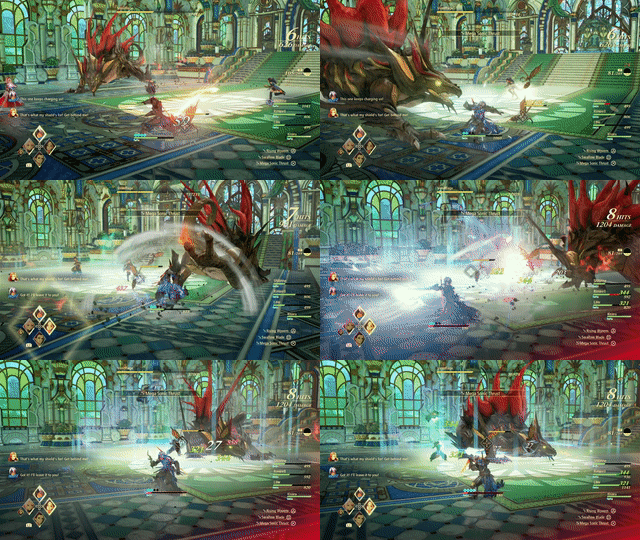
The Charge Attack that Venoflage performs is slower when compared to the same type of attack that other Bosses can execute, but is nonetheless as deadly as others. Due to its slower speed, Venoflage will be able to adjust its direction more fluidly, making it much more difficult to dodge away from the attack.
Alternatively, you can directly use Kisara during these attacks and cause Venoflage to focus on her. Execute perfect blocks to negate any damage you would otherwise receive from these charges.
Tales of Arise Related Guides
Beyond the Dawn DLC Bosses
Beyond the Dawn Story Bosses
| Story Bosses | |
|---|---|
 Nimus Pandemonium Nimus Pandemonium |
 Venoflage Venoflage |
 Nazamil Nazamil |
 Nazamil Nether Nazamil Nether
|
 Ooze Hive Ooze Hive |
 Nazamil Nether Nazamil Nether (2nd Encounter) |
 Nazamil Nether Nazamil Nether (3rd Encounter) |
 Captive Nazamil Captive Nazamil |
 Oppressor Oppressor |
 Emergence Suppressor Emergence Suppressor |
Beyond the Dawn Optional Bosses
| Optional Bosses | ||
|---|---|---|
 Ruthless Ruthless
|
 Boisterous Roper Boisterous Roper
|
 Cruel Keeper Cruel Keeper |
 Megawrecker Megawrecker |
 Ghoulish Arms Ghoulish Arms |
 Nimus Juggernaut Nimus Juggernaut |
 Grinymuk Grinymuk |
 Mother Boomy Mother Boomy |
- |
Story Bosses
Optional Bosses
Author
Venoflage Boss Guide: Recommended Setup and How to Beat
improvement survey
03/2026
improving Game8's site?

Your answers will help us to improve our website.
Note: Please be sure not to enter any kind of personal information into your response.

We hope you continue to make use of Game8.
Rankings
- We could not find the message board you were looking for.
Gaming News
Popular Games

Genshin Impact Walkthrough & Guides Wiki

Honkai: Star Rail Walkthrough & Guides Wiki

Umamusume: Pretty Derby Walkthrough & Guides Wiki

Pokemon Pokopia Walkthrough & Guides Wiki

Resident Evil Requiem (RE9) Walkthrough & Guides Wiki

Monster Hunter Wilds Walkthrough & Guides Wiki

Wuthering Waves Walkthrough & Guides Wiki

Arknights: Endfield Walkthrough & Guides Wiki

Pokemon FireRed and LeafGreen (FRLG) Walkthrough & Guides Wiki

Pokemon TCG Pocket (PTCGP) Strategies & Guides Wiki
Recommended Games

Diablo 4: Vessel of Hatred Walkthrough & Guides Wiki

Fire Emblem Heroes (FEH) Walkthrough & Guides Wiki

Yu-Gi-Oh! Master Duel Walkthrough & Guides Wiki

Super Smash Bros. Ultimate Walkthrough & Guides Wiki

Pokemon Brilliant Diamond and Shining Pearl (BDSP) Walkthrough & Guides Wiki

Elden Ring Shadow of the Erdtree Walkthrough & Guides Wiki

Monster Hunter World Walkthrough & Guides Wiki

The Legend of Zelda: Tears of the Kingdom Walkthrough & Guides Wiki

Persona 3 Reload Walkthrough & Guides Wiki

Cyberpunk 2077: Ultimate Edition Walkthrough & Guides Wiki
All rights reserved
© BANDAI NAMCO Entertainment America Inc. All third party content, brands, names, and logos are used under license and remain property of their respective owners. All rights reserved.
The copyrights of videos of games used in our content and other intellectual property rights belong to the provider of the game.
The contents we provide on this site were created personally by members of the Game8 editorial department.
We refuse the right to reuse or repost content taken without our permission such as data or images to other sites.

 Balseph
 Ice Wolf Leader
 Ooze Hive
 Lord Ganabelt
 Zacarania
 Kisara
 Dohalim
 Venoflage
 Temararus
 Grinymuk
 Almeidrea & Mesmald
 Meria Phein
 Kalmarzel & Kaldinzel
 Vholran
 Eljarania
 Efreet
 Tormented Limbs
 Red Woman
 Valclynimus
 Great Astral Spirit
 Subsumer
 Vholran (Final Boss)
 Toxidillo
 Boisterous Roper
 Polycephus
 Great Dragon
 Relentless Charger
 Flamewrecker
 Alpha Reaper
 Stormbringer
 Elemental
 Regent Bee
 Agony Keeper
 Mother Boomy
 Ruthless
 Thunderite
 Mantis
 Calamity Arms
 Meneiys
 Ezamamuk
 Sword Dancer
 Undine Drop
 Luo Undine
 Grand Gnome & Vas Phein
 Masher Mare & Masher Bull
 Procella Sylph & Sylph Zloa
 Mesmald
 Edna
Edna Nimus Origin
 Eizen
Eizen Edna & Eizen
 Chronos
 Dulneiys, Maleiys, & Vasneiys


![Everwind Review [Early Access] | The Shaky First Step to A Very Long Journey](https://img.game8.co/4440226/ab079b1153298a042633dd1ef51e878e.png/thumb)

![Monster Hunter Stories 3 Review [First Impressions] | Simply Rejuvenating](https://img.game8.co/4438641/2a31b7702bd70e78ec8efd24661dacda.jpeg/thumb)


