Nimus Juggernaut Boss Guide
☆ Earn bonuses before you start the DLC.
★ Clear campaign & sub-quests | Get max lvl
☆ Learn all the ingredients in this new Gourmet Saga!
★ Get all Beyond the Dawn Trophies with these guides:
☆ Ryugola Weapons | All Portraits | Hero of the Summit

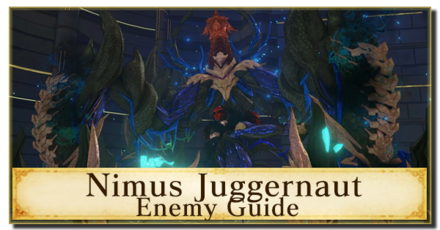
Nimus Juggernaut is a Unique Boss that you can fight in the Tales of Arise (Beyond the Dawn)! Read on to learn how to beat Nimus Juggernaut, as well as its stats, weaknesses, attack patterns, and the best party setup in this boss guide!
Nimus Juggernaut Stats and General Info
Nimus Juggernaut Location

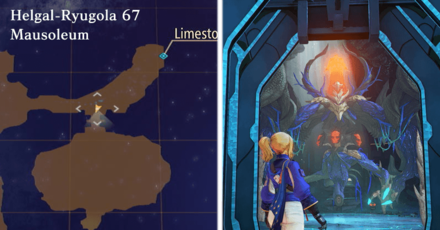
Nimus Juggernaut can be found in the Control Compartment Layer of the Helgal-Ryugola 67.
Nimus Juggernaut Stats
| Recommended Level: 81 | |||
|---|---|---|---|
 HP: 239882 |
|||
| Attack | 2843 | Defense | 1011 |
| Elemental Attack | 2675 | Elemental Defense | 899 |
| Penetration | 2673 | Resistance | 1970 |
| Weakness | Resistance | ||
Loot and Drops
| This boss does not drop any loot upon defeat. |
How to Beat Nimus Juggernaut
To aid in your battle against Nimus Juggernaut, here are some tips that you can utilize in your fight.
Avoid its High Jump Attack
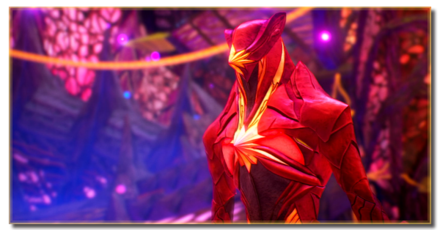
Nimus Juggernaut fights exactly the same way as Nimus Pandemonium does. Whenever you see it jump high in the air, create as much space between yourself and the center of the fighting area. If you can, time your jump at the point of impact to save yourself.
Focus on Healing, but still Fight Aggressively
Bring out both Shionne and Dohalim to the active party. This way Dohalim can act as both support attacker and reserve healer. Having Rinwell as a sub for Kisara in your party is can also benefit your fight if you plan on taking advantage of Nimus Juggernaut's low Elemental Defense.
Recommended Party Setup for Nimus Juggernaut
Party Members
| Leader | Members | ||
|---|---|---|---|
 Alphen Alphen
Lv. 85 |
 Shionne Shionne
Lv. 85 |
 Dohalim Dohalim
Lv. 85 |
 Kisara Kisara
Lv. 85 |
Take Advantage of Low Defense and Elemental Defense
Nimus Juggernaut has the upper hand when it comes to brute force and attacking power. However, it has low Defense and Elemental Defense making the battle seem more like a patient game of cat and mouse. Deal as much damage as you can when the window of opportunity shows itself, and retreat to a safer distance when you notice it charging its attacks.
Alphen Equipment and Artes
 Alphen Alphen
Lv. 85 |
Equipment |
|---|---|
| El Vahf | |
| Shining Armor of Dawn | |
| Warrior Emblem | |
| Ground Artes | Aerial Artes |
| First Set | |
| Lightning Thrust | Mirage |
| Dragon Swarm | Luna Rondo |
| Double Demon Fang | Stardust |
| Second Set | |
| Eternal Devastation | Soaring Light Spear |
| Rising Wyvern | Hurricane Thrust |
| Sword Rain: Alpha | Rising Falcon |
Spam Stardust When Enemy is Stationary
Launch yourself into the air with a Rising Attack Arte and then spam Stardust just to get in as much damage as you can before Nimus Juggernaut winds up for an attack.
Shionne Equipment and Artes
 Shionne Shionne
Lv. 85 |
Equipment |
|---|---|
| Sacred Karma | |
| Witch Dress | |
| Resist Ring | |
| Ground Artes | Aerial Artes |
| First Set | |
| Healing Circle | Scorched Earth |
| Ignis Celestra | Toxicity |
| Annihilation | Displode |
| Second Set | |
| Resurrection | Aranea Celestra |
| Flare Tornado | Tres Ventos |
| Burning Strike | Scorched Earth |
Primary Healer, Support Attacker
Shionne will be a support attacker, focusing more on keeping you and your allies and providing additional Elemental Damage alongside the rest of the team.
Dohalim Equipment and Artes
 Dohalim Dohalim
Lv. 85 |
Equipment |
|---|---|
| Ending Rod Bucks | |
| Moonlight Revelry | |
| Pierce Emblem | |
| Ground Artes | Aerial Artes |
| First Set | |
| Elusive Deity | Tornado Drive |
| Stalagmite | Rotating Piledriver |
| Seismic Rupture | Tornado Drive |
| Second Set | |
| Ground Dasher | Tornado Drive |
| Seismic Rupture | Rotating Piledriver |
| Resurrection | - |
Secondary Attacker, Reserve Healer
Dohalim will play the role of an attacker first and foremost, only being a healer if you decide to swap out Shionne or Kisara for Rinwell. While not as heavy hitting as Alphen, Law, or Kisara, Dohalim provides a good balance between having the ability to use healing artes and offensive artes as well.
Kisara Equipment and Artes
 Kisara Kisara
Lv. 85 |
Equipment |
|---|---|
| Supreme Shield Aegis | |
| Stout Closer | |
| Black Onyx | |
| Ground Artes | Aerial Artes |
| First Set | |
| Rolling Thunder | Lightning Streak |
| Tiger Blade | - |
| Slag Assault | - |
| Second Set | |
| Inferno Crossing | Lightning Streak |
| Slag Assault | - |
| Flaming Meteor | - |
Tank Hits for the Party
Kisara's main task is still to tank hits for the party. Alternatively you can swap out Kisara for Rinwell to make use of Rinwell's arsenal of Elemental Artes which are better suited against Nimus Juggernaut.
Tales of Arise Beyond the Dawn Related Guides
Beyond the Dawn DLC Bosses
Beyond the Dawn Story Bosses
| Story Bosses | |
|---|---|
 Nimus Pandemonium Nimus Pandemonium |
 Venoflage Venoflage |
 Nazamil Nazamil |
 Nazamil Nether Nazamil Nether
|
 Ooze Hive Ooze Hive |
 Nazamil Nether Nazamil Nether (2nd Encounter) |
 Nazamil Nether Nazamil Nether (3rd Encounter) |
 Captive Nazamil Captive Nazamil |
 Oppressor Oppressor |
 Emergence Suppressor Emergence Suppressor |
Beyond the Dawn Optional Bosses
| Optional Bosses | ||
|---|---|---|
 Ruthless Ruthless
|
 Boisterous Roper Boisterous Roper
|
 Cruel Keeper Cruel Keeper |
 Megawrecker Megawrecker |
 Ghoulish Arms Ghoulish Arms |
 Nimus Juggernaut Nimus Juggernaut |
 Grinymuk Grinymuk |
 Mother Boomy Mother Boomy |
- |
Story Bosses
Optional Bosses
Comment
Author
Nimus Juggernaut Boss Guide
improvement survey
03/2026
improving Game8's site?

Your answers will help us to improve our website.
Note: Please be sure not to enter any kind of personal information into your response.

We hope you continue to make use of Game8.
Rankings
- We could not find the message board you were looking for.
Gaming News
Popular Games

Genshin Impact Walkthrough & Guides Wiki

Honkai: Star Rail Walkthrough & Guides Wiki

Umamusume: Pretty Derby Walkthrough & Guides Wiki

Pokemon Pokopia Walkthrough & Guides Wiki

Resident Evil Requiem (RE9) Walkthrough & Guides Wiki

Monster Hunter Wilds Walkthrough & Guides Wiki

Wuthering Waves Walkthrough & Guides Wiki

Arknights: Endfield Walkthrough & Guides Wiki

Pokemon FireRed and LeafGreen (FRLG) Walkthrough & Guides Wiki

Pokemon TCG Pocket (PTCGP) Strategies & Guides Wiki
Recommended Games

Diablo 4: Vessel of Hatred Walkthrough & Guides Wiki

Fire Emblem Heroes (FEH) Walkthrough & Guides Wiki

Yu-Gi-Oh! Master Duel Walkthrough & Guides Wiki

Super Smash Bros. Ultimate Walkthrough & Guides Wiki

Pokemon Brilliant Diamond and Shining Pearl (BDSP) Walkthrough & Guides Wiki

Elden Ring Shadow of the Erdtree Walkthrough & Guides Wiki

Monster Hunter World Walkthrough & Guides Wiki

The Legend of Zelda: Tears of the Kingdom Walkthrough & Guides Wiki

Persona 3 Reload Walkthrough & Guides Wiki

Cyberpunk 2077: Ultimate Edition Walkthrough & Guides Wiki
All rights reserved
© BANDAI NAMCO Entertainment America Inc. All third party content, brands, names, and logos are used under license and remain property of their respective owners. All rights reserved.
The copyrights of videos of games used in our content and other intellectual property rights belong to the provider of the game.
The contents we provide on this site were created personally by members of the Game8 editorial department.
We refuse the right to reuse or repost content taken without our permission such as data or images to other sites.

 Balseph
 Ice Wolf Leader
 Ooze Hive
 Lord Ganabelt
 Zacarania
 Kisara
 Dohalim
 Venoflage
 Temararus
 Grinymuk
 Almeidrea & Mesmald
 Meria Phein
 Kalmarzel & Kaldinzel
 Vholran
 Eljarania
 Efreet
 Tormented Limbs
 Red Woman
 Valclynimus
 Great Astral Spirit
 Subsumer
 Vholran (Final Boss)
 Toxidillo
 Boisterous Roper
 Polycephus
 Great Dragon
 Relentless Charger
 Flamewrecker
 Alpha Reaper
 Stormbringer
 Elemental
 Regent Bee
 Agony Keeper
 Mother Boomy
 Ruthless
 Thunderite
 Mantis
 Calamity Arms
 Meneiys
 Ezamamuk
 Sword Dancer
 Undine Drop
 Luo Undine
 Grand Gnome & Vas Phein
 Masher Mare & Masher Bull
 Procella Sylph & Sylph Zloa
 Mesmald
 Edna
Edna Nimus Origin
 Eizen
Eizen Edna & Eizen
 Chronos
 Dulneiys, Maleiys, & Vasneiys


![Everwind Review [Early Access] | The Shaky First Step to A Very Long Journey](https://img.game8.co/4440226/ab079b1153298a042633dd1ef51e878e.png/thumb)

![Monster Hunter Stories 3 Review [First Impressions] | Simply Rejuvenating](https://img.game8.co/4438641/2a31b7702bd70e78ec8efd24661dacda.jpeg/thumb)


