Calamity Arms Boss Guide: Recommended Setup and How to Beat
☆ Earn bonuses before you start the DLC.
★ Clear campaign & sub-quests | Get max lvl
☆ Learn all the ingredients in this new Gourmet Saga!
★ Get all Beyond the Dawn Trophies with these guides:
☆ Ryugola Weapons | All Portraits | Hero of the Summit
This is a guide on how to beat Calamity Arms in Tales of Arise! Learn more about Calamity Arms's stats, weaknesses, attack patterns, and the best party setup including Artes and Equipment for this boss fight!
List of Contents
Calamity Arms Stats and General Info
Calamity Arms Location
| Map | Actual Location |
|---|---|
 |
 |
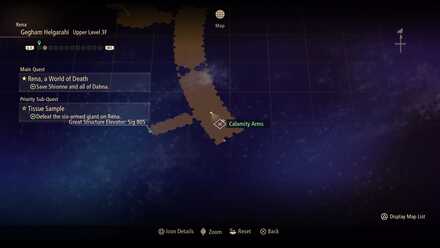
Calamity Arms will only appear on Gegham Helgarahi - Upper Level 3F after accepting the sub-quest Tissue Sample.
Tissue Sample Sub-Quest Walkthrough: Rewards and How to Clear
Calamity Arms Stats
| Recommended Level: 50 | |||
|---|---|---|---|
 HP: 282020 |
|||
| Attack | 2843 | Defense | 1004 |
| Elemental Attack | 2437 | Elemental Defense | 893 |
| Penetration | 2849 | Resistance | 2999 |
| Weakness | Resistance | ||
Item to Drop
| Astral Flower | Cursed Claw (6) |
How to Beat Calamity Arms
| Tips |
|---|
Attack From Behind
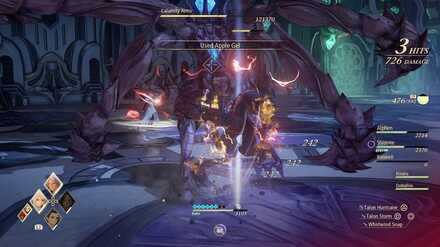
Most of Calamity Arms' attacks are frontal attacks. Go around its back before performing combos if you're using a melee character to get more hits in. Calamity Arms also doesn't move that quickly so stop attacking and prepare to dodge when it turns around.
Aim for Its Core

Calamity Arms' weak point is located on its head. It might be dangerous to attack it head on since most of its attacks are frontal attacks but you can actually hit its weak point from behind.
Dodge Its Blink Attack
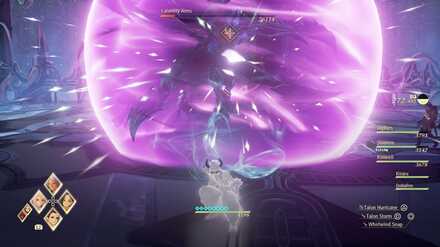
Once its HP drops below 50% and it enters Over Limit mode, Calamity Arms will start using an attack where it teleports to your character while damaging everyone around it. If you're close enough, you can dodge away and trigger a Counter Edge.
Recommended Party Setup for Calamity Arms
Party Members
| Leader | Members | ||
|---|---|---|---|
 Law Law
Lv. 50 |
 Alphen Alphen
Lv. 50 |
 Rinwell Rinwell
Lv. 50 |
 Shionne Shionne
Lv. 50 |
Switch between Law and Alphen
Depending on who you're most comfortable with, you can switch between Law and Alphen as your main attacker.
Calamity Arms' attacks are quite slow so you don't have to worry much about not being able to maintain Law's Awakening or Alphen being able to take more hits because he's tankier.
Law Equipment and Artes
 Law Law
Lv. 50 |
Equipment |
|---|---|
| Divine Wrath | |
| Prismatic Jacket | |
| Zephyr's Ring | |
| Ground Artes | Aerial Artes |
| First Set | |
| Talon Hurricane | Eagle Assault |
| Talon Storm | Fang Bolero |
| Whirlwind Snap | Inferno Punch |
| Second Set | |
| Steel | - |
| - | - |
| - | - |
Maintain Awakening status
Law's Awakening makes his attacks get stronger the more hits he lands without getting damaged. Attack Calamity Arms from behind so you can safely build up Awakening.
Alphen Equipment and Artes
 Alphen Alphen
Lv. 50 |
Equipment |
|---|---|
| El Vahf | |
| Mumbane | |
| Pierce Emblem | |
| Ground Artes | Aerial Artes |
| First Set | |
| Lightning Thrust | Mirage |
| Swallow Blade | Stardust |
| Double Demon Fang | Hurricane Thrust |
| Second Set | |
| - | - |
| - | - |
| - | - |
Use boost attack to boost break
Alphen's boost attack can instantly down Calamity Arms. Use it to interrupt Calamity Arms' attacks so the other party members, especially Law, can focus on spamming artes.
Rinwell Equipment and Artes
 Rinwell Rinwell
Lv. 50 |
Equipment |
|---|---|
| Historia Rene | |
| Spirit Robe | |
| Magic Emblem | |
| Ground Artes | Aerial Artes |
| First Set | |
| Shooting Star | Placid Pool |
| Sharpness | Razor Cyclone |
| Thunder Field | Celestial Hammer |
| Second Set | |
| - | - |
| - | - |
| - | - |
Spam Light artes
Rinwell's Shooting Star and Thunder Field both deal Light damage. Since Shooting Star has a long casting time and takes a while before hitting its target, try to cast it when Calamity Arms just finished attacking so the attack lands while Calamity Arms is standing still.
You can also get Celestial Hammer for aerial combos then spam it on Celestial Arms' core. Unlock Mid-Air Jump from the skill panel as well so you can hit the weak point consistently.
Shionne Equipment and Artes
 Shionne Shionne
Lv. 50 |
Equipment |
|---|---|
| Sclopetum Rene | |
| Wedding Dress | |
| Magic Emblem | |
| Ground Artes | Aerial Artes |
| First Set | |
| Luke Celestra | Scorched Earth |
| Burning Strike | Tres Ventos |
| Magna Ray | - |
| Second Set | |
| Resurrection | - |
| Healing Circle | - |
| First Aid | - |
Offensive healer
Other than being in charge of healing the team, Shionne can also spam Luke Celestra to exploit Calamity Arms' weakness.
Calamity Arms Attack Patterns
Calamity Beam

Fires a laser from its head to an arc in front. Calamity Arms will execute this attack in place so use this opportunity to land more attacks.
Venom Blast

Throws six poison orbs one by one from its six arms then end the attack by throwing three more orbs that track their targets.
Rising Death
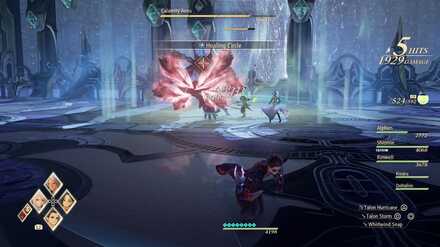
Brandishes its arms before performing a rush attack. At the end of the rush, Calamity Arms will swipe upwards to deal additional damage to those caught in the charge.
Slicing Vortex

Spins around and teleports next to its target. This attack deals damage to anyone near Calamity Arms while it's spinning, both before and after teleporting.
Blight Drop

Calamity Arms uses this attack right before its Over Limit ends. Jumps high and randomly throws poison orbs below, then lands by performing a slam attack.
Tales of Arise Related Guides

List of Gigants
Author
Calamity Arms Boss Guide: Recommended Setup and How to Beat
improvement survey
03/2026
improving Game8's site?

Your answers will help us to improve our website.
Note: Please be sure not to enter any kind of personal information into your response.

We hope you continue to make use of Game8.
Rankings
- We could not find the message board you were looking for.
Gaming News
Popular Games

Genshin Impact Walkthrough & Guides Wiki

Honkai: Star Rail Walkthrough & Guides Wiki

Umamusume: Pretty Derby Walkthrough & Guides Wiki

Pokemon Pokopia Walkthrough & Guides Wiki

Resident Evil Requiem (RE9) Walkthrough & Guides Wiki

Monster Hunter Wilds Walkthrough & Guides Wiki

Wuthering Waves Walkthrough & Guides Wiki

Arknights: Endfield Walkthrough & Guides Wiki

Pokemon FireRed and LeafGreen (FRLG) Walkthrough & Guides Wiki

Pokemon TCG Pocket (PTCGP) Strategies & Guides Wiki
Recommended Games

Diablo 4: Vessel of Hatred Walkthrough & Guides Wiki

Fire Emblem Heroes (FEH) Walkthrough & Guides Wiki

Yu-Gi-Oh! Master Duel Walkthrough & Guides Wiki

Super Smash Bros. Ultimate Walkthrough & Guides Wiki

Pokemon Brilliant Diamond and Shining Pearl (BDSP) Walkthrough & Guides Wiki

Elden Ring Shadow of the Erdtree Walkthrough & Guides Wiki

Monster Hunter World Walkthrough & Guides Wiki

The Legend of Zelda: Tears of the Kingdom Walkthrough & Guides Wiki

Persona 3 Reload Walkthrough & Guides Wiki

Cyberpunk 2077: Ultimate Edition Walkthrough & Guides Wiki
All rights reserved
© BANDAI NAMCO Entertainment America Inc. All third party content, brands, names, and logos are used under license and remain property of their respective owners. All rights reserved.
The copyrights of videos of games used in our content and other intellectual property rights belong to the provider of the game.
The contents we provide on this site were created personally by members of the Game8 editorial department.
We refuse the right to reuse or repost content taken without our permission such as data or images to other sites.
 Mother Boomy
 Boisterous Roper
 Ruthless
 Cruel Keeper
 Grinymuk
 Toxidillo
 Polycephus
 Great Dragon
 Flamewrecker
 Relentless Charger
 Alpha Reaper
 Stormbringer
 Elemental
 Regent Bee
 Agony Keeper
 Thunderite
 Mantis
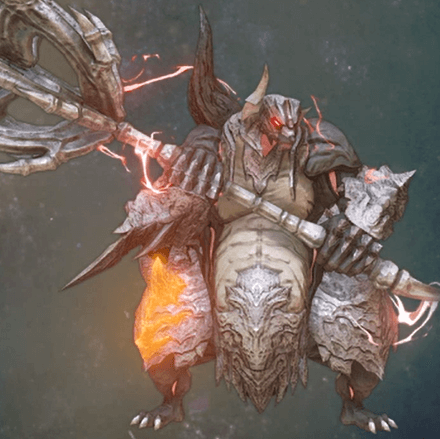 Masher Bull
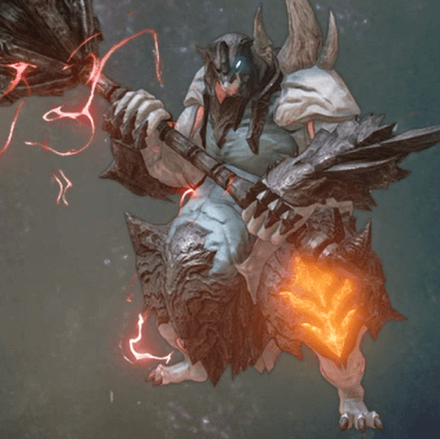 Masher Mare
 Ezamamuk
 Sword Dancer


![Everwind Review [Early Access] | The Shaky First Step to A Very Long Journey](https://img.game8.co/4440226/ab079b1153298a042633dd1ef51e878e.png/thumb)

![Monster Hunter Stories 3 Review [First Impressions] | Simply Rejuvenating](https://img.game8.co/4438641/2a31b7702bd70e78ec8efd24661dacda.jpeg/thumb)


