Relentless Charger Boss Guide: Recommended Setup and How to Beat
☆ Earn bonuses before you start the DLC.
★ Clear campaign & sub-quests | Get max lvl
☆ Learn all the ingredients in this new Gourmet Saga!
★ Get all Beyond the Dawn Trophies with these guides:
☆ Ryugola Weapons | All Portraits | Hero of the Summit
This is a guide on how to beat Relentless Charger in Tales of Arise! Learn more about Relentless Charger's stats, weaknesses, attack patterns, and the best party setup including Artes and Equipment for this boss fight!
List of Contents
Relentless Charger Stats and General Info
Relentless Charger Location
| Map | Actual Location |
|---|---|
 |
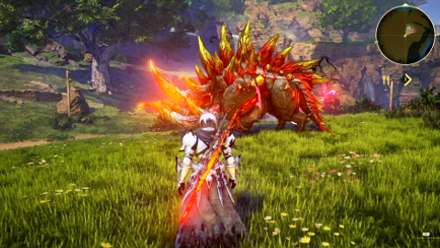 |
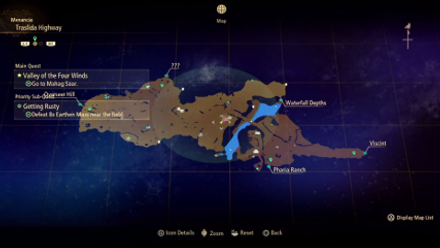
Relentless Charger can be found near the entryway to the bridge leading to the village in front of Viscint. It appears there as part of the Sub-Quest A Boorish Boar.
A Boorish Boar Sub-Quest Walkthrough: Rewards and How to Clear
Relentless Charger Stats
| Recommended Level: 25 | |||
|---|---|---|---|
 HP: 85,650 |
|||
| Attack | 826 | Defense | 359 |
| Elemental Attack | 708 | Elemental Defense | 319 |
| Penetration | 1220 | Resistance | 1285 |
| Weakness | Resistance | ||
Item to Drop
| Astral Flower | Granite Fang (2) |
| Sturdy Megabone (3) |
How to Beat Relentless Charger
| Tips |
|---|
Attack its Weak Point
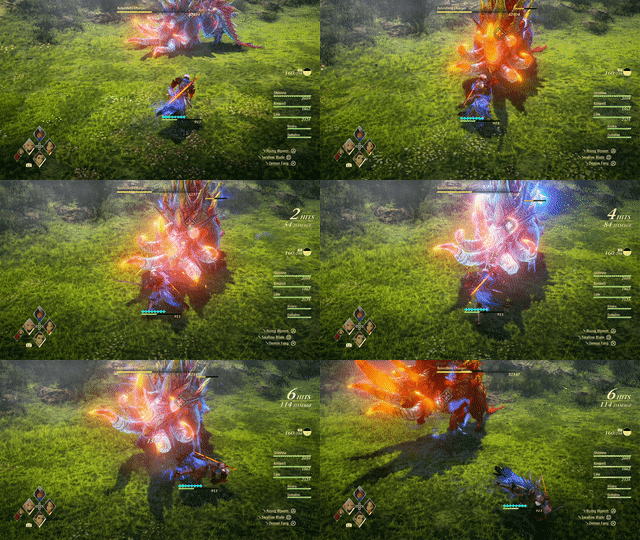
Relentless Charger's Weak Point is found on its head – directly targeting its glowing horns will allow you to more easily break its core, downing it and leaving it open to your attacks.
You can down the boss by using Alphen's Boost Attack – alternatively, you can use Kisara's Boost Attack to stop a charge attack to get the same effect.
Use Wind Attacks
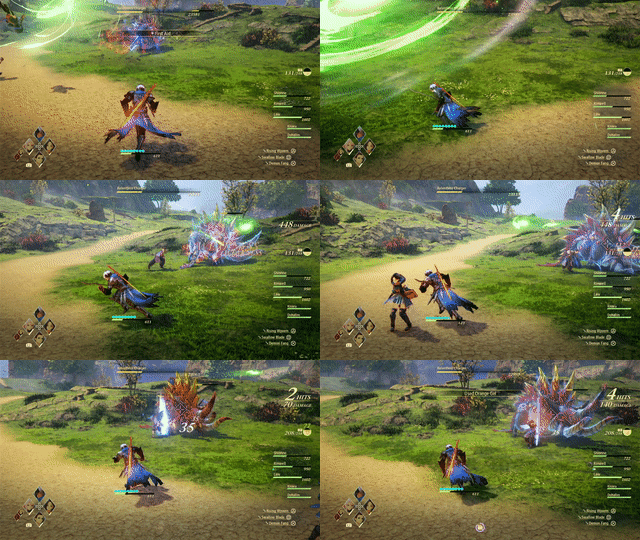
Relentless Charger is an Earth-type enemy, and as such its weakness is Wind-type attacks. Using a number of Arcane Artes, particularly from Rinwell, will help deal elemental damage against this boss.
Attack When it's Downed
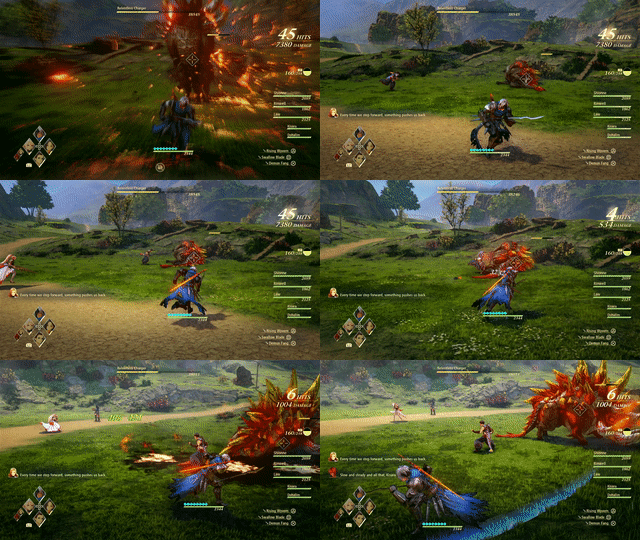
After managing to down Relentless Charger, hit it hard with Boost Attacks from your party members and use Alphen's charged artes as they deal extra damage to downed foes.
If you are having difficulty dodging the boss' attacks when trying to get to its horns, attacking the weak spot while it is down is a highly effective way to deal significant damage to it.
Avoid its Over Limit Attacks
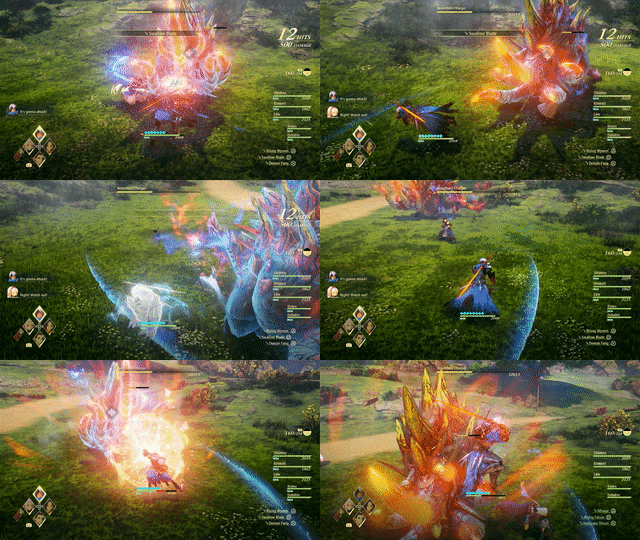
When the boss starts to glows blue, it has entered its Over Limit state. It will unrelentingly attack the party, which might make it difficult for you to deal damage while it is constantly moving. It is best to avoid these attacks and go for counterattacks until its Over Limit expires.
Recommended Party Setup for Relentless Charger
Party Members
| Leader | Members | ||
|---|---|---|---|
 Alphen Alphen
Lv.25 |
 Shionne Shionne
Lv.25 |
 Rinwell Rinwell
Lv.25 |
 Kisara Kisara
Lv.25 |
Unlock Wind-type Artes
It is highly recommended that you equip your party with Wind-type Artes before fighting the Relentless Charger. In particular, Rinwell's Astral Artes can really help to end the fight much faster.
Alphen Equipment and Artes
 Alphen Alphen
Lv.25 |
Equipment |
|---|---|
| Flare Claw | |
| Topaz Mail | |
| - | |
| Ground Artes | Aerial Artes |
| Severing Wind | Mirage |
| Sword Rain: Alpha | Stardust |
| Mega Sonic Thrust | - |
Use Boost Attacks
Apart from making use of Kisara's Boost Attack to block the boss' charges, you can also use Alphen's Boost Attack to stop the boar in its tracks.
For Kisara's Boost Attack wait for the boar to get near you while charging before triggering the attack, which will cause it to fall on its side. In Alphen's case, just be within melee range and you can stagger the boss with a Boost Attack at any time, as long as the boss is not in Over Limit mode.
This Boost Attacks are also an effective way to damage the boss' Weak Point.
Shionne Equipment and Artes
 Shionne Shionne
Lv.25 |
Equipment |
|---|---|
| Innocent Lily | |
| Middy Blouse | |
| Garnet | |
| Ground Artes | Aerial Artes |
| Healing Circle | Toxicity |
| Burning Strike | Glacio Celestra |
| Magna Ray | - |
Time Healing Artes Carefully
Although Shionne's Healing Circle arte can heal the entire party in one go, be careful of using it whenever Relentless Charger is preparing for another charge attack. Your party members will likely be gathered in the area of effect of the Healing Circle, but that also makes them easy targets and they can take damage simultaneously if they are caught by a charge attack.
Rinwell Equipment and Artes
 Rinwell Rinwell
Lv.25 |
Equipment |
|---|---|
| Silver Sword the Owl | |
| Topaz Cloak | |
| Garnet | |
| Ground Artes | Aerial Artes |
| Air Thrust | Swallow's Flight |
| Spread | Placid Pool |
| Tempest Whirl | - |
Turn Off All Other Artes
To maximize your damage output with Rinwell, make sure to turn off her Artes that are not Wind-type ones if you're not planning on directly controlling her. This is to make sure that she does not automatically use Artes that deal less damage than her Wind attacks against Relentless Charger.
Kisara Equipment and Artes
 Kisara Kisara
Lv.25 |
Equipment |
|---|---|
| Imperial Shield | |
| Topaz Guard | |
| - | |
| Ground Artes | Aerial Artes |
| Flaming Meteor | - |
| Guardian Field | - |
| Tiger Blade | - |
Use Boost Attack to Stop Charges
Although not the most powerful attacker at this stage in the game, Kisara's Boost Attacks are an effective tool to use against Relentless Charger's charge attacks. Kisara's Boost Attack also causes the boss to drop to the ground when hit during its charge, similar to how Alphen's Boost Attack works.
Relentless Charger Attack Patterns
Charge Attack
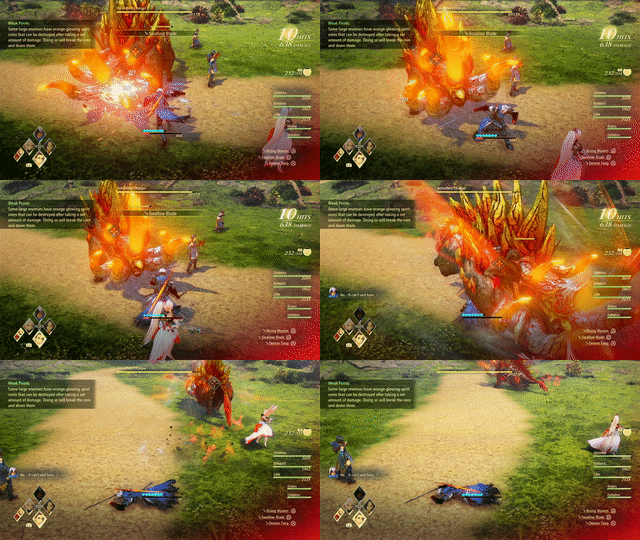
Relentless Charger is incredibly similar to Boars that you encounter as a regular enemy. It will kick its feet up right before charging at you. Getting caught in this attack will cause you to be either pushed aside, thrust into the air or knocked down.
It will rear its head upwards and turn around to face you again at the end of its charge, which also causes damage when its feet land if you are within its immediate vicinity.
Horn Thrust
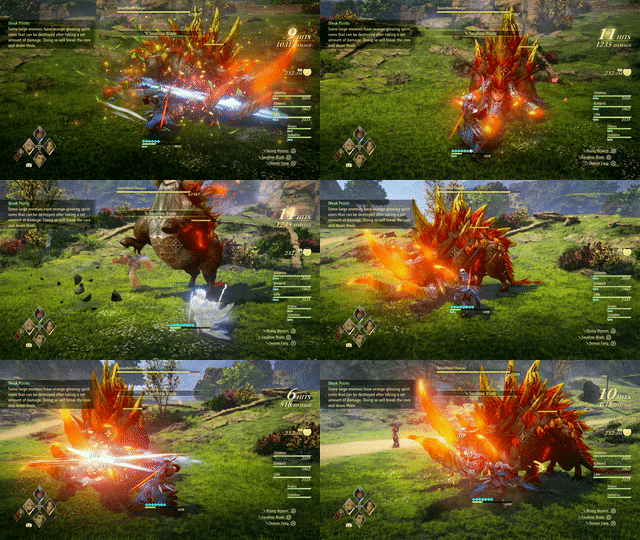
Provided that you are close enough, Relentless Charger can simply ram its horn against you with a quick thrust. These are simple to avoid or perform a dodge against, which opens up the possibility of a counter-attack against its Weak Point.
Side Attack
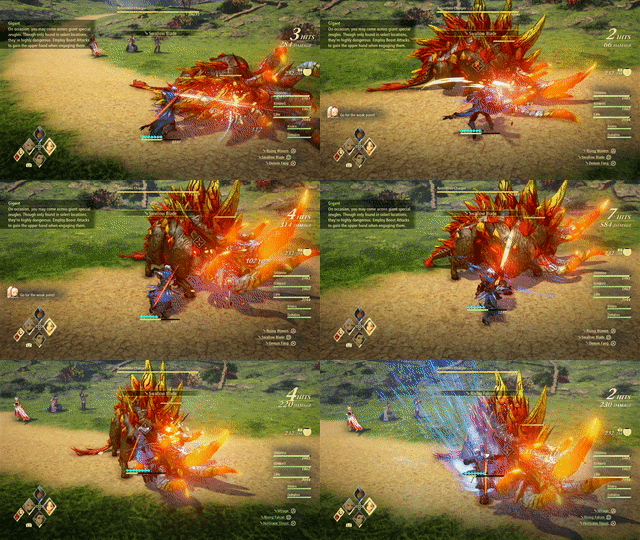
Attacking Relentless Charger from the sides will cause it to shift its body sideways against you. Compared to its Horn Thrust, this type of attack is difficult to avoid due to the boss' large size, especially if you are locked into an attack animation.
Consecutive Charge Attack

When its life has been successfully halved, it can perform its regular Charge Attack against you. However, it will now be able to charge you again immediately after it performs the initial Charge Attack.
Roar
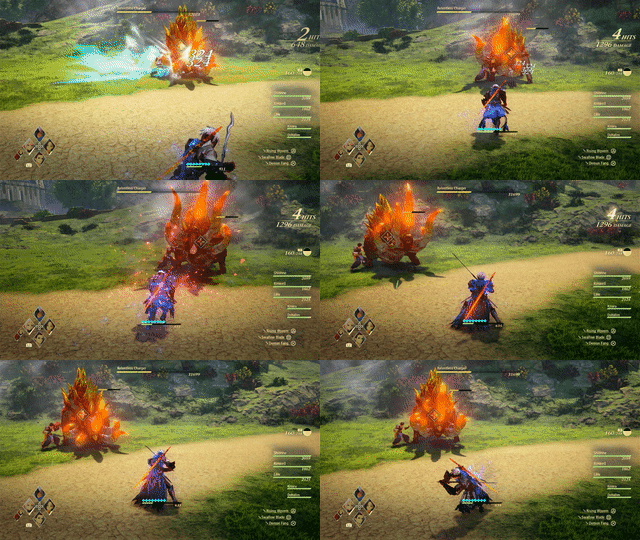
Sometimes after its Charge Attacks – consecutive or otherwise – Relentless Charger will let out a roar. Staying in its path will cause you damage and you will momentarily enter a stunned state.
Tales of Arise Related Guides
Beyond the Dawn DLC Bosses
Beyond the Dawn Story Bosses
| Story Bosses | |
|---|---|
 Nimus Pandemonium Nimus Pandemonium |
 Venoflage Venoflage |
 Nazamil Nazamil |
 Nazamil Nether Nazamil Nether
|
 Ooze Hive Ooze Hive |
 Nazamil Nether Nazamil Nether (2nd Encounter) |
 Nazamil Nether Nazamil Nether (3rd Encounter) |
 Captive Nazamil Captive Nazamil |
 Oppressor Oppressor |
 Emergence Suppressor Emergence Suppressor |
Beyond the Dawn Optional Bosses
| Optional Bosses | ||
|---|---|---|
 Ruthless Ruthless
|
 Boisterous Roper Boisterous Roper
|
 Cruel Keeper Cruel Keeper |
 Megawrecker Megawrecker |
 Ghoulish Arms Ghoulish Arms |
 Nimus Juggernaut Nimus Juggernaut |
 Grinymuk Grinymuk |
 Mother Boomy Mother Boomy |
- |
Story Bosses
Optional Bosses
Author
Relentless Charger Boss Guide: Recommended Setup and How to Beat
improvement survey
03/2026
improving Game8's site?

Your answers will help us to improve our website.
Note: Please be sure not to enter any kind of personal information into your response.

We hope you continue to make use of Game8.
Rankings
- We could not find the message board you were looking for.
Gaming News
Popular Games

Genshin Impact Walkthrough & Guides Wiki

Honkai: Star Rail Walkthrough & Guides Wiki

Umamusume: Pretty Derby Walkthrough & Guides Wiki

Pokemon Pokopia Walkthrough & Guides Wiki

Resident Evil Requiem (RE9) Walkthrough & Guides Wiki

Monster Hunter Wilds Walkthrough & Guides Wiki

Wuthering Waves Walkthrough & Guides Wiki

Arknights: Endfield Walkthrough & Guides Wiki

Pokemon FireRed and LeafGreen (FRLG) Walkthrough & Guides Wiki

Pokemon TCG Pocket (PTCGP) Strategies & Guides Wiki
Recommended Games

Diablo 4: Vessel of Hatred Walkthrough & Guides Wiki

Fire Emblem Heroes (FEH) Walkthrough & Guides Wiki

Yu-Gi-Oh! Master Duel Walkthrough & Guides Wiki

Super Smash Bros. Ultimate Walkthrough & Guides Wiki

Pokemon Brilliant Diamond and Shining Pearl (BDSP) Walkthrough & Guides Wiki

Elden Ring Shadow of the Erdtree Walkthrough & Guides Wiki

Monster Hunter World Walkthrough & Guides Wiki

The Legend of Zelda: Tears of the Kingdom Walkthrough & Guides Wiki

Persona 3 Reload Walkthrough & Guides Wiki

Cyberpunk 2077: Ultimate Edition Walkthrough & Guides Wiki
All rights reserved
© BANDAI NAMCO Entertainment America Inc. All third party content, brands, names, and logos are used under license and remain property of their respective owners. All rights reserved.
The copyrights of videos of games used in our content and other intellectual property rights belong to the provider of the game.
The contents we provide on this site were created personally by members of the Game8 editorial department.
We refuse the right to reuse or repost content taken without our permission such as data or images to other sites.

 Balseph
 Ice Wolf Leader
 Ooze Hive
 Lord Ganabelt
 Zacarania
 Kisara
 Dohalim
 Venoflage
 Temararus
 Grinymuk
 Almeidrea & Mesmald
 Meria Phein
 Kalmarzel & Kaldinzel
 Vholran
 Eljarania
 Efreet
 Tormented Limbs
 Red Woman
 Valclynimus
 Great Astral Spirit
 Subsumer
 Vholran (Final Boss)
 Toxidillo
 Boisterous Roper
 Polycephus
 Great Dragon
 Flamewrecker
 Alpha Reaper
 Stormbringer
 Elemental
 Regent Bee
 Agony Keeper
 Mother Boomy
 Ruthless
 Thunderite
 Mantis
 Calamity Arms
 Meneiys
 Ezamamuk
 Sword Dancer
 Undine Drop
 Luo Undine
 Grand Gnome & Vas Phein
 Masher Mare & Masher Bull
 Procella Sylph & Sylph Zloa
 Mesmald
 Edna
Edna Nimus Origin
 Eizen
Eizen Edna & Eizen
 Chronos
 Dulneiys, Maleiys, & Vasneiys


![Everwind Review [Early Access] | The Shaky First Step to A Very Long Journey](https://img.game8.co/4440226/ab079b1153298a042633dd1ef51e878e.png/thumb)

![Monster Hunter Stories 3 Review [First Impressions] | Simply Rejuvenating](https://img.game8.co/4438641/2a31b7702bd70e78ec8efd24661dacda.jpeg/thumb)


